


How to Make a Paper Mache Pendant Light
Create a super chic (and inexpensive) pendant light using newspaper, glue and some gold spray paint.

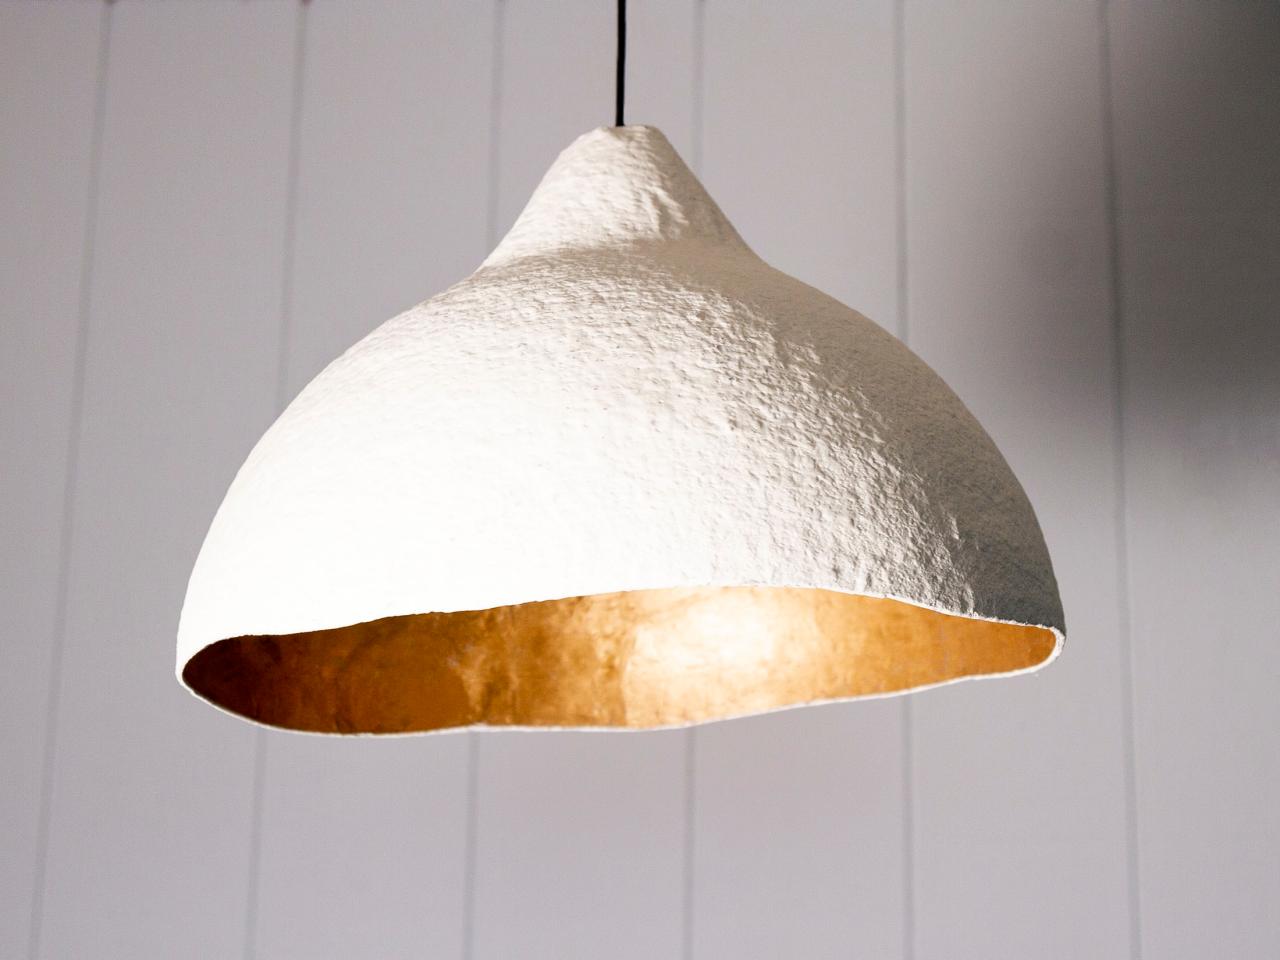
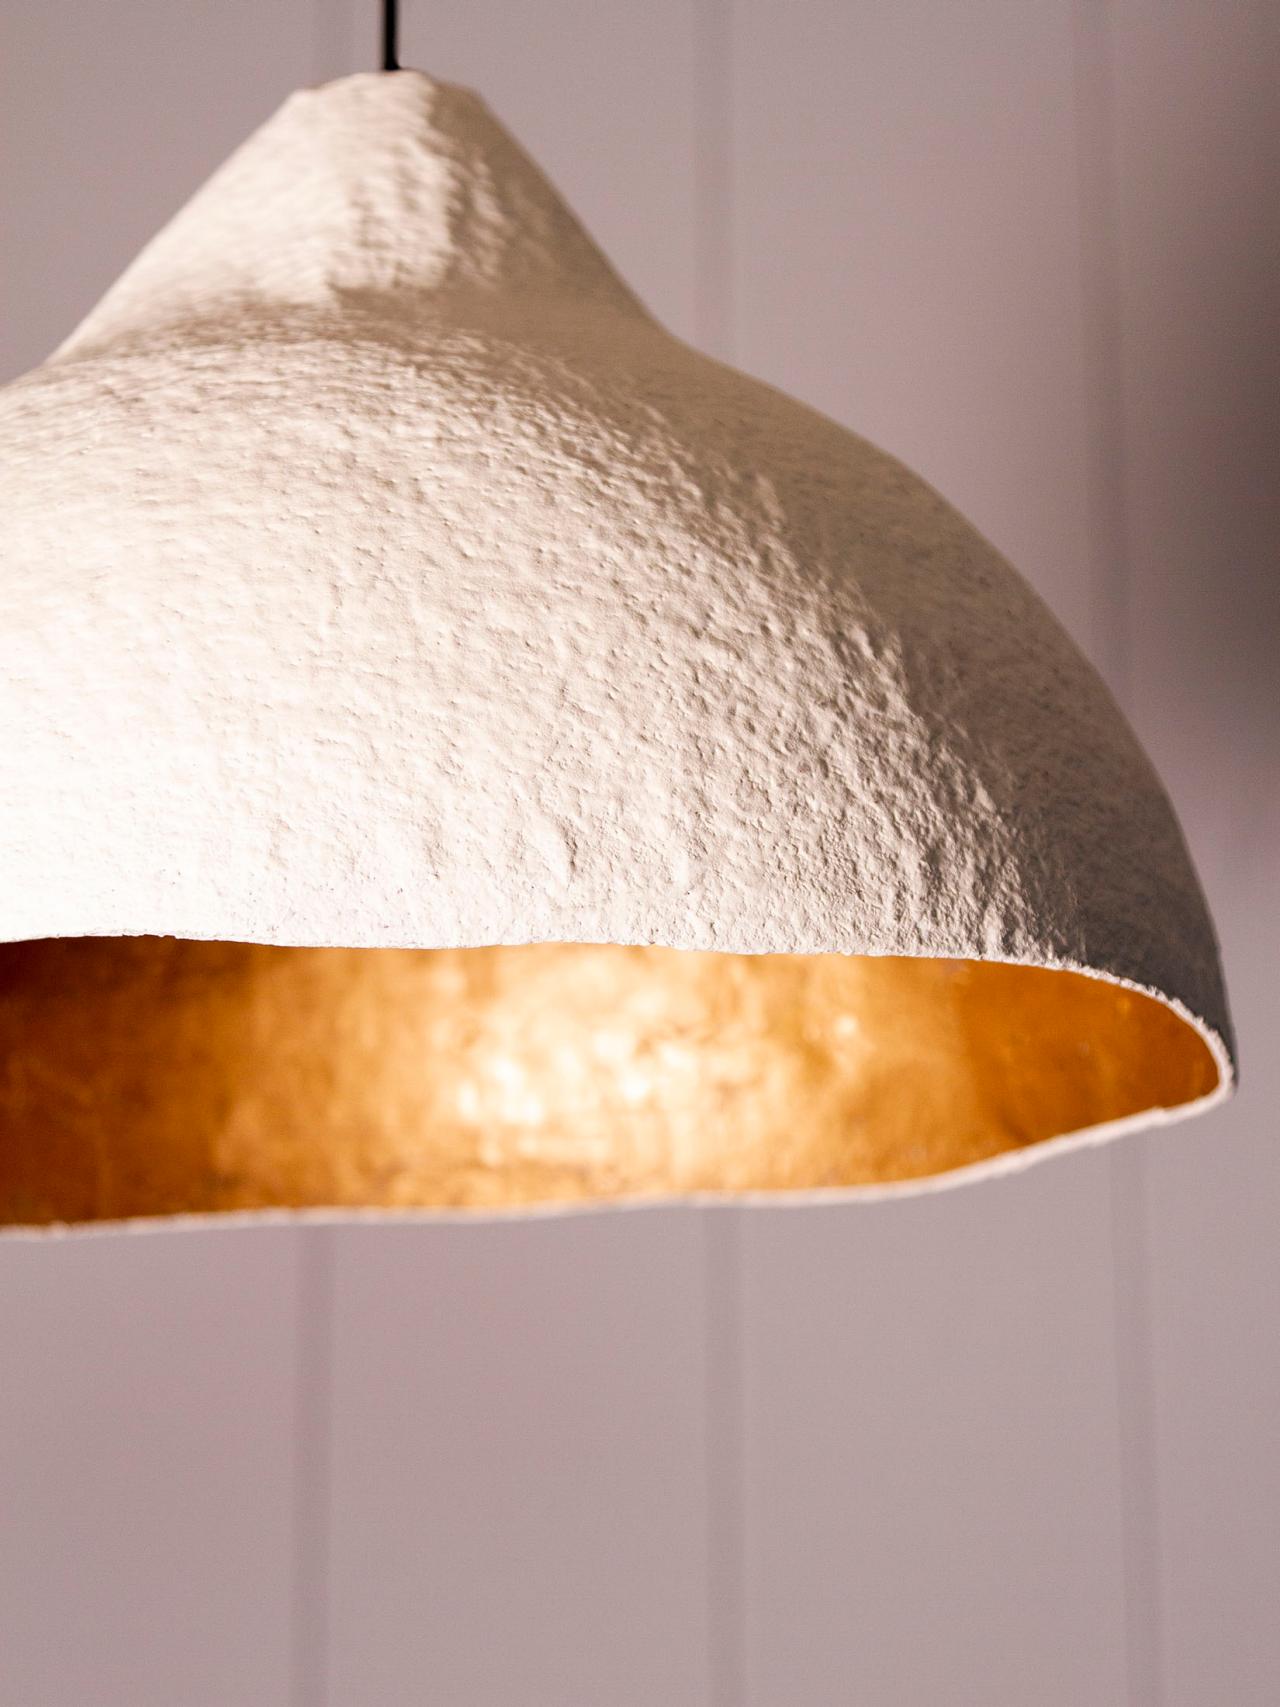
Paper mache is nothing new, but how you use the technique could be. With a little ingenuity you can turn newspaper into a one of a kind light fixture. The size and style are completely up to you. Want a huge fixture? Create your pendant shade with an exercise ball. For our fixture, we used a large kids’ play ball. To amp up the glam, we lined the pendant with high-quality gold spray paint. Not only does it add some sophistication, but it also creates a warm glow with the light, perfect for use over a dining space.

Tools and Materials
- clamp light
- aluminum foil
- masking tape
- large play ball
- newspaper
- sewing ruler or other straight edge
- large mixing bowl
- white school/craft glue
- water
- knife
- sandpaper or sanding block
- gold spray paint
- scissors
- ceiling texture spray
- awl
Step 1: Create the Form


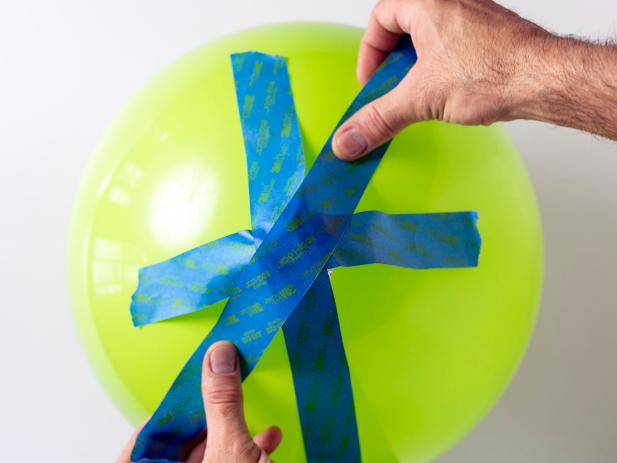
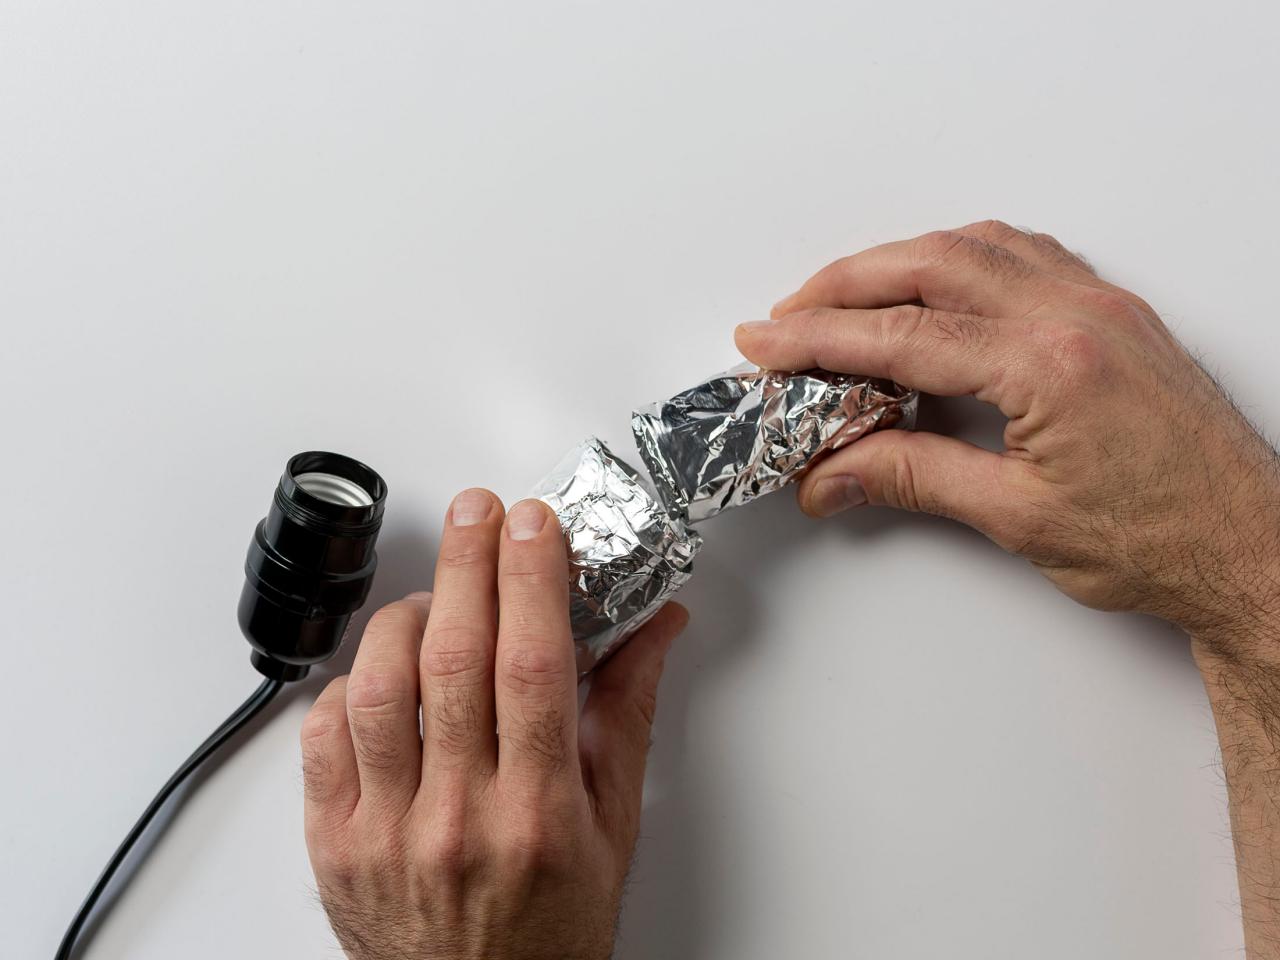
Remove the bell shade from the clamp light (Image1). Wrap aluminum foil around the light bulb housing to create a mold (Image 2). Fill the mold with a cylinder of tightly wound aluminum foil to create a solid mold for the light bulb housing at the top of the pendant (Image 3). Place the mold on top of the ball and secure it in place with several long strips of masking tape (Image 4).
Step 2: Prep the Paper Mache


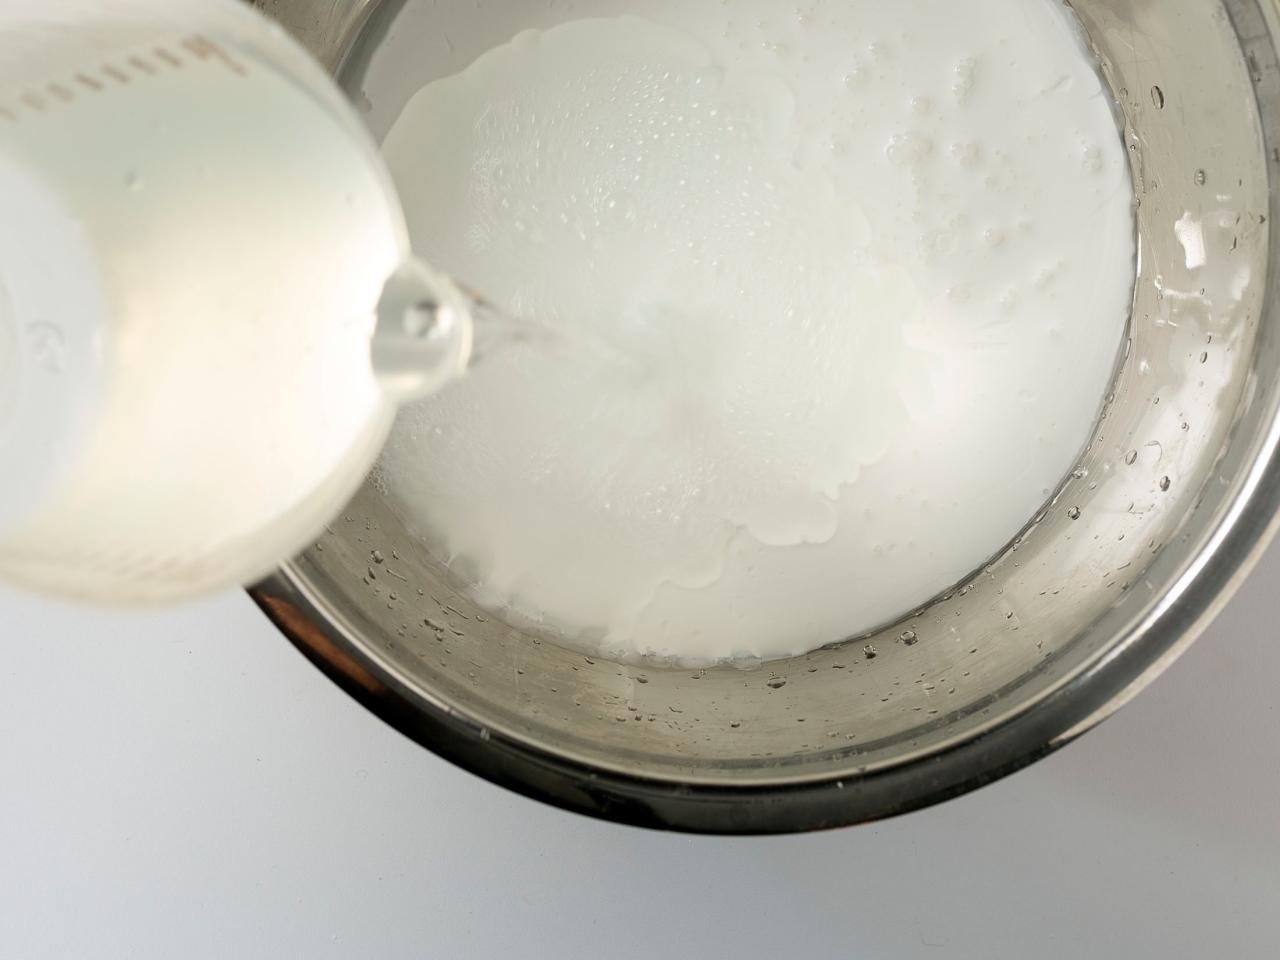
Tear newspaper into strips about 1-1/2" wide (Image 1). Use a sewing ruler or other straight edge to get consistent strips. Make a 50/50 mixture of glue and water (Image 2). We used three cups of each.
Step 3: Create the Pendant


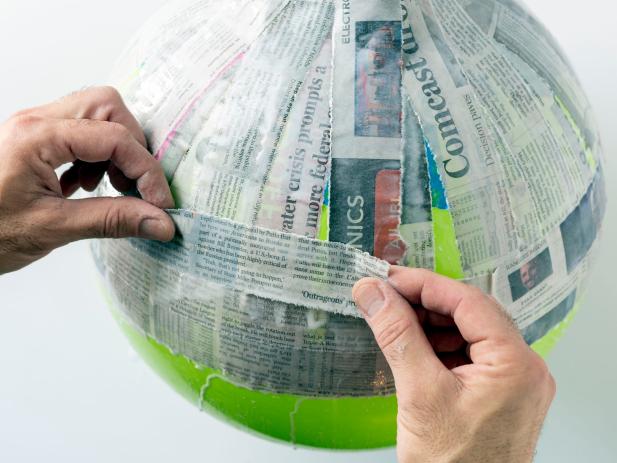

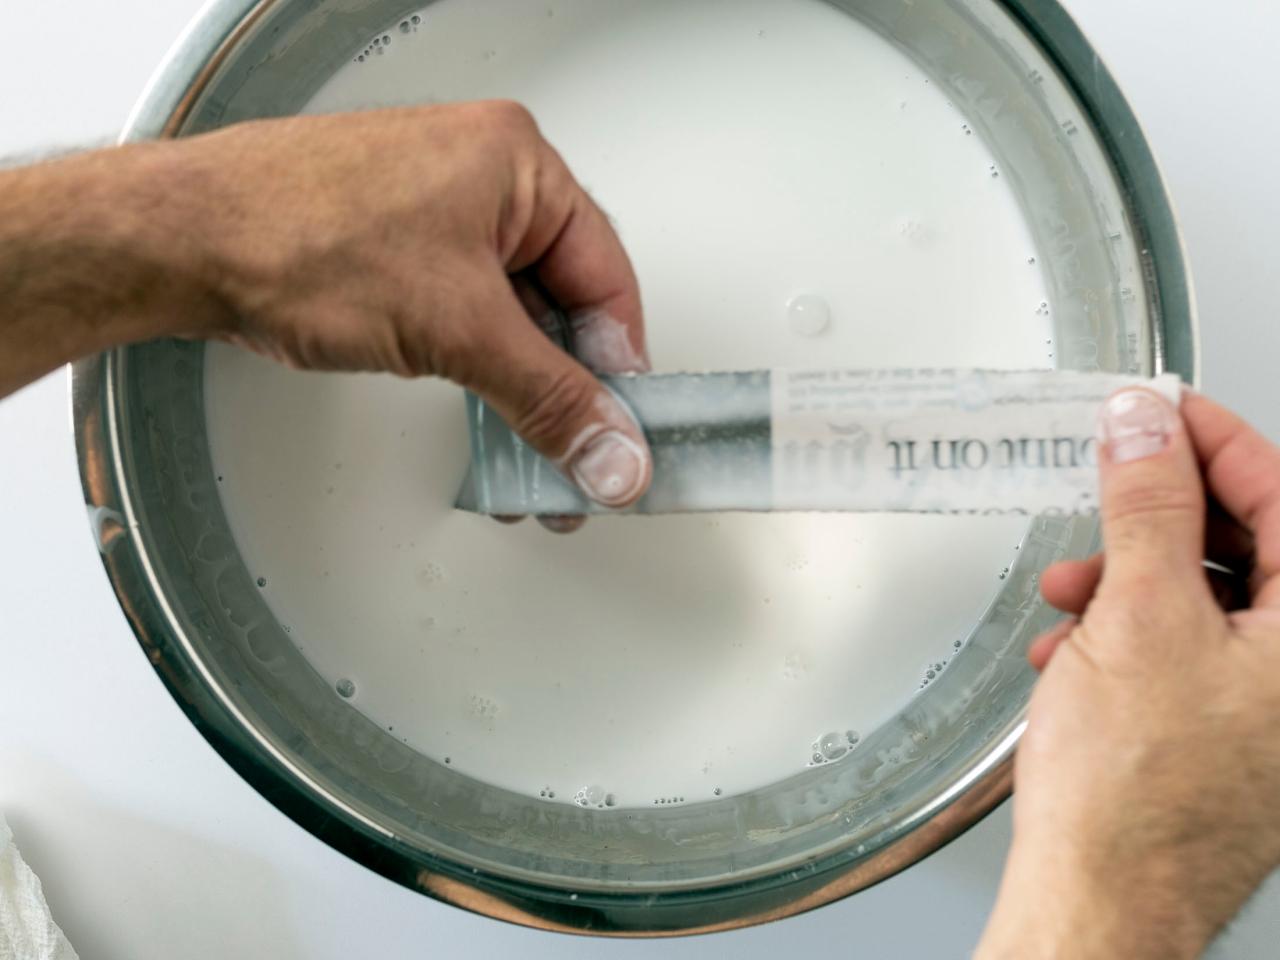
Dip the newspaper strips, one at a time, into the glue/water mixture. Pass the strips between two fingers to remove the excess mixture (Image 1). Begin the pendant by wrapping the long strips over the top of the pendant where the light bulb housing mold is taped in place (Image 2). The center of the strips should line up with the center of the top of the light bulb housing mold. Add as many strips as necessary to completely cover the top of the form. Begin wrapping strips horizontally around the ball, start at the bottom of the vertical strips placed to cover the light bulb housing (Image 3). Overlap the strips slightly as you work toward the top of the pendant. It should not be necessary to wrap the very top. Tear the strips into smaller pieces as necessary to avoid folding. Apply at least 10 layers of paper mache (Image 4). Allow it to dry completely.
Step 4: Paint the Inside
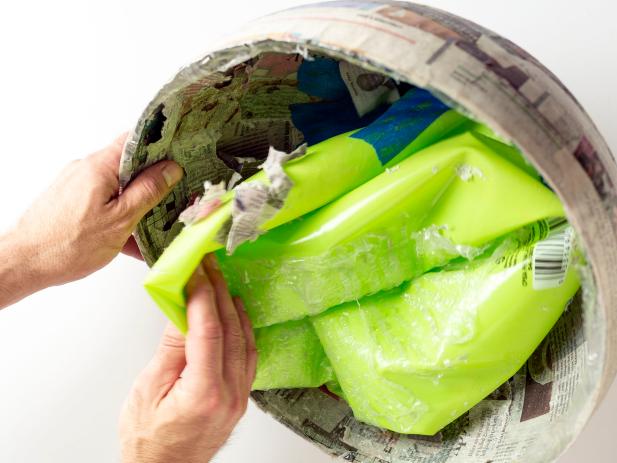


Pop the ball with a sharp object or blade. Remove the ball carefully and gently pull away any pieces of newspaper that have pulled away from the pendant form (Image 1). Use sandpaper or a sanding block to smooth out the rough edges (Image 2). Paint the inside of the pendant with gold spray paint (Image 3). Apply a second coat if needed and allow it to dry completely before proceeding. Use scissors to cut around the bottom of the pendant form in a slight wave for an organic look (Image 4).
Step 5: Paint the Outside


Cover the inside of the pendant with masking tape and paper or plastic (Image 1). Ensure that the masking tape has a good bond around the edges and follows the wave edge closely. Coat the outside of the pendant with ceiling texture spray (Image 2). Add a second coat if necessary. Allow the texture spray to dry completely before proceeding.
Step 6: Assemble
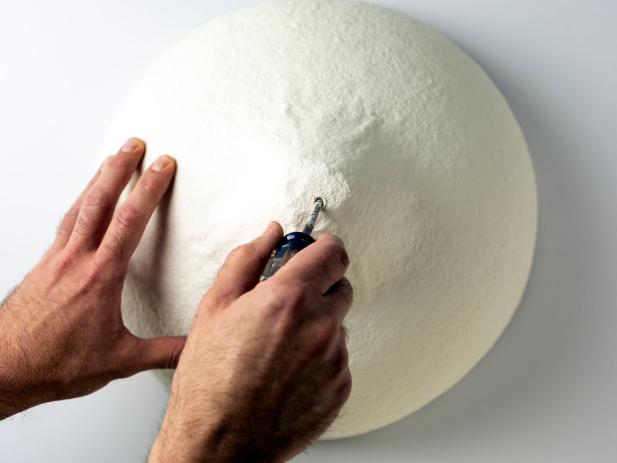


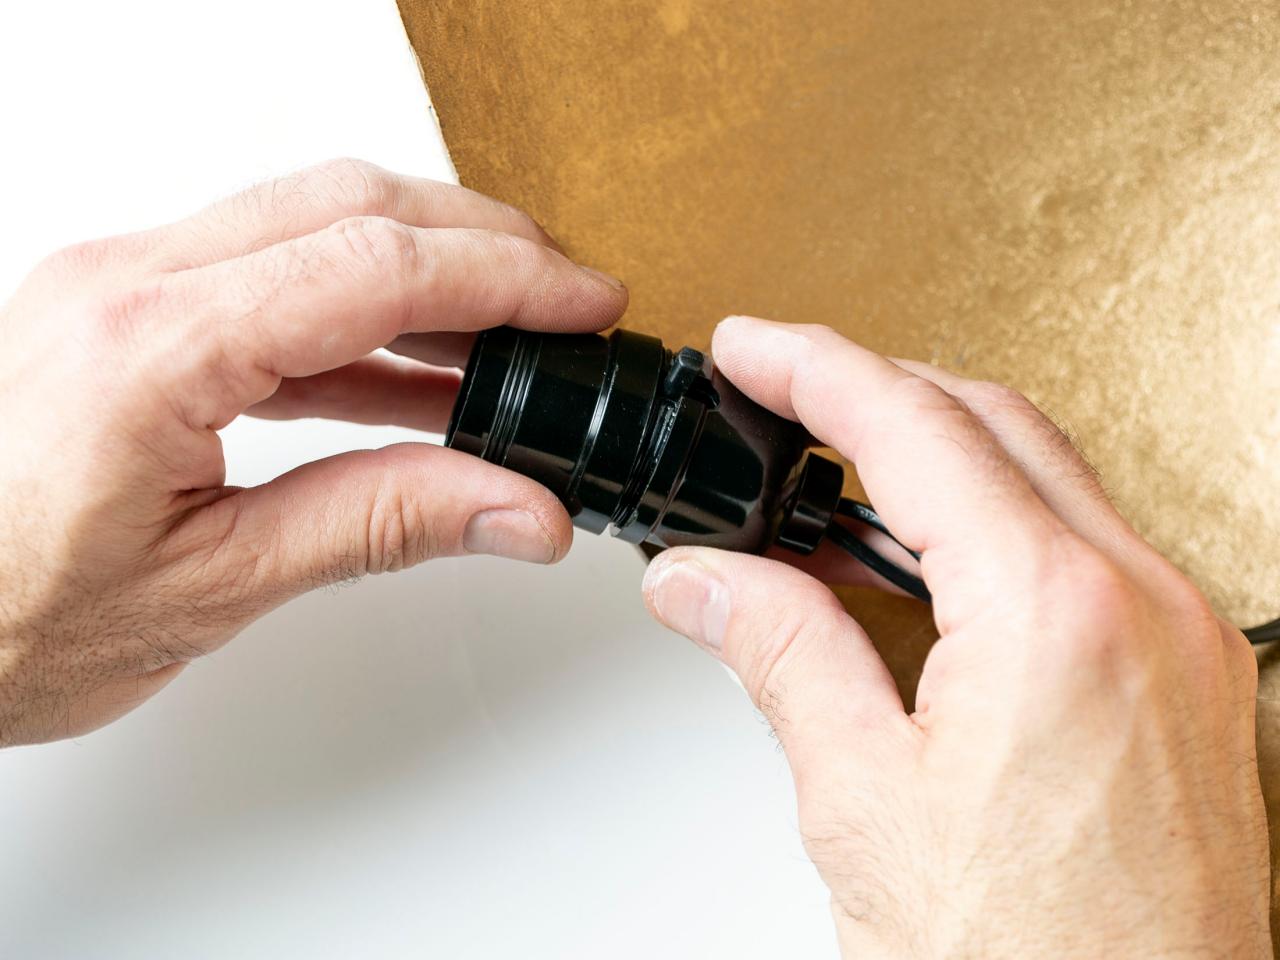
Use an awl to make a hole in the top of the pendant for the electrical cord (Image 1). Disassemble the light bulb housing and disconnect the wires (Image 2). Insert the wires through the hole at the top of the outside of the pendant and reconnect the wires to the light bulb housing. Reassemble the housing and pull the cord from the outside to move the light bulb housing to the top inside of the pendant (Image 3). Add a light bulb (not an incandescent) and hang the pendant in place.


