


How to Make a Macrame Light-Cord Cover
Electrical cords can be so unattractive and boring. Learn how to dress up pendant light cords with macrame.
Turn an unattractive light cord into a stunning piece of bohemian art with one simple macrame knot. Easy to master, the act of wrapping a cord in knots is meditative and the results are gorgeous. Use a pendant lamp as the base for this treatment or dress up a simple swag light kit with these pretty knots and an attractive bulb.

Carla Wiking
Safety Note: The macrame does not interfere with the electrical components of the light whatsoever, as always do not exceed the recommended wattage when you make your bulb choice and be sure that your cord isn’t touching the light itself when you hang it.
Carla Wiking
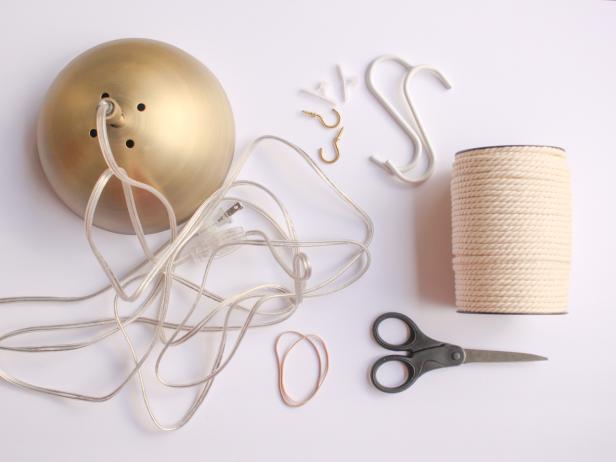
Tools and Materials
- pendant light or hanging light cord
- (160’) 5mm cotton macrame cord
- (2) S hooks
- (2) cup hooks
- anchors
- scissors
- (2) rubber bands
Step 1: Prepare Cord

Carla Wiking
Measure and cut a length of macrame cord approximately 160’ long, this is for wrapping the full length of a 15’ cord. If you plan to wrap less, reduce your cord length accordingly; figure at least 10’ of macrame cord per foot of lamp cord.
Step 2: Mark Center

Carla Wiking
Mark the center of the macrame cord by tying a small slip knot or attaching a small piece of tape.
Step 3: Bundle Ends
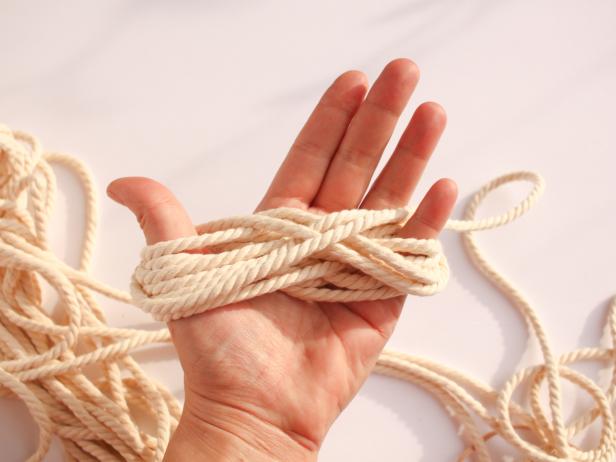
Carla Wiking

Carla Wiking
Wrap the macrame cord in bundles to make it easier to work with. Start at one end of the cord, wrap it around your pinky and your thumb to create a figure-eight shape. Continue until you get close to the spot you marked as the center. Hold the bundle together with a rubber band. Repeat this wrap on the other end of the cord.
Step 4: Tie a Half Knot
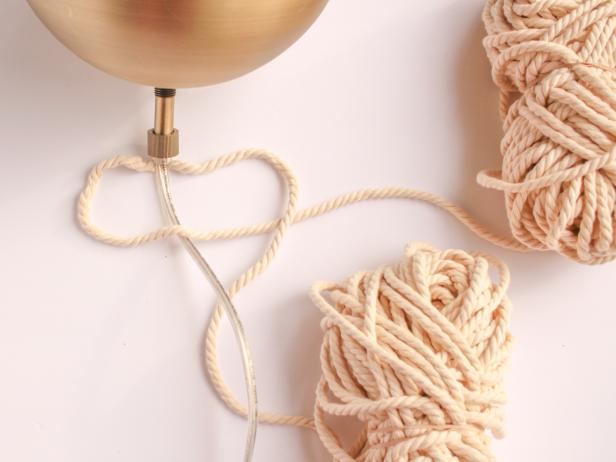
Carla Wiking
Carla Wiking

Carla Wiking
Place the top of the light cord over the center of your cord, pull out the knot or remove the tape. Take the left strand of macrame cord over the light cord and under the right strand, leaving a loop on the left side. Next, take the right strand under the lamp cord and through the left loop to lay over the left strand. Gently pull both strands to create a snug but not overly tight knot.
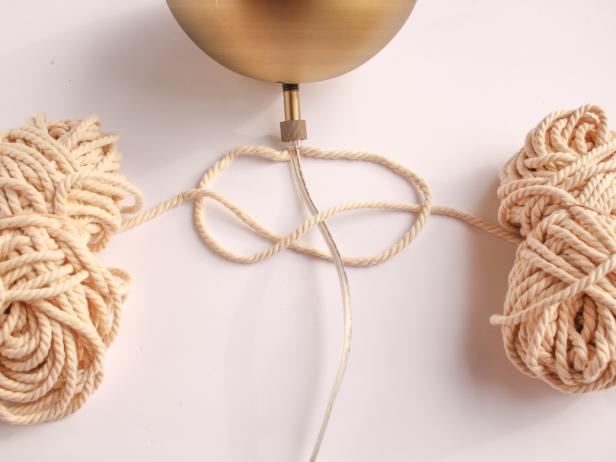
Step 5: Continue Knotting

Carla Wiking

Carla Wiking
Repeat step 4 over and over again, always starting with the left side. Your knots will naturally twist around the cord. (If you want the macrame to not twist, alternate the starting side.) As you work, make sure that the light cord stays smooth and untwisted inside the knots.
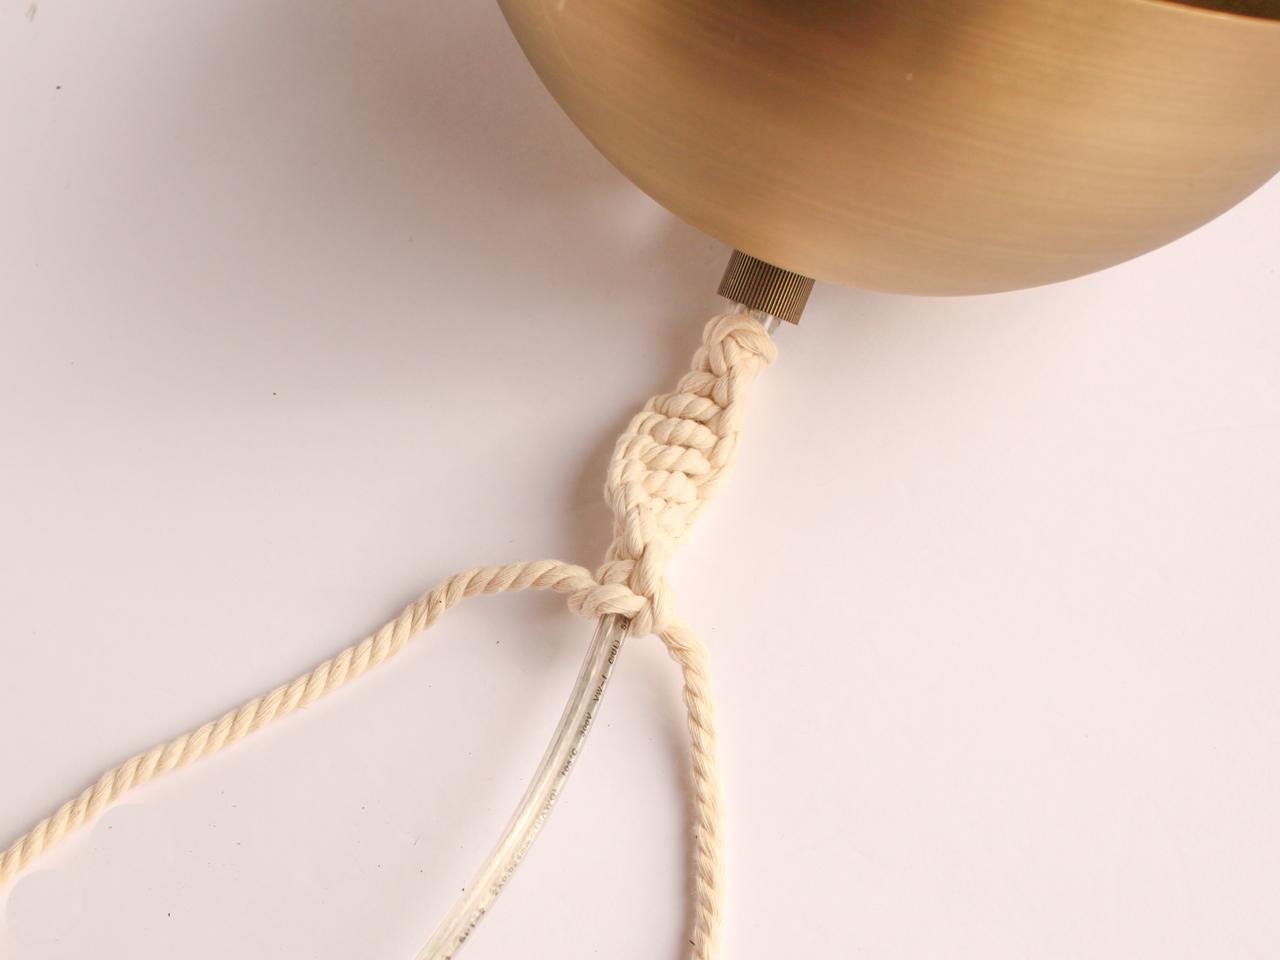
Step 6: Wrap Switch
Carla Wiking
When you reach the switch, tie a simple overhand knot on the side of the lamp cord that faces the back of the switch, pull the strands down against the back of the switch and tie another overhand knot to secure. Flip the lamp cord back over and continue half knotting.
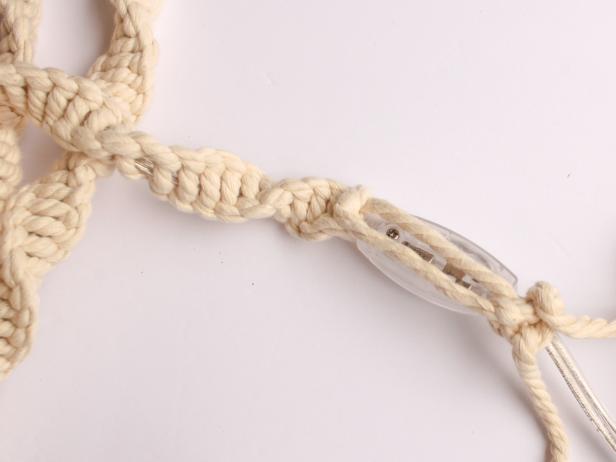
Step 7: Finish
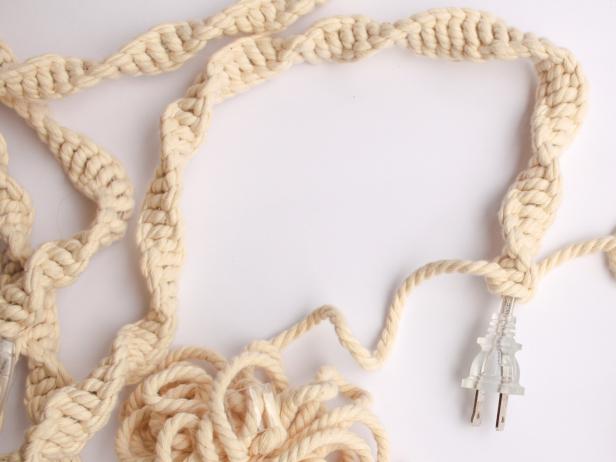
Carla Wiking

Carla Wiking
Stop half knotting about 1/2” from the plug. Tie a secure square knot and cut the macrame cord nice and short.
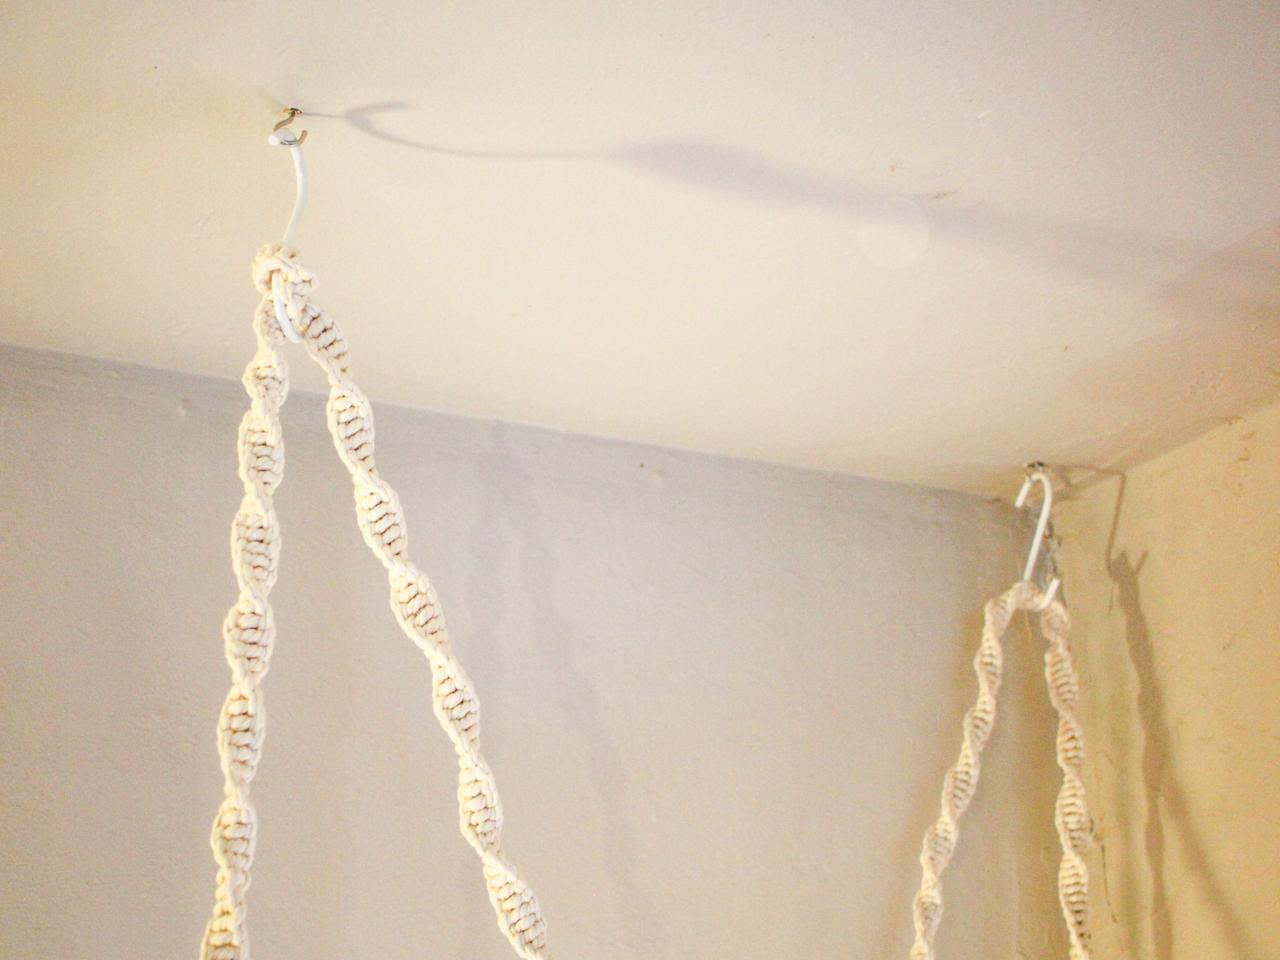
Step 8: Hang

Carla Wiking
Using anchors, install two hooks in your ceiling. If you are using small hooks, hang larger S-hooks from those. Hang your newly decorated lamp from the large hooks, looping around the hook if you find that the cord doesn’t feel totally secure.


