


How to Install a Fabric Feature Wall

Blue & White Country Bedroom With Fabric Wall
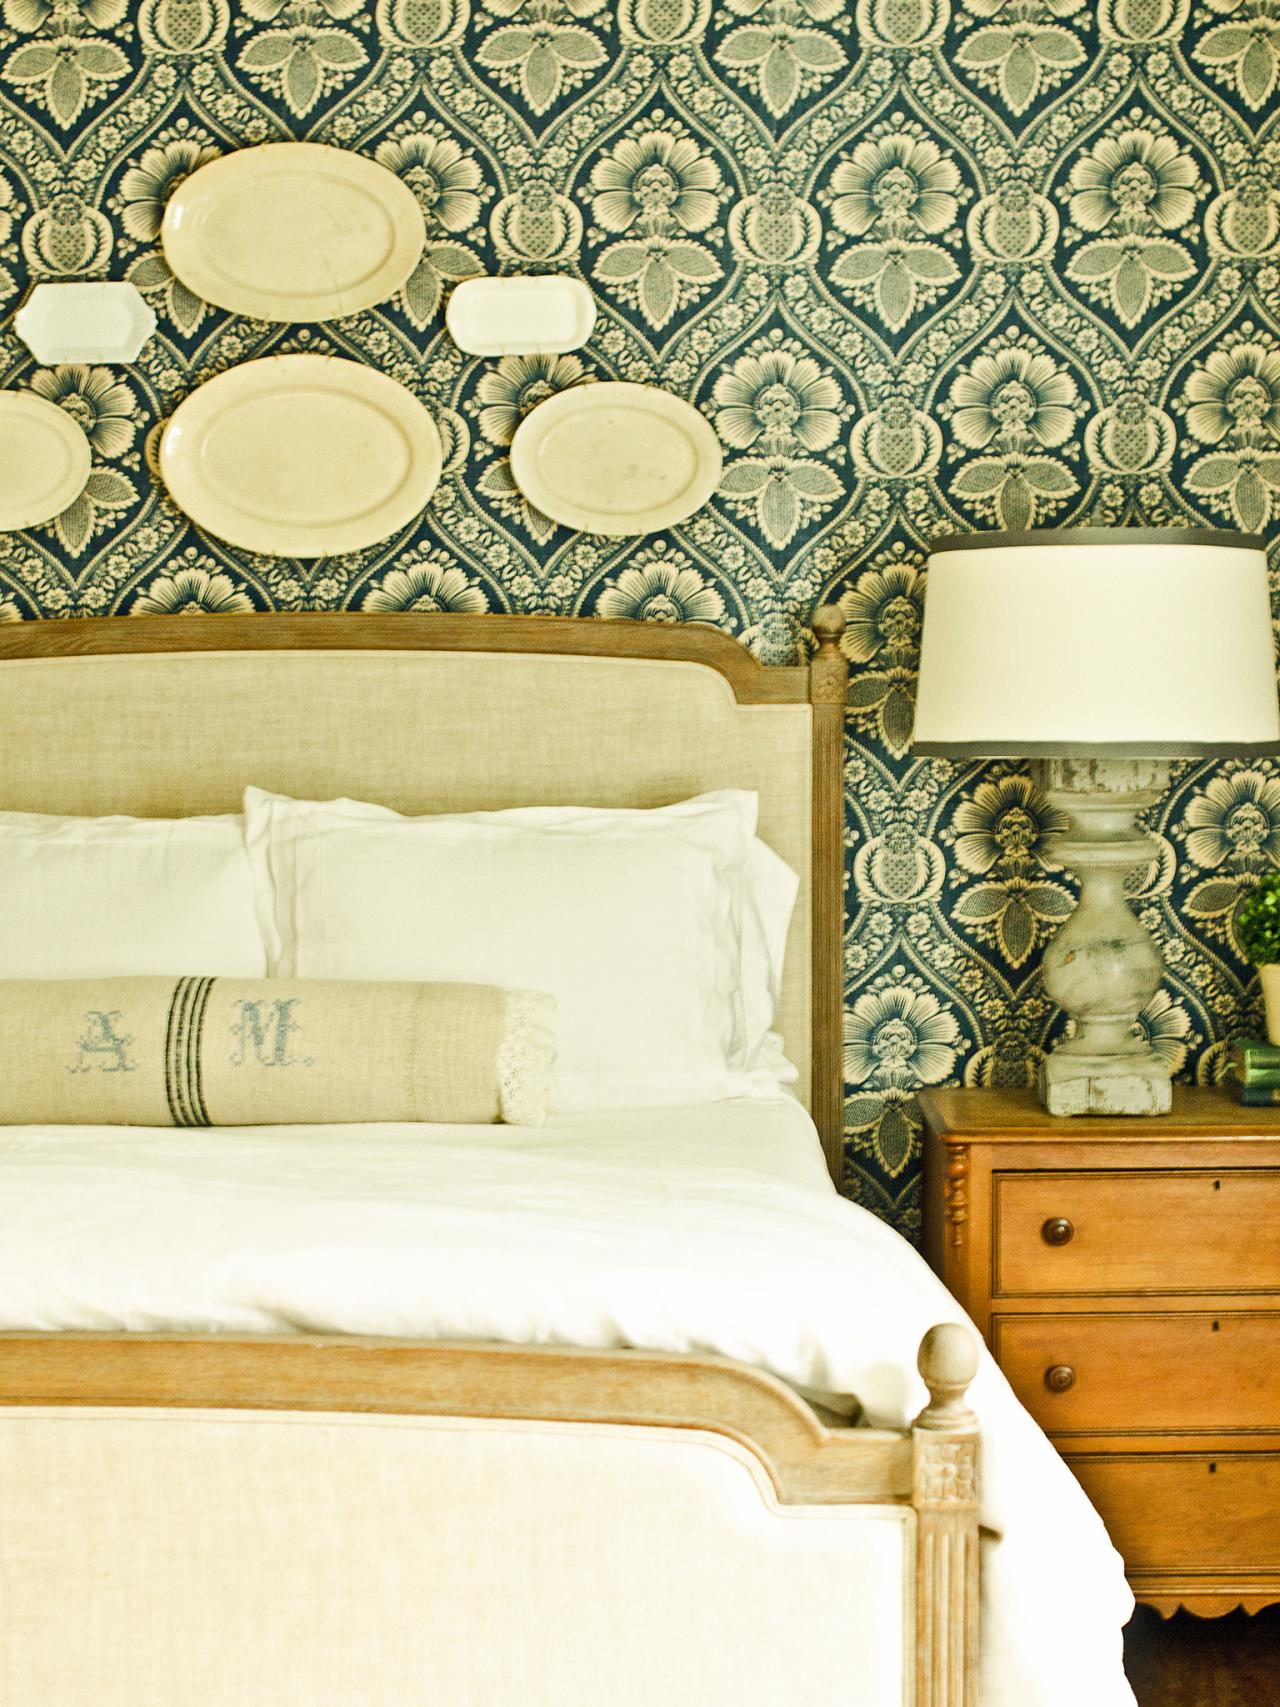
This lovely bedroom features a platter gallery wall on blue and cream fabric instead of wallpaper. The bold wall pattern is toned down by simple white linens and an understated headboard. Distressed lamps and shabby shic nightstands creates a quirky, country-inspired feel in the space.

Materials Needed:
- approximately 8 yards of 54"-wide decorator fabric for an 8 ft. x 12-14 ft. wall
- quart bottle of liquid starch
- tape measure
- pencil
- 4-foot level
- paint tray and plastic tray liner
- paint roller bar, cover and extension pole
- scissors
- rotary cutter and cutting mat
- yardstick
- stepladder
Measure and Mark Wall
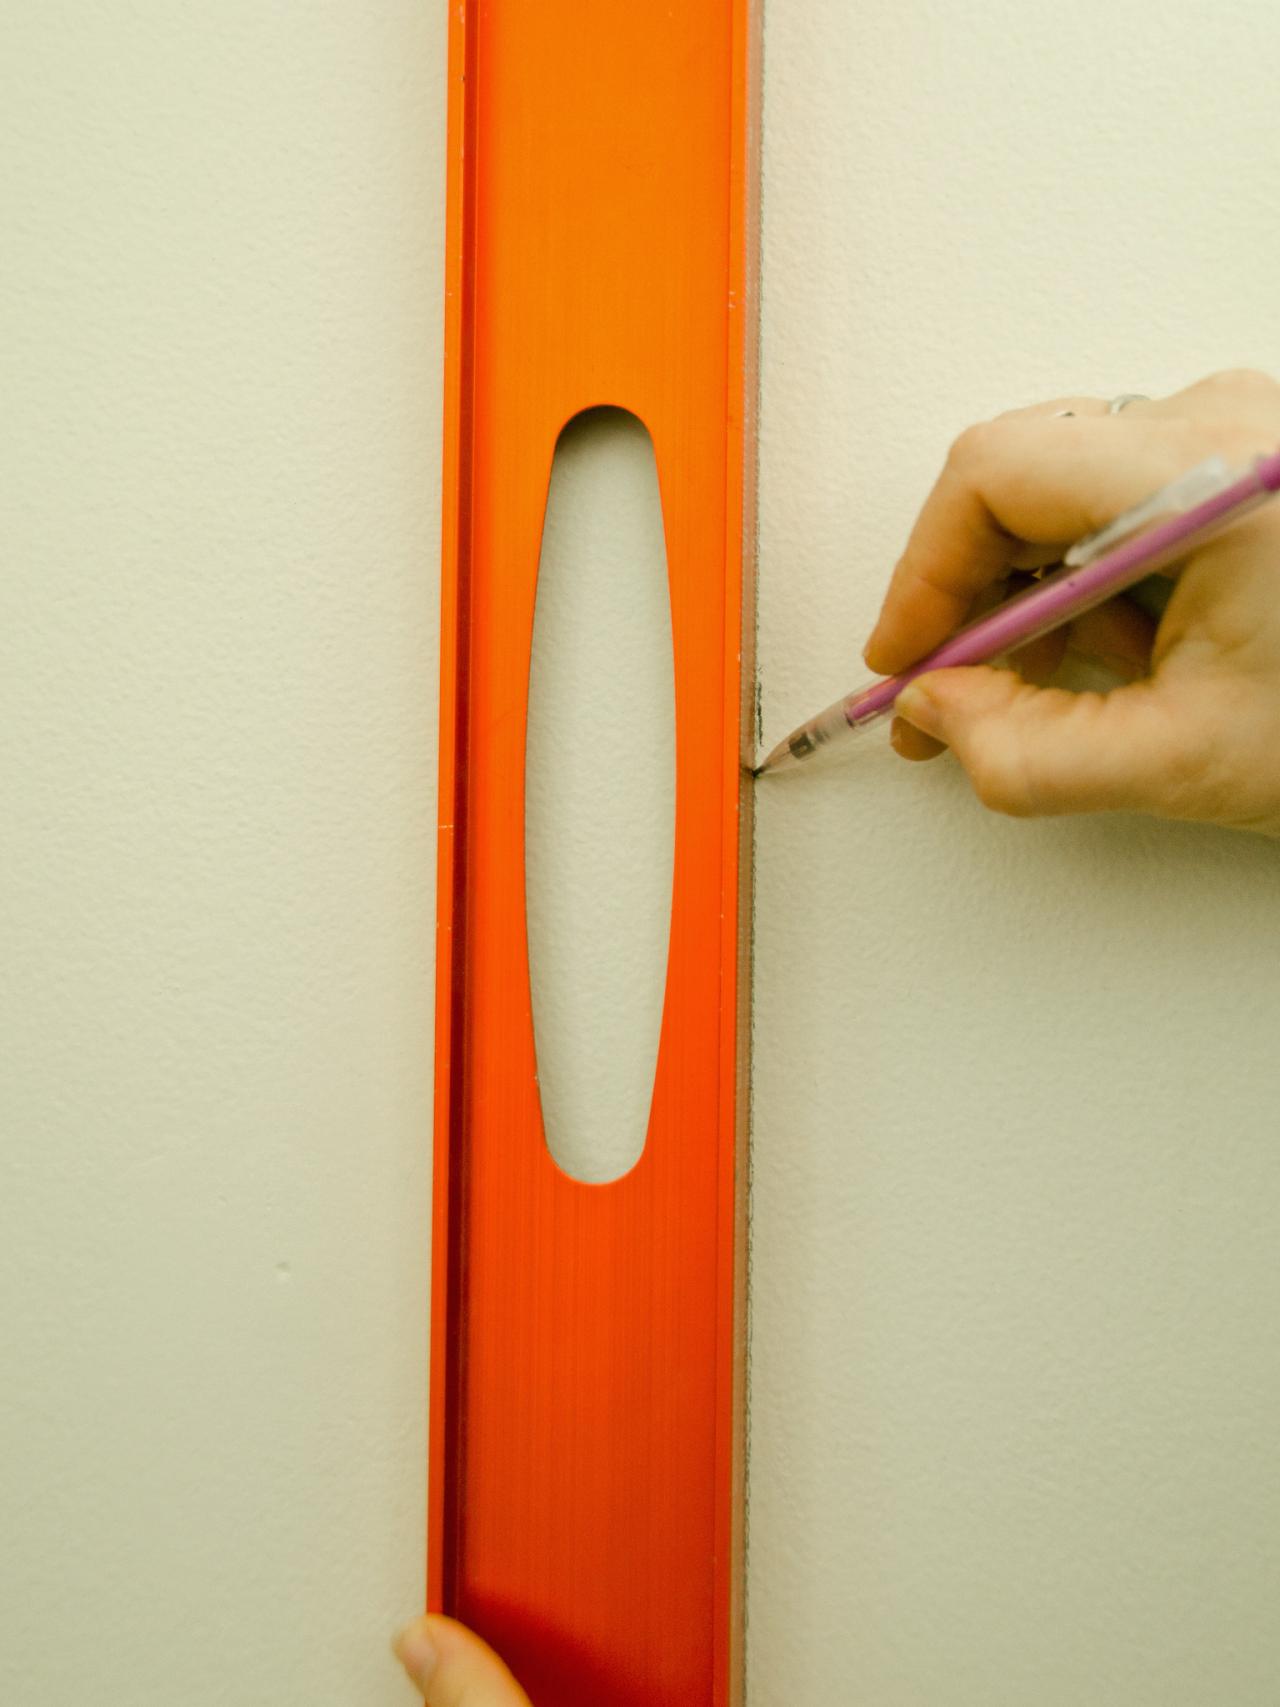
Make sure wall is clean and free from any nails or screws. Patch any holes and remove outlet and light-switch plates. Use a tape measure to determine wall width and find center point. Mark the center with a pencil (Image 1). Measure then mark a distance that is half of the fabric's width to the left of the wall's center point. For example: If fabric is 52" wide once raw edges are trimmed, make a mark 26 inches left of center point. Place level vertically on this mark and make a plumb line from floor to ceiling (Image 2). This line will be used as a guide when hanging the first fabric panel, which will be centered on your wall.
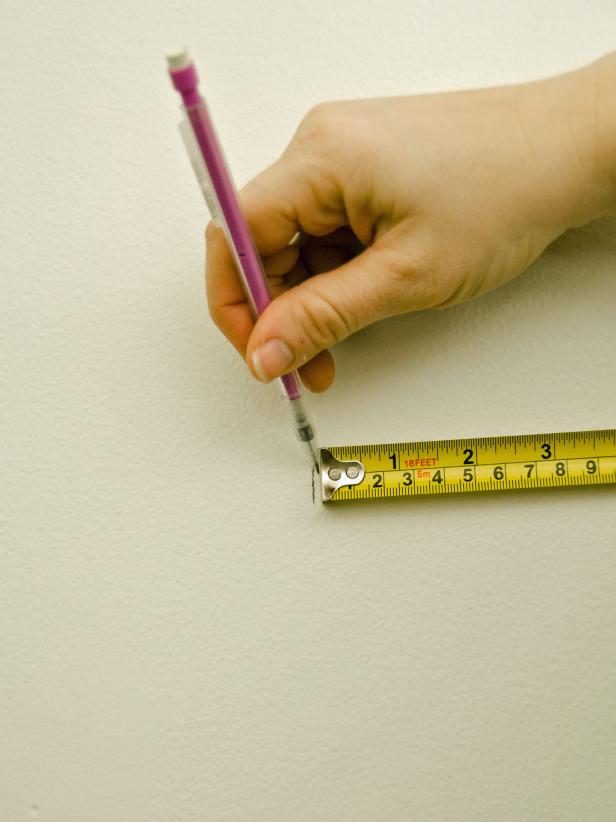

Measuring to Find the Center
Marking a Wall's Center With a Level
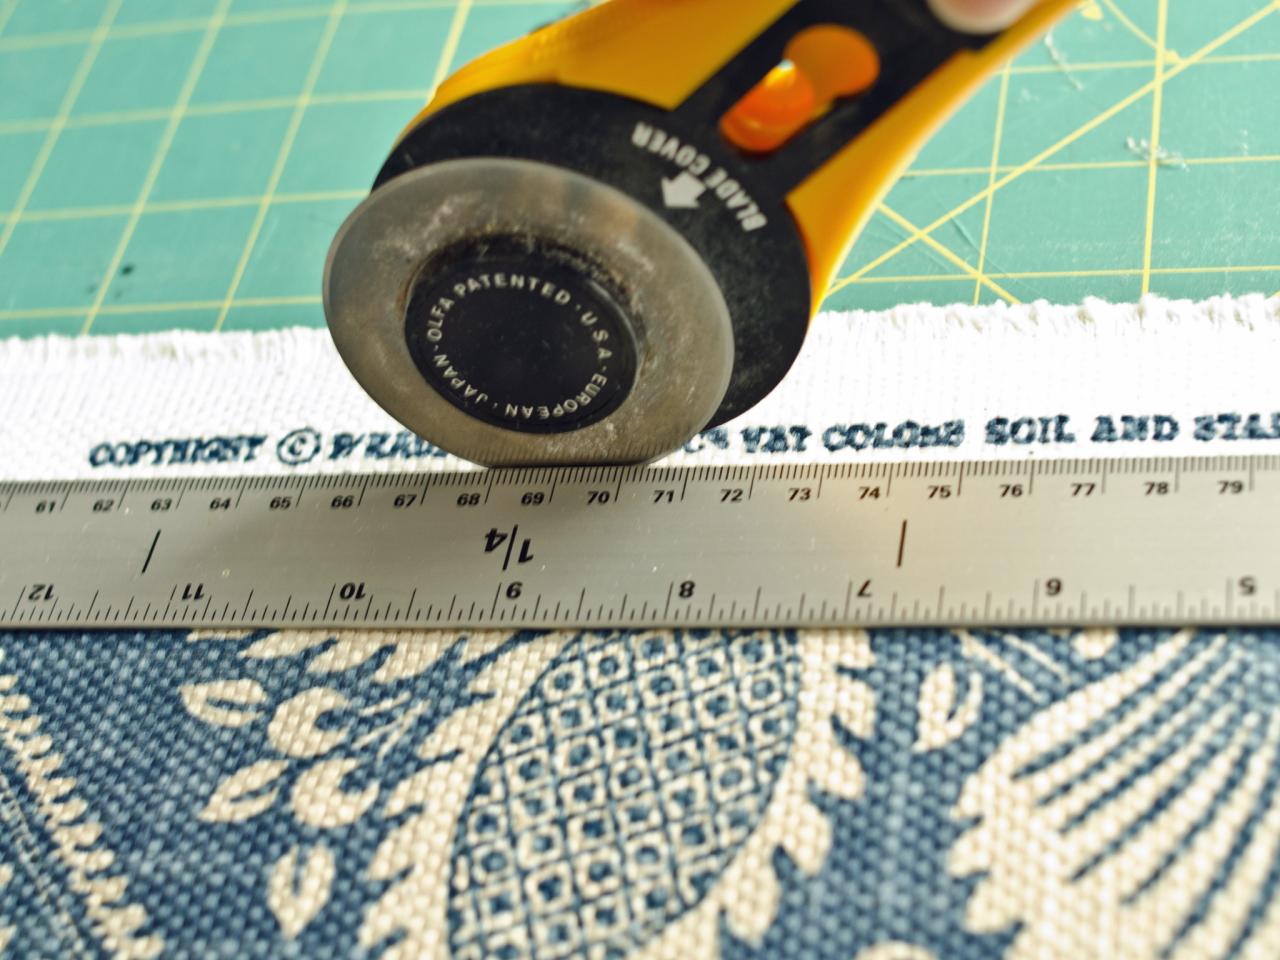
Trim Edges and Cut Fabric
Remove fabric's raw edges using scissors or a rotary cutter, cutting mat, and a yardstick or straight edge. All cuts need to be as straight as possible with minimal fraying. Measure wall's height (minus any trim like baseboards or crown molding) and add a few inches to this measurement if you're working with patterned fabric (to allow for shifting to match up the pattern) then cut panels. Measure and make cuts to allow for any outlets as well, if necessary.

Cutting Fabric
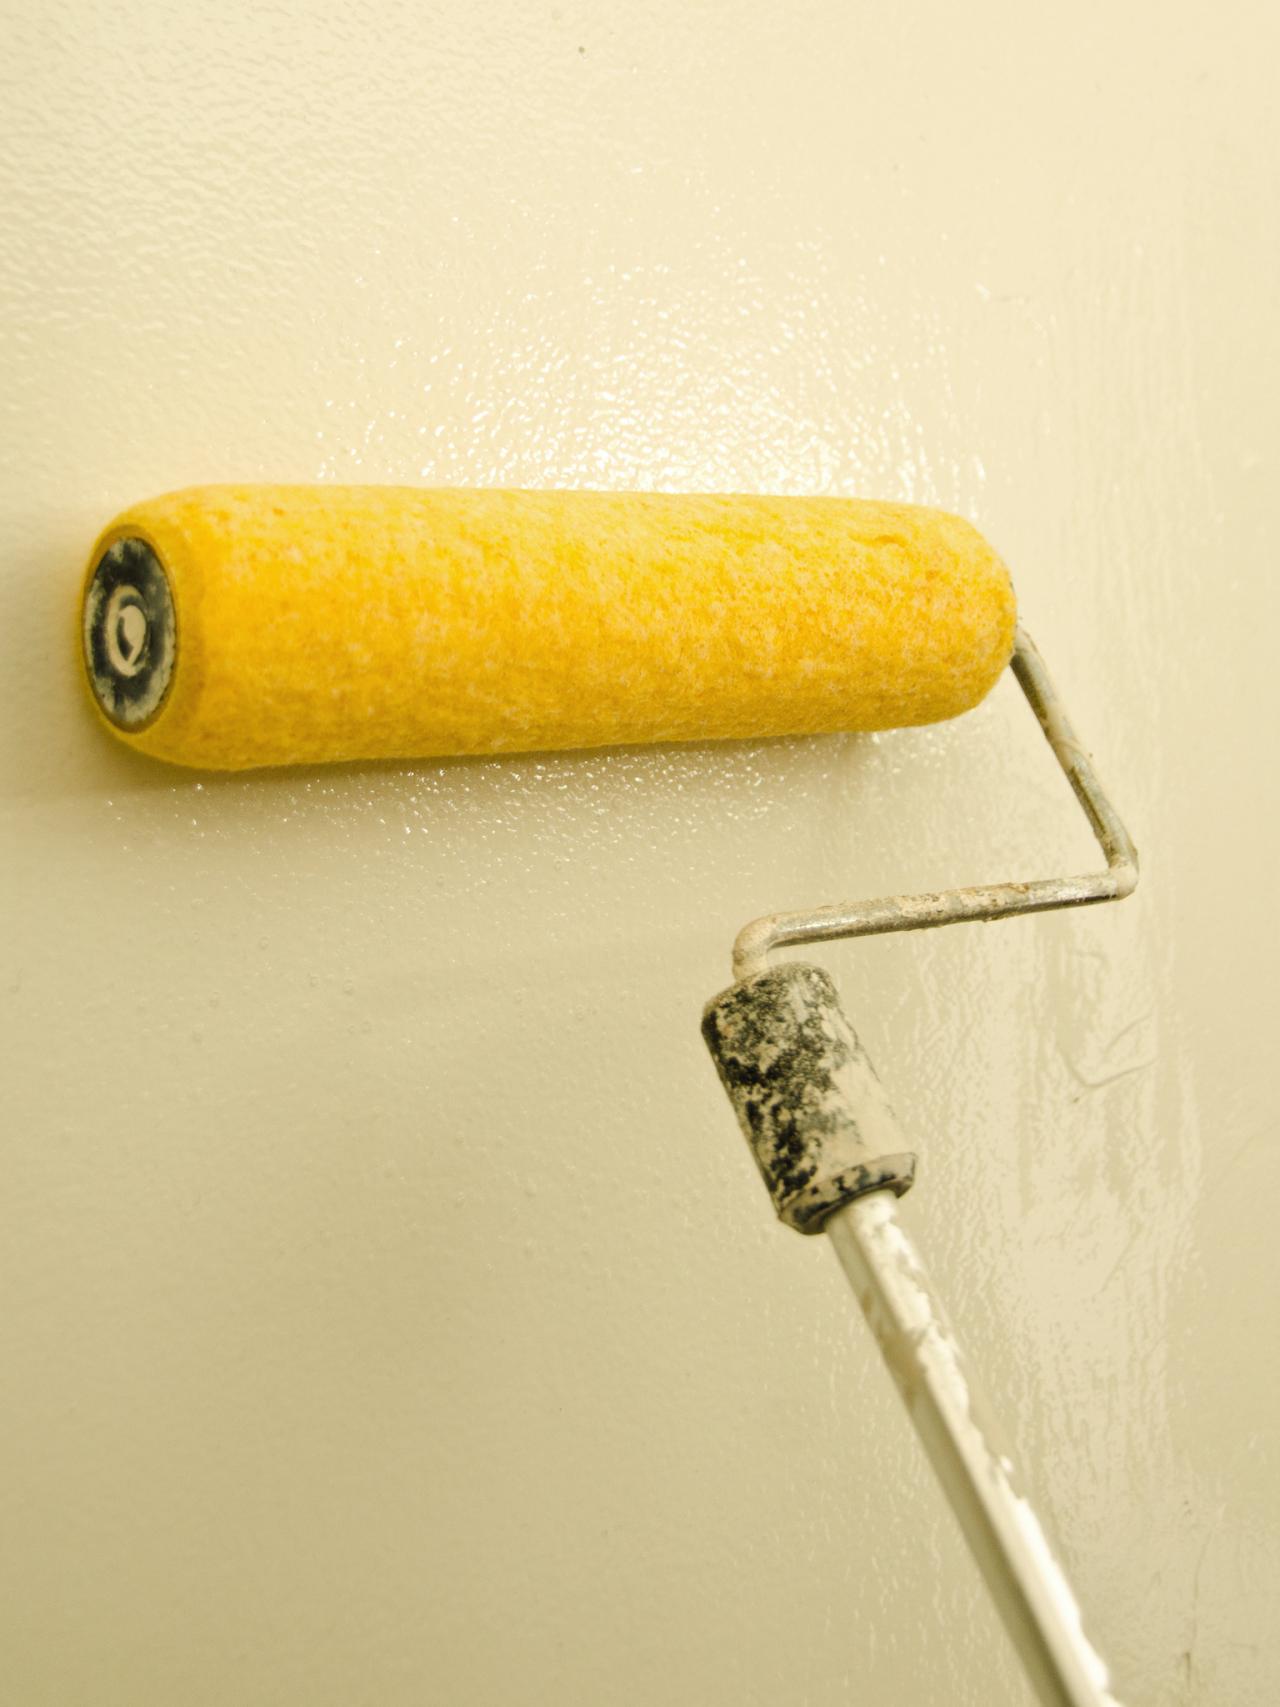
Roll Starch Onto Wall
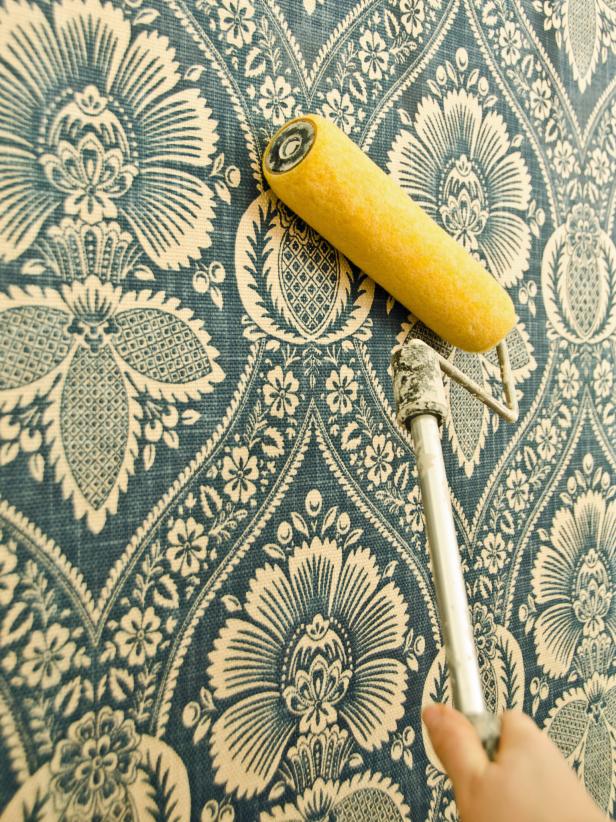
Pour liquid starch into a lined paint tray then roll the starch onto the wall's center section that will be covered with the first fabric panel. This entire section should be liberally covered with starch, but not so much that it's dripping. Tip: If using this treatment on a wall with electrical outlets or switches, turn off power to that room at the breaker when applying starch and fabric around outlets. This will ensure safety and prevent the possibility of being shocked when working with wet hands around an electrical source. It's safe to turn the breaker back on when the area around outlet is completed.

Rolling Starch Onto Wall
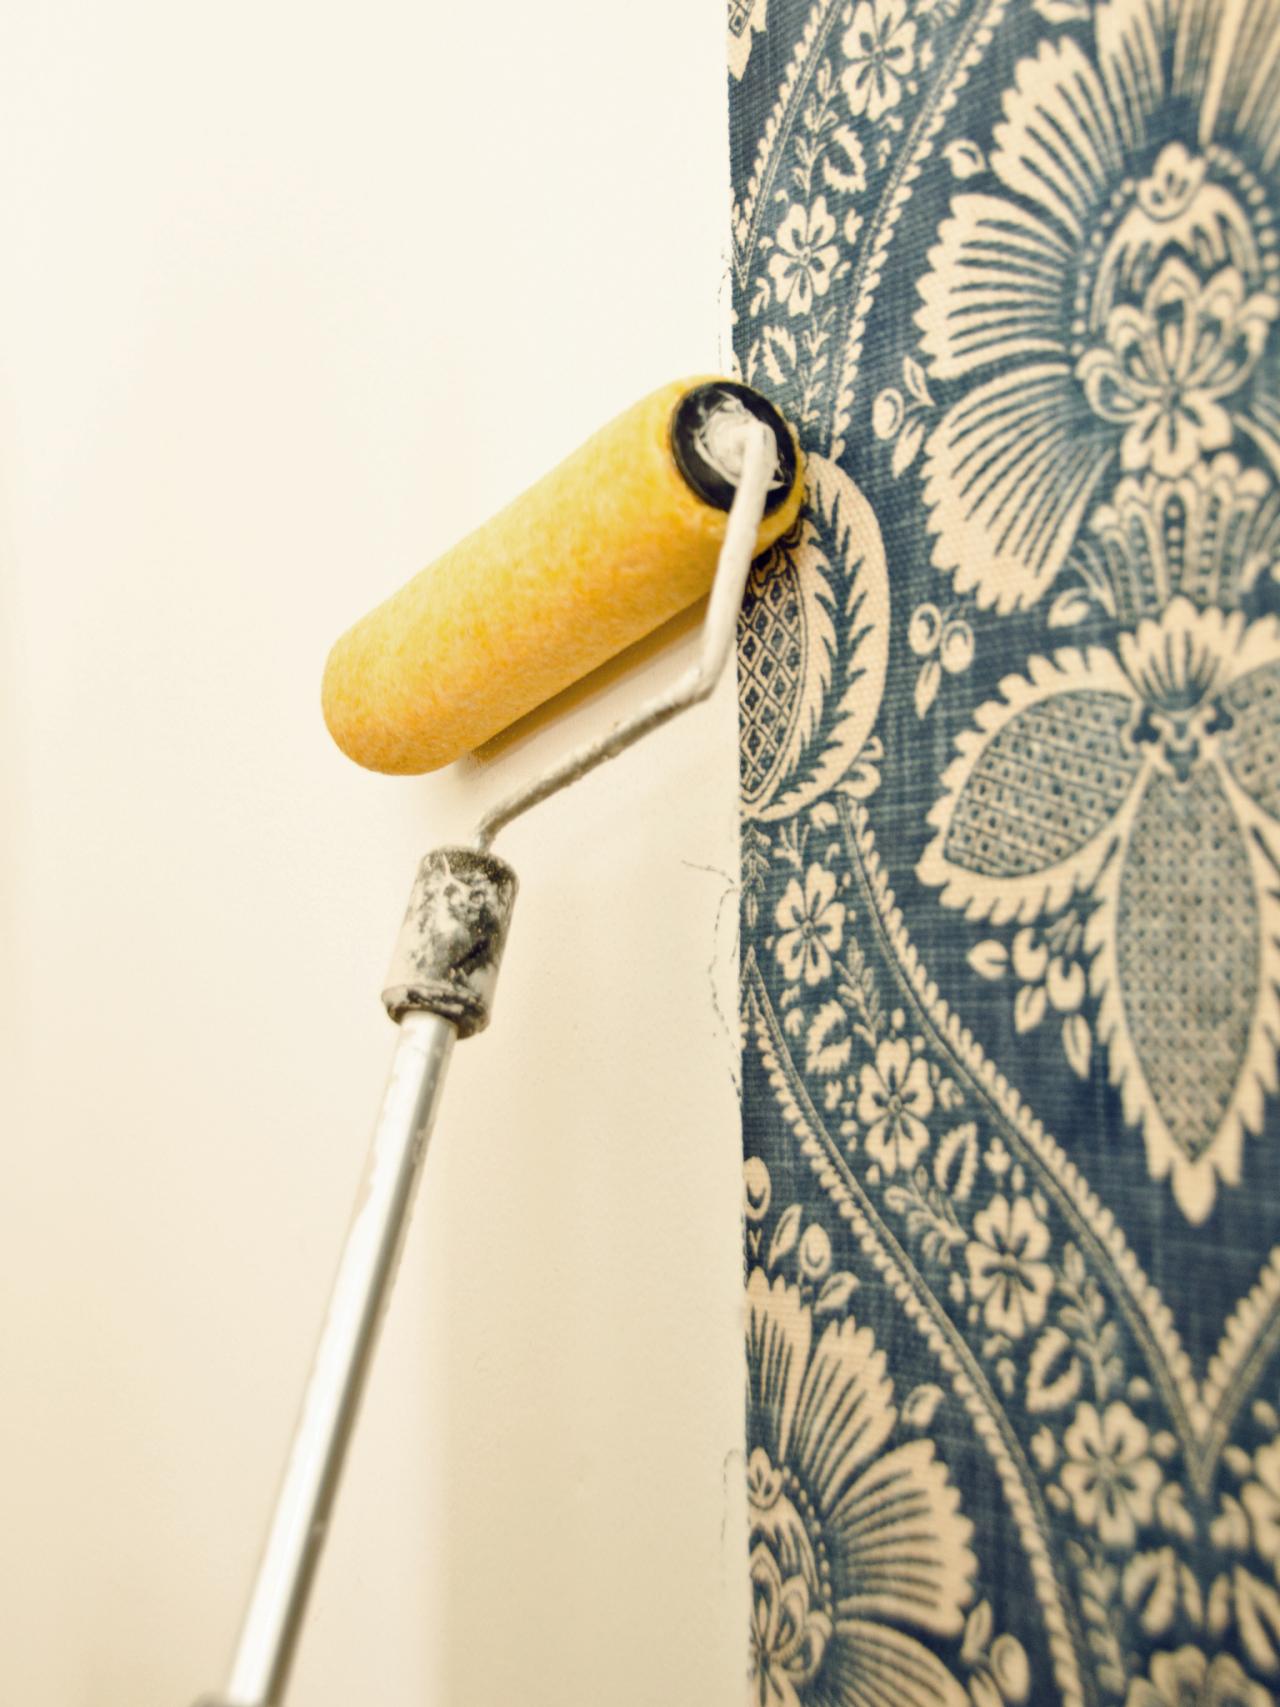
Install First Fabric Panel
Using a stool or stepladder to stand on, line up the precut panel's top left side with the plumb line. Smooth out the fabric working right and down until the entire panel is affixed to wall. Any bubbles or wrinkles can be smoothed out by hand. Shift fabric, if necessary, to make sure it's square to the ceiling or crown molding and straight along plumb line. Once panel is properly placed, roll over entire panel with starch. Tip: One person can complete this project alone but it's helpful to have two people when applying large fabric panels.

Hanging Starched Fabric Instead of Wallpaper
Rolling Starch Onto Wall
Measure and Cut Additional Panels
Using a tape measure, determine the width needed for fabric panels to the left and right of the center panel if the wall is too small for additional full panels. Transfer this measurement to fabric and cut to appropriate width, leaving approximately 1/4" for overlap, depending on fabric's repeat. When cutting the left piece, trim excess off left side of fabric panel. Do the reverse for right panel. This will ensure the fabric will line up properly with a slight overlap. Hold fabric panel up to wall for a "dry fit" to see if any adjustments need to be made before hanging as it's difficult to trim panels once they are hung. When cutting fabric to fit the height, it may be necessary to trim off some fabric to ensure pattern will line up.

Cutting Fabric
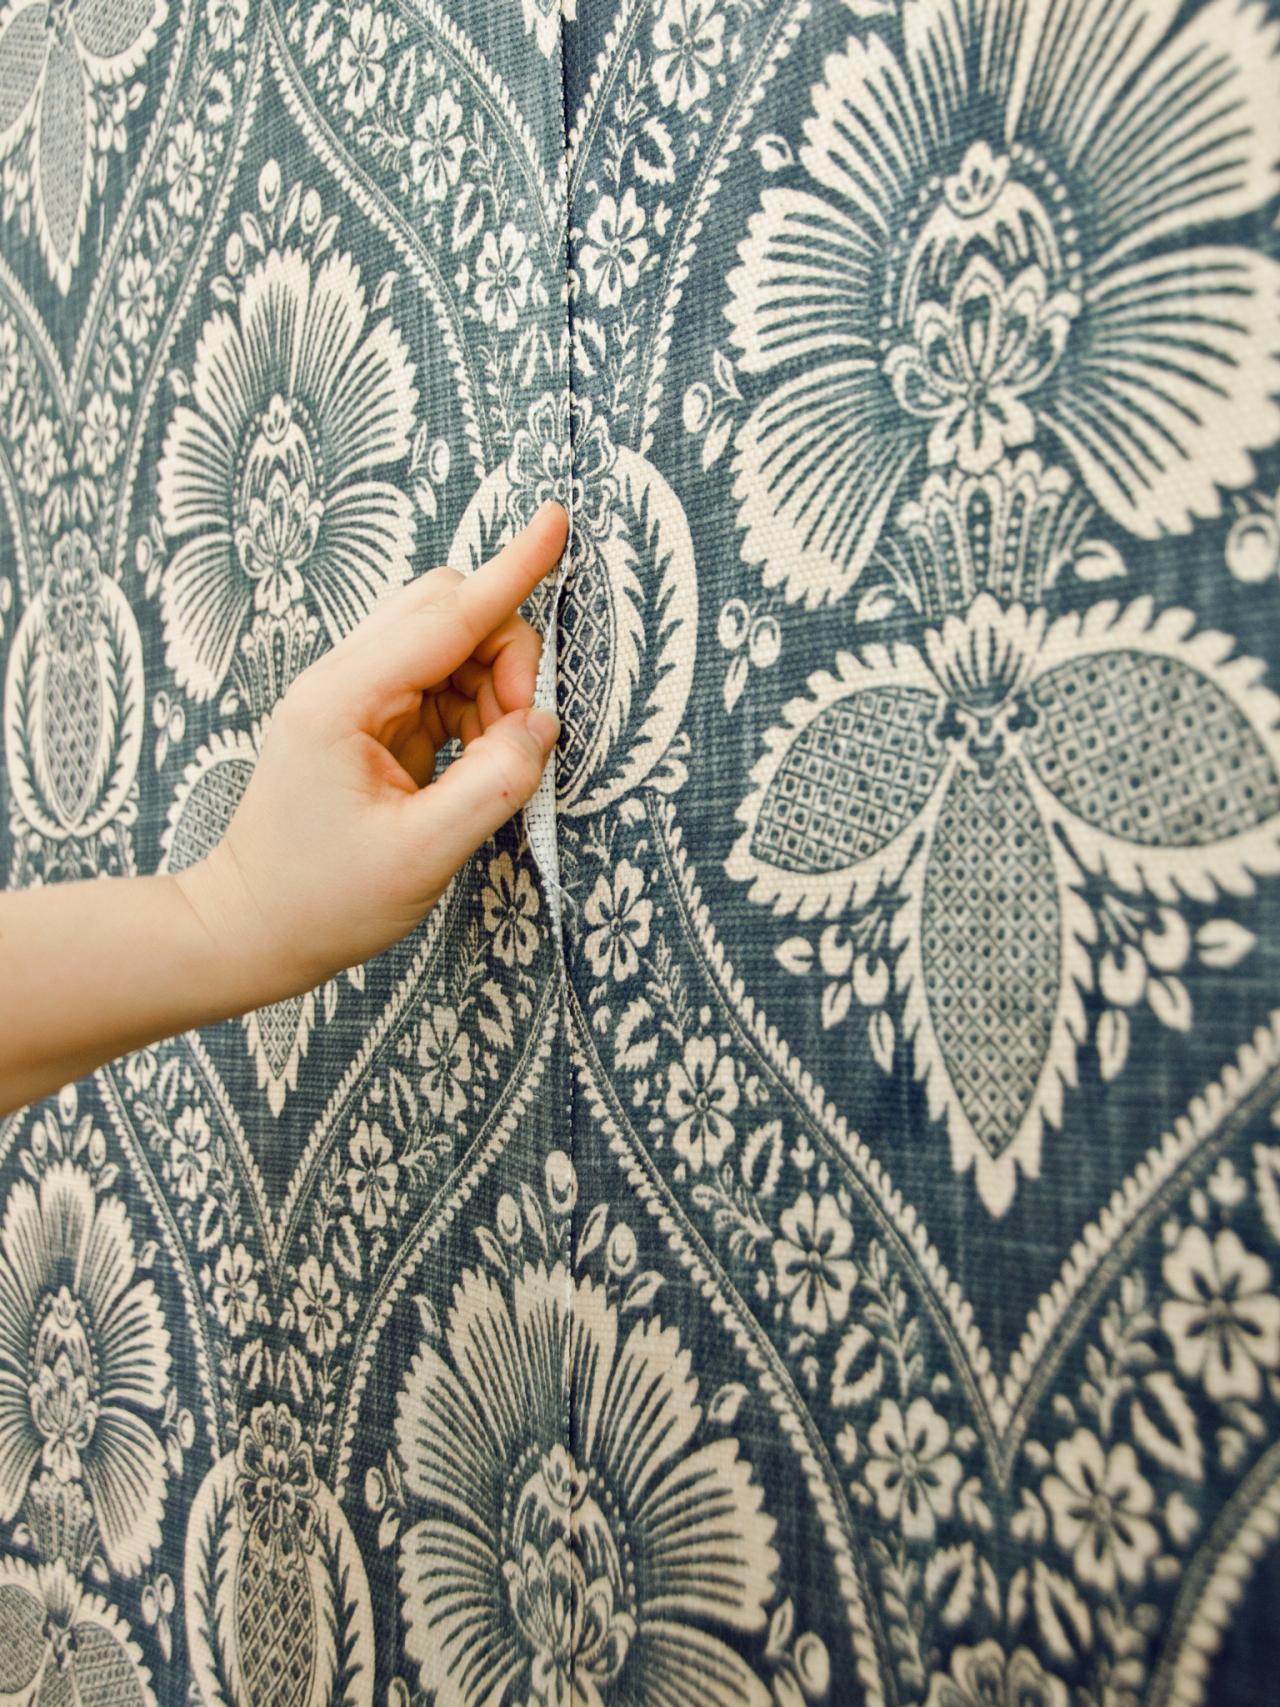
Install Additional Panels
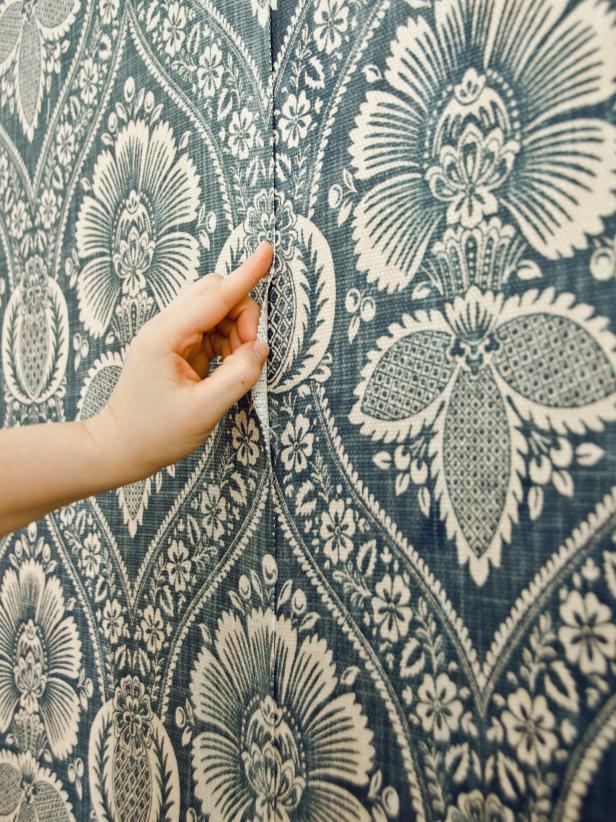
Use roller to apply starch to wall where next fabric panel will hang (Image 1). Line fabric up at the top with adjacent panel and smooth the fabric down and away from that side. Fabric may be shifted, if necessary, to make sure pattern lines up. The panels should overlap each other slightly, about 1/4" (Image 2). Press panel tightly to the wall, smoothing out any bubbles or wrinkles by hand. Remove any loose threads at the seam or apply a little starch with a fingertip to get them to lay flat, but don't pull on a thread as it may unravel the edge. Roll starch over entire fabric panel and repeat with any additional panels. Use a paintbrush or your fingertips to apply starch into tight corners where roller will not reach. Allow fabric to dry in place. Once dry, fabric can be vacuumed with a brush attachment to clean or fabric panels can be removed, dry-cleaned and reinstalled if stained. This treatment is perfect for renters or DIYers who like change, because fabric can be removed at any time without damaging the wall underneath.


Rolling Starch Onto Wall
Hanging Starched Fabric Instead of Wallpaper
Traditional Bedroom With Fabric Feature Wall


