


How to Hang Wallpaper on the Ceiling


Materials Needed:
- graphic wallpaper
- wallpaper paste
- wallpaper smoothing tool
- pencil
- utility knife or razor
- screwdriver or drill
- ladder
- measuring tape
- small bucket or 1-gallon aluminum paint can
- dishwashing liquid
- damp cloth
- 5-gallon bucket
- roller handle
- roller sleeve
- paint pan
- drop cloth
- level
- flat worktable or counter at least 30" wide by 76" long
- warm water
Roll Paste, Dry-Fit and Cut First Run
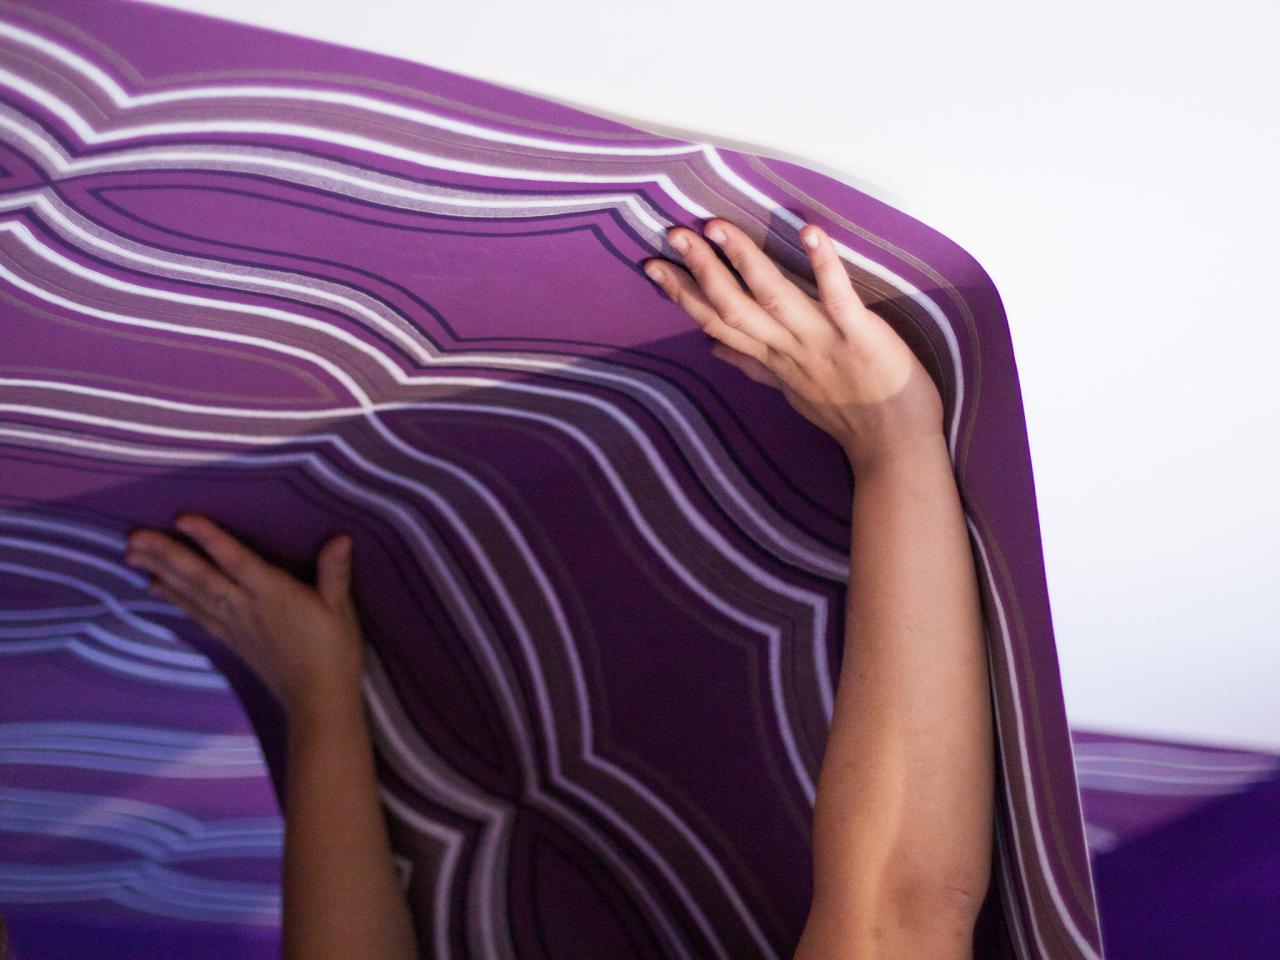
Remove any air vents or light fixtures from ceiling using screwdriver. Pour wallpaper paste into 5-gallon bucket, then add an even coat of paste along area of ceiling where first roll of wallpaper will be installed using paint roller handle and roller sleeve. Unfurl wallpaper approximately 6” longer in width than the ceiling itself, then cut to size using utility knife or razor blade. Position first roll of paper in place up against paste-covered area of ceiling, repositioning paper until perfectly straight. Tip: This is referred to as a “dry fit” which requires a run of paper be put in place yet left loose for positioning.
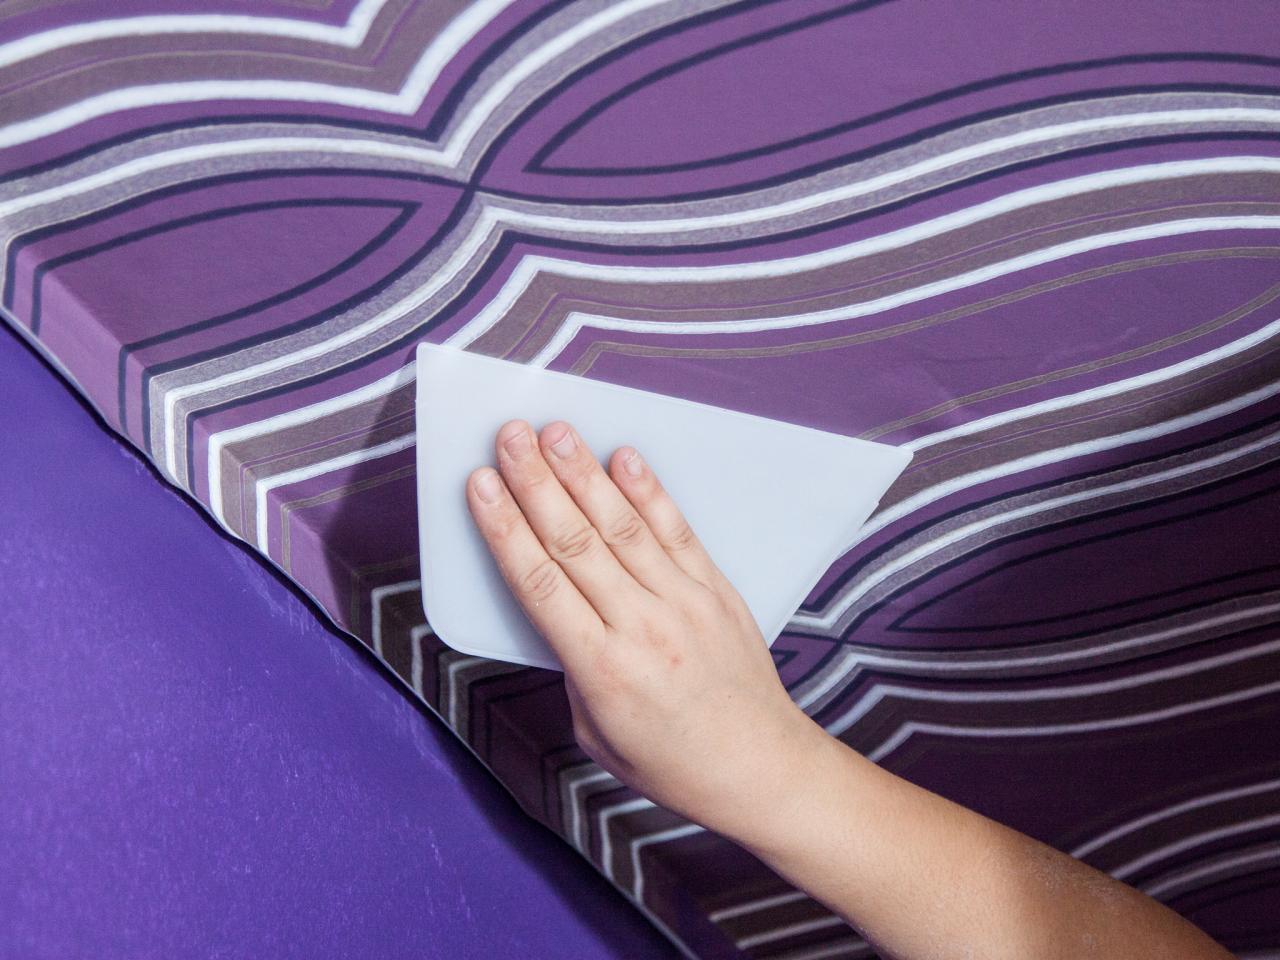
To ensure symmetry, make sure the pattern repeat falls approximately in the same spot on each end of the ceiling. Once in place, use wallpaper smoothing tool to smooth out any air bubbles, then cut excess along corner of ceiling with utility knife or razor. Wipe away excess glue using damp cloth dipped into small bucket or 1-gallon aluminum paint can filled with warm water and one teaspoon of dishwashing liquid.

Match Repeat on Ceiling
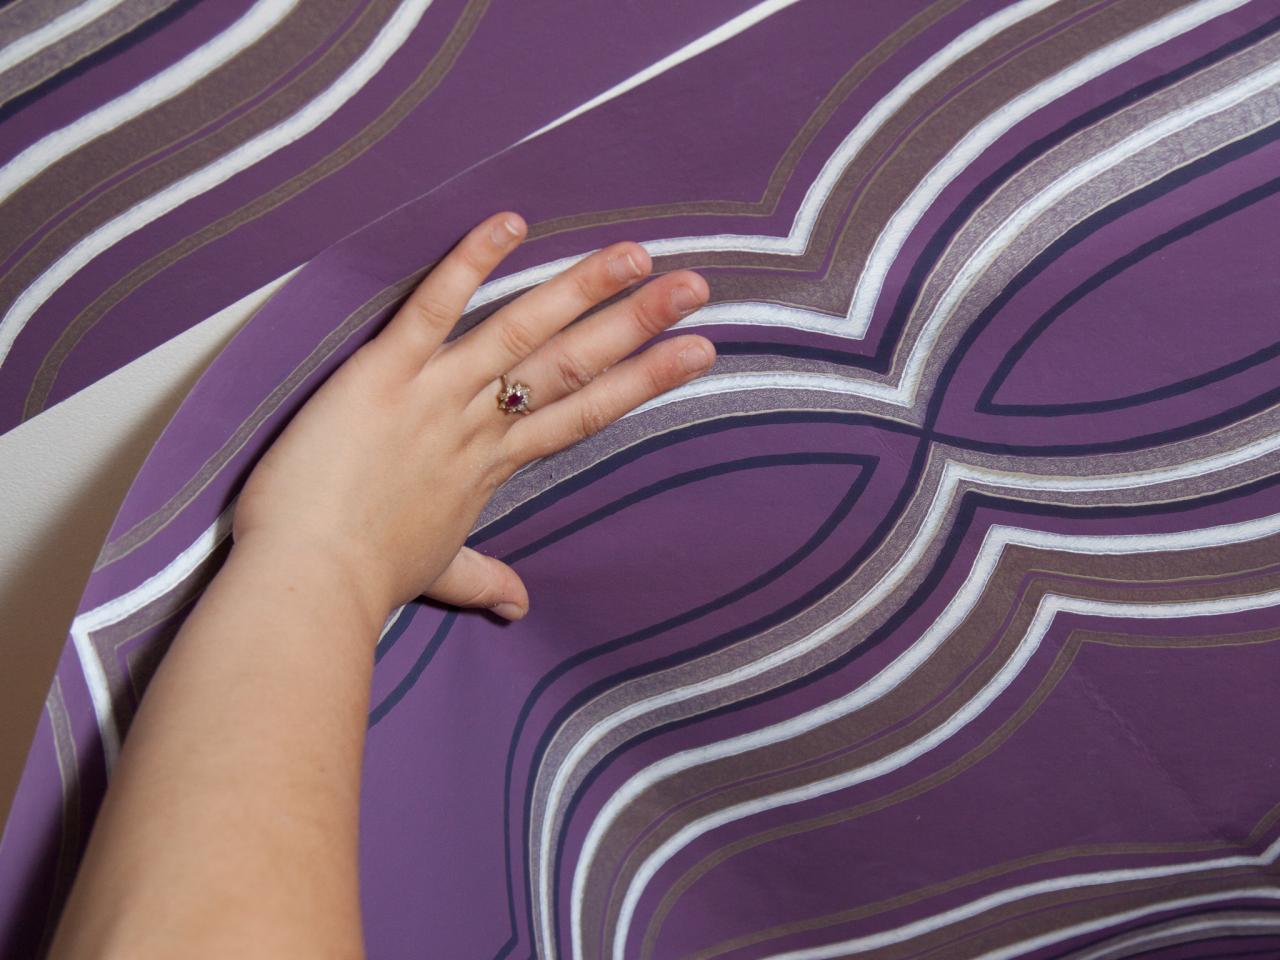
Once the first run of wallpaper is securely hung, it will be used as a template for lining up the pattern repeat for the remaining runs. First, apply an even coat of wallpaper paste for the next run. Dry-fit the next run across the ceiling from wall to wall. Next, line the edges of each run up against one another.

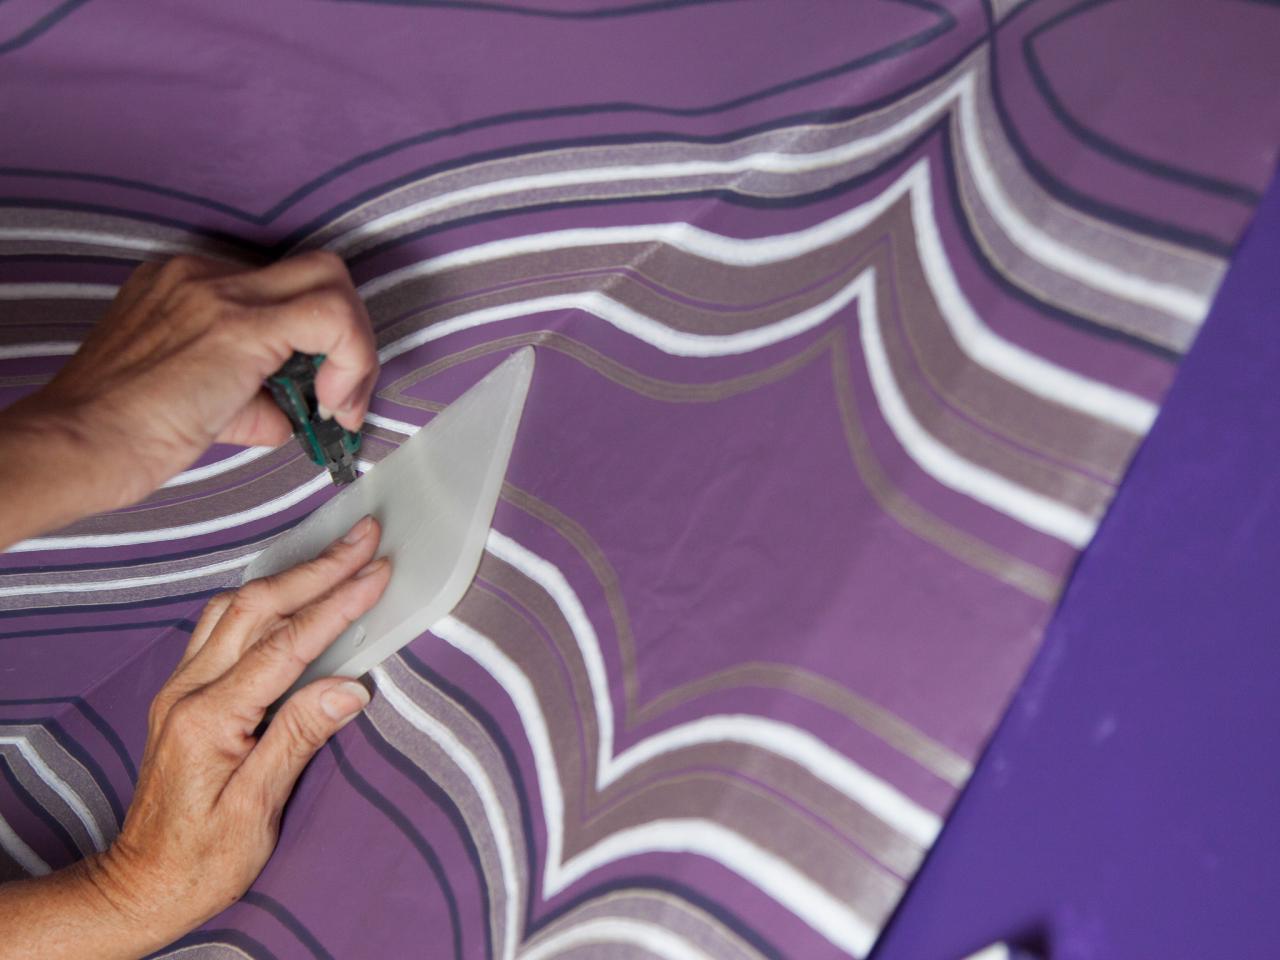
Match Repeat at Corners
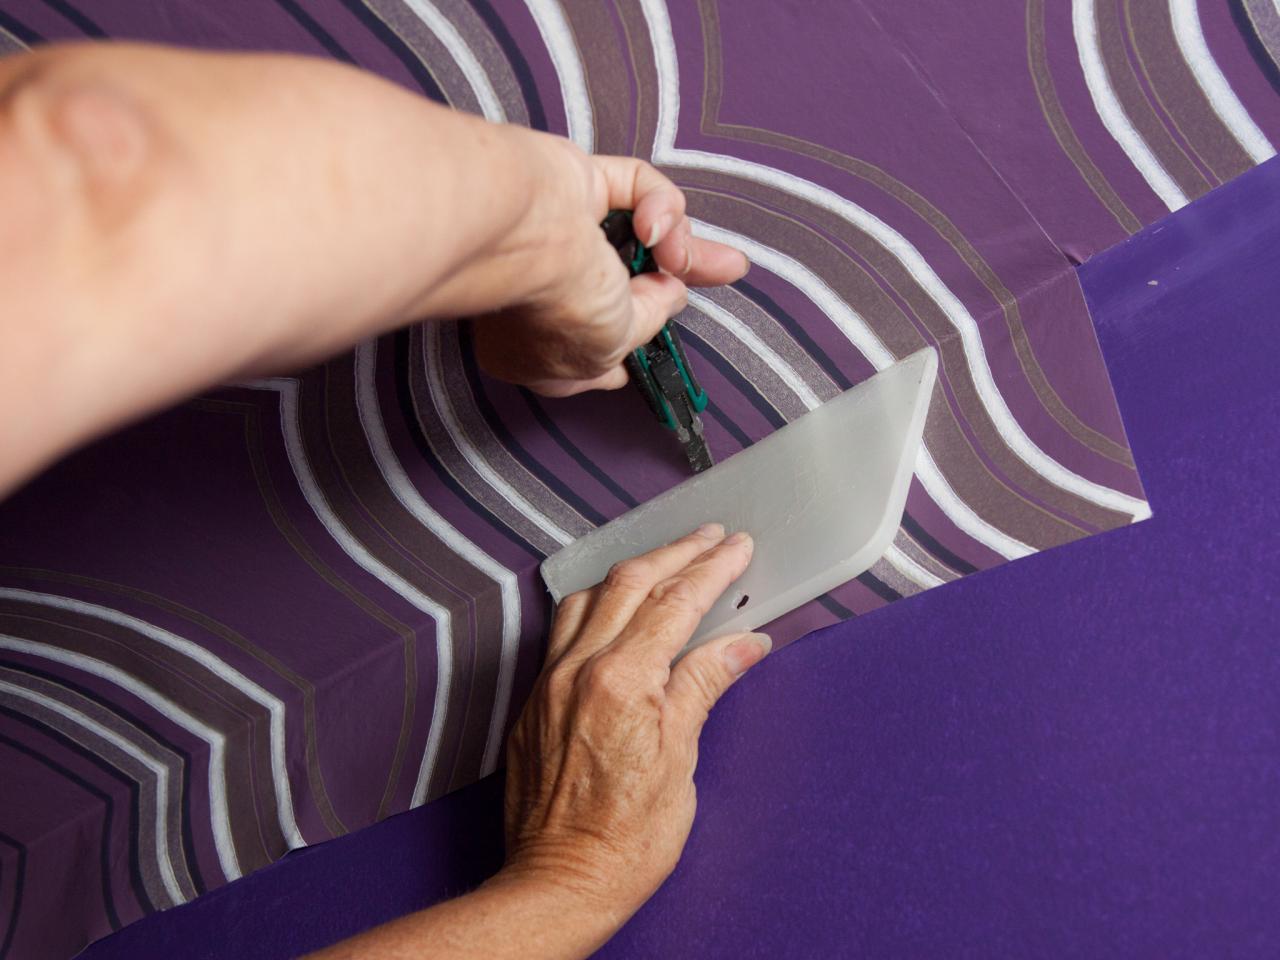
Once the run reaches the corner, reposition wallpaper until repeat of first run matches up perfectly with repeat of second run.

Trim Corners
With the repeats of each run matched up perfectly, cut excess at corner of ceiling using utility knife or razor.

Continue Rolling Paste, Matching Repeat and Trimming Corners
Repeat steps 1 through 4 until a junction box or air vent is reached.

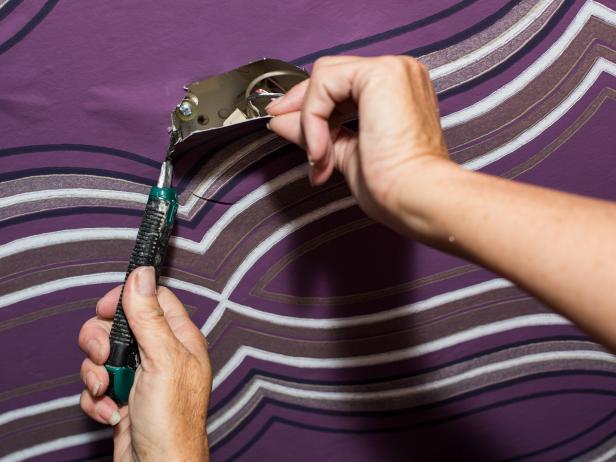
Trim Around Air Vents and Junction Boxes
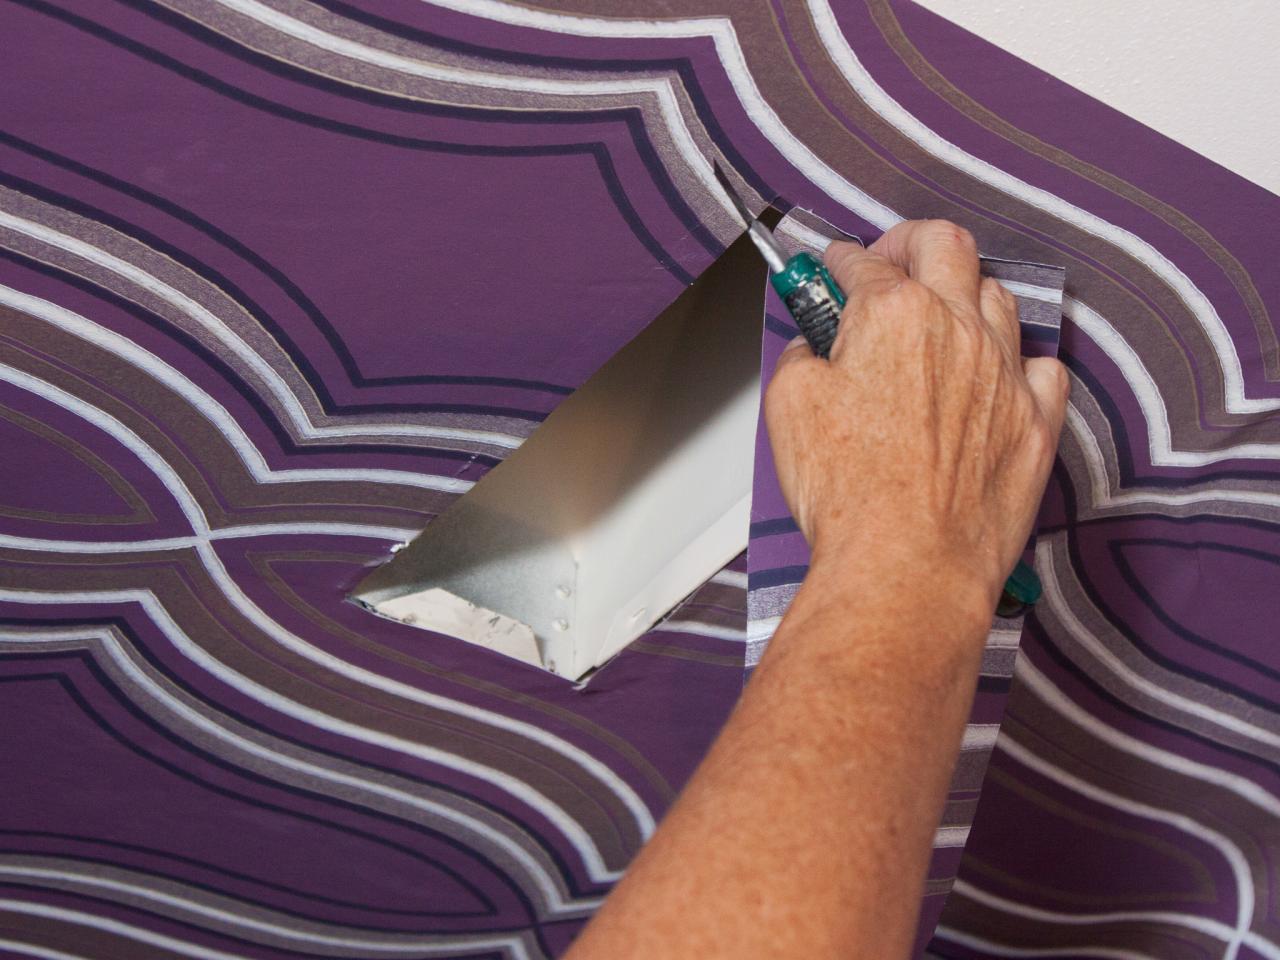
Continue hanging runs of paper along ceiling, matching the pattern repeat along ceiling and corners. Once a point is reached in which wallpaper will interact with a junction box or air vent, roll ceiling with paste, dry-fit the run, then cut out around junction box or air vent using utility knife or razor. Continue hanging all runs until ceiling is completely covered. Thoroughly wipe all runs using damp cloth.
Once dry, re-install light fixtures and air vents using screwdriver or drill. Then, look up and enjoy the new view!


