


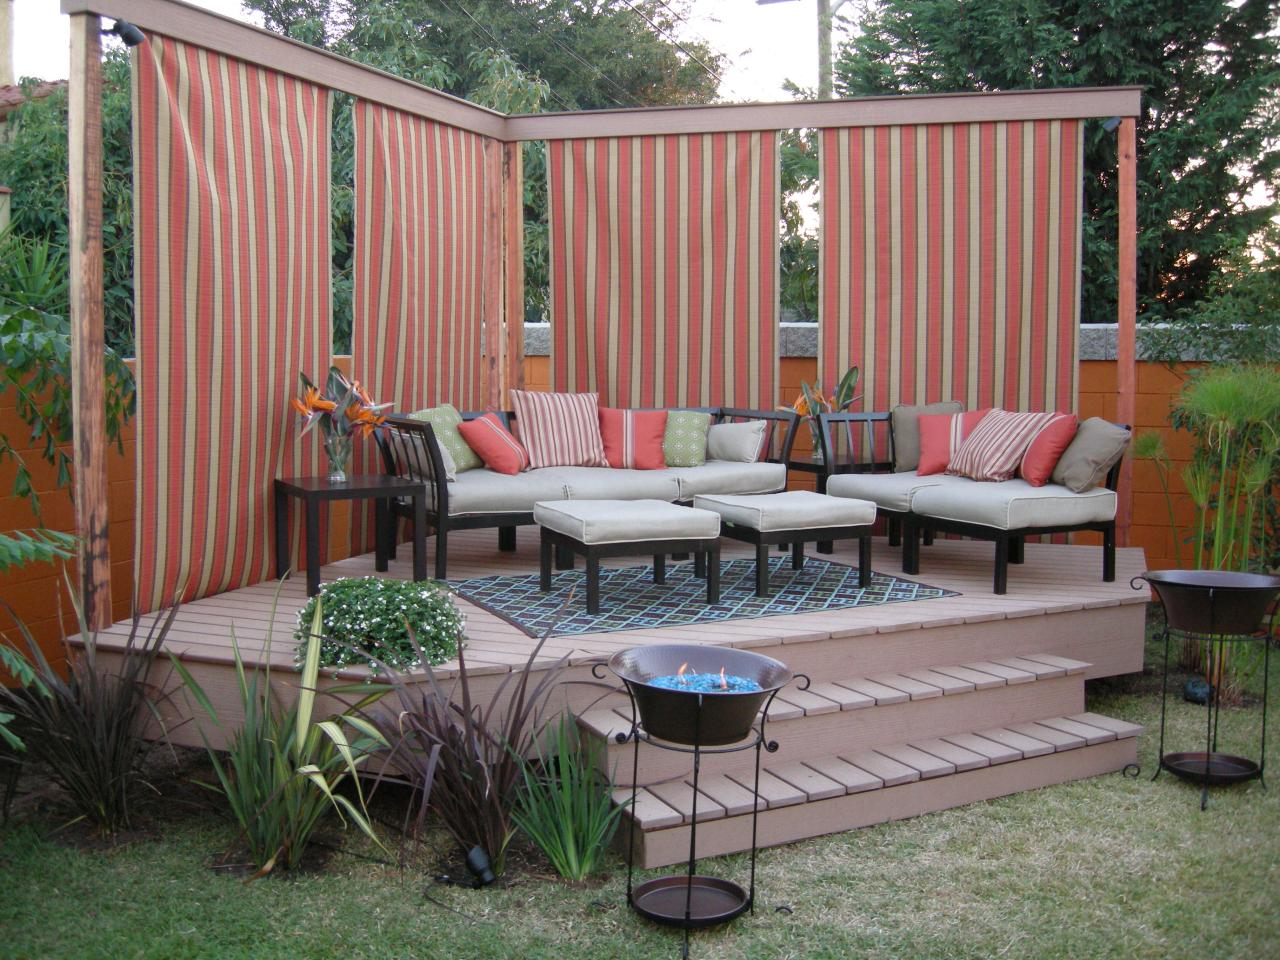
How to Build a Detached Deck
Decks are a great way to add defined space to an otherwise-empty yard — and you can entertain in high style. Here’s the building plan:
Materials and Tools:

contractor’s marking paint
8 precast concrete piers
2x6-inch boards
4x6-inch boards
4-inch composite planks for decking
12-inch planks for deck facing
shims
1-3/8-inch joist hanger nails
joist hangers
3-inch galvanized framing nails
2½-inch composite deck screws
prefabricated stair risers
miter saw
drill
tamper
chalk line
level
chain saw
hammer
deck guide
Steps:
1. Measure and mark the outline of your deck. Measure and mark where your concrete piers will sit. When laying each pier, make sure they’re no more that 6 feet apart. (Check local building codes; they may require that you use more than just piers.)
2. If you have a grass yard, cut out the sod so that the pier will sit easily on solid ground. Wherever you’ll be placing a pier, use a tamper to compact the ground. This will make sure that the earth is solid enough to support the weight of the deck.
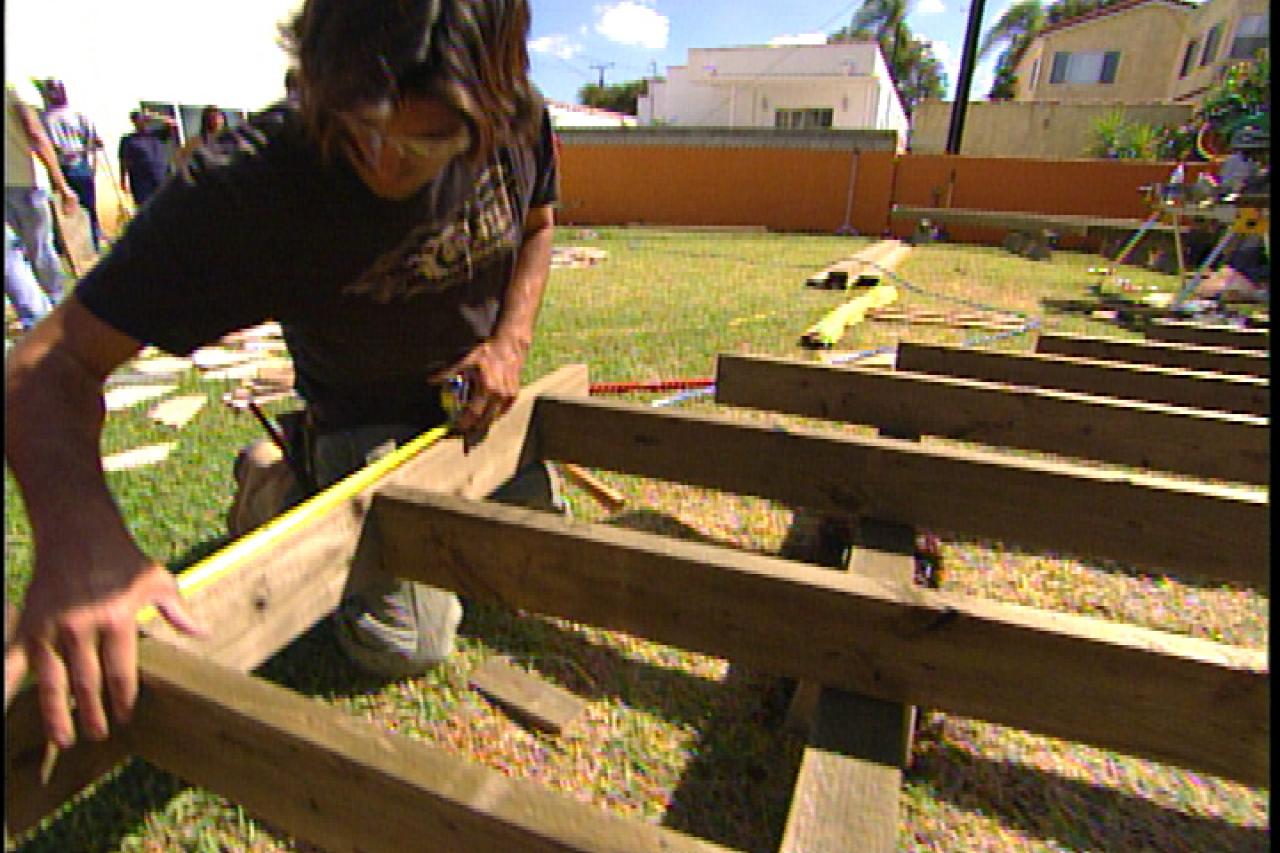
3. Once the piers are placed, lay the girders in the joist hangers on the concrete piers. Set each end of a level on a separate girder to make sure they’re both the same level. If they aren’t, tamp down the soil of the higher pier until it’s level. If you can’t lower the pier, place shims under the girder to raise it to the appropriate level. Make sure all the joists are even by placing the level between each joist. Nail the joists into place.
4. Lay the cross beams out 16 inches from center over the girders. Since the pictured deck has an angled side, the first four beams are 136 inches long, the fifth beam is 127½ inches, the sixth is 111½ inches, the seventh is 95½ inches, the eighth is 79½ inches and the last beam is 63½ inches. Attach the cross beams to the 4-by-6 beams with joists hangers.

5. Place 2x4’s along the ends of the cross beams on each side of the deck and secure with framing nails. Add joist hangers where the frame and the cross joist intersect. Because the deck will have an angled side, miter the ends of the two frame beams that will sit on either side of the angle to 45 degrees. Place the beam that runs along the angled side, and attach with the framing nails.
6. With a chain saw, cut the end of the girders that extend past the edge of the frame. Start from the back of the deck and work your way to the front. Place your first beam 1½ inches over the frame. It’s usually recommended that you don’t leave more than an inch of overlay, but we’ll be adding a ½-inch facing to the side of the deck.

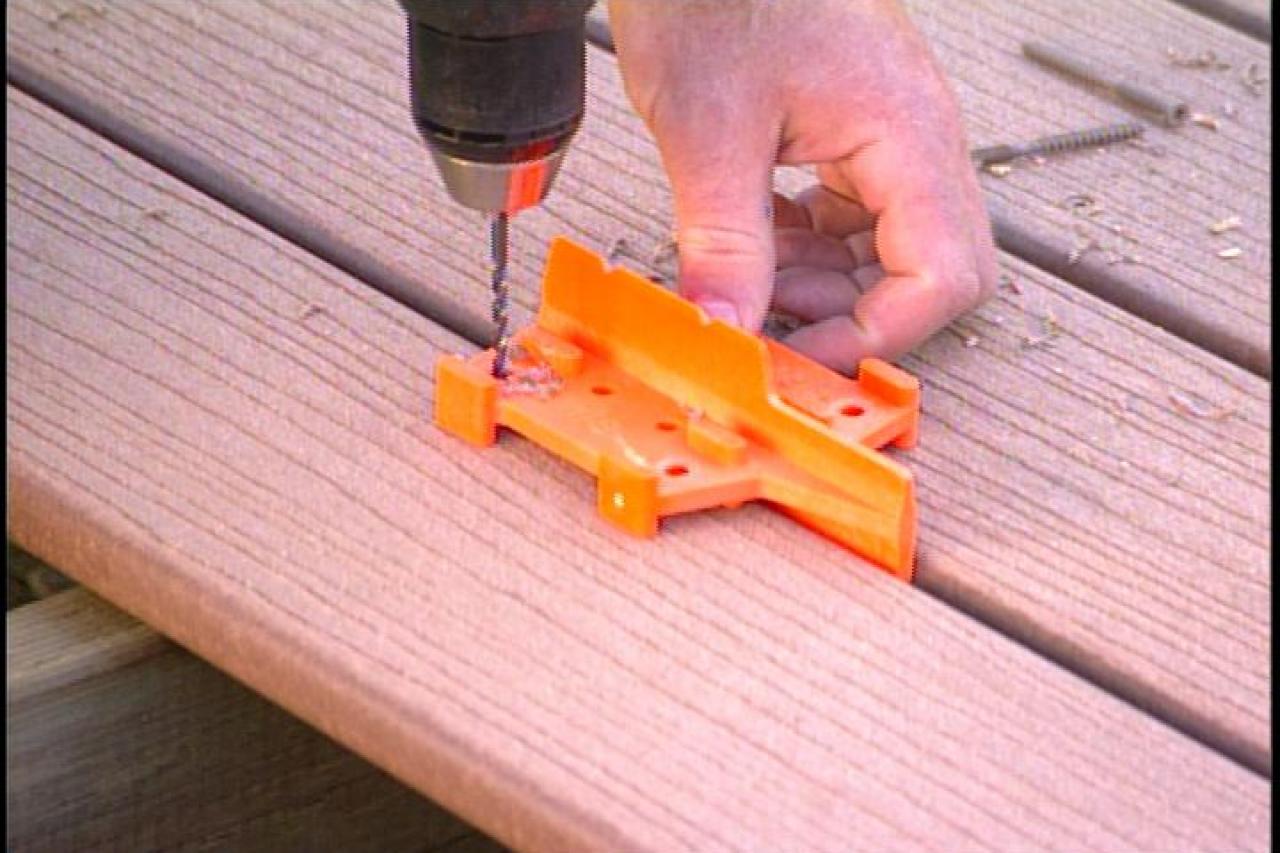
7. Use a deck guide when placing your decking. This will assure that each piece is uniformly spaced. For the pictured project, the pieces are spaced ¼-inch apart. The deck guide will also allow you to align the spaces for pre-drilling holes. With 2½-inch deck screws, attach the beams to the frame. As you near the end, you can adjust the deck spacing so you end up with a 1½-inch overhang on the opposite side.
8. Once your decking is placed, snap a chalk line across the outside ends of the boards. Trim along the chalk line with a circular saw, making the jagged side of the deck straight.
9. For the stairs, use prefabricated risers. Cut a section big enough for the cross beam to fit, starting at the base of the third step. If the riser is too big, trim the bottom. Make sure all the risers sit completely level. Once in place, drill 4-inch screws through the cross beam and into the portion of the riser behind it. For extra strength, add front and back 2x4’s for each level of stairs. Attach the rear 2x4’s of the second step to the frame. Add the decking material to the stairs.
10. Cut your 12-inch deck facing to size (if needed) for each side of the deck. Miter the ends of each piece so they form clean corners. Place the facing on the outer side of the frame so it skirts around the deck. Attach it with 3-inch galvanized framing nails.


