


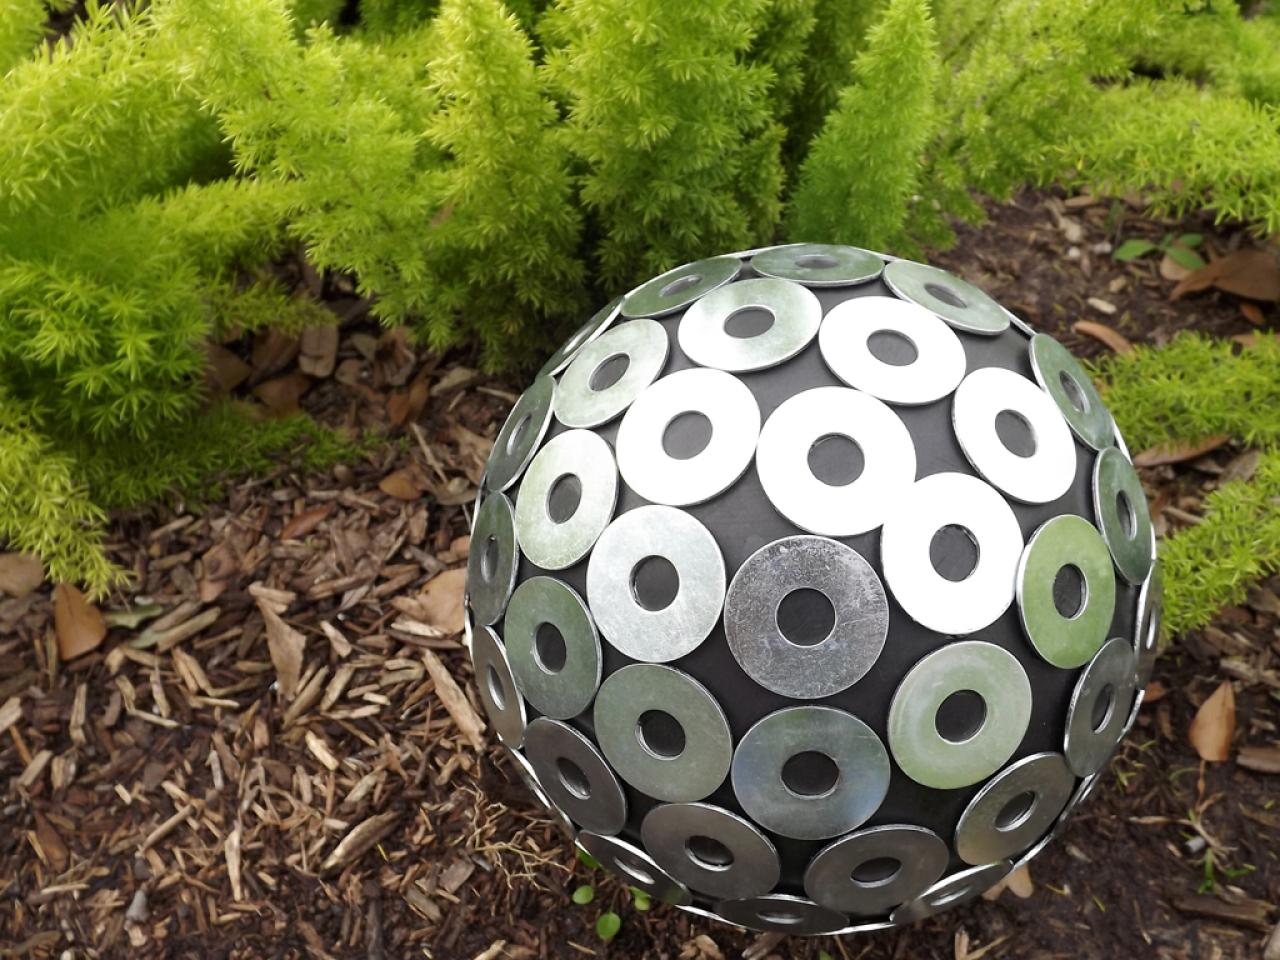
How to Make a Contemporary Garden Gazing Ball

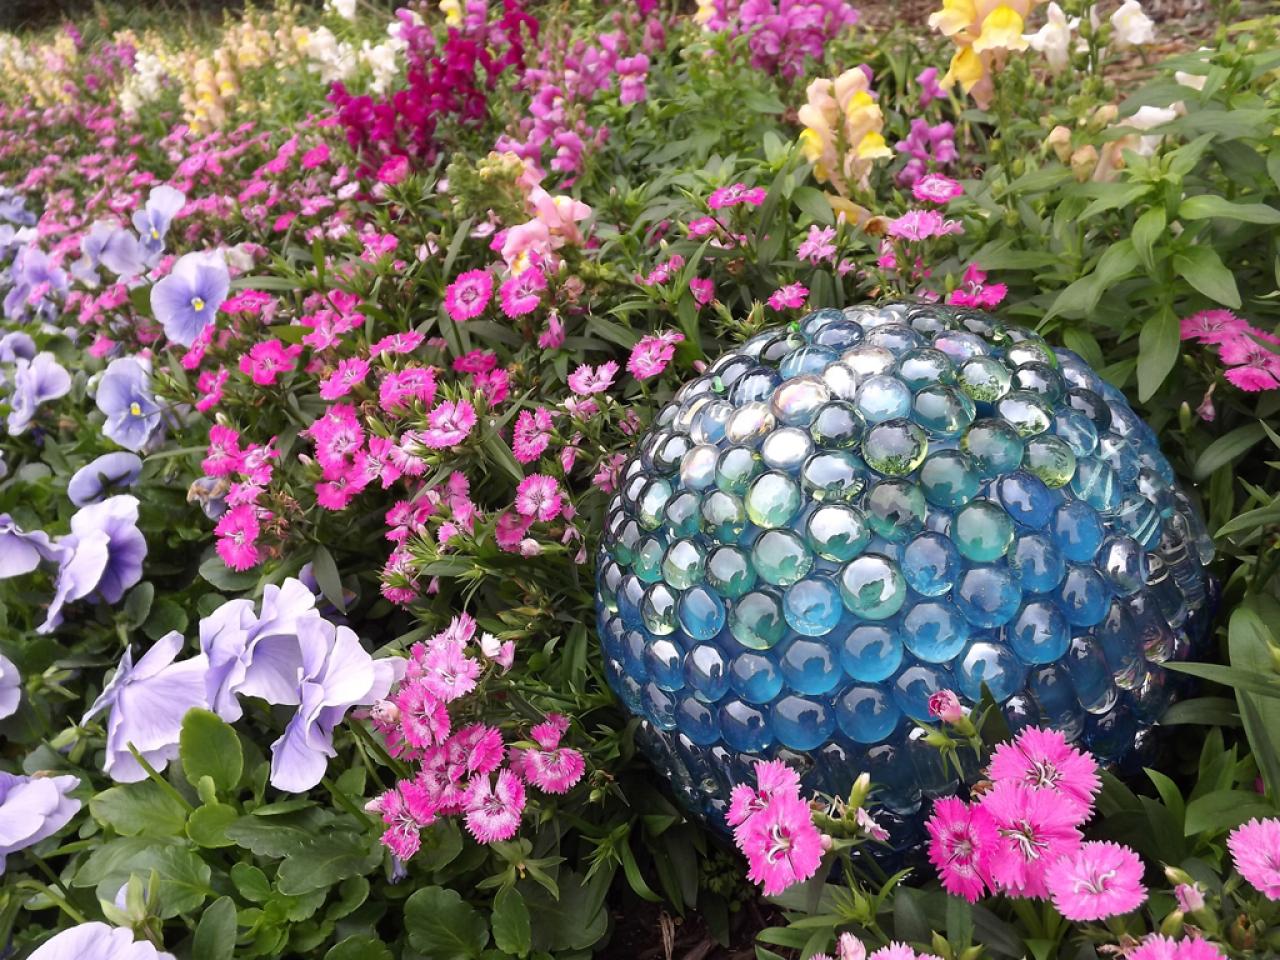
A beautiful gazing ball adds a multi-season accent to the garden, reflecting its surroundings and adding light and sparkle. Here's a fun project creating garden art that will last many years.
Materials Needed:
- bowling ball
- sandpaper or sanding block
- silicon sealant or epoxy adhesive
- painter's tape
- length of string, at least as long as the width of the ball
- large rubber band
- chalk
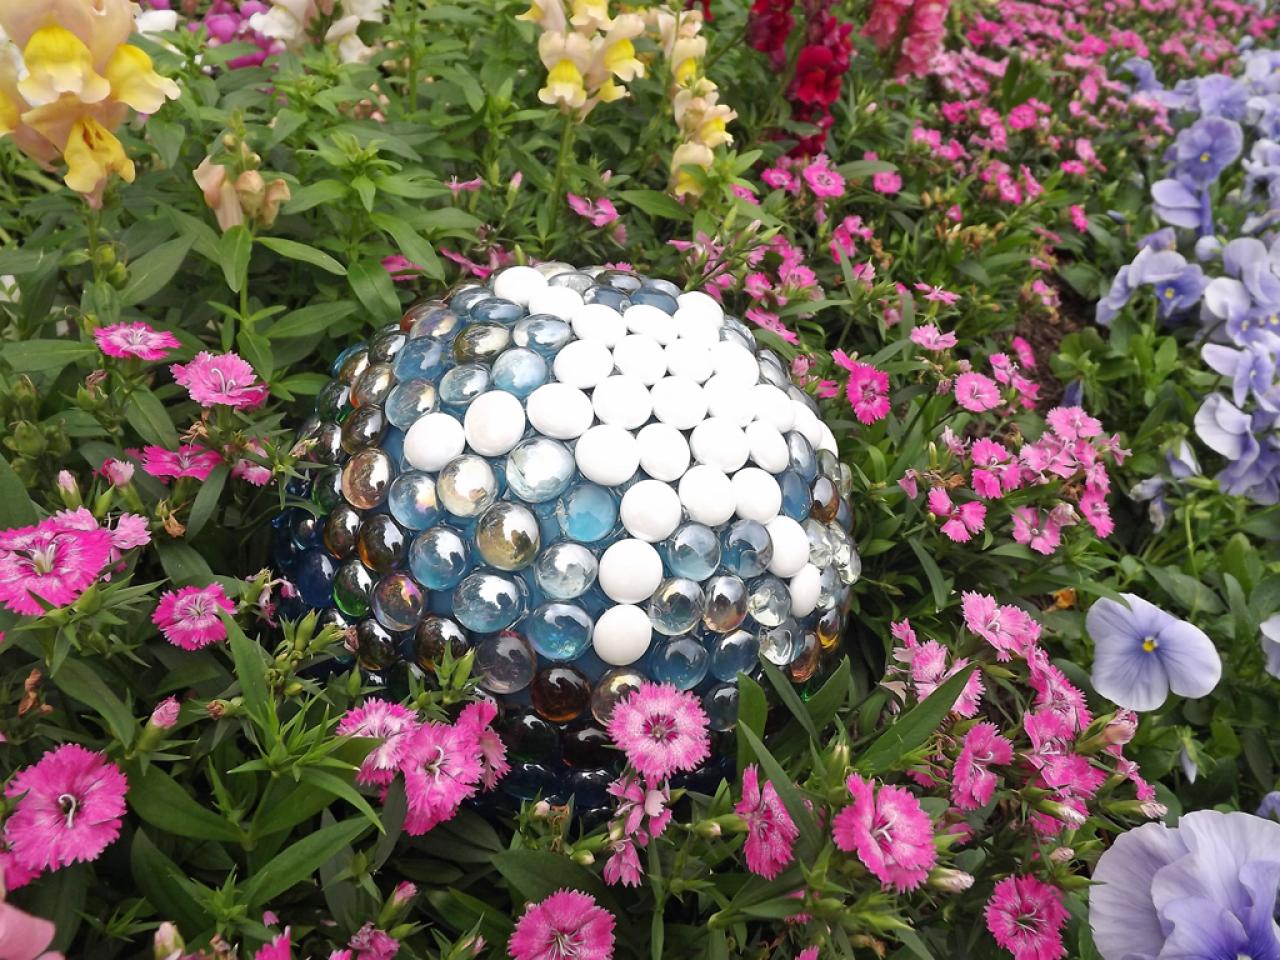
- decorative embellishments (metal washers, glass beads, mirrors, ceramic tile, marbles)
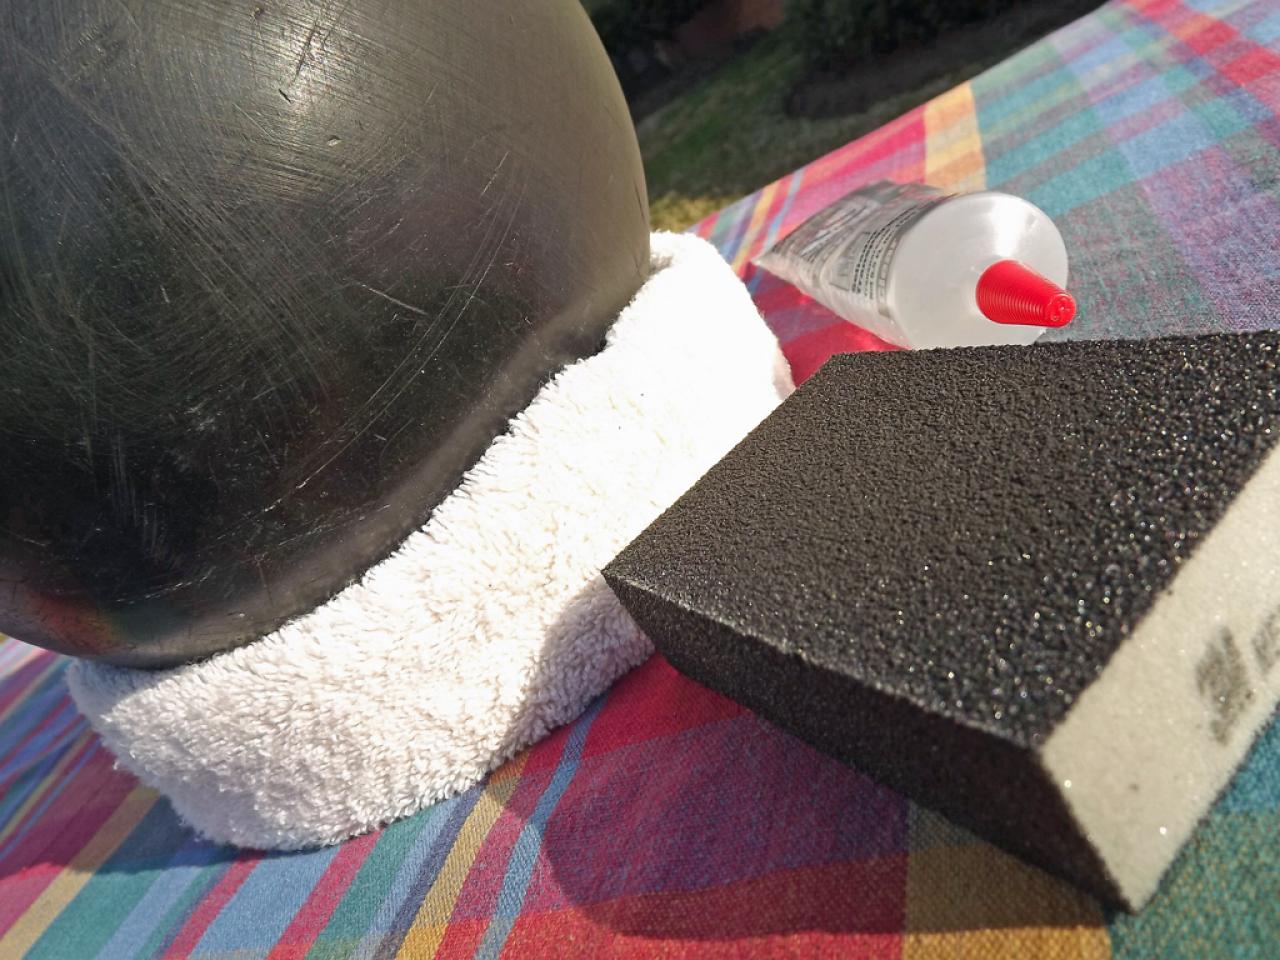
Prepare the gluing surfaces.
Sand the bowling ball and wipe it clean to remove dust.
For better adhesion, lightly sand one side of embellishments that have smooth finishes.

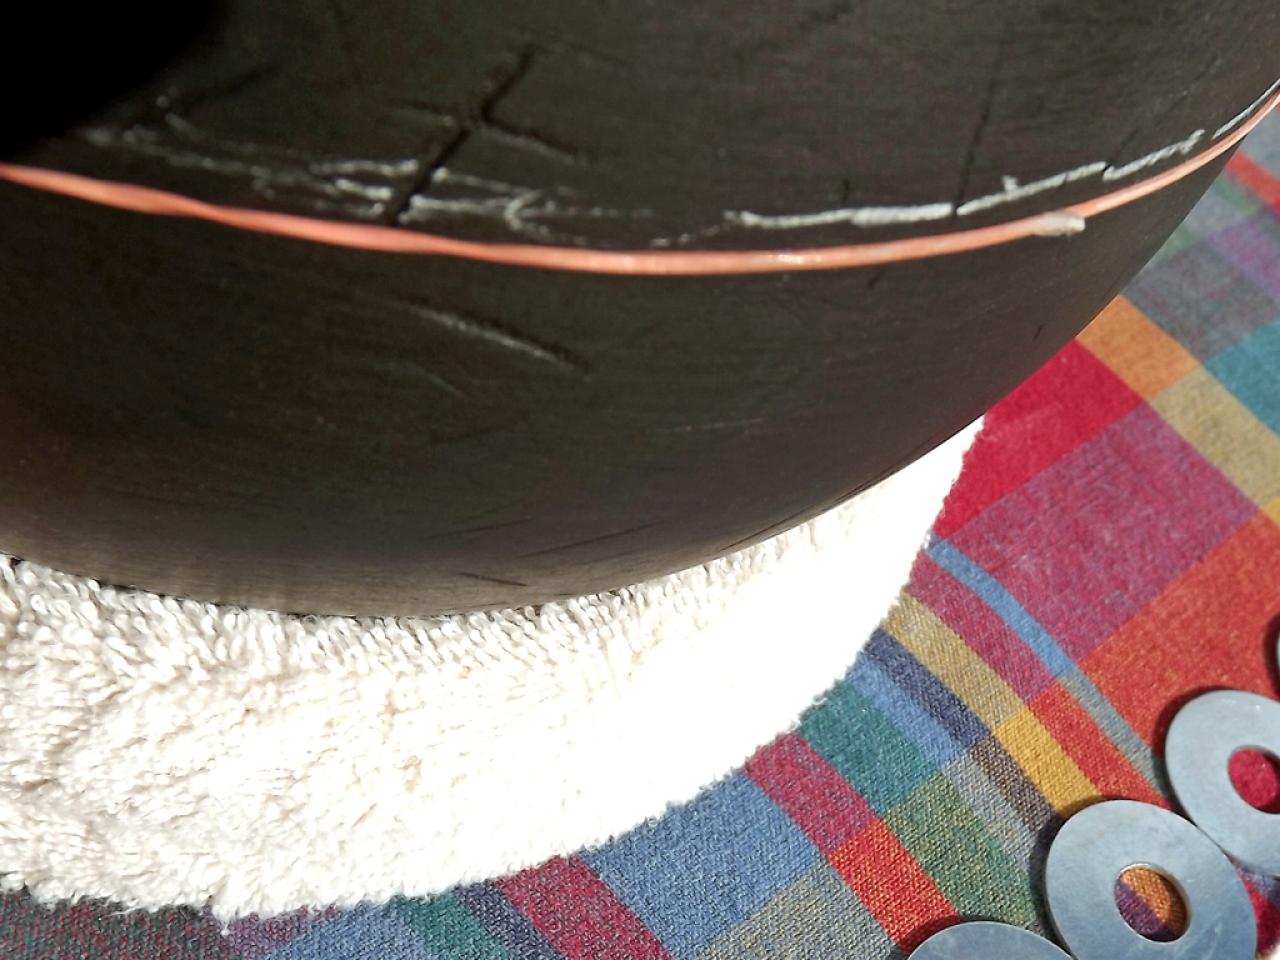
Find the ball's widest point.
1. Place a rubber band around the bowling ball to find the widest part of the bowling ball. Once you have found the center of the ball, mark it with chalk (image 1).
2. Wrap the length of string and wrap it around the bowling ball along the chalk line. Cut string where the ends meet. This will give you the circumference of the bowling ball at its widest point.
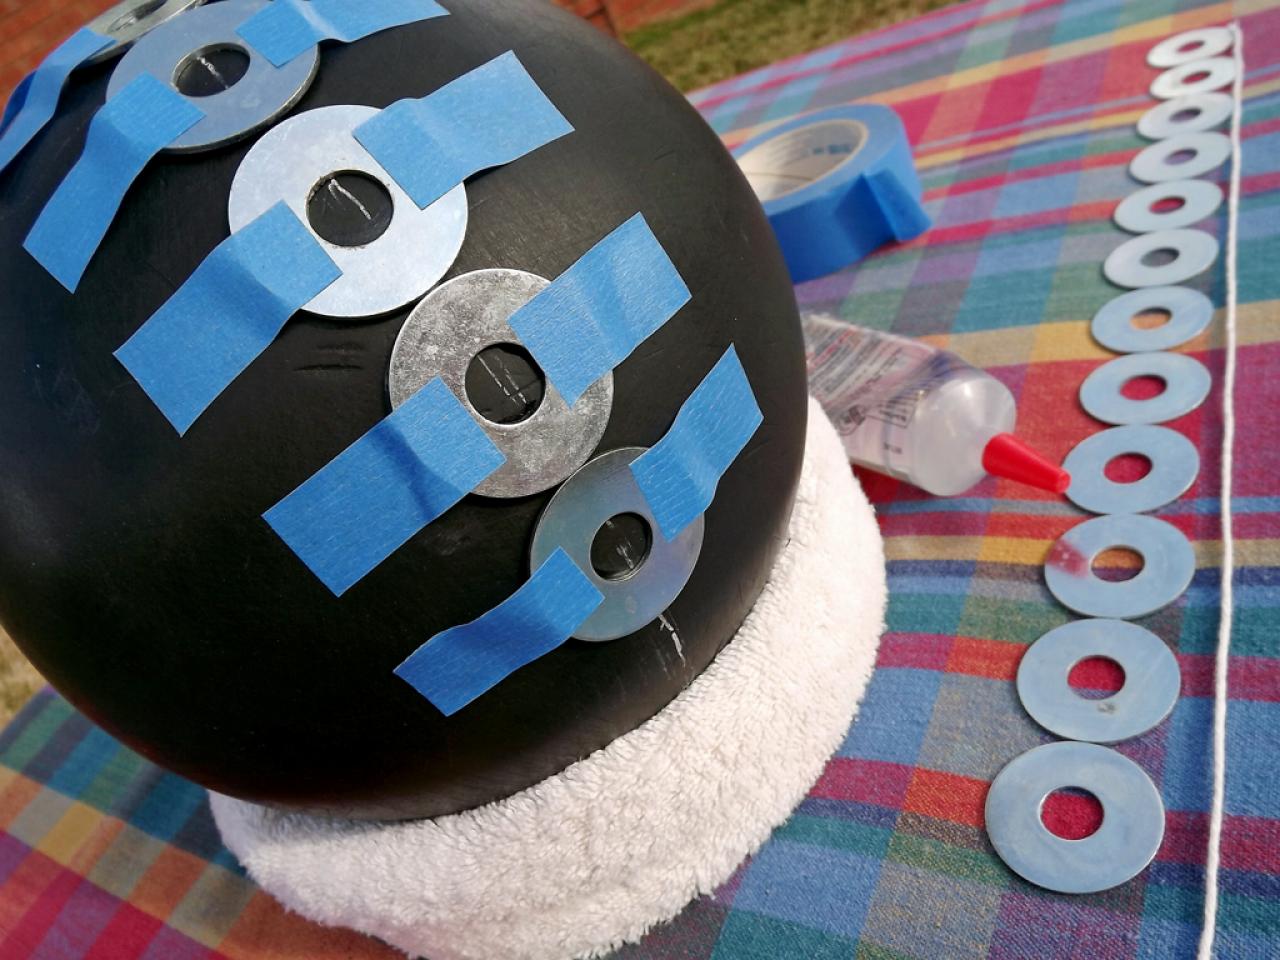
3. Lay the string down in a straight line, and place the embellishments alongside it. This will help you know how much space to allow between each embellishment on the ball.

Apply the decorative pieces.
Using a generous amount of adhesive and following the manufacturer's instructions, begin applying embellishments. Large or heavy pieces may need to be secured temporarily with painter's tape to keep them from sliding down the ball.
Work in small sections of the ball at a time, allowing the adhesive to cure as you work your way around the surface of the bowling ball. Check your embellishments often during the drying process.
If necessary, clean up excess adhesive following manufacturer's instructions.

Place the gazing ball in the garden.
Allow adhesive to completely cure before exposing gazing ball to elements.
Experiment with other embellishments to create more gazing balls for your garden.


")


