


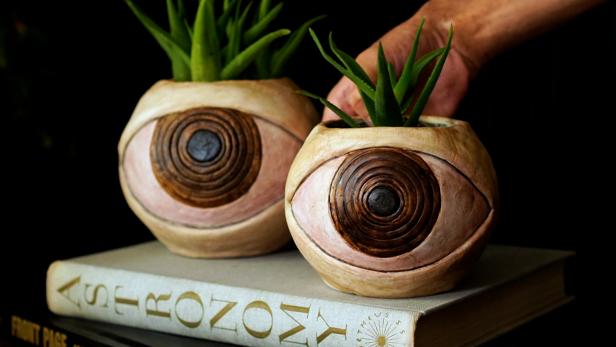
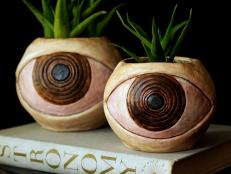
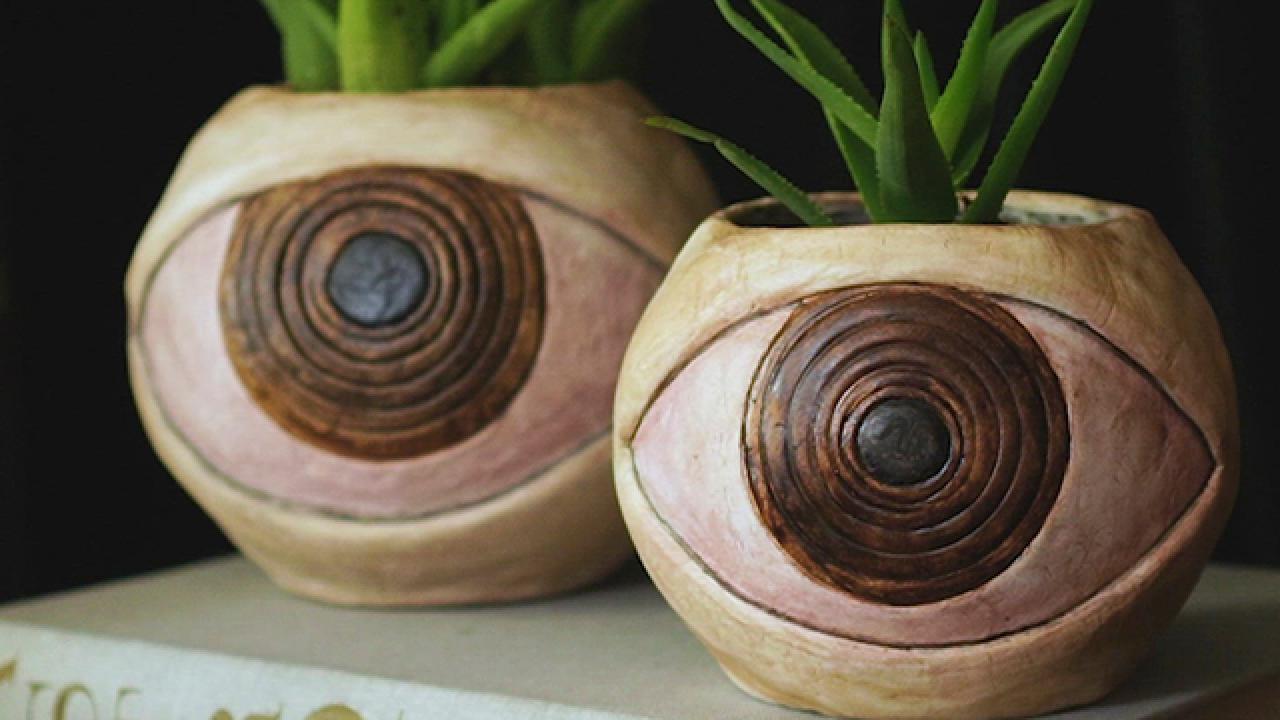
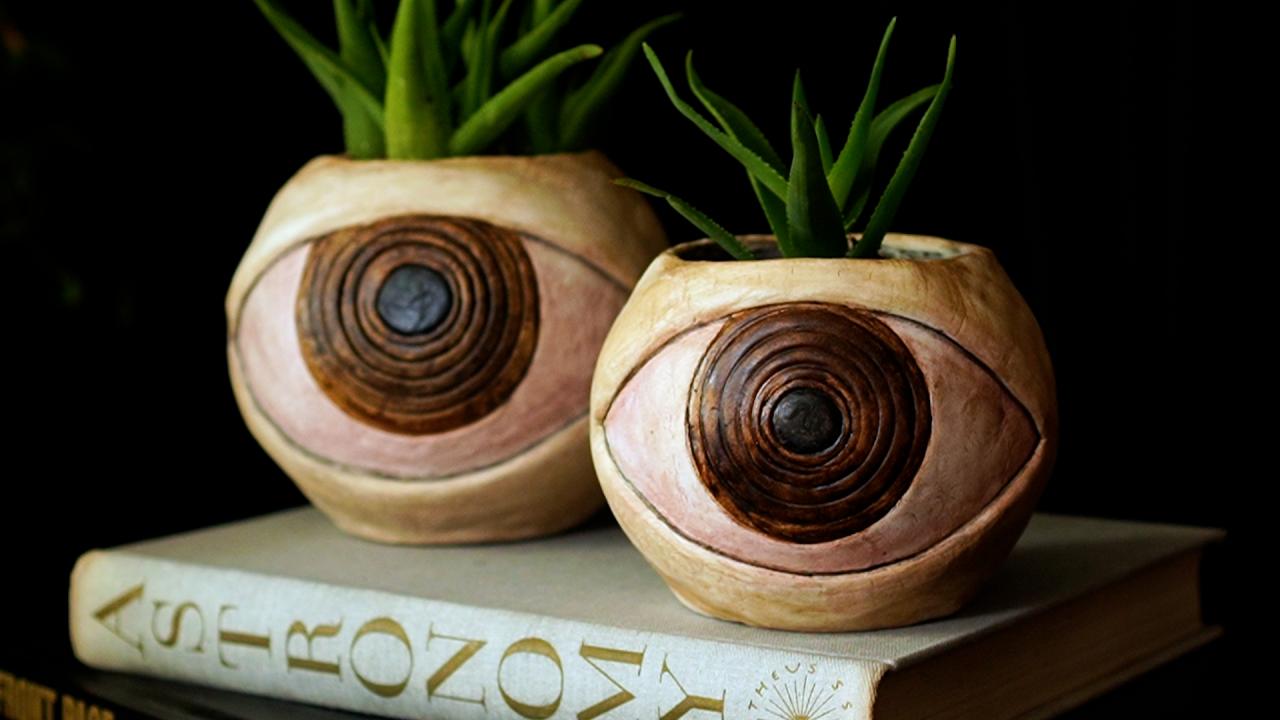
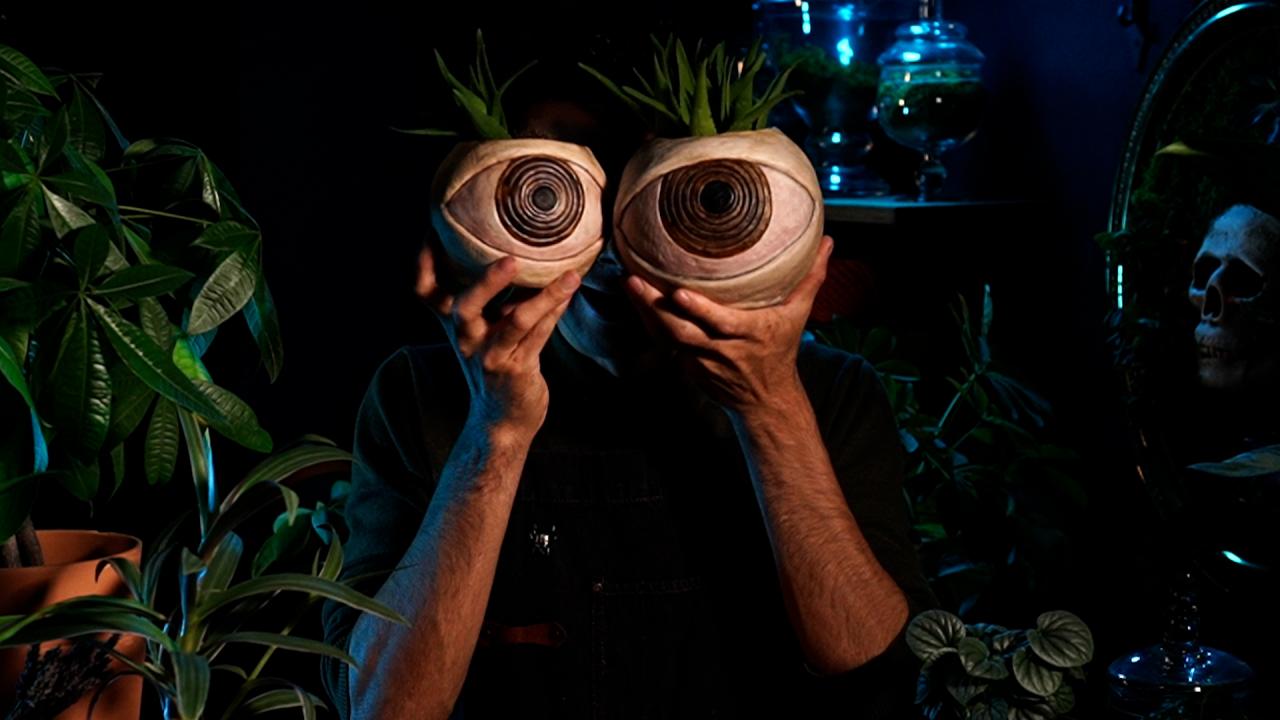
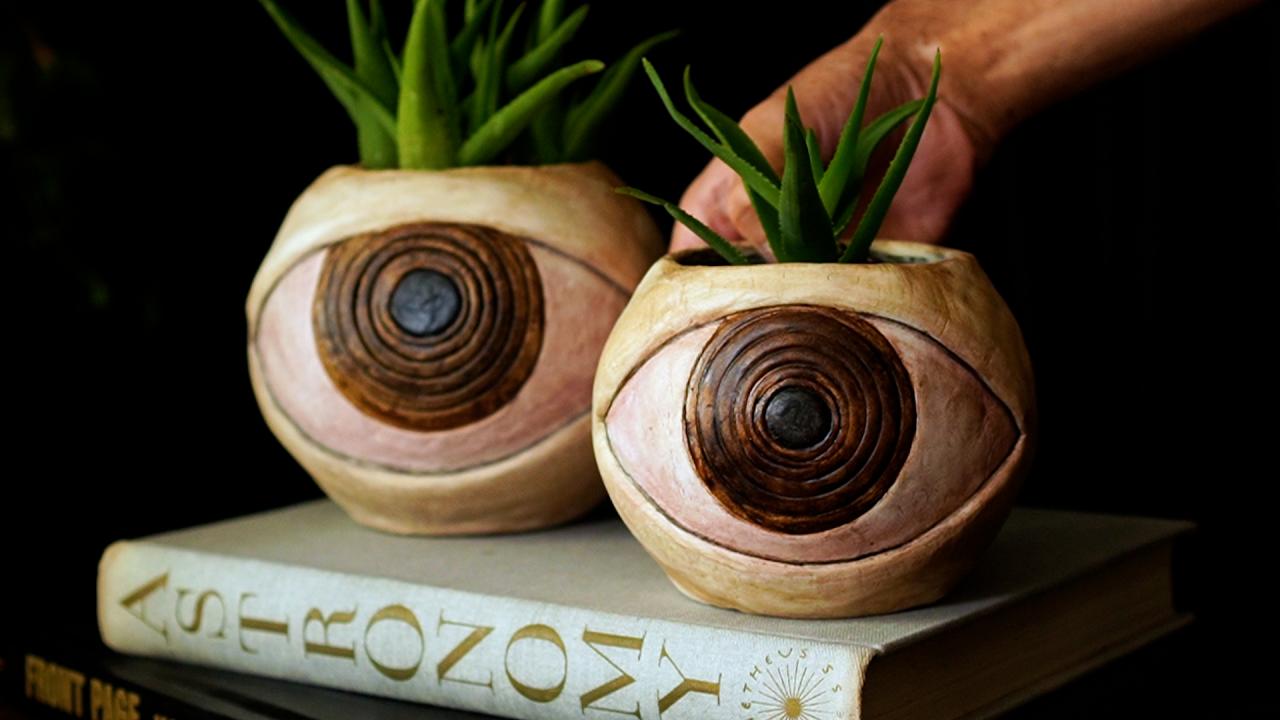
Make More Than One of These Creepy Clay Eyeball Planters
If these eerie air-dry clay and espresso-dyed eyeball planters don't cast the perfect Halloween spell, we don't know what will.

Nikk Alcaraz

The one thing Van Morrison, Billy Idol and Frankie Valli have in common: songs about eyes. Curious-content creator and food artist Nikk Alcaraz takes a note from Mr. Sandman with this wicked DIY that’s sure to make any guest feel the stare of a watchful eye. Craft these DIY eyeball planters with air-hardening clay, handmade espresso dye and cookie cutters before it’s too late.

Nikk Alcaraz
Materials + Tools
- Das Air-Hardening Clay
- instant espresso powder
- glass globe vase
- round cookie cutters and spice jar lids
- rulers
- parchment paper
- black acrylic paint
- plum acrylic paint
- matte acrylic spray
- paintbrush
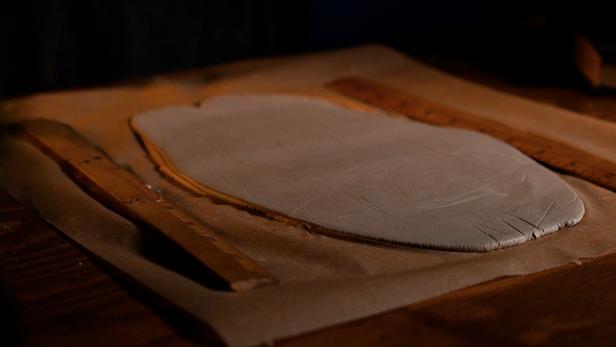
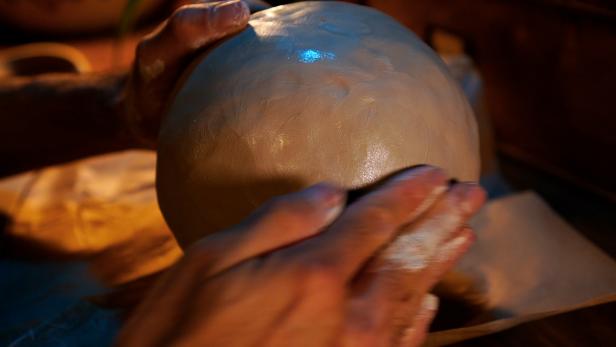
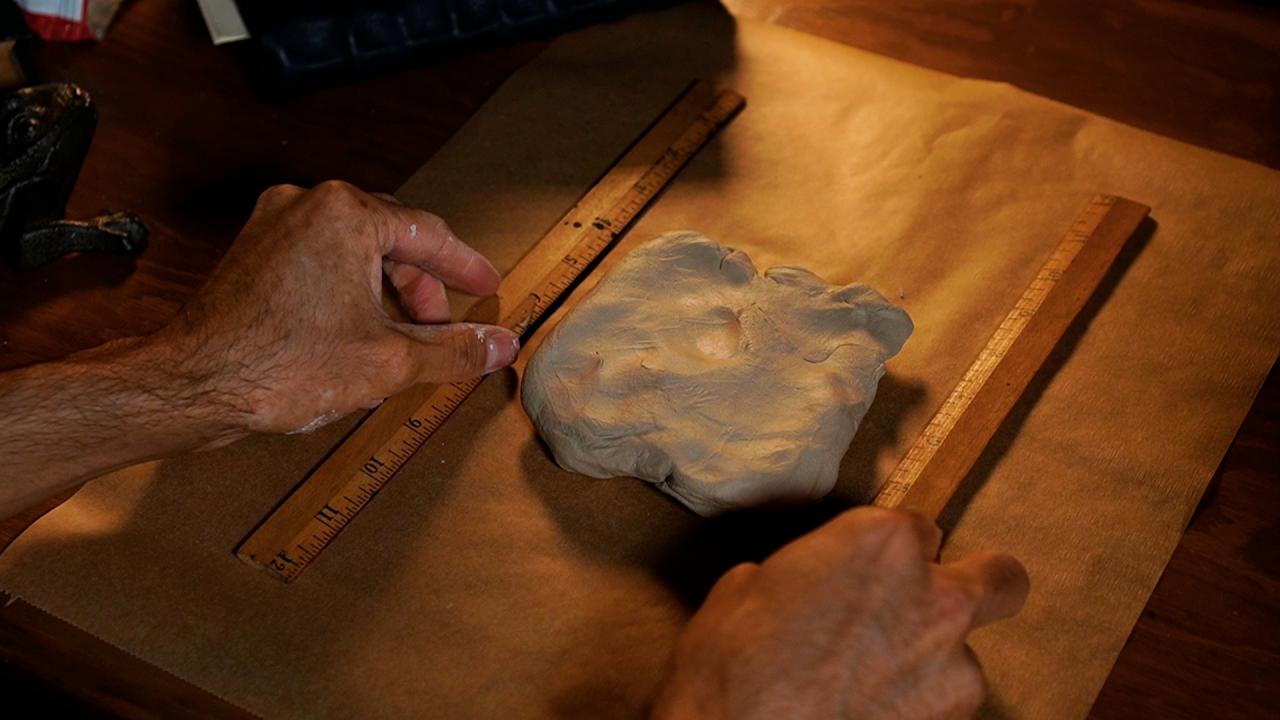
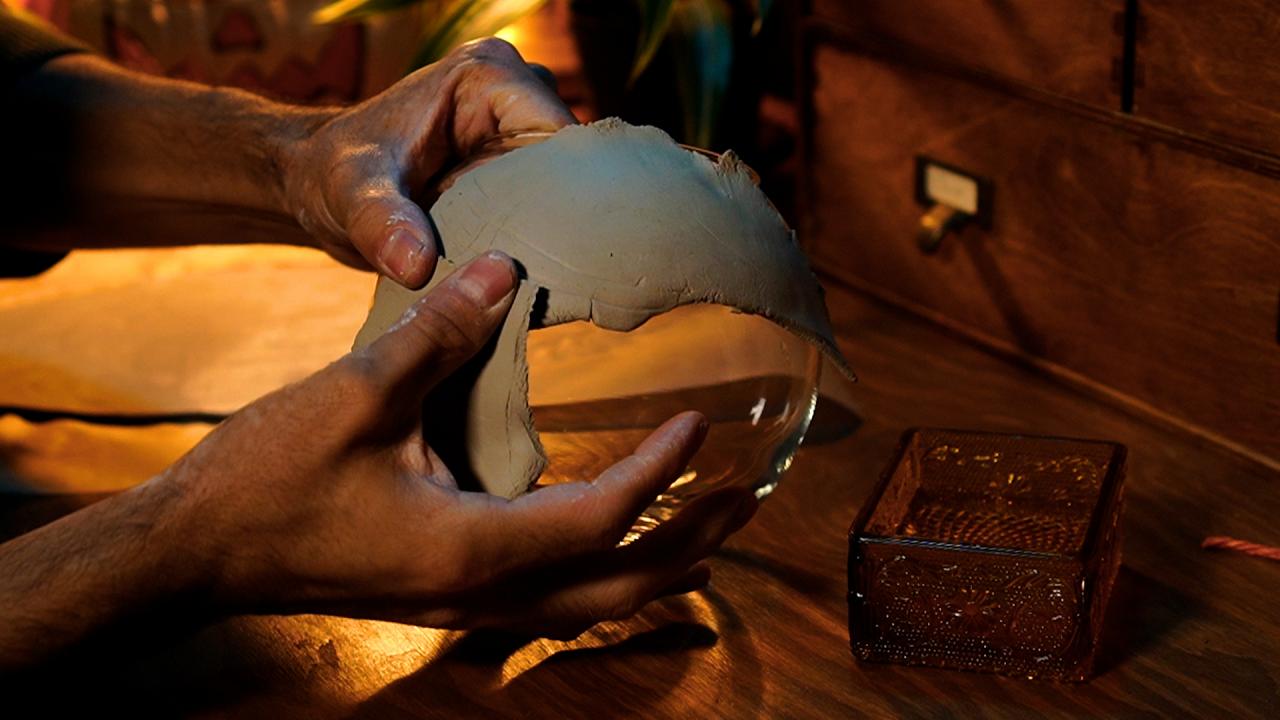
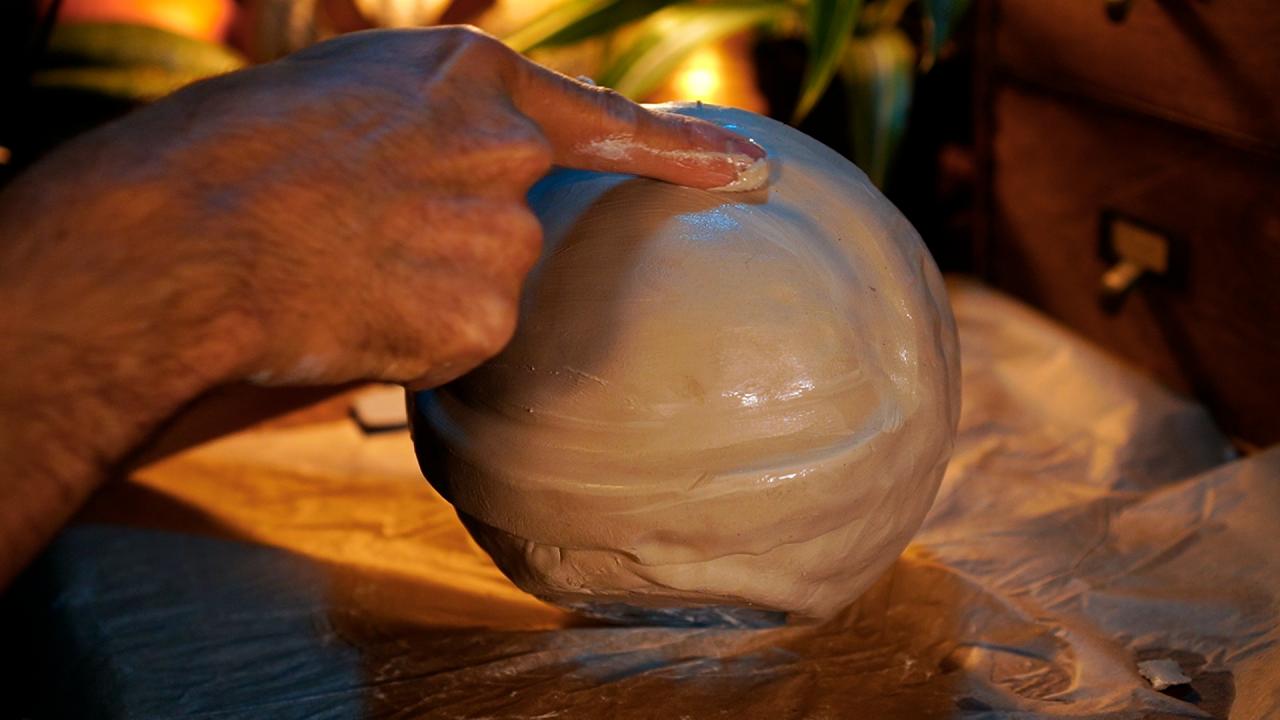
1. Prep Clay + Mold Glass
First, take a chunk of Das Air-Hardening Clay and place it on a piece of parchment paper between two rulers (Image 1). Tip: The rulers will help everything stay the same thickness once rolled. Use a rolling pin to flatten the clay (Image 2). Next, tear off two pieces of the flattened clay and press them onto the glass globe vase until fully covered (Image 3), following the process again to add more clay if needed. Dip your fingers into water and run along the clay to smooth out the edges and create a seamless look (Image 4).

Nikk Alcaraz
Nikk Alcaraz

Nikk Alcaraz
Nikk Alcaraz
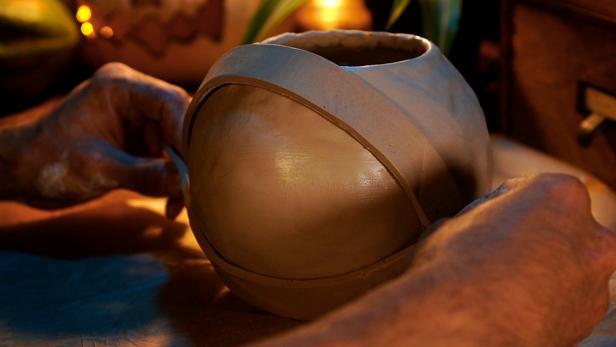
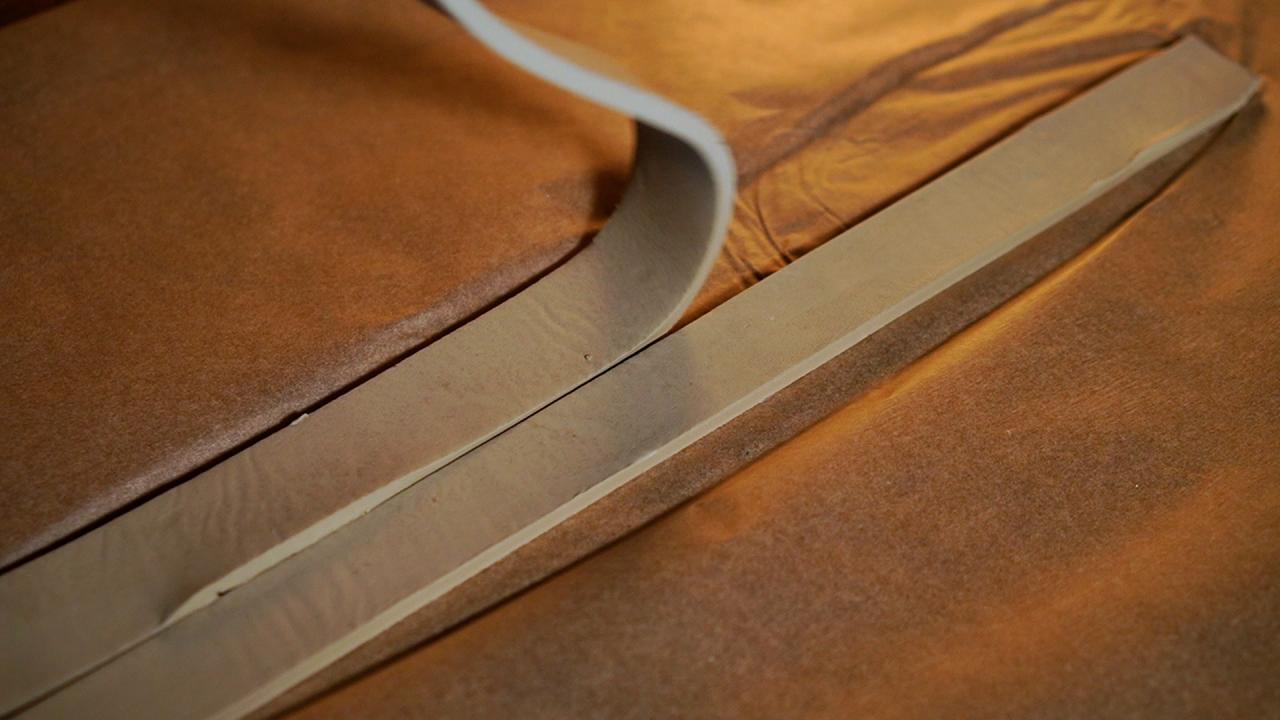
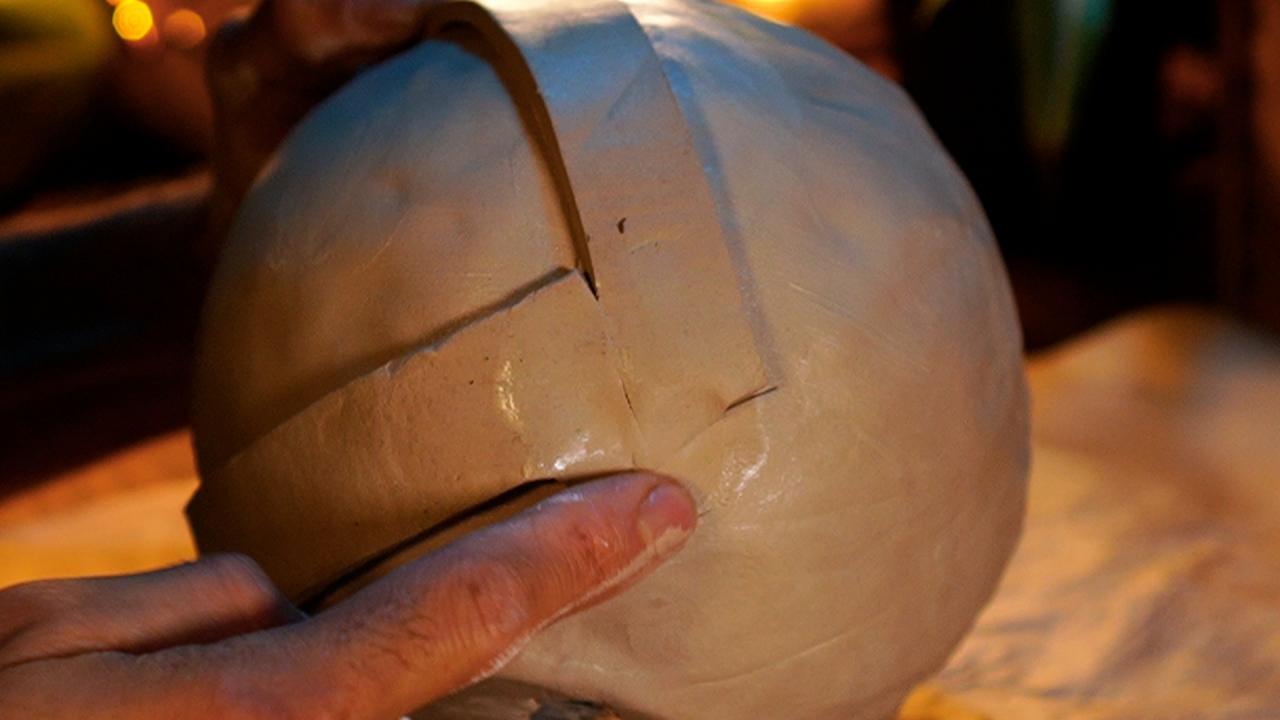
2. Make Eyelids
Use a craft knife to cut two thin, narrow strips of clay (Image 1) and add them to the top and bottom of the globe to create an eye shape (Image 2). Once the strips are in place, use a craft knife to cut any excess (Image 3). Then use water to soften the eyelid edges (Image 4). Last, smooth the entire eyeball with water for a softer, more realistic look (Image 5).

Nikk Alcaraz
Nikk Alcaraz

Nikk Alcaraz

Nikk Alcaraz

Nikk Alcaraz
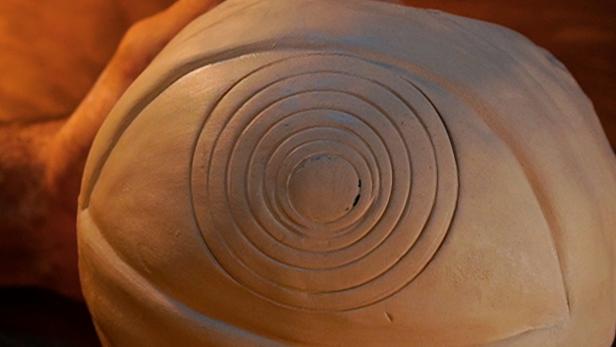
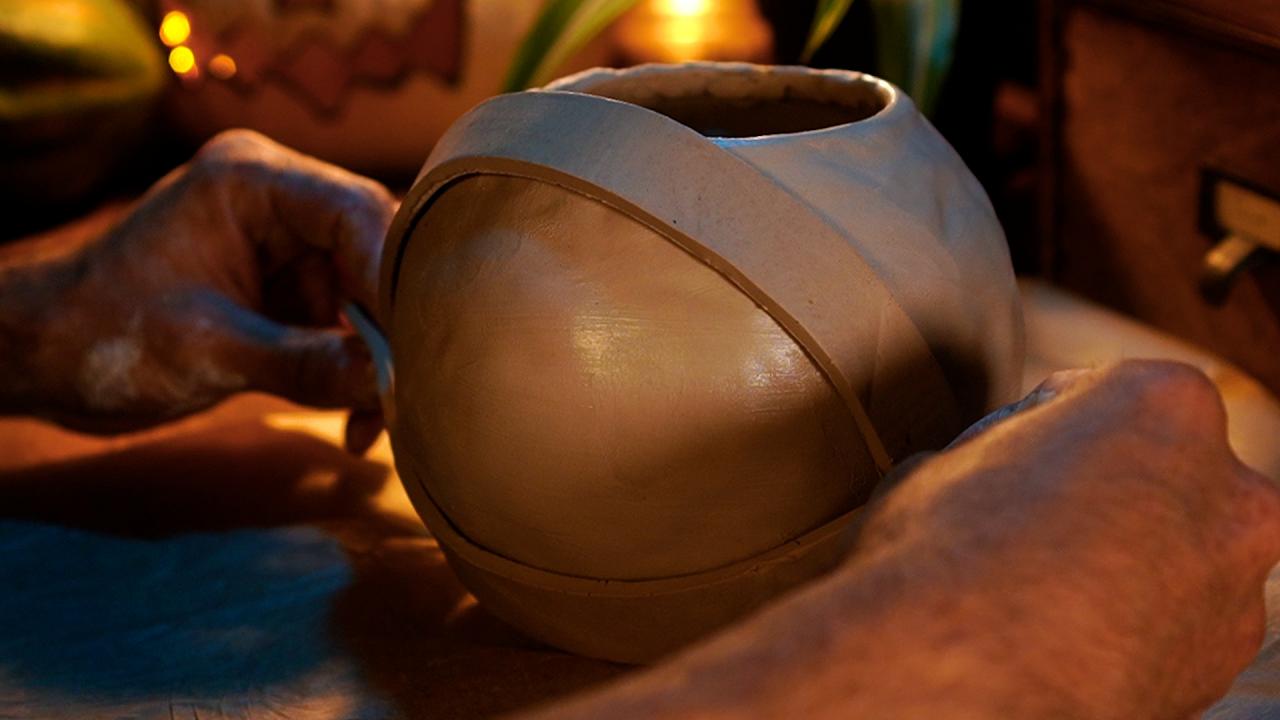
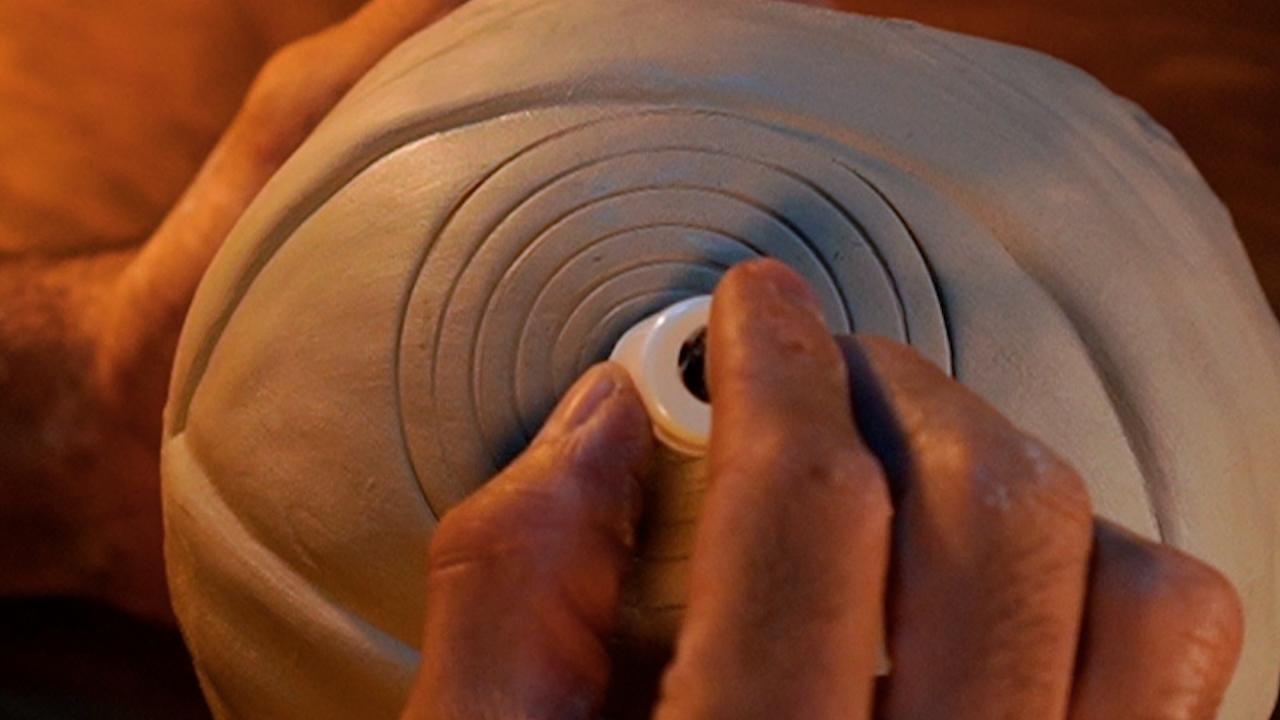
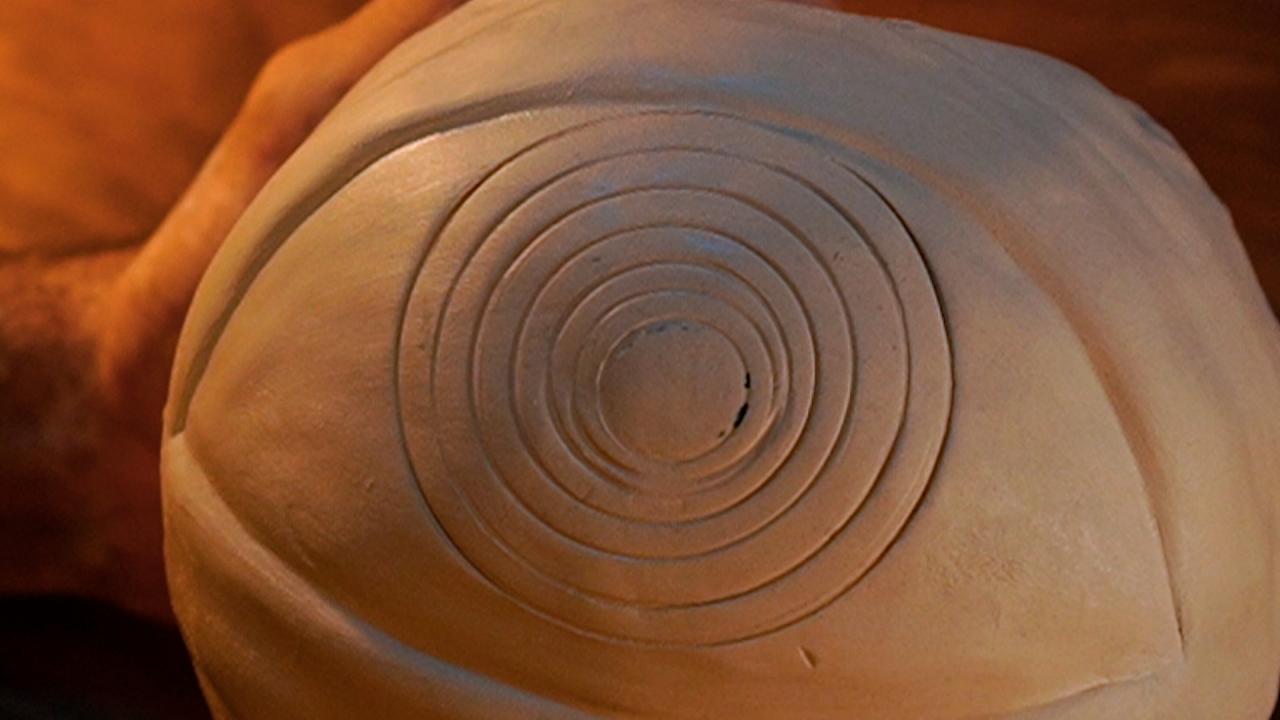
3. Make Iris and Pupils
Use various-sized, circular cookie cutters and spice jar caps to create an iris and pupil. Press them into the clay starting with the larger cookie cutter (Image 1) and working down to the smallest in your collection (Image 2). Once done, place the clay eyeball into a cabinet and let it dry overnight (Image 3). Tip: The cabinet protects the clay from any drafts that could potentially lead to cracking the clay.

Nikk Alcaraz

Nikk Alcaraz
Nikk Alcaraz
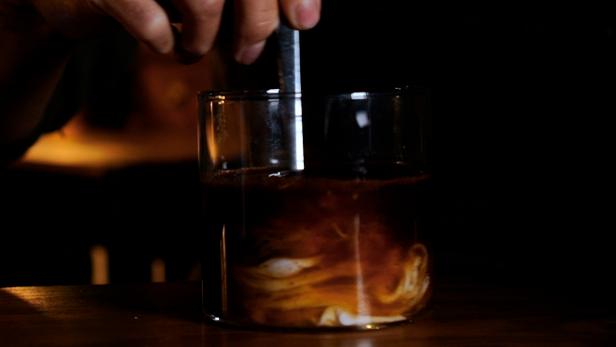
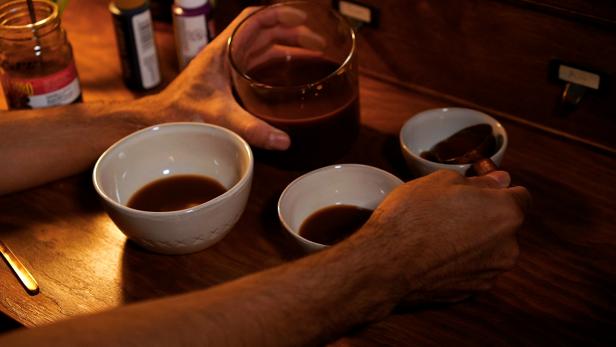
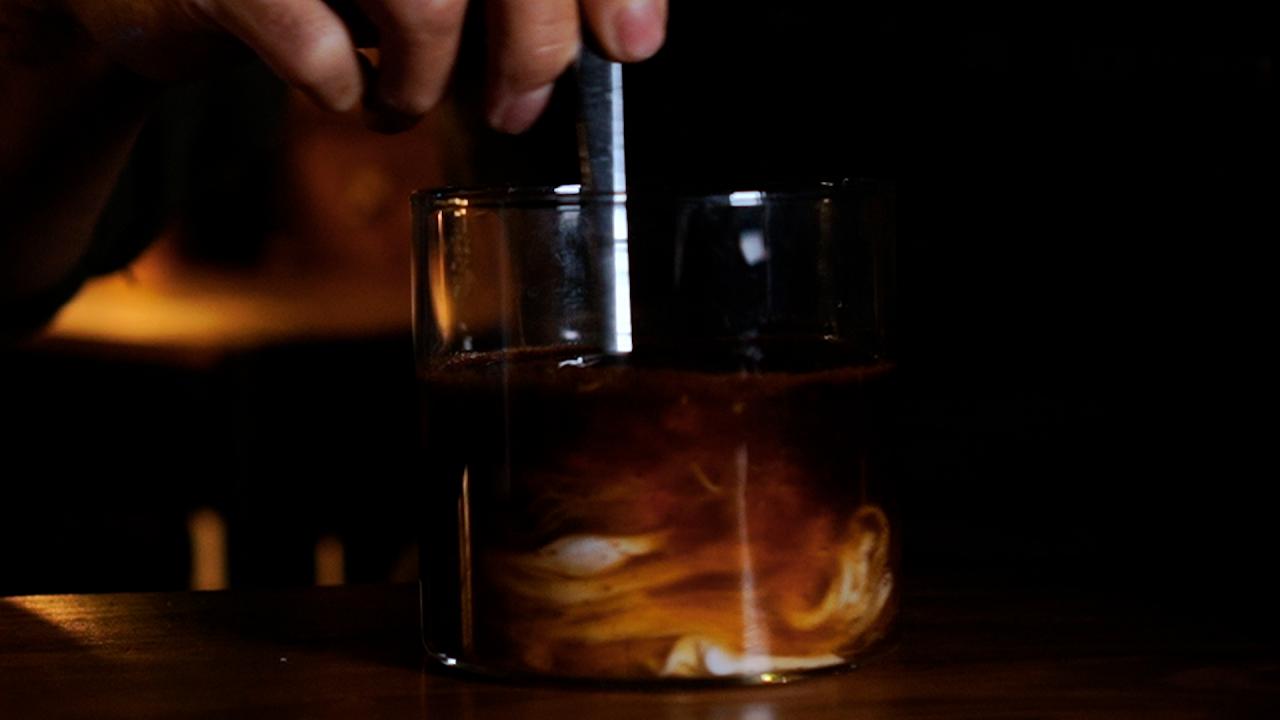
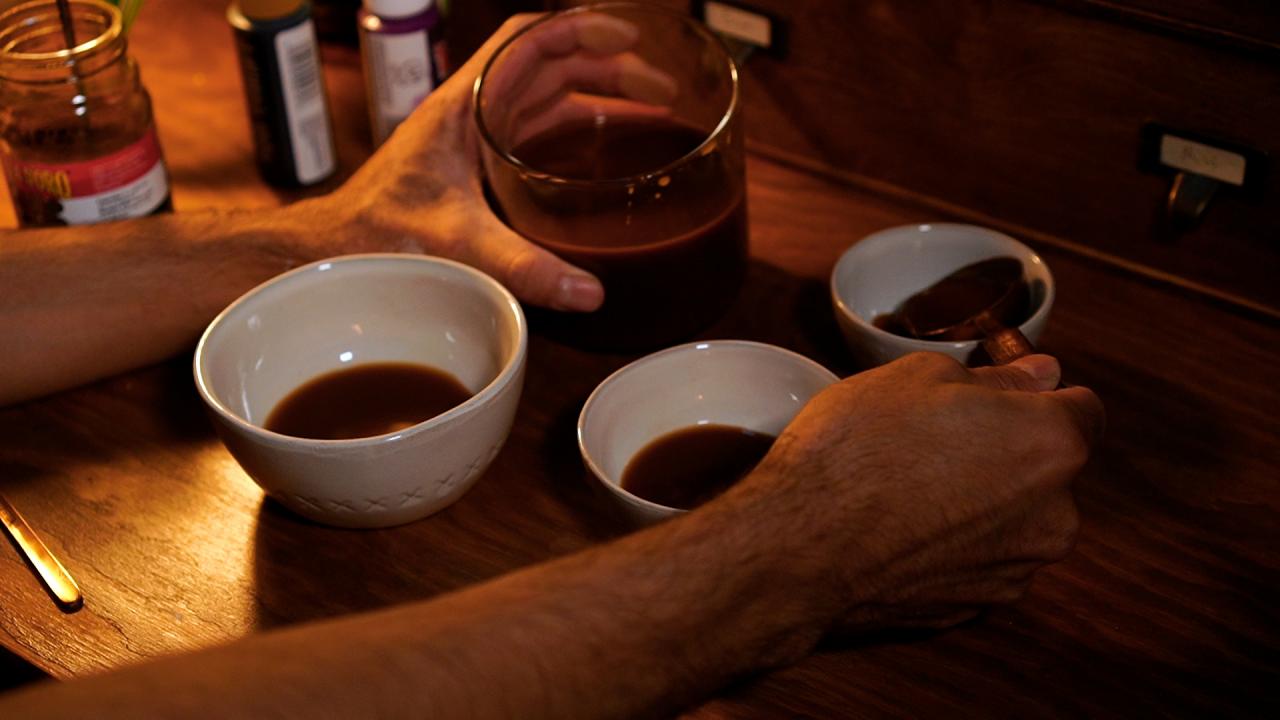
4. Mix Dye
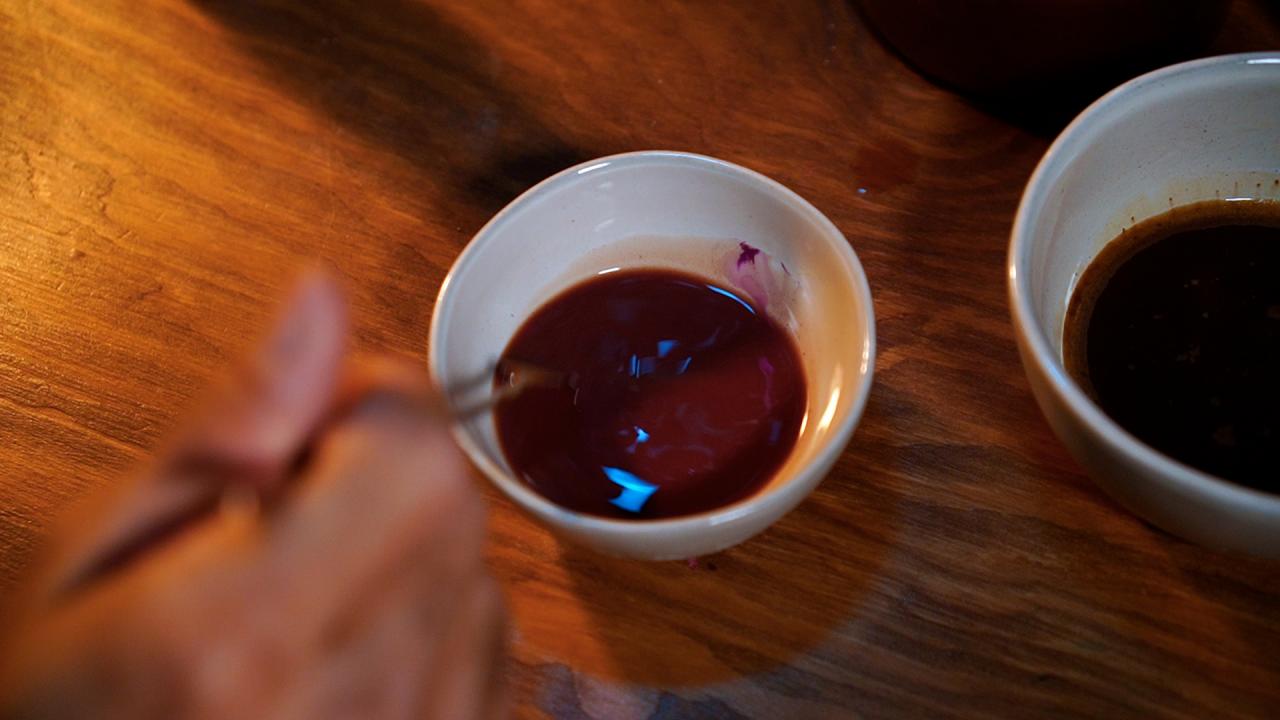
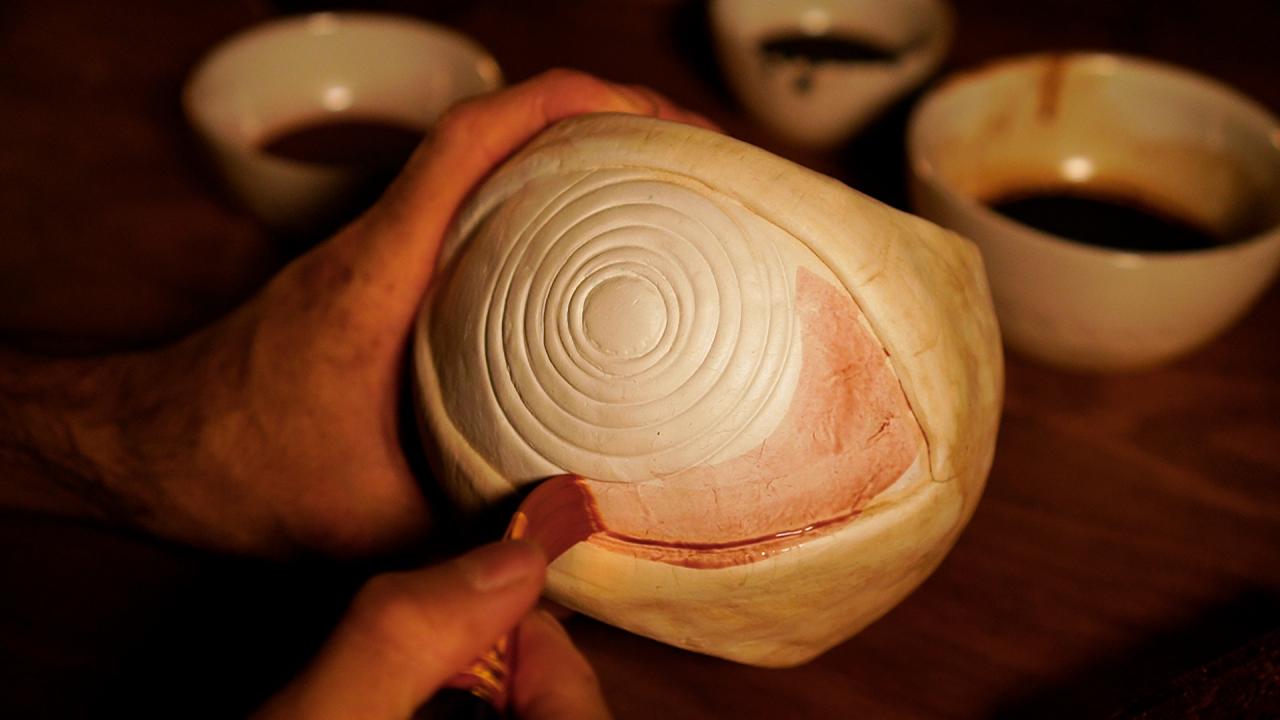
Add 1/2 cup of school glue to 1/2 cup of warm water (Image 1). Then add a tablespoon of espresso powder to the glue mixture and stir (Image 2). Next, divide the mixture into three new bowls (Image 3). Add a few drops of plum acrylic paint to one bowl mixture (Image 4), black acrylic paint to the second bowl mixture and a bit more espresso powder to the third bowl mixture to make a dark brown. Tip: Use paint and espresso sparingly to keep the dye mixtures transparent and not opaque.

Nikk Alcaraz
Nikk Alcaraz
Nikk Alcaraz

Nikk Alcaraz
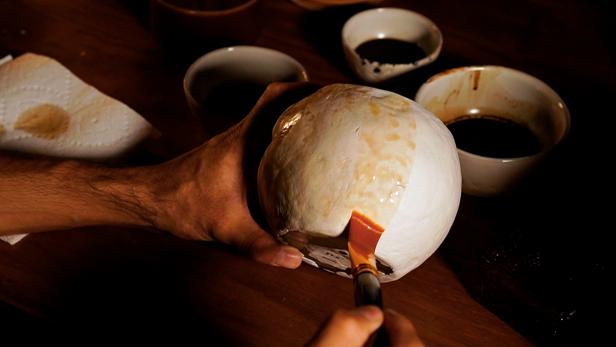
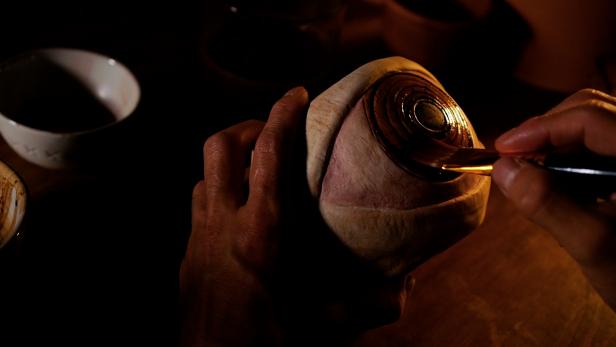
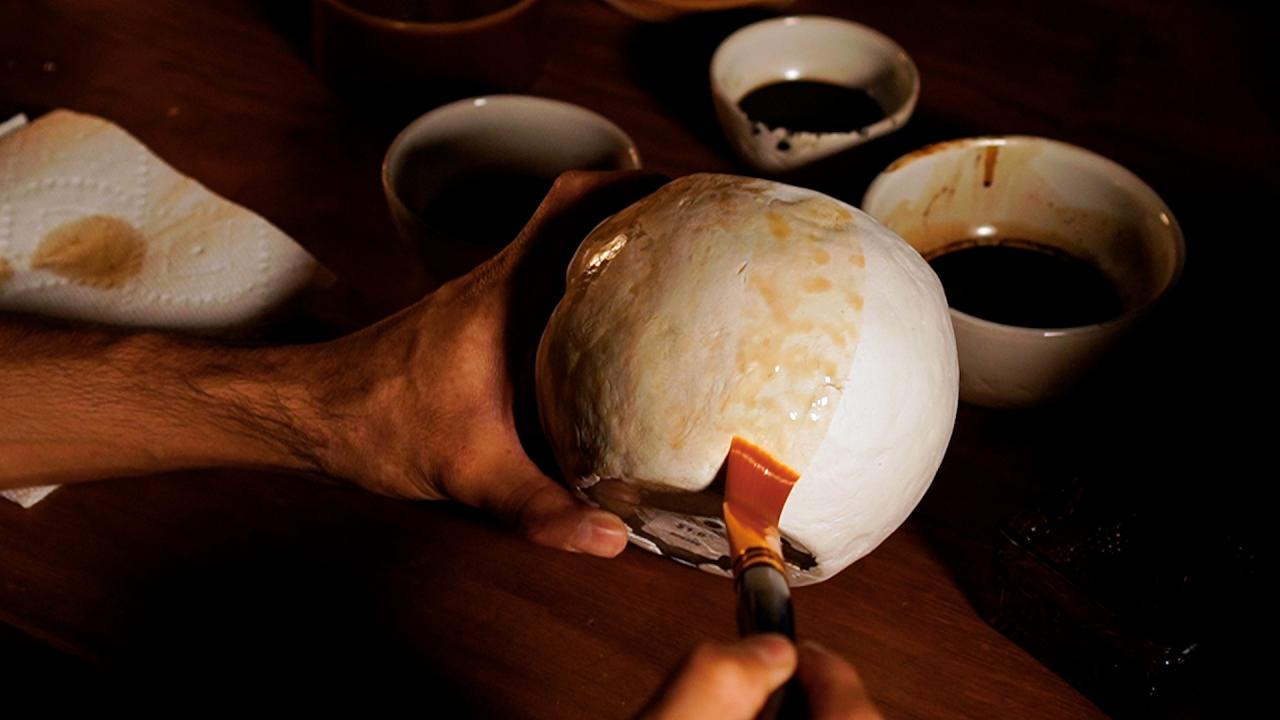
5. Paint + Display
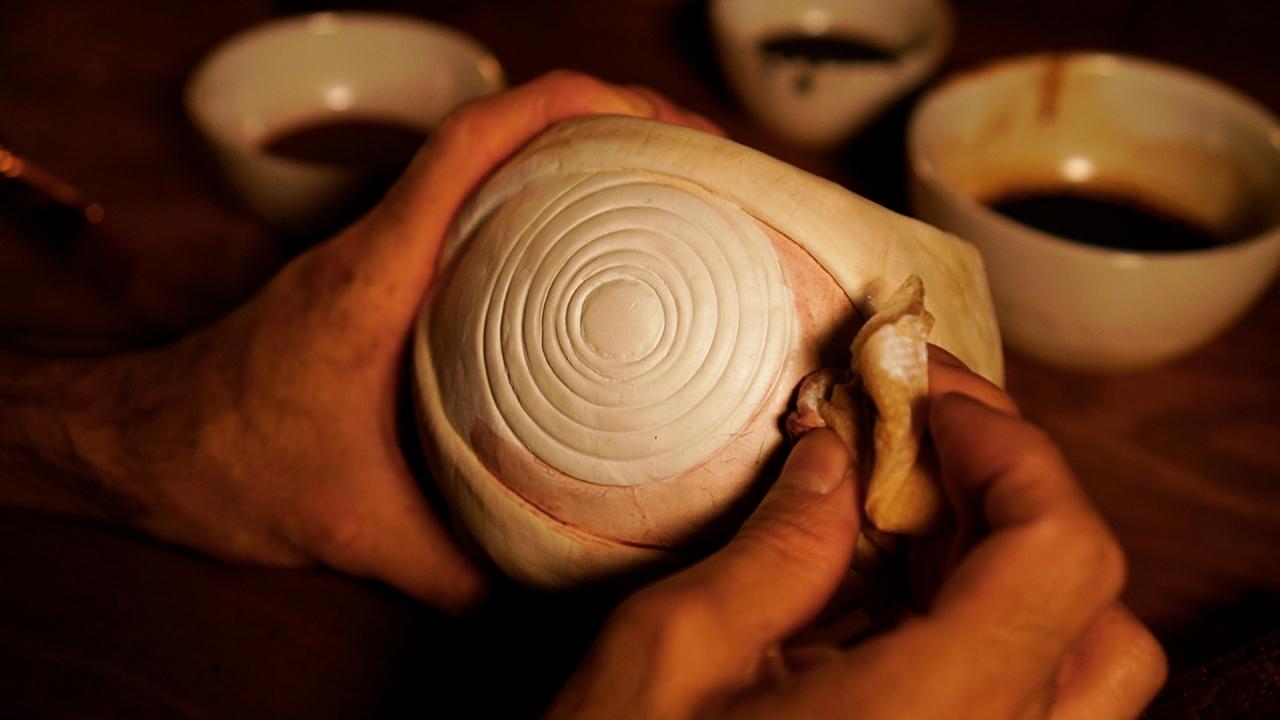
Use a paintbrush to stain the outside of the eyeball with the original color mixture to give it an aged look (Image 1). Then paint the inside of the eye with the light plum color (Image 2). Tip: Wipe fresh paint with a paper towel to create an aged look (Image 3). Coat the iris with the dark brown color and the pupil with the black paint (Image 4). Finish the clay eyeball with a matte acrylic spray. Use low-water, low-maintenance plants inside, opt for artificial greenery or set a small potted plant with drainage inside and remove when you need to water. Display these wandering eyes around your home and enjoy (Image 5).
Nikk Alcaraz

Nikk Alcaraz

Nikk Alcaraz
Nikk Alcaraz
Nikk Alcaraz
Peculiar Projects From Nikk Alcaraz
Nikk Alcaraz is a DIY and food artist based in Los Angeles, California, and the founder of Practical Peculiarities, a creative hub for all peculiar food and crafts.


