


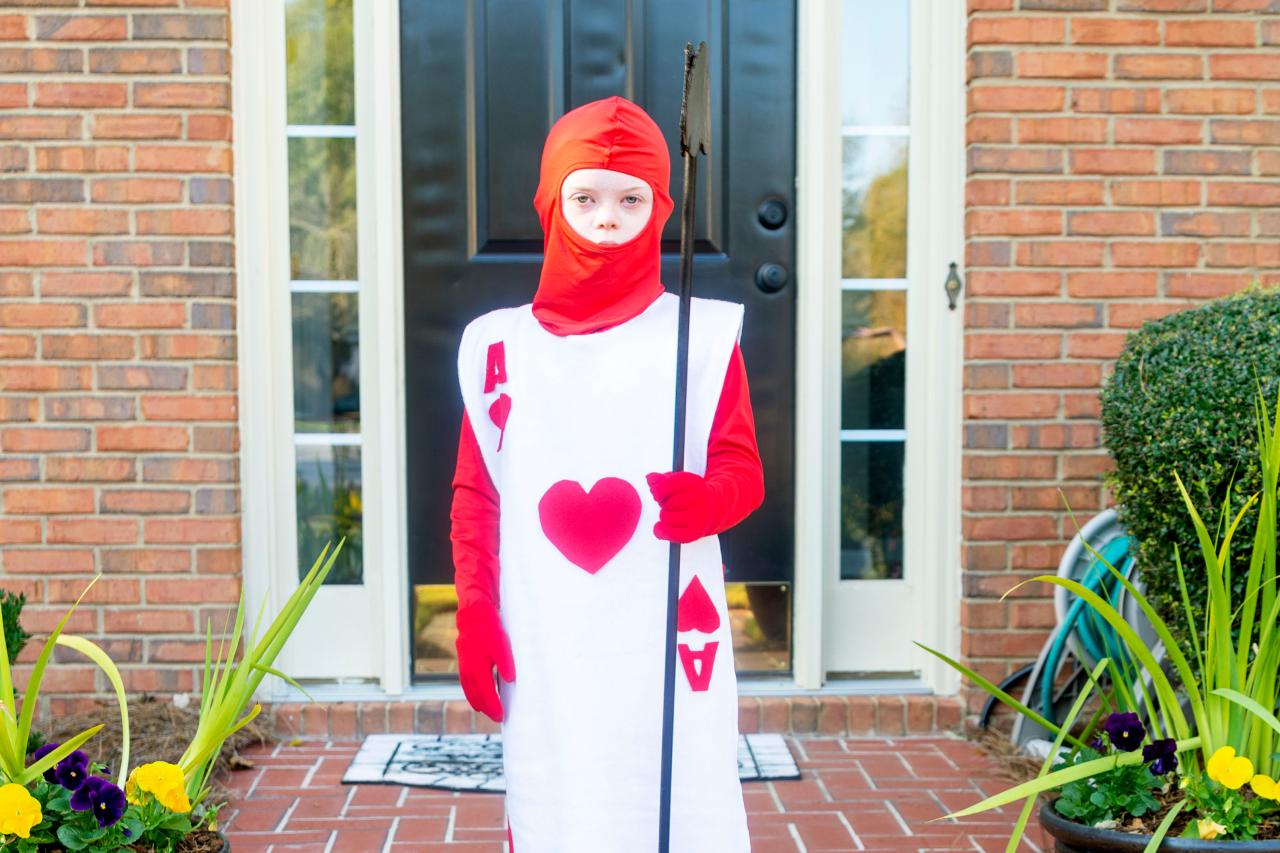
A Storybook Soldier
Create this easy DIY costume in less than an hour.


Debbie Wolfe
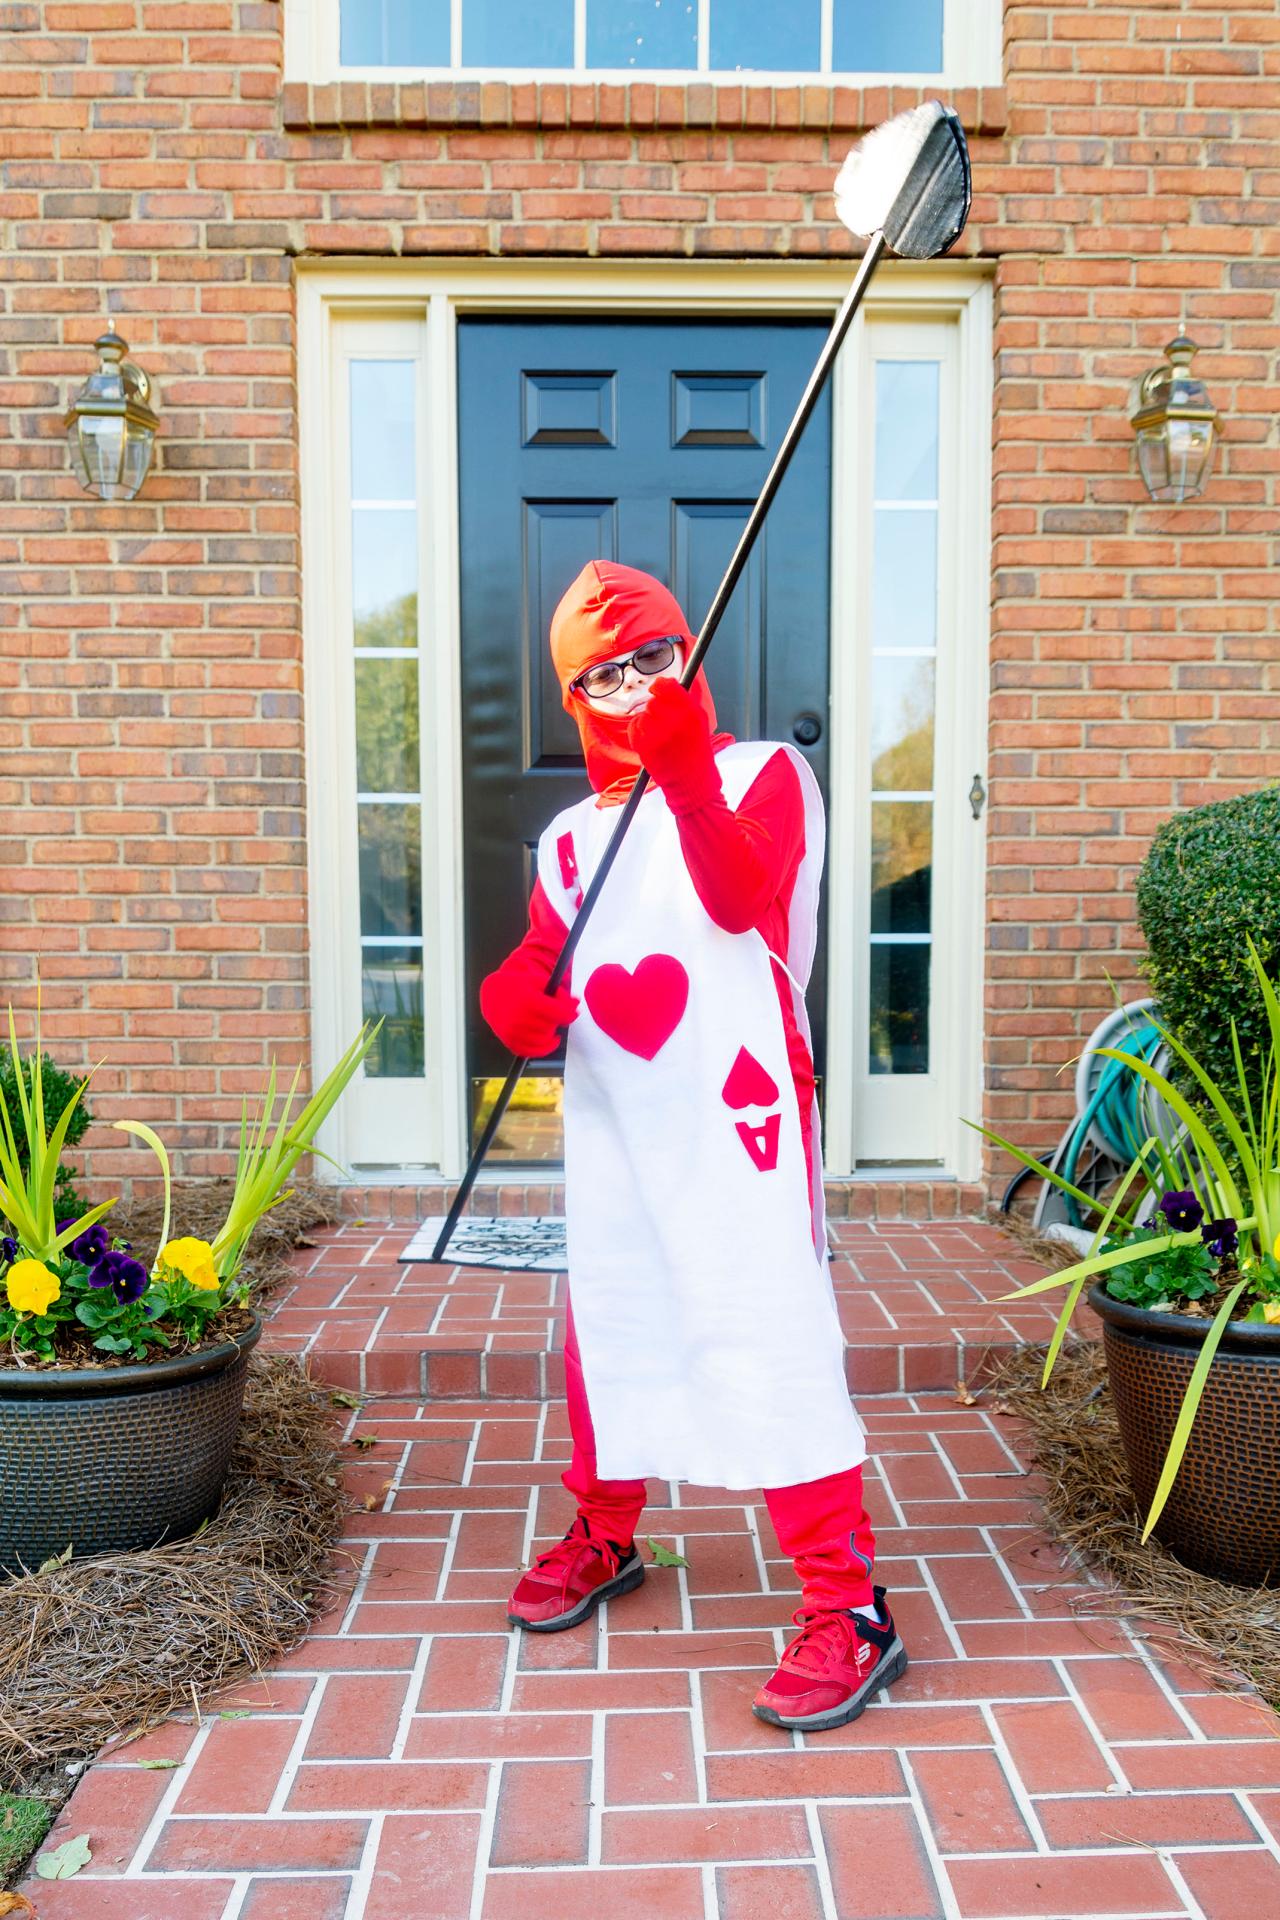
This whimsical playing card soldier from Lewis Carroll's childhood classic Alice in Wonderland is an easy DIY costume that kids will love. It takes minimal sewing skills and can be completed in less than an hour. This costume is so fun and easy, don’t be surprised if your child wants to wear this year-round.
Supplies and Materials
- 2 yards white fleece
- one sheet of red craft felt
- 6" of 1/4" elastic
- 4' 1/4" dowel rod
- cardboard
- hot glue
- black spray paint
- freezer paper
- pencil
- iron
- scissors
- pins
- printer (optional)
- sewing machine or serger (optional)
Notes on Supplies
This costume is easily adaptable. The length of fleece you need depends on the size of your child. Most fabric sold by the yard is 44 inches wide. Two yards of fleece will be enough for most children, and you should be able to make two tunics. I chose to go with a red Ace of Hearts for my soldier costume. If you prefer a black card, use black felt.

Debbie Wolfe
The Tunic Base
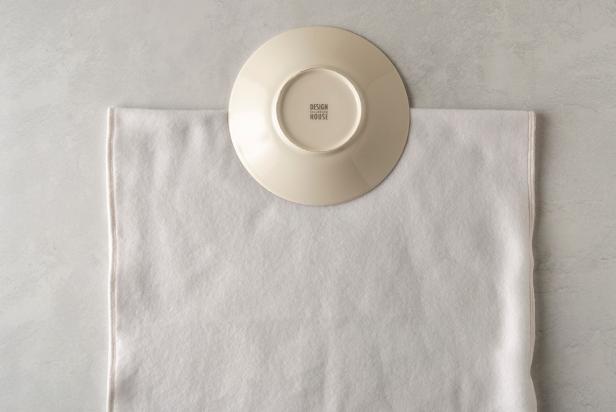
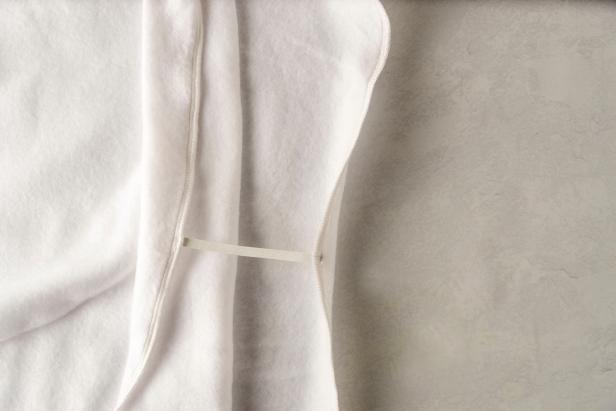
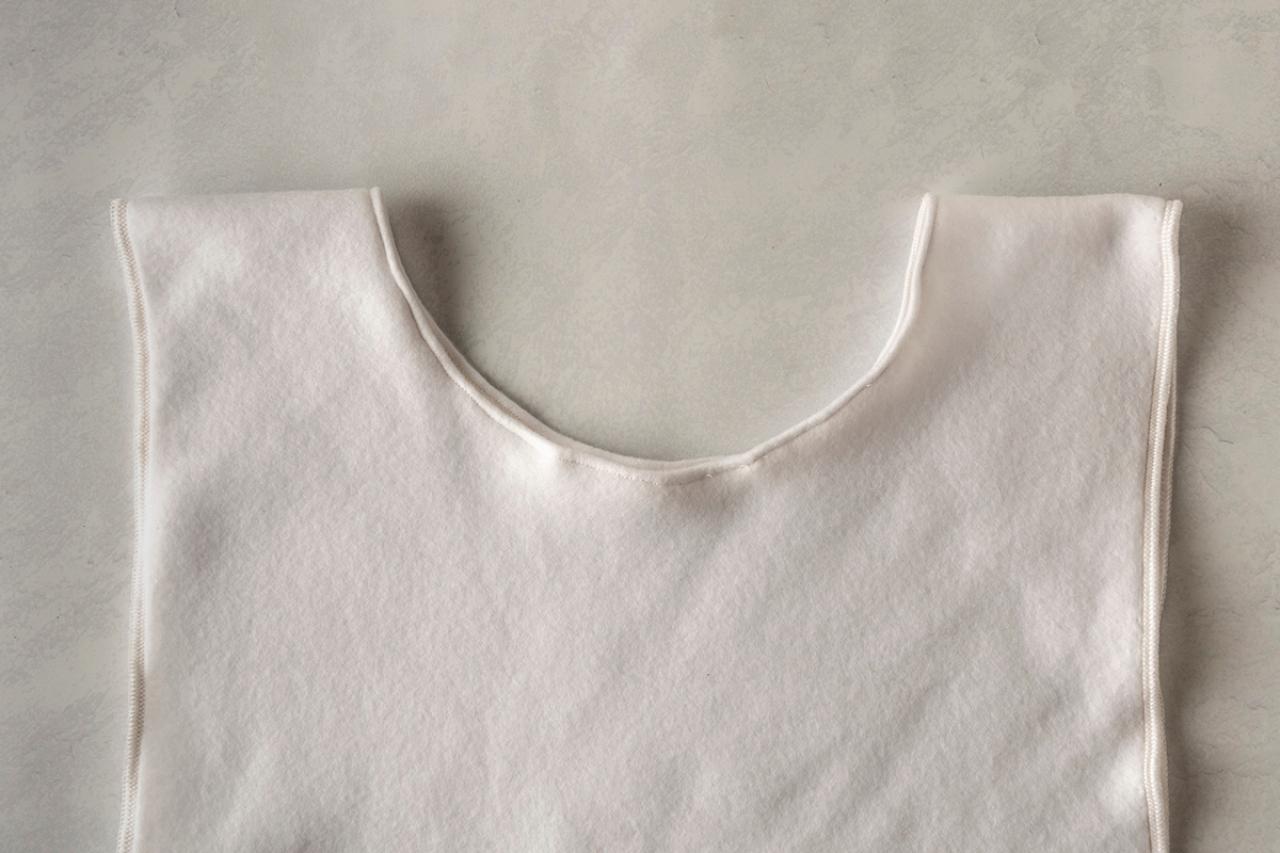
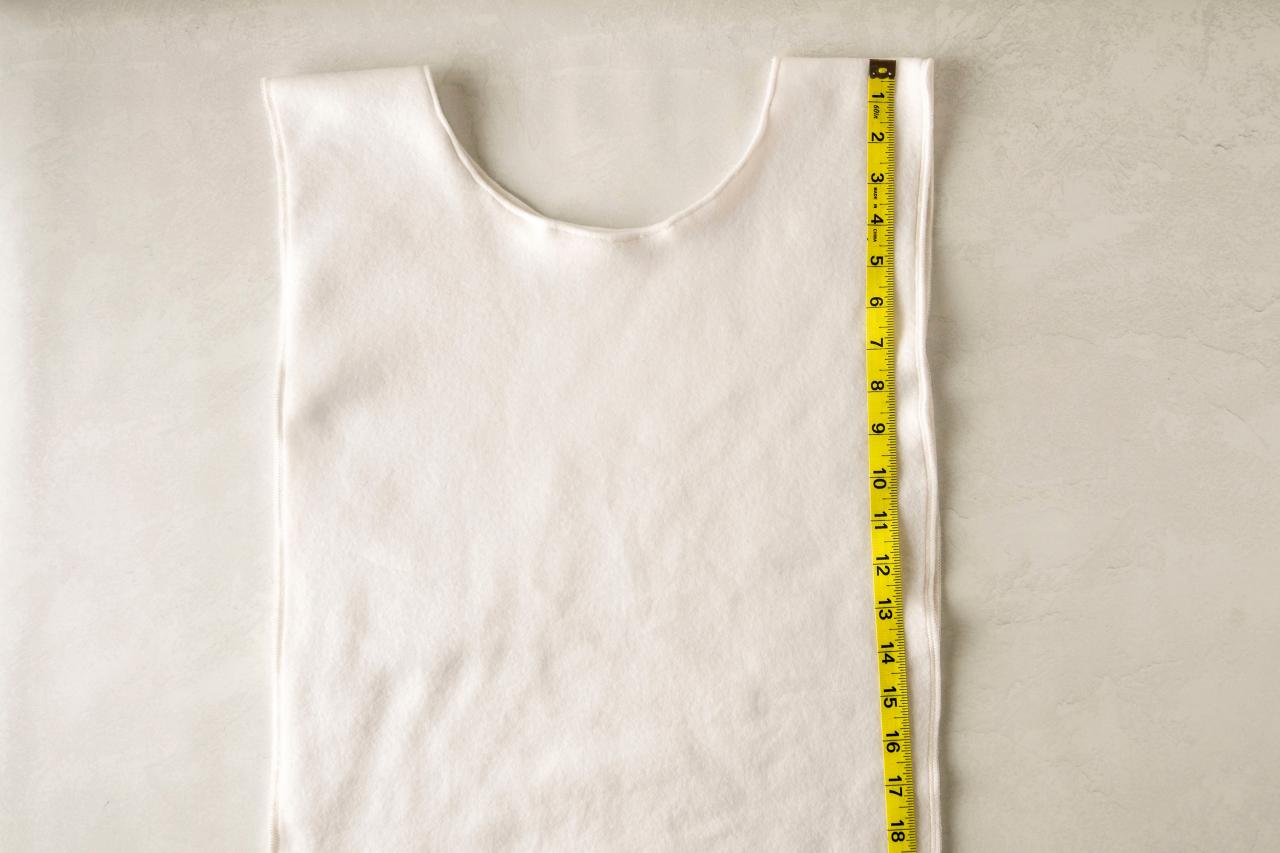
Measure your child from shoulder to shoulder and then from shoulder to about 4 inches below the knees. Record the measurements. Fold the two yards of fleece in half, width-wise. Measure along the top of the fold to match the width measurement of your child. Cut the fleece to that measurement. You can serge the raw edges or hem them if you like. To make the neckline in the tunic, place an 8-inch salad plate on the folded end of the fleece. I lined up the diameter of my plate to the edge of the fold. Trace along the circle edge of the plate with a pencil. You should form a semicircle (Image 1). Cut out the semicircle. Make sure to cut through both sides of the fabric. Serge or hem around the raw edges of the circle if you like (Image 2). Line up the end of a measuring tape to the fold of one of the shoulders. Measure about 14 inches from the top and make a mark. Repeat on the other side (Image 3). Cut two 3-inch pieces of 1/4-inch elastic. Stitch or glue the elastic in the place where you marked in the previous step. This helps keep the tunic closed and from flopping open as your child moves (Image 4).
Debbie Wolfe

Debbie Wolfe

Debbie Wolfe
Debbie Wolfe
Embellishing the Tunic
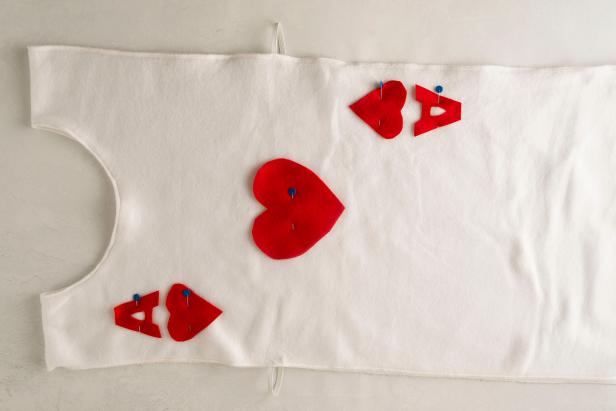
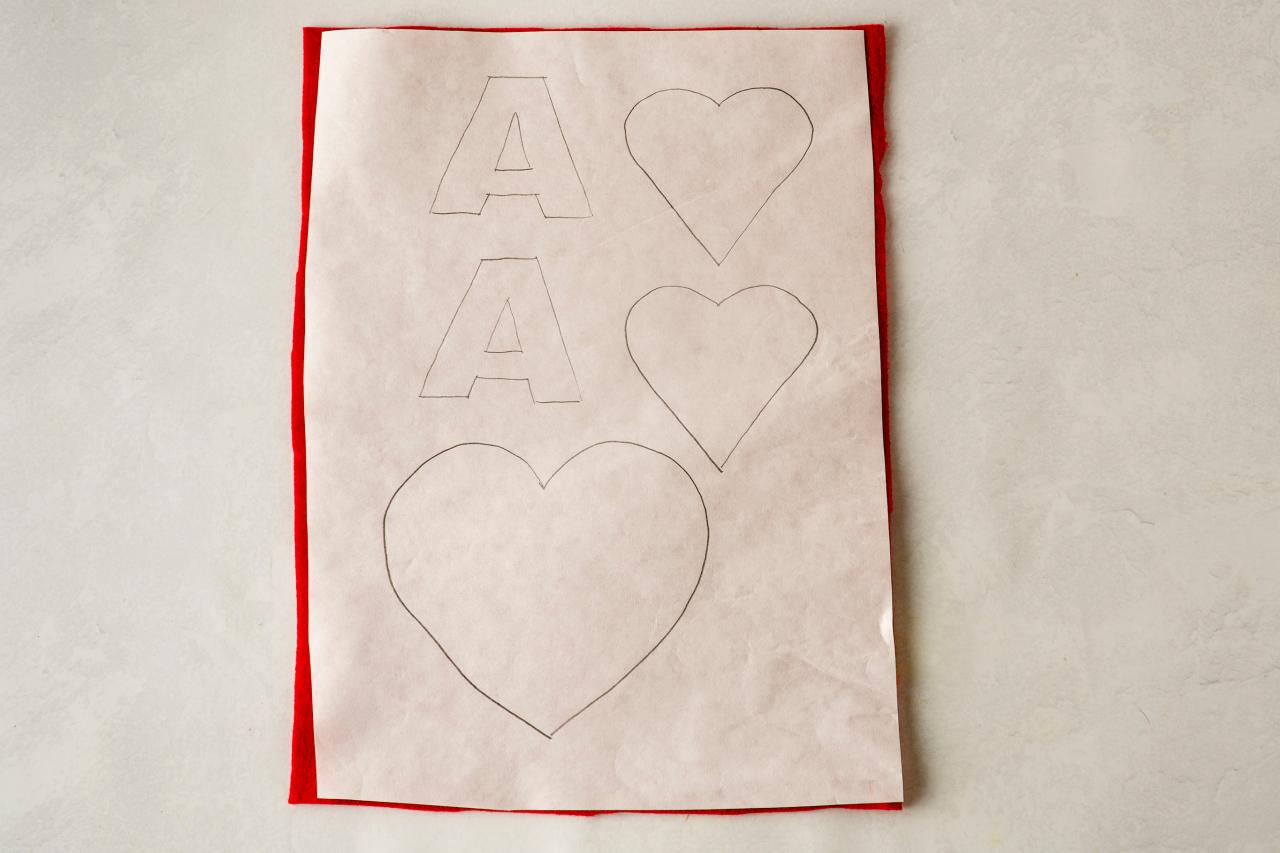
I used a word processing program to make a 2-inch upper-case “A,” two 2-inch hearts and one 4-inch heart. I then traced them onto the non-shiny side of some freezer paper — set your iron on low heat. Place the freezer paper, shiny side down, on the red felt and press lightly. The freezer paper will adhere to the felt. This makes it easy to cut out the felt shapes with precision. Cut out the shapes, then remove the freezer paper (Image 1). Pin the letters and hearts in place. One “A” and a 2-inch heart go in the upper right shoulder; the 4-inch heart goes in the center of the chest; and the other “A” and heart go to the bottom left. Make sure to invert the heart and “A” at the bottom (Image 2). Adhere them in place with hot glue.

Debbie Wolfe
Debbie Wolfe
The Spear
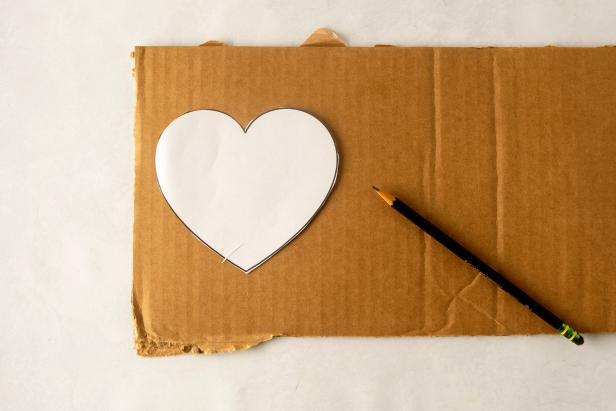
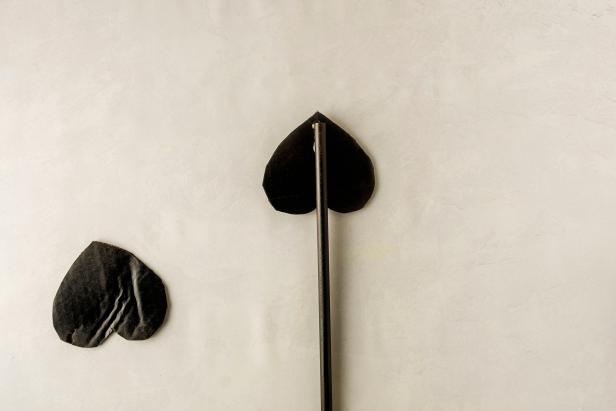
Take the same 4-inch heart template and trace it onto the piece of cardboard. You will need two hearts (Image 1). Cut out the hearts, and paint them black. Paint the 4-foot dowel rod black. Once the paint is dry, hot glue the heart upside down on the end of one dowel rod (Image 2). Glue the second heart on top of the first. Make sure you match the edges.
Debbie Wolfe
Debbie Wolfe
Finishing Touches
To complete the outfit, dress your child in a long-sleeved red shirt, red pants and shoes. For the hood, I used a red Balaclava face mask and red knit gloves. If you decide to go with a black card, swap out the face make, gloves, shirt, pants and shoe with black.

Debbie Wolfe


