


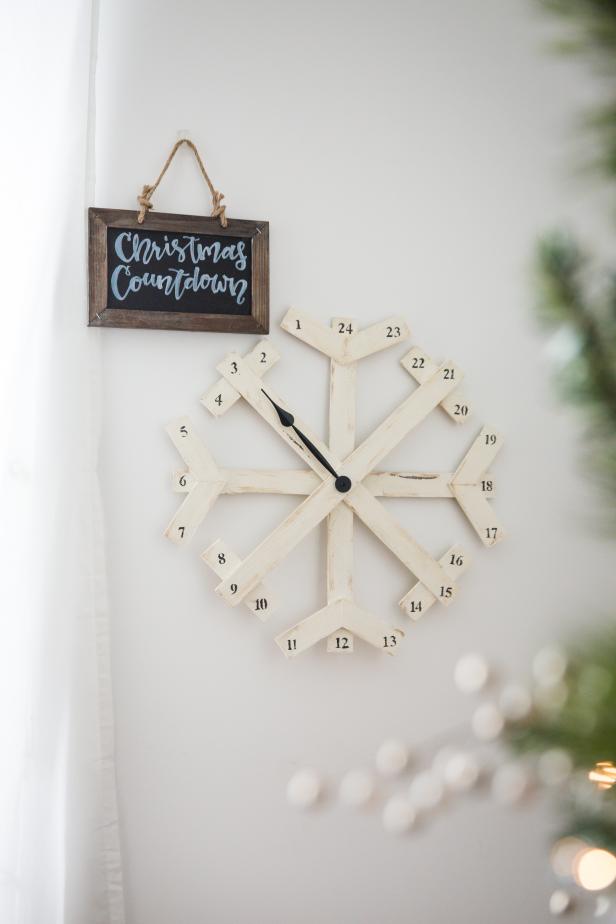
3-2-1: DIY Christmas Countdown Snowflake
Get in the holiday spirit and give your kids something to ooh and ahh over with this Christmas craft.

The countdown to Christmas may seem like a rollercoaster to you, but to your kids, it’s the ultimate test of their patience. Make this year’s Christmas countdown a special something the whole family can get involved in with a homemade countdown snowflake!
Materials Needed
- (4) 20” pine wood lath
- tape measure
- pencil
- hot glue gun + wood glue sticks
- (8) 4-1/2” pine wood lath pieces
- miter saw
- (4) 5” pine wood lath pieces
- white spray paint
- drill + bit
- stencil numbers
- sandpaper
- black paint + small brush
- dark wax
- coarse brush
- (2) rubber washers
- large clock hand + hardware
Assemble Snowflake

Jalynn Baker

Jalynn Baker
Jalynn Baker

Jalynn Baker
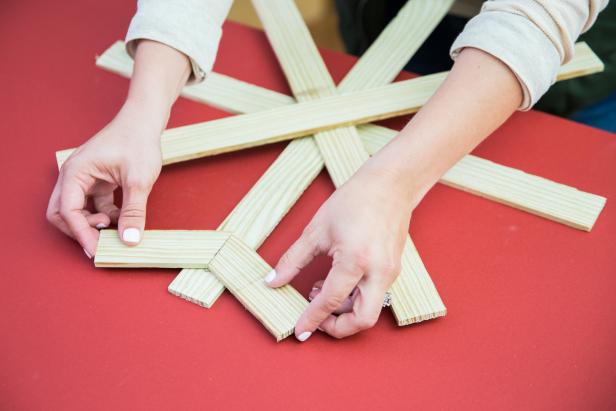
Begin by creating two equal crosses with the 8-inch pieces of lath, using hot wood glue to secure the pieces at the center. Stack the two crosses to create an 8-sided snowflake shape and glue in the same fashion. Cut the eight 4-1/2-inch pieces at a 62-degree angle on one end. Glue the angled sides together to create four arrow shapes. Once the glue has dried, glue the arrows pointing inward on every other snowflake arm, about 1 inch from the top. Flip the snowflake over and glue the four 5-inch pieces of lath on the remaining snowflake arms. Paint the snowflake white.
Drill Hole for Clock Hand
Jalynn Baker
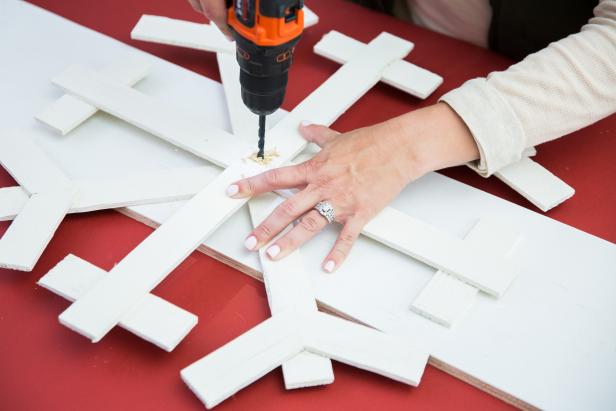
Place the snowflake on a scrap board and use a drill to place a hole directly through the center. Set the clock hand to the side for later installation.
Add Numbers and Attach Clock Hand

Jalynn Baker
Jalynn Baker

Jalynn Baker
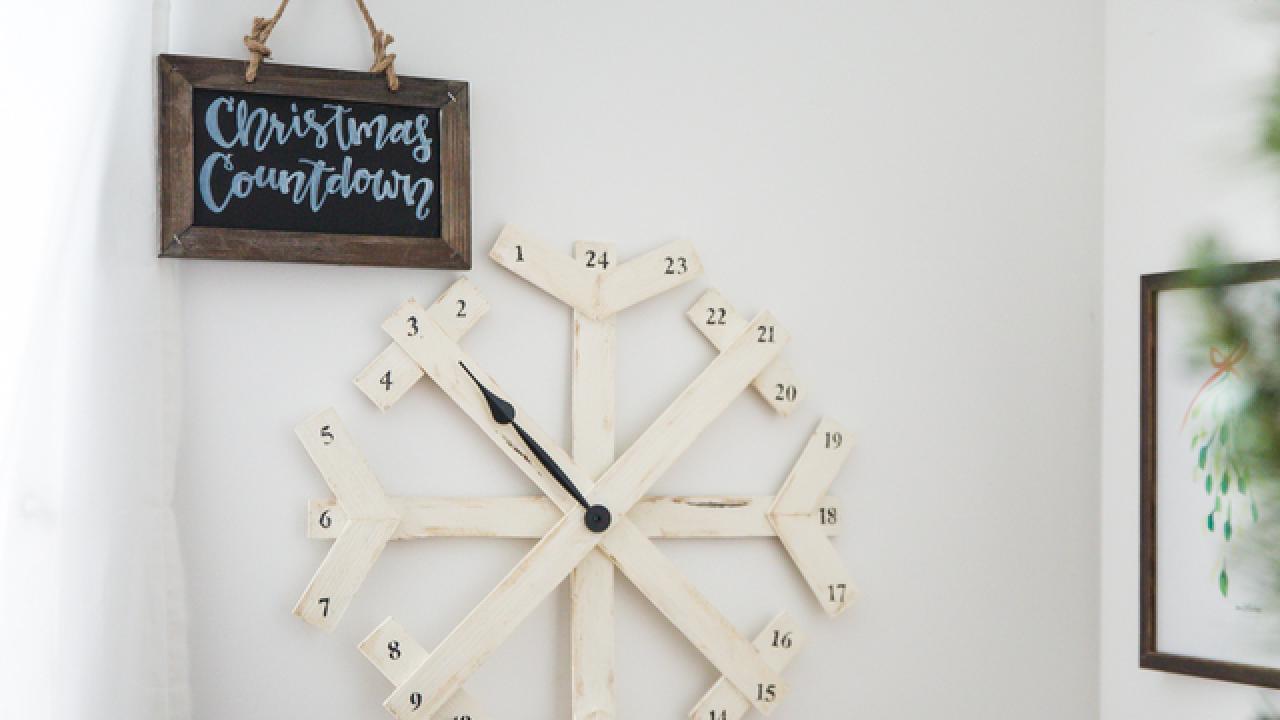
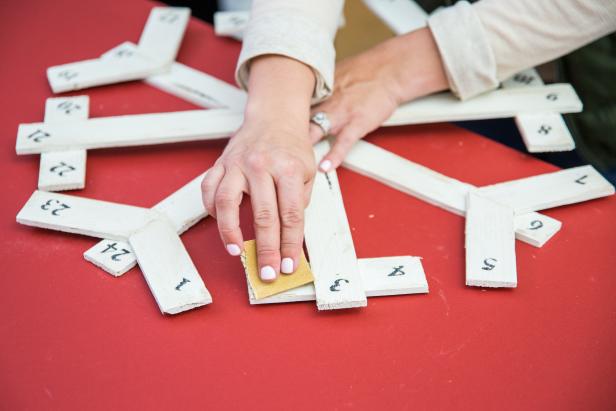
On each of the snowflake’s 24 extremities, use a stencil to paint numbers 1 through 24. Once dry, use dark wax and a coarse brush to distress the snowflake. In the previously drilled hole, place the large clock hand with rubber washers. Hand-tighten to allow for easy turning and let the Christmas countdown fun begin!
Jalynn Baker


