


How to Remove a Deadbolt
Follow our easy steps on how to remove and replace a deadbolt.

Jalynn Baker

Materials and Tools:
- deadbolt kit
- flat-head screwdriver
- Phillips-head screwdriver
- paint (same color as the door)
- sandpaper
- paintbrush
Remove the Rose Plates
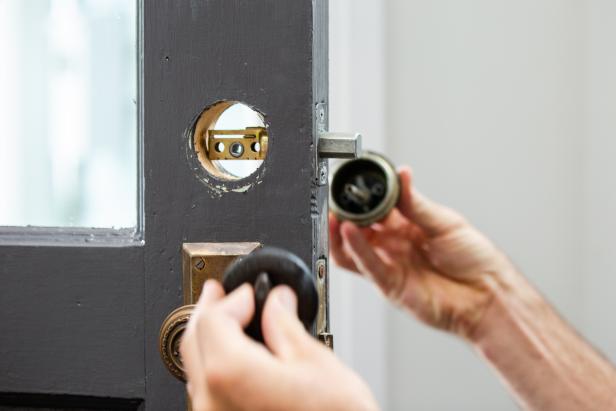
You will notice two screws behind the lock knob on the rose plate. These screws hold both rose plates onto each side of the door. Remove both rose screws using a Phillips-head screwdriver or driver, and set aside (Image 1). Pull both the knob side and key side of the deadbolt off the door (Image 2).

Jalynn Baker
Jalynn Baker
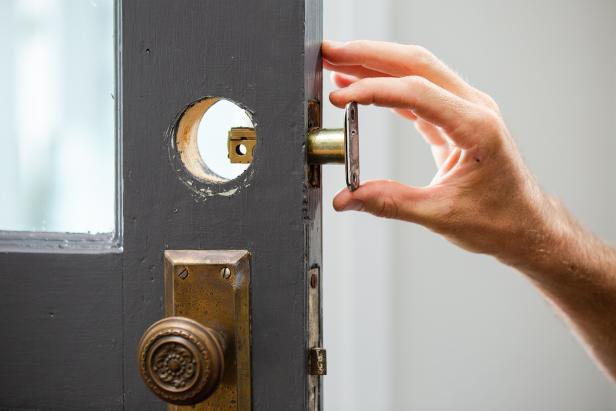
Remove the Latch Assembly
The latch assembly is held in the door using two screws. Remove the two screws using a Phillips-head screwdriver or driver (Image 1). The latch assembly should slide easily out of the hole in the door (Image 2). If it is stuck, slide your screwdriver through one of the holes in the latch assembly, and use it to leverage the assembly out of the door.

Jalynn Baker
Jalynn Baker
Adjust the New Latch Assembly
Now, you can replace the old deadbolt with a new one. You will perform this installation in the reverse of the removal. Install the latch assembly first. There are two possible adjustments needed for the latch assembly to be installed properly. First, ensure the cam slot (the hole that holds the cam bar and turns the deadbolt) is situated in the middle of the door’s circular hole. The latch assembly is made to be adjustable. If the cam slot falls short of the middle, turn the latch assembly cylinder until the cam slot extends to the proper distance. If it is too far, rotate the cylinder the other way until the cam slot is in the correct position.
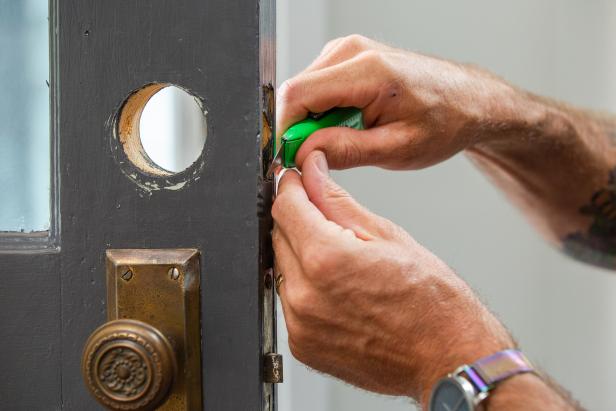
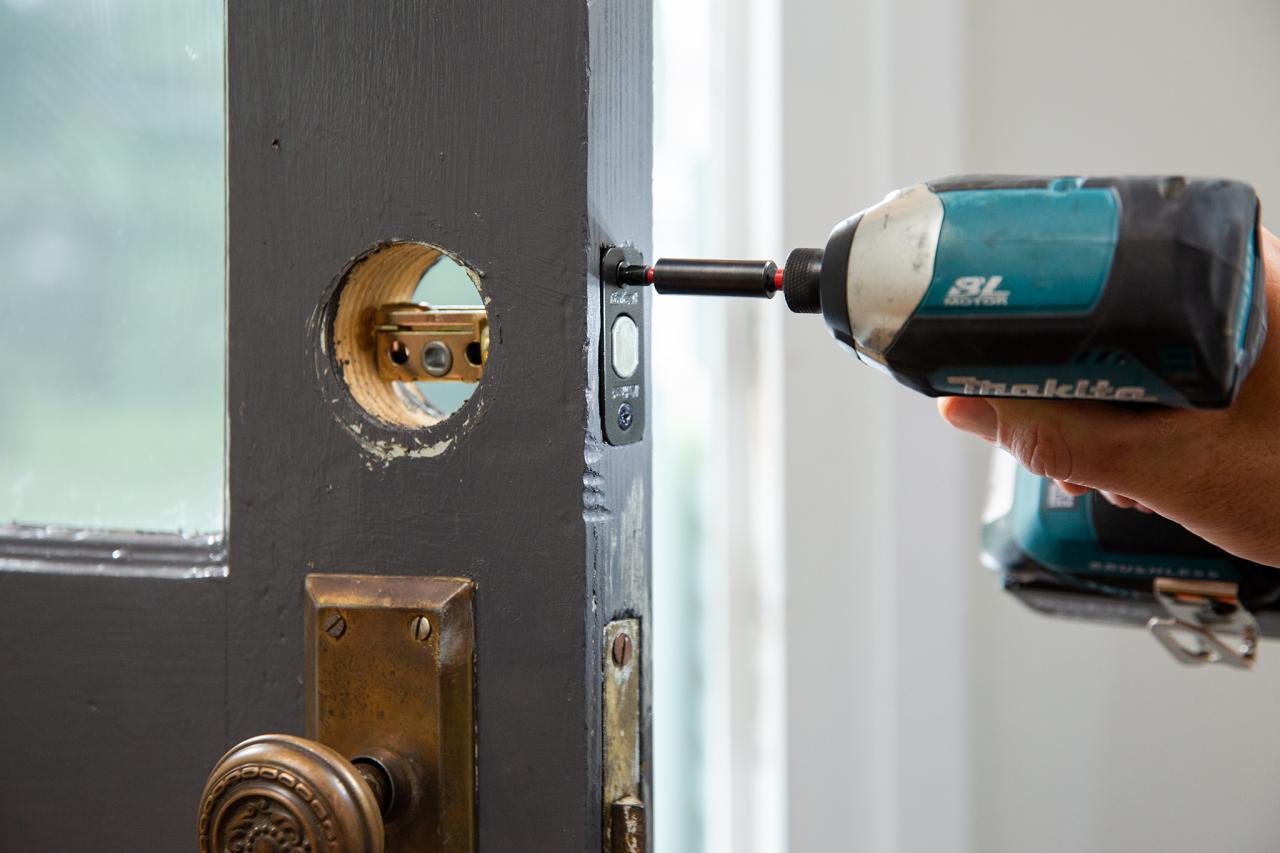
Second, the latch assembly faceplate should fit flush with the door. If it doesn't sit flush, you may need to remove a bit of wood from the area. Using a pencil, outline the faceplate on the door to determine how much wood to remove (Image 1). Cut the excess wood using a razor knife (Image 2). Make sure you remove enough wood so the faceplate rests at the appropriate depth, keeping everything flush with the door’s surface (Image 3). Once the plate rests flush, use a screwdriver or driver to attach it to the door using the screws provided (Image 4).

Jalynn Baker
Jalynn Baker
Jalynn Baker

Jalynn Baker
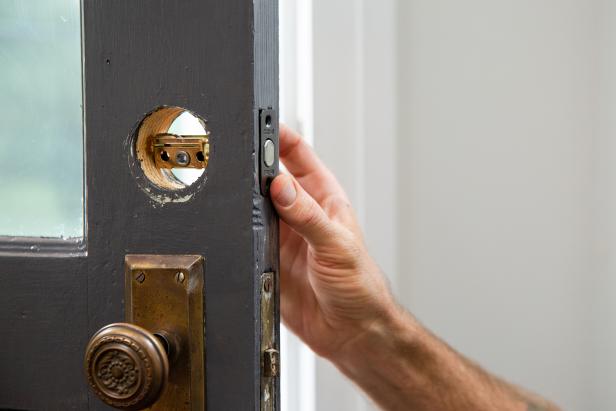
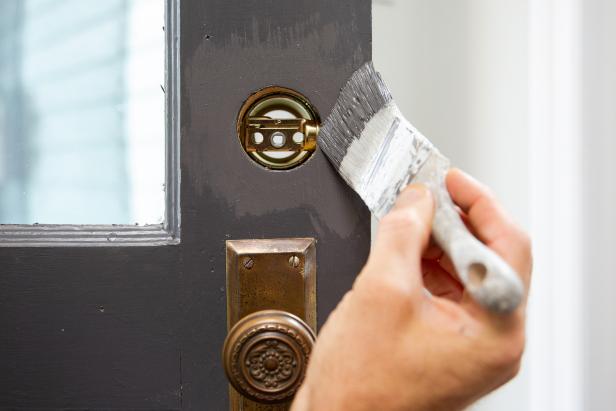
Install the Deadbolt Cylinder
Take the deadbolt cylinder that has the cam bar, and insert it into the door making sure the cam bar slides smoothly into the cam slot.

Jalynn Baker

Jalynn Baker
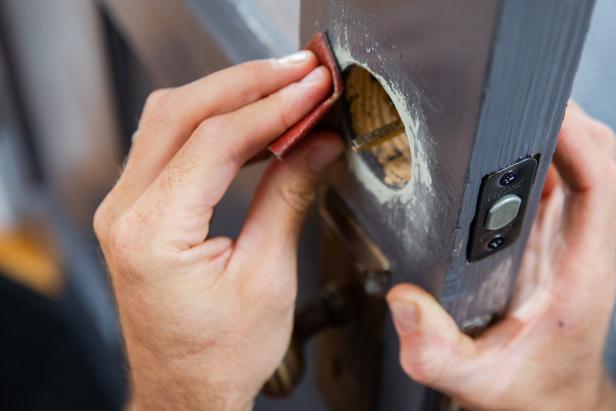
Install the Rose Plate
Place the rose plate on the opposite side of the circular hole, and line it up with the deadbolt cylinder. If it's smaller than the original rose plate, touch up the paint by sanding the area and adding a couple coats (Images 1 and 2). Let it completely dry. The rose plate should fit smoothly onto the cam bar. If the cam bar is not lining up properly, the latch assembly might not be extended the proper distance from the faceplate. If this is so, go back to the step where you remove the latch assembly. Make sure both screws and the cam bar are lining up properly. This can be a little tricky. Go slow and insert the screws one at a time rotating and wiggling them until they catch in the other cylinder. Do not get one screw fully tightened and then attempt to insert the other screw. Get one screw to catch, and tighten it one turn of the screwdriver and then get the other screw to catch. Once both have caught, tighten the two sides of the cylinder together (Image 3).
Jalynn Baker
Jalynn Baker

Jalynn Baker


