


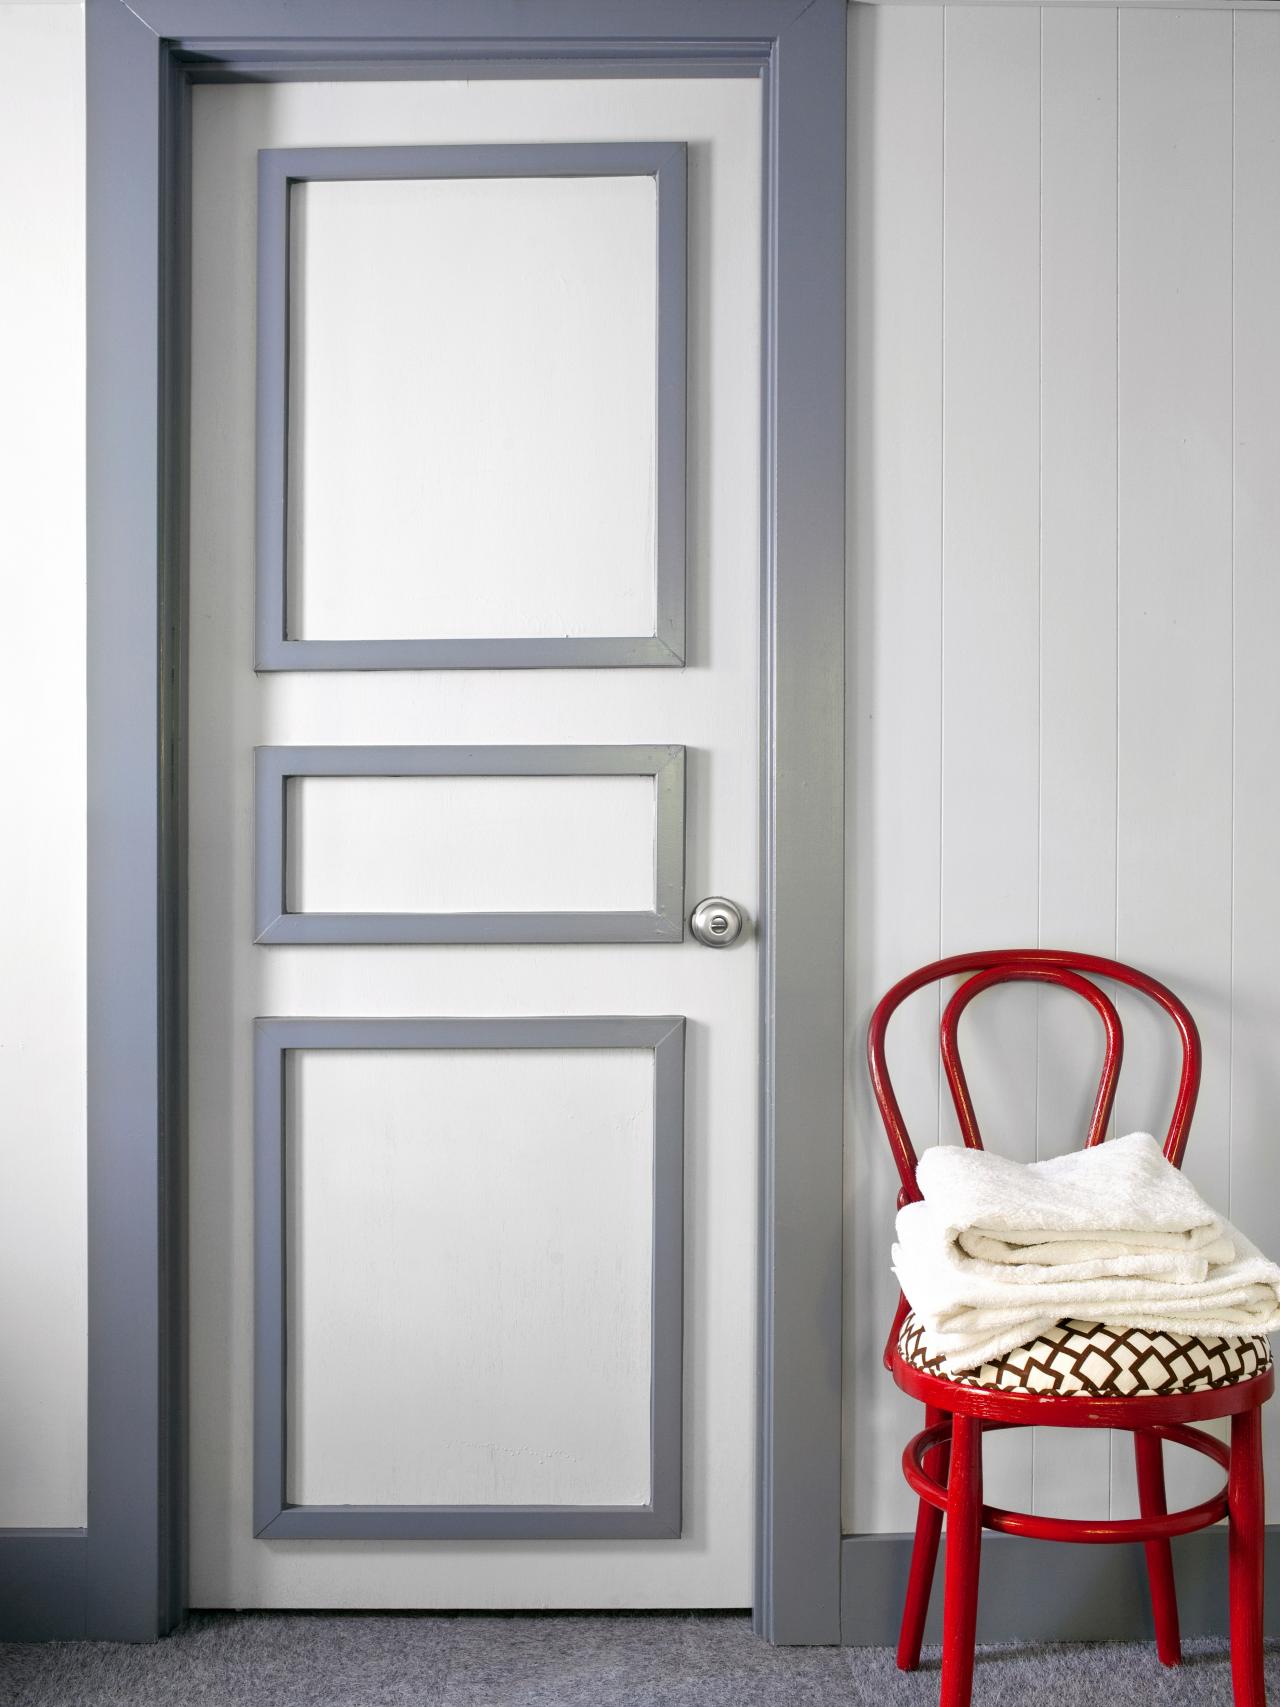
Bold Bathroom Door Update


Materials Needed:
- hollow-core or solid wood slab interior door
- 1x2 MDF trim
- wood glue
- nail gun
- nails
- caulk
- caulk gun
- painter's tape
- gloss finish latex paint
- paint roller
- roller cover
- paint pan
- pan liner
- chop saw
- spackle
- putty knife
- drop cloth
- tape measure
- pencil
- notepad
- medium-grit sanding block
- drill
- wood screws
Measure Door
Use tape measure to determine length and height of door. Jot dimensions and rough sketch of desired trim pattern and sizes on notepad with pencil.
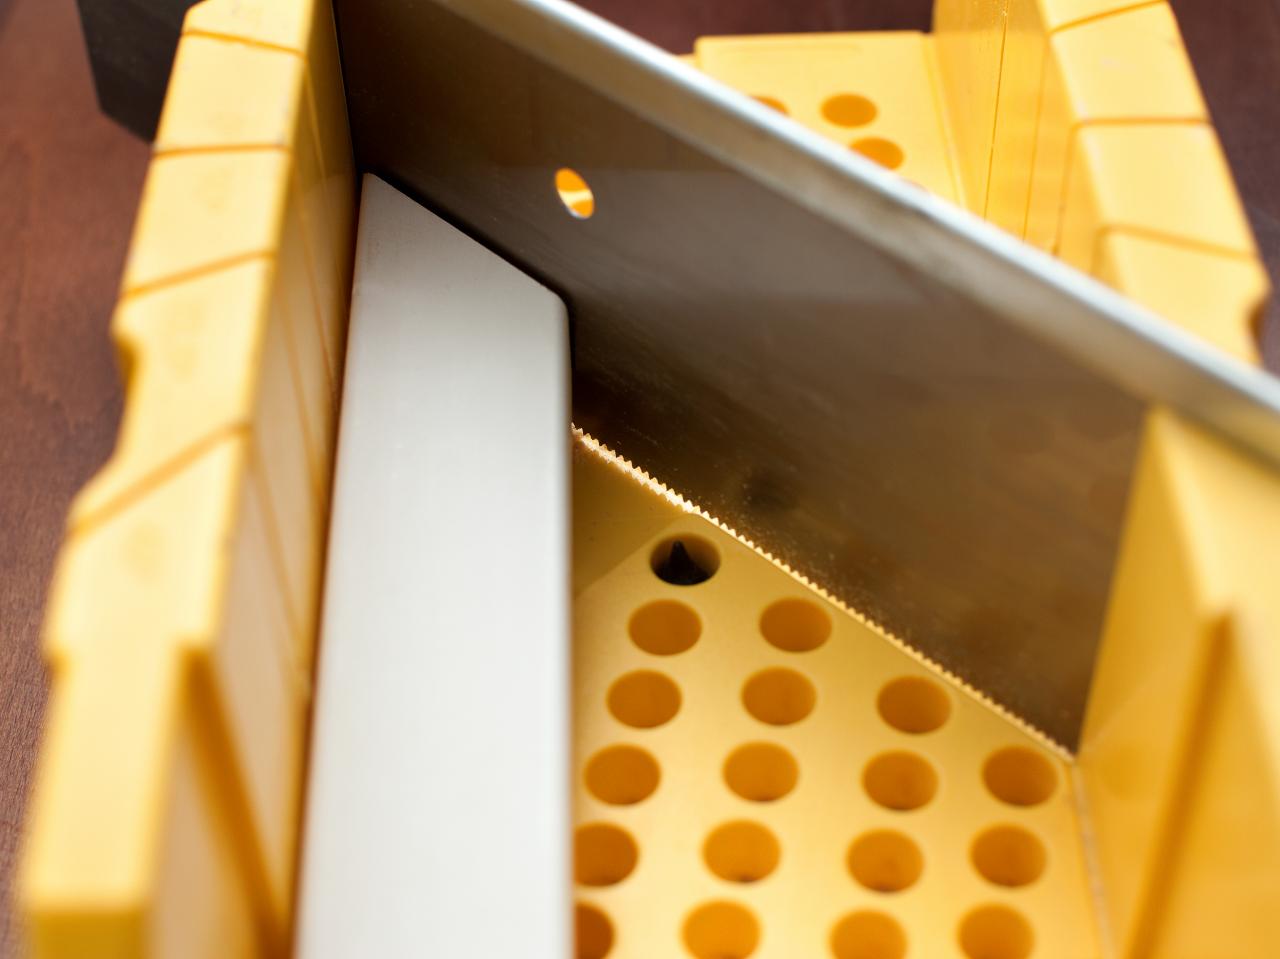
Measure, Mark and Cut Trim
Referring to notes, mark trim to size with pencil. Cut each piece of trim with chop saw, mitering corners. Sand rough edges of trim with medium-grit sanding block.

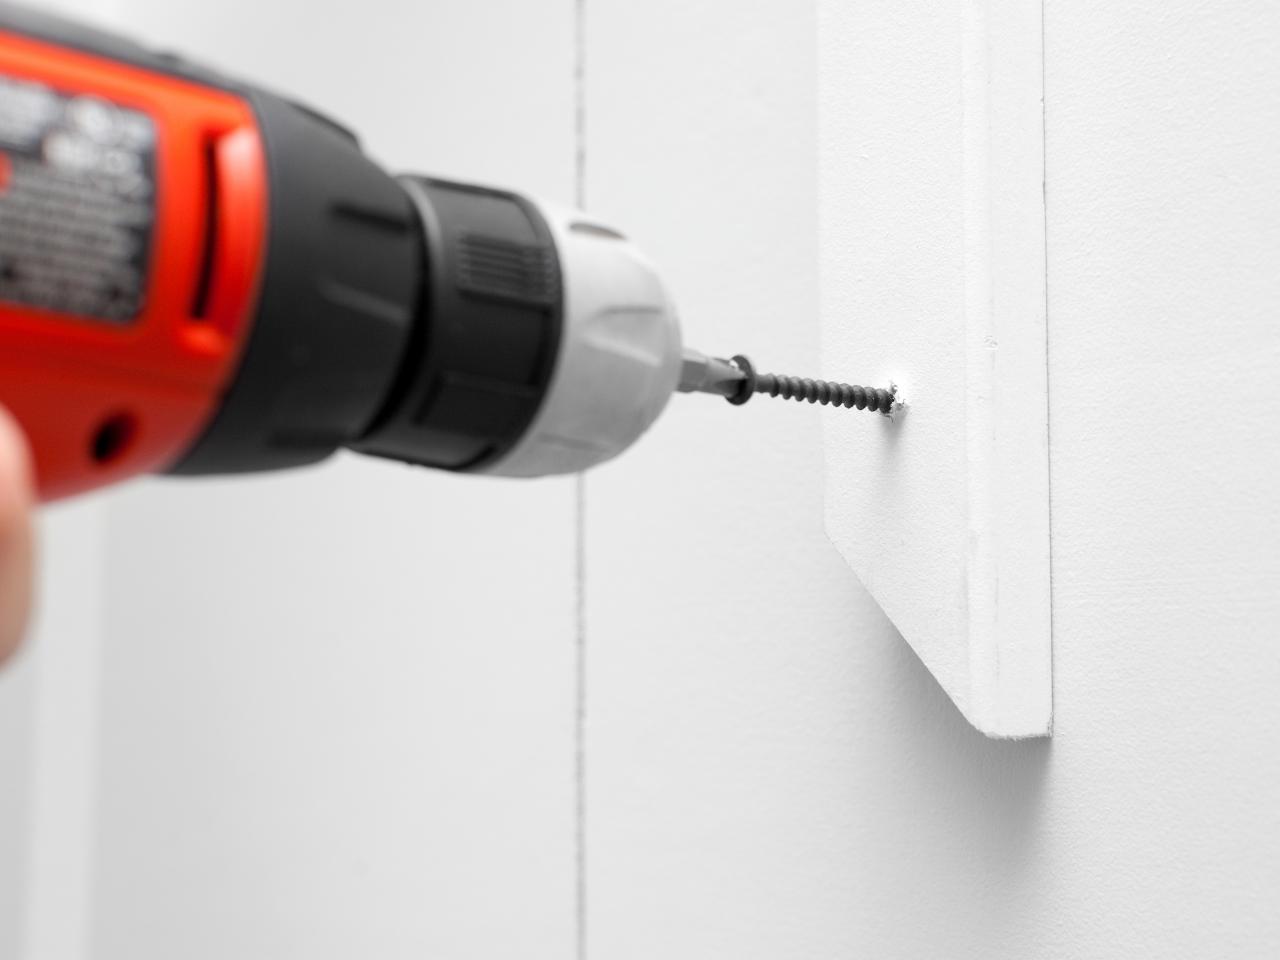
Attach Trim
Place each piece of trim on door. For hollow-core doors, attach trim to surface by adding bead of wood glue to back, then holding in place with painter's tape until glue dries. For solid wood doors, attach trim using nail gun or with wood screws using drill.

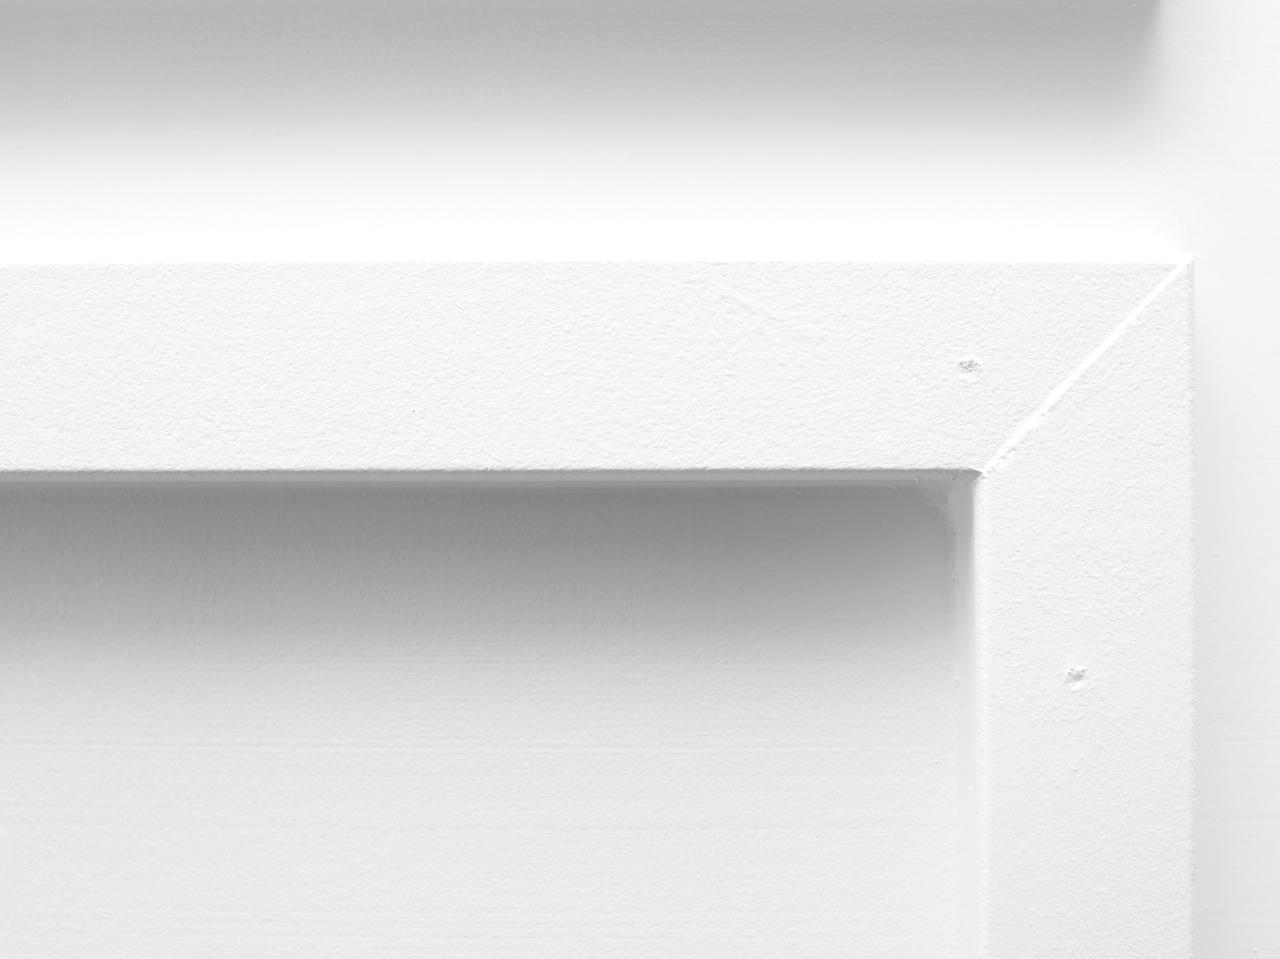
Sand, Spackle and Caulk
Once all mitered pieces of trim are attached, sand any nail holes with medium-grit sanding block, fill with spackle using a putty knife, then caulk edges with caulk gun.

Paint Door
Before painting, protect area below and around door with drop cloth. Using a paintbrush, apply two coats of paint to front and sides of trim. Once dry, paint surface of door with roller. Touch up necessary surface areas with detail brush.


