How to Build a Pollinator House for Your Garden
Boost your garden's ecosystem and keep bees and other pollinators coming back for more by following these easy steps to create your own DIY pollinator house.
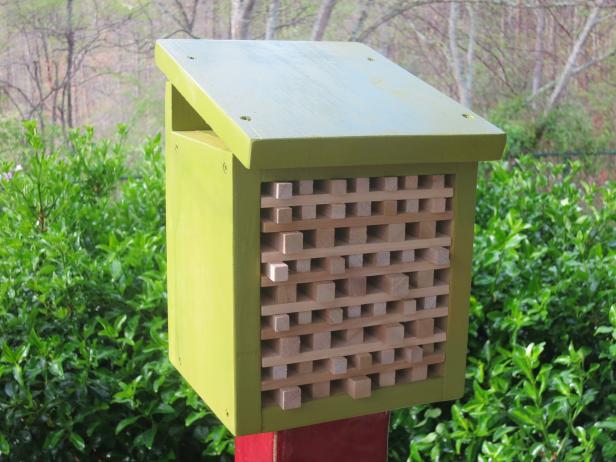
Image courtesy of Ashley English
To help keep some of our favorite foods on the table, it’s important that we take care of our pollinator friends. And not just honeybees! There are countless pollinators that work tirelessly to keep the plant world healthy, so why not take a little time to give them the shelter they deserve after a long day’s work? With a little effort and creativity, you can craft a perfect pollinator house to add visual appeal to your garden and keep the pollinators coming back for more.
Materials Needed
- 1x8 pine board
- 3/8” square wooden dowels
- 1/2” square wooden dowels
- 1/4” boards
- drill
- wood screws
- pencil
- miter saw
- measuring tape
- wood glue (optional)
- paint or stain (optional)
1. Build Box Frame
If you have an old birdhouse or a small wooden box, you may be able to save some time by repurposing it as your pollinator house. If not, start by building a wooden box. There are no rules to how large or small a pollinator house should be, so repurpose some scrap wood if you have it. If not, a 1x8 pine board will do the trick. When cutting and assembling, think of it like a birdhouse. The desired structure should be a wooden box with a closed back, open front and a pitched roof to shed water. Use 2-inch wood screws to assemble. To make a pitched roof, simply cut the back piece longer than the total height of the structure and place the roof piece on top.

Image courtesy of Ashley English
2. Add Shelves and Dowels
Cut 1/4-inch-thick boards to fit the interior dimensions of the house and cut a few square dowels to fit the depth of the box (Image 1). If you’re able to source them, bamboo tubes also make great spacers in place of the dowels. The idea is to stack rows of dowels separated by the 1/4-inch-thick shelves. We opted to alternate between 3/8-inch and 1/2-inch dowels for a variety of hole sizes. To maintain a consistent space between each dowel, use one of the dowel pieces as a spacer when you’re positioning the pieces. Create a three-dimensional effect on the front by placing some dowels further in and out than others (Image 2). According to experts, it can help the pollinators to recognize their own hole from the others if the entrances are not totally uniform.
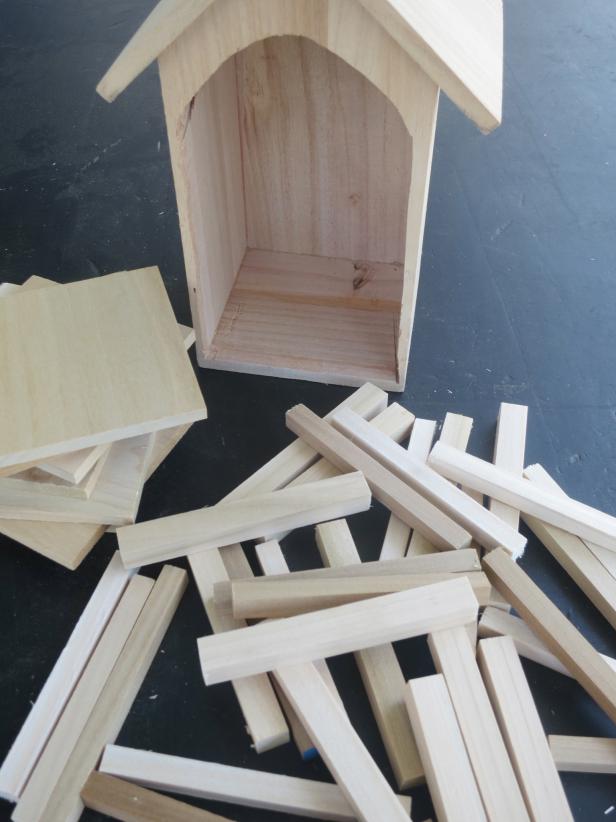
Image courtesy of Felicia Feaster

Image courtesy of Ashley English
Pro Tip: To glue or not to glue? It’s totally up to you whether or not you glue the dowels and shelves in place. The positive to gluing is that it helps the dowels to stay in place, but it takes away the ability to remove the dowels and shelves for cleaning and inspection. If your desire is to use the box as a teaching project for children, it can be useful to take the house apart and study the life cycle of the creatures.

Image courtesy of Ashley English
3. Paint Exterior
Once you’ve finished assembling your pollinator house, feel free to paint or seal the exterior with fun colors. This will not only look prettier but add protection against the elements and help water from reaching the pollinators. Refrain from painting or staining the interior, as it deters the pollinators from seeking the shelter.
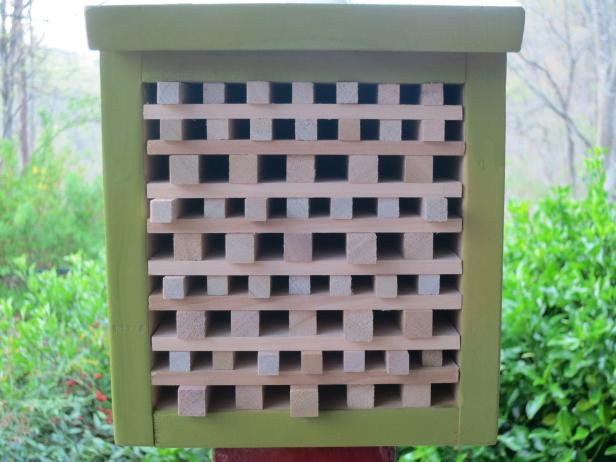
Image courtesy of Ashley English
4. Mount Your Masterpiece
Use wood screws to mount your pretty pollinator home wherever you desire. This can be a tree, fence post, the side of a shed or anything you can think of. Now take a step back and enjoy your work!

Image courtesy of Ashley English


