


Hip, Handmade Christmas Tree Skirt

School Pennant Christmas Tree Skirt
Keep your Christmas tree grounded with school spirit and vintage flair with a one-of-a-kind souvenir pennant Christmas tree skirt.

Materials Needed:
- between 14 and 16 felt souvenir pennants
- sewing needle
- spool of thread
Create Layout
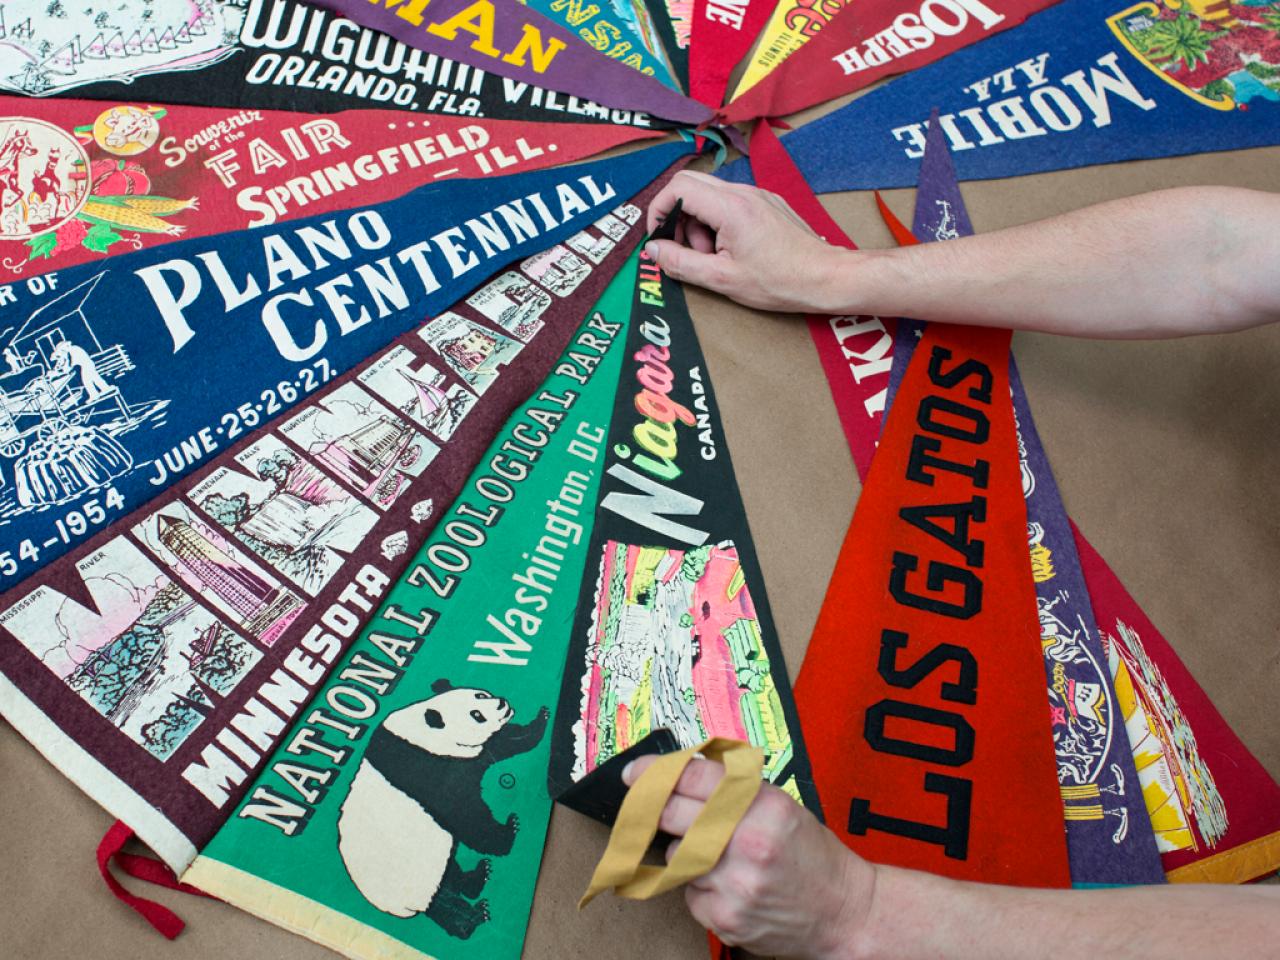
Spread pennants out in a circular formation, alternating color and theme until you're happy with their placement.

Making a Team Pennant Tree Skirt
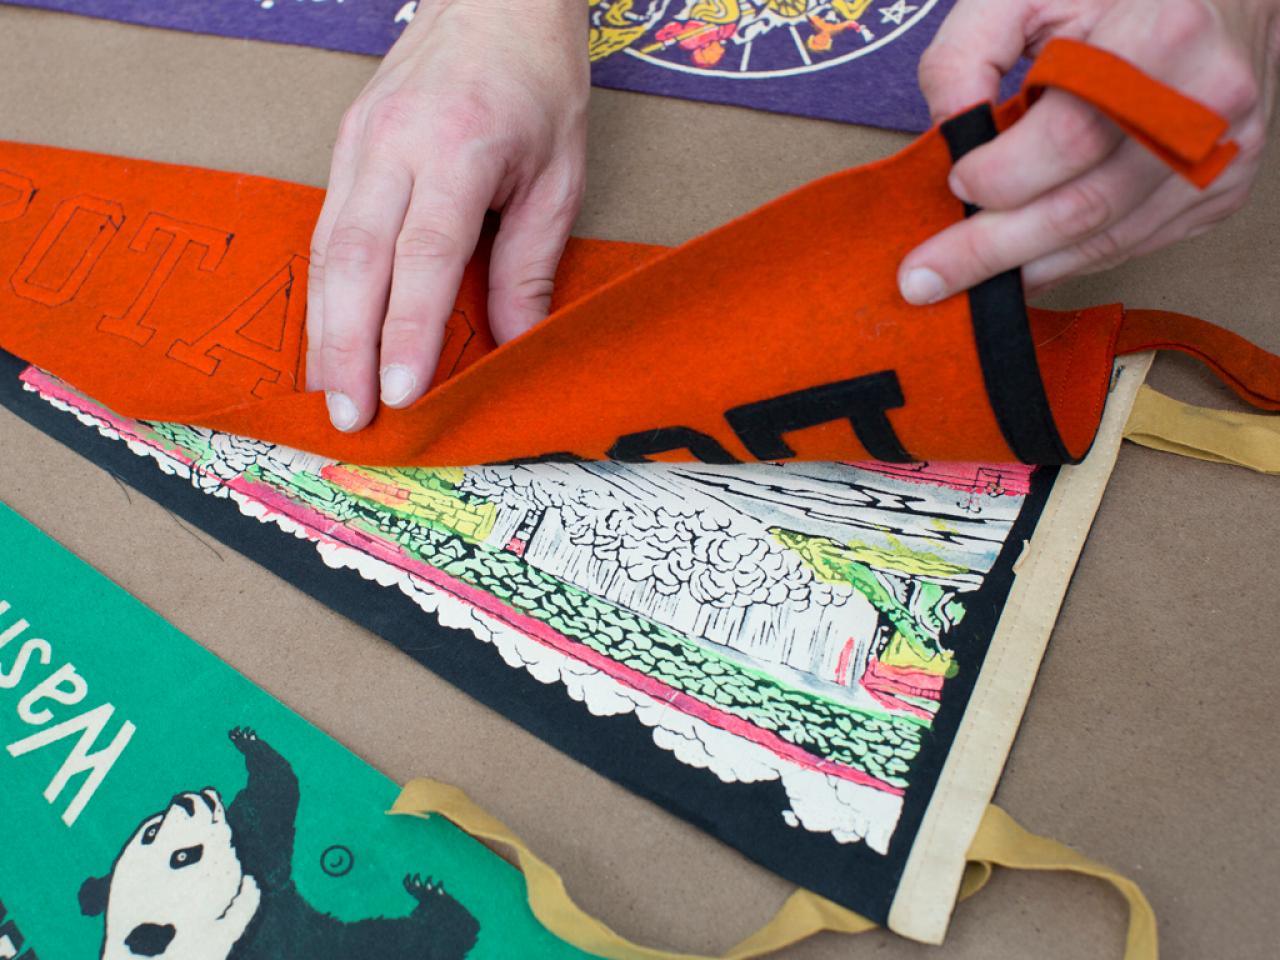
Starting on one end of the circular formation, flip a pennant on top of the one beside it. Next, move the top pennant down 3/4" from the top edge of the bottom pendant.
Place Pennants Face-to-Face
Starting on one end of the circular formation, flip a pennant on top of the one beside it. Next, move the top pendant down 3/4" from the top edge of the bottom pendant. Tip: Allowing a 3/4" gap ensures a consistent, solid clean line at the tops and bottoms of each pendant. This also creates a more graphic look by eliminating blank solid areas from peeking through.

DIY Christmas Tree Skirt from Pennants
Allowing a 3/4" gap ensures a consistent, solid clean line at the tops and bottoms of each pennant, and eliminates blank solid areas from peeking through.
Stitch Pennants Together
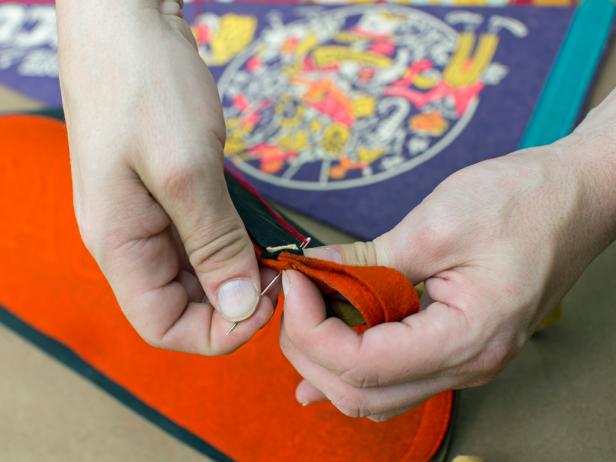
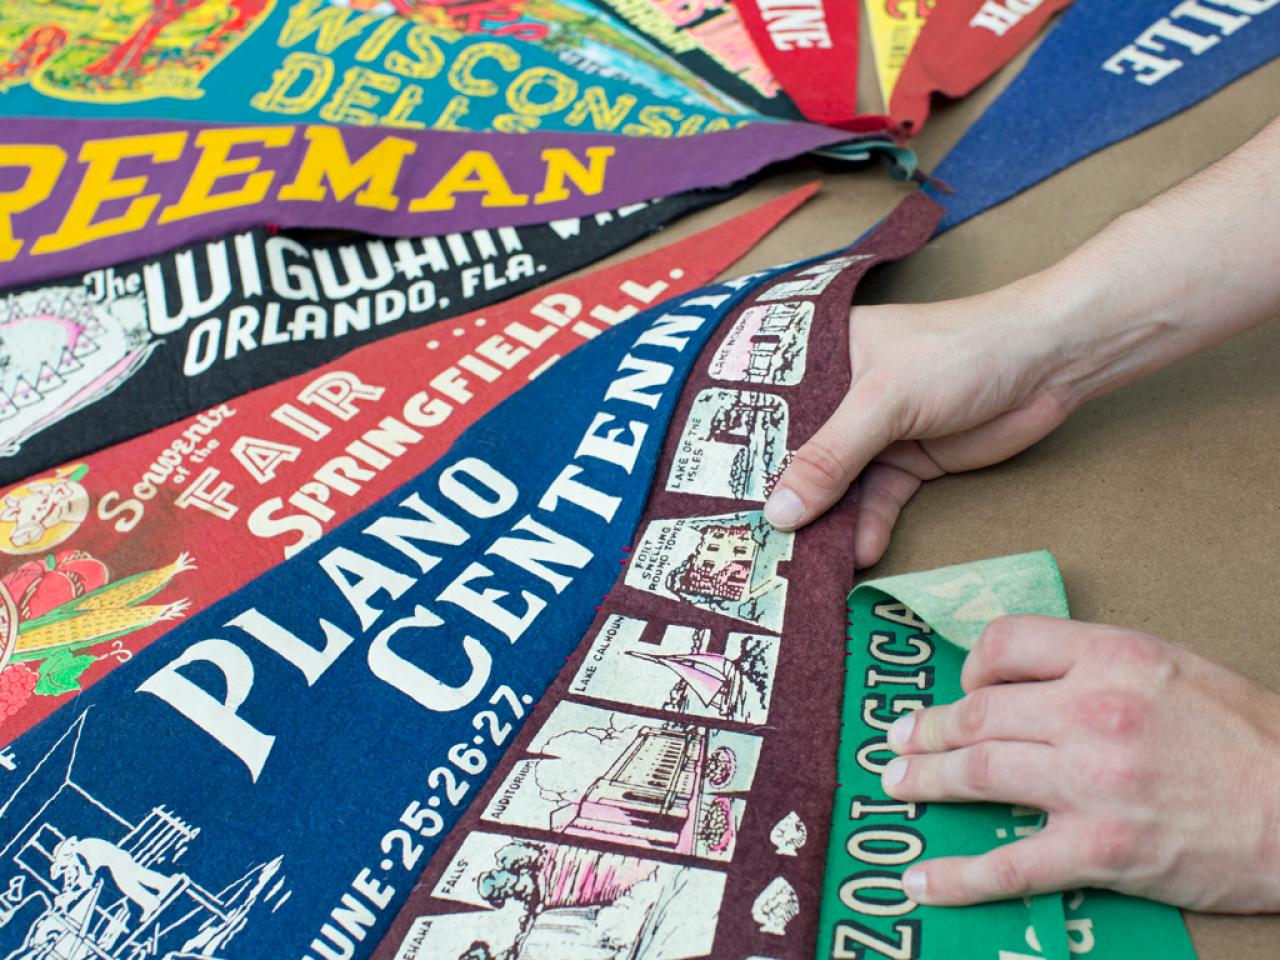
Thread needle then stitch the first two pennants together. Starting from the top thick end of each pair of overlapping pennants, loop threaded needle in and out, creating a whip-stitch. Continue stitching until you are four inches away from the bottom tip, then create a knot and cut thread. This extra unstitched space will allow room for the base of a tree to be placed through the skirt and into the tree stand.
Pennants Sewn Into Tree Skirt
Thread needle then stitch the first two pennants together, starting from the top thick end of each pair of overlapping pennants.
Tree Skirt Made from Pennants
Starting from the top thick end of each pair of overlapping pennants, loop threaded needle in and out, creating a whip-stitch. Continue stitching until you are four inches away from the bottom tip, then create a knot and cut thread.
Repeat Placement and Whip-Stitching
Working your way from one end of the circular formation to the other, repeat steps 2, 3 and 4, periodically checking to ensure stitching is tight, and that a clean, straight line is consistent from each pennant's thick end to the thin end.
Check Overlap
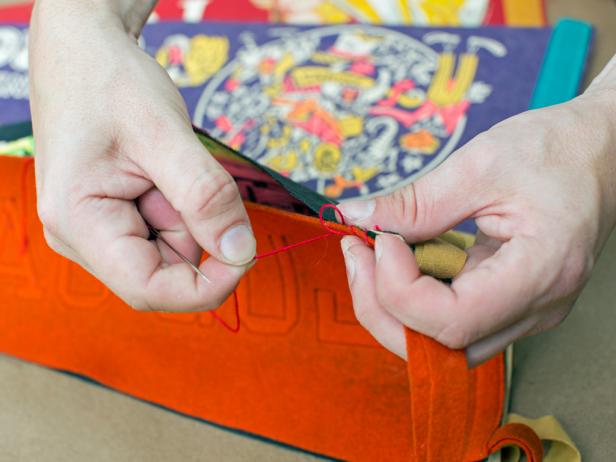
Once every two pennants are stitched together, be sure to check for a straight overlapping edge before beginning the next two pennants (Images 1 and 2). Tip: Leave the edge of the final pennant unstitched to make sliding the skirt under the tree easy. This also allows for easier folding of the tree skirt when not in use.
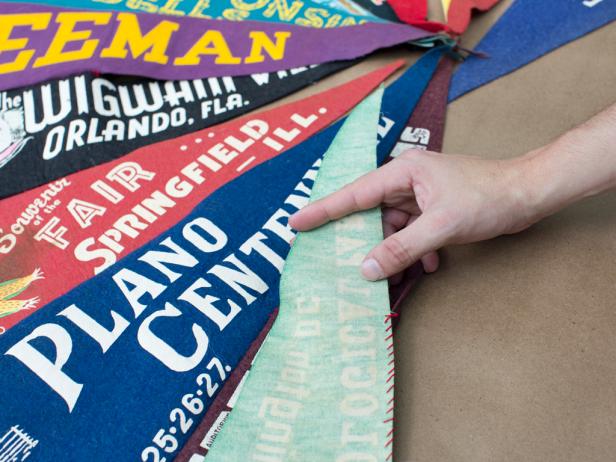

Align and Stitch Pennants for Tree Skirt
Line up pennants and make sure they overlap slightly before stitching them into your tree skirt.
Making a Sports Pennant Christmas Tree Skirt
Once every two pennants are stitched together, be sure to check for a straight overlapping edge before beginning the next two pennants.


