


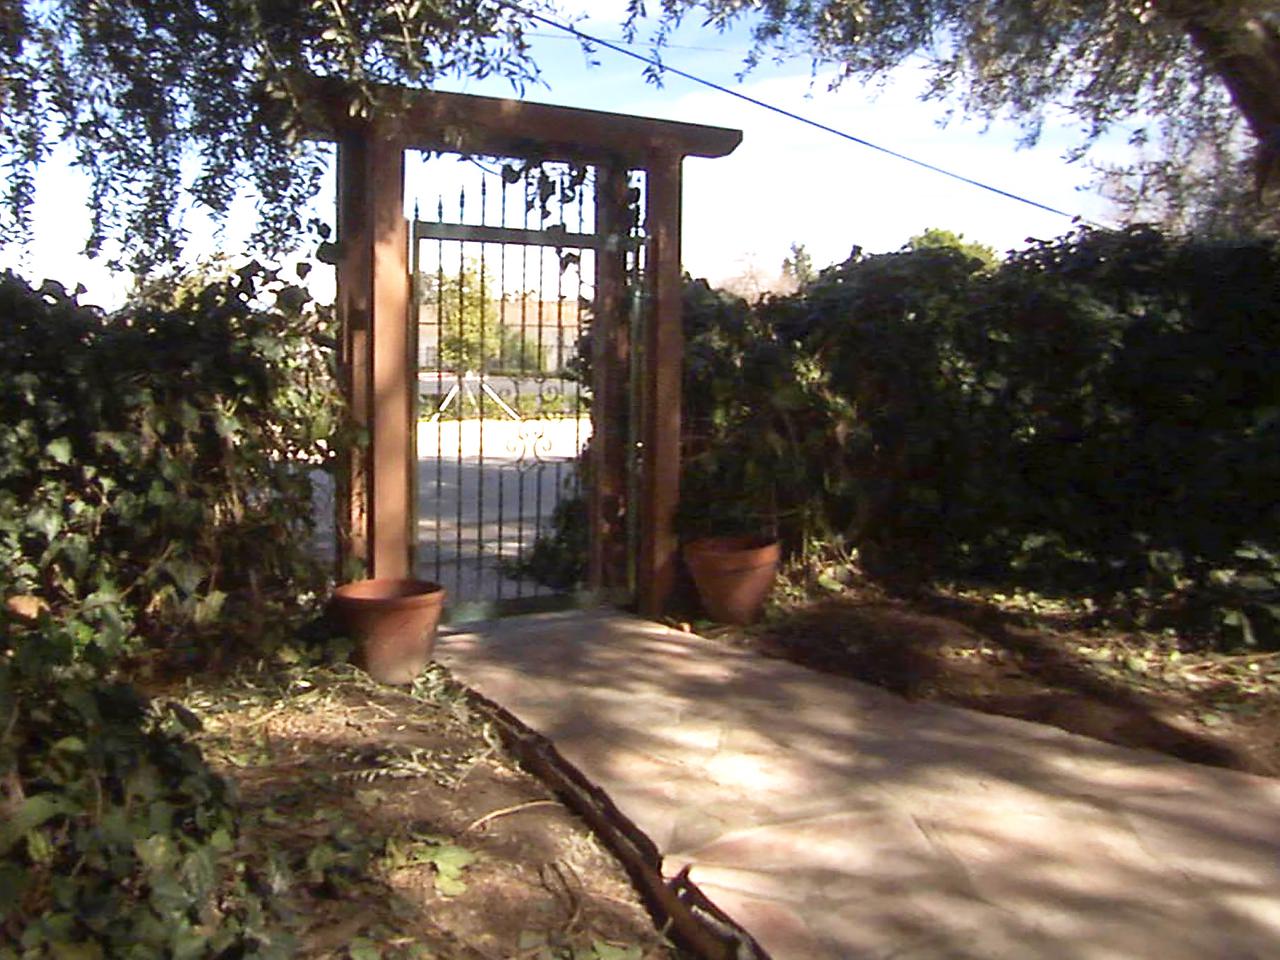
Flagstone Walkway and Trellis Gate

Part of an overgrown hedge is torn down and a new pathway is constructed. Below is a summary of the basic steps, as well as a list of tools and materials used in this project.
Tools and Materials:
basic hand tools: tape measure, square, level, chalk line, hammer
circular saw
reciprocating saw
compressor
framing nailer
saw horses
screw gun
drill
shovels, rakes and post hole digger
welder
plasma cutter
16d, 8d deck screws
eight framing T straps
6x column anchors
four 6”x6”x8’ posts
four 6”x6”x12’ posts
2x4 material for concrete form
20 feet of 1-1/4” square tube metal stock
20 feet of 3” iron flat stock
14 twisted iron pickets
two carts wet concrete from truck or enough quick set concrete for 120 square feet
two bags mortar
grout bags
cement and sand for grout
chemical patina (Japanese brown)

Steps:

1. Clear away the area for your pathway and gate. Make sure the ground is level and clear of stumps and big roots.
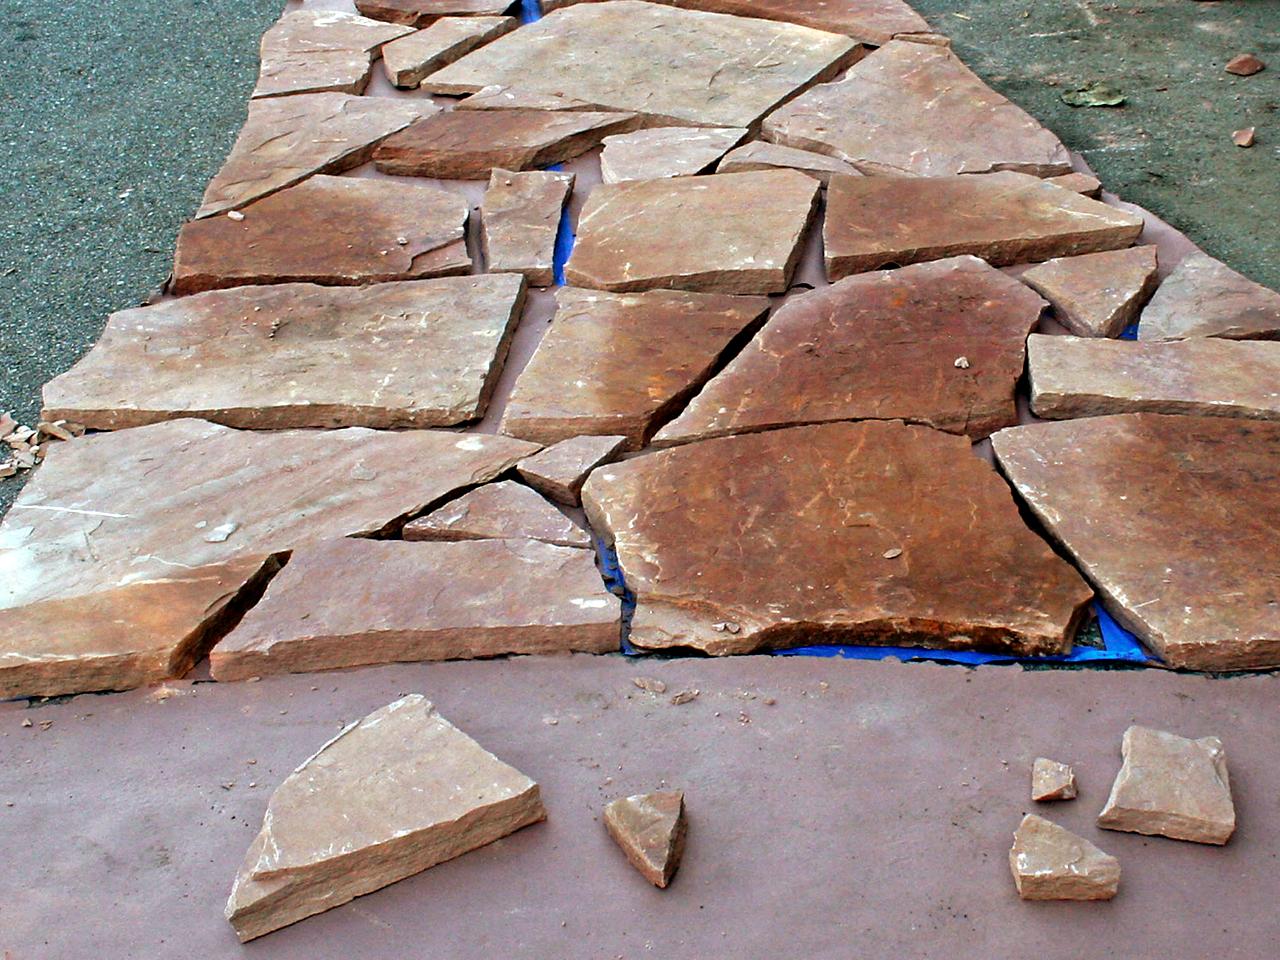
2. Plan the layout of your new path. Design the pattern by laying out each piece of flagstone in an area near where the path will be. This way, you’ll be ready to go when the concrete is poured. Fit all your pieces together and break up the bigger pieces to get the look you want.

3. Dig out the area for the walkway and stake out borders with 2x4 lumber to create the form for the concrete to be poured.

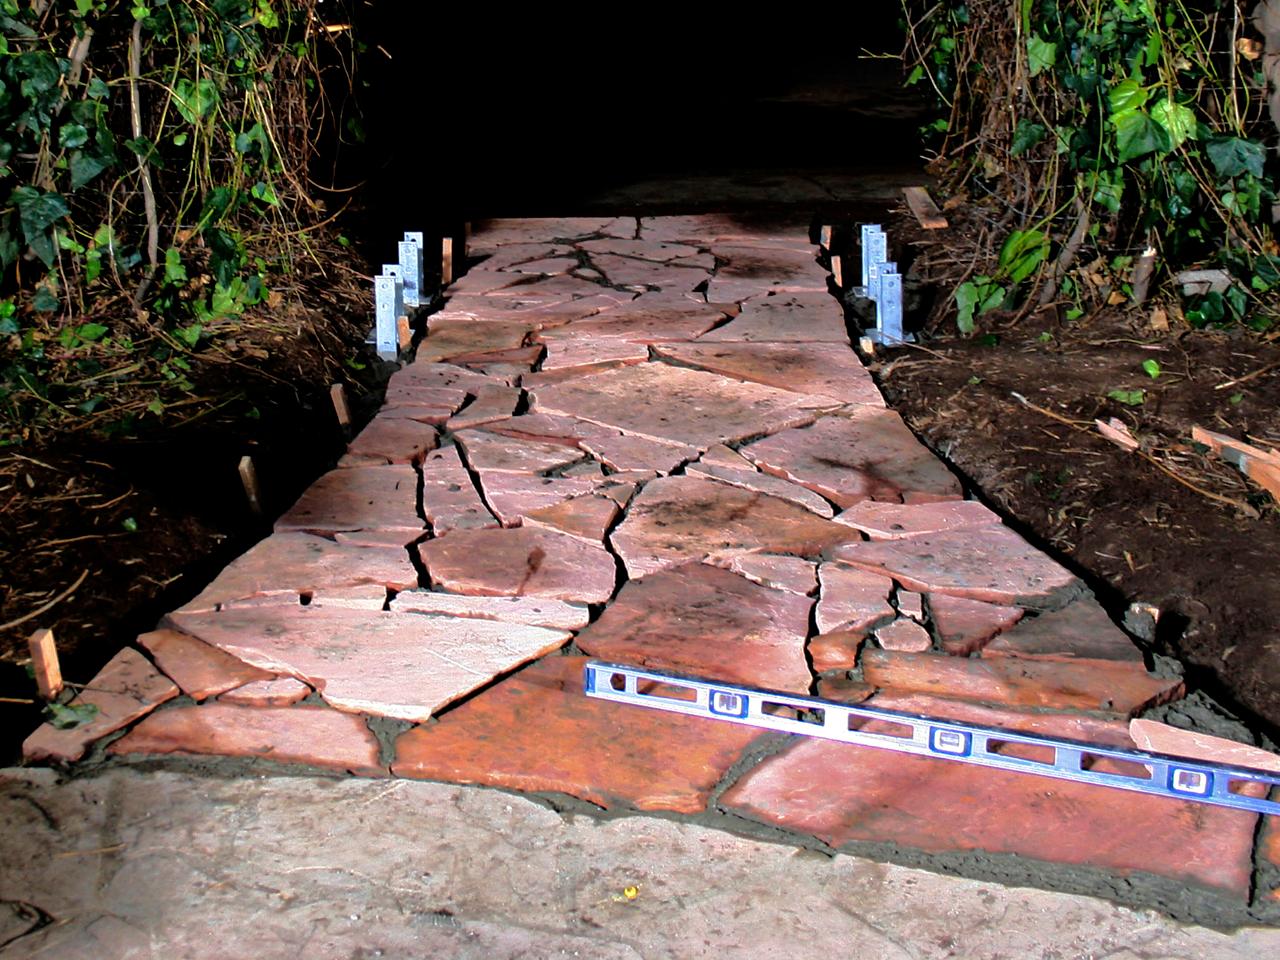
4. Pour concrete from mixing truck or mix dry concrete and pour into the form. Scrape and level the wet concrete so you will have a proper surface for the flagstones to be installed.
5. Start laying the flagstones into the wet cement. Establish corners and perimeter for the stones. Start at one end and work towards the other to maintain a balanced pattern. Press pieces into wet concrete firmly, giving a small twist to set the stone properly and get rid of any air pockets. Make sure your stones are sitting level at the same height. Allow the flagstones to set up overnight in concrete.
6. Set post anchors at predetermined spots for trellis columns.
7. Determine the size and layout of the new metal gate. Begin with the edge pieces of the gate and work inward to establish your pattern using various pieces of metal stock. Use scrap wood blocks screwed tight to each side to hold the pieces in place.
8. Starting with the outside frame of the gate, begin welding the pieces together. Make sure to stop along the way and check that your pieces are square. Weld interior design pieces together. Once all seams are welded, flip the gate over and weld the opposite side seams.
9. Using a grinder, grind down and smooth all welds and seams on your gate.
10. Once the flagstones have cured properly in the concrete, grout the seams using grout bags and cement grout mix.
11. Build the trellis for the gate. Pre-drill four 6’ x 6’ column posts for the through-bolts. Set the posts into the post anchors in cement. Feed the through-bolts into the anchors and tighten. Nail two 6’ x 6’ top beams to the posts using a nailer. Make sure to check that they are level and square. Pre-drill the uprights and top beams for the through-bolts for the support straps. Tighten all bolts.
12. Mount the gate, continually checking for levelness and make sure the gate swings free and clear of obstructions.
13. To finish the gate, pick out the desired patina effect — we used a Japanese brown patina. Spray on chemical patina and let it dry completely. Spray on a clear coat to seal the steal.


