


How to Make Shibori-Dyed Christmas Ornaments
Learn how to add a touch of celestial indigo to your holiday decor.

Sam Zachrich

Shibori is a Japanese technique of dyeing fabric with indigo. Typically, the cloth is folded, twisted and bound before it is submerged in the dye. While not everyone can get their hands on actual indigo, fear not, its simple to achieve similar results with regular fabric dye in a dark-indigo hue. Whatever is used to bind or twist the fabric will resist the dye and create a pattern. There are endless numbers of patterns and designs that can be created with this technique.

Sam Zachrich
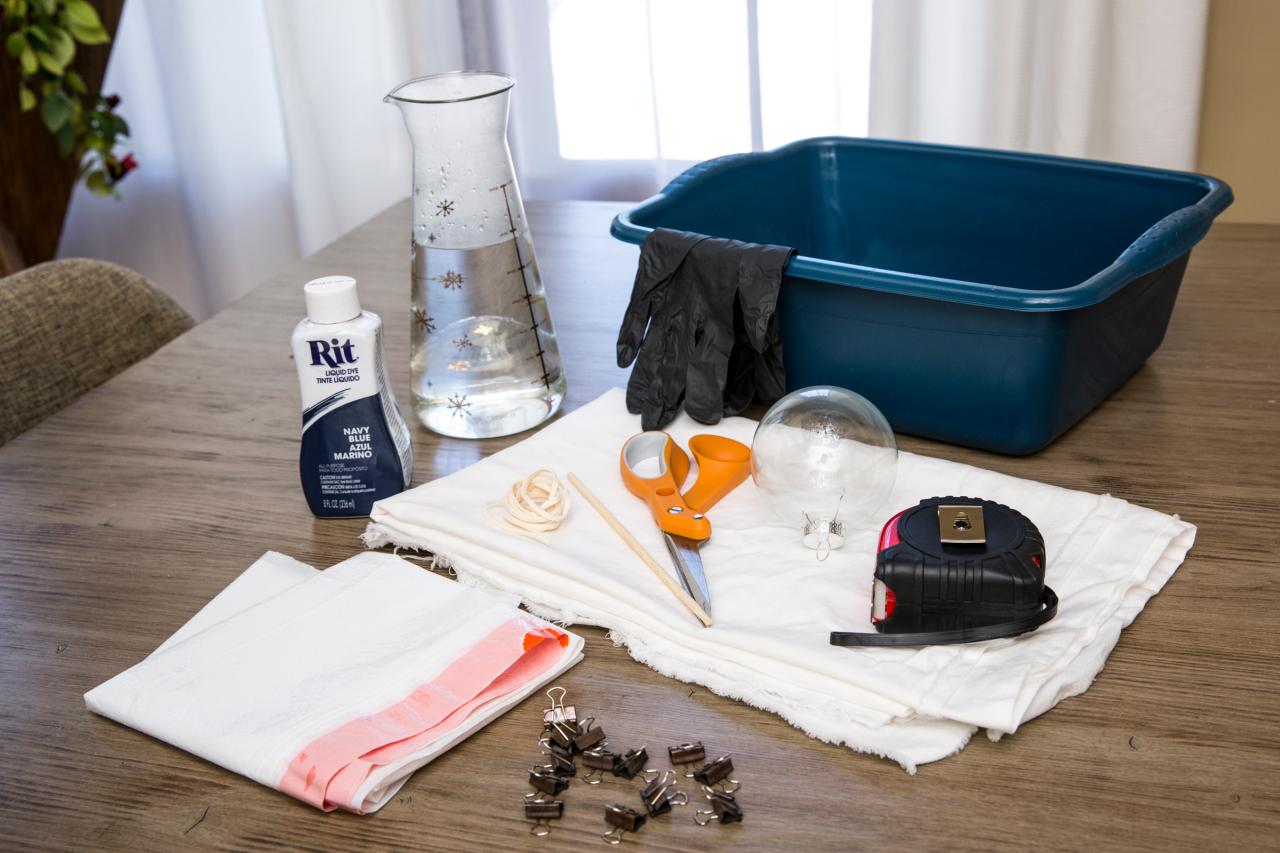
Tools and Materials:
- rubber gloves
- plastic container
- scissors
- chopstick or other item to stir
- tape measure
- trash bag
- natural white fabric (cotton, linen or silk)
- round ornament
- fabric dye
- suede ribbon
- binder clips
- hot water

Sam Zachrich
Step 1: Cut Fabric to Size
Before beginning this project, wash and dry the fabric. This will remove any coating or dust that might be on it from the fabric store. Cut fabric into a square, 12” x 12” is the perfect size to go around larger round ornaments, with a bit of extra. You can test the fabric shape by wrapping it around your ornament before you begin – if the extra fabric feels like too much, you can also trim it down to a 10 ”x 10” or 8” x 8” cut.
Sam Zachrich

Sam Zachrich
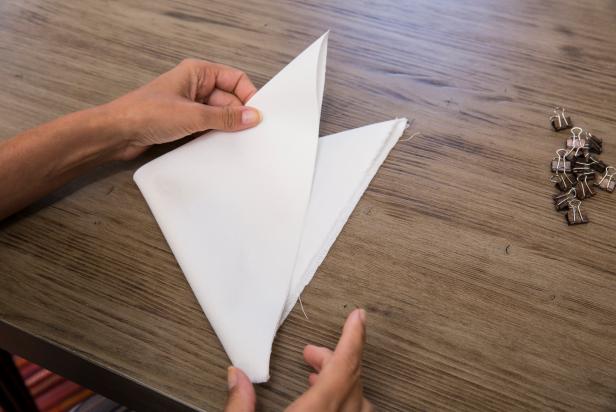
Step 2: Fold Fabric
Place fabric flat on a table. Fold one corner across to the opposite corner creating a large triangle. Then take the opposite two ends and fold into a smaller triangle. Repeat this folding two more times. Try to be as precise as possible, so that your pattern will be as symmetrical as it can be.

Sam Zachrich

Sam Zachrich
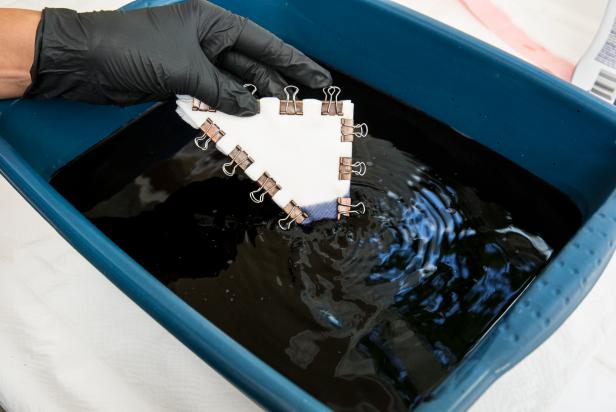
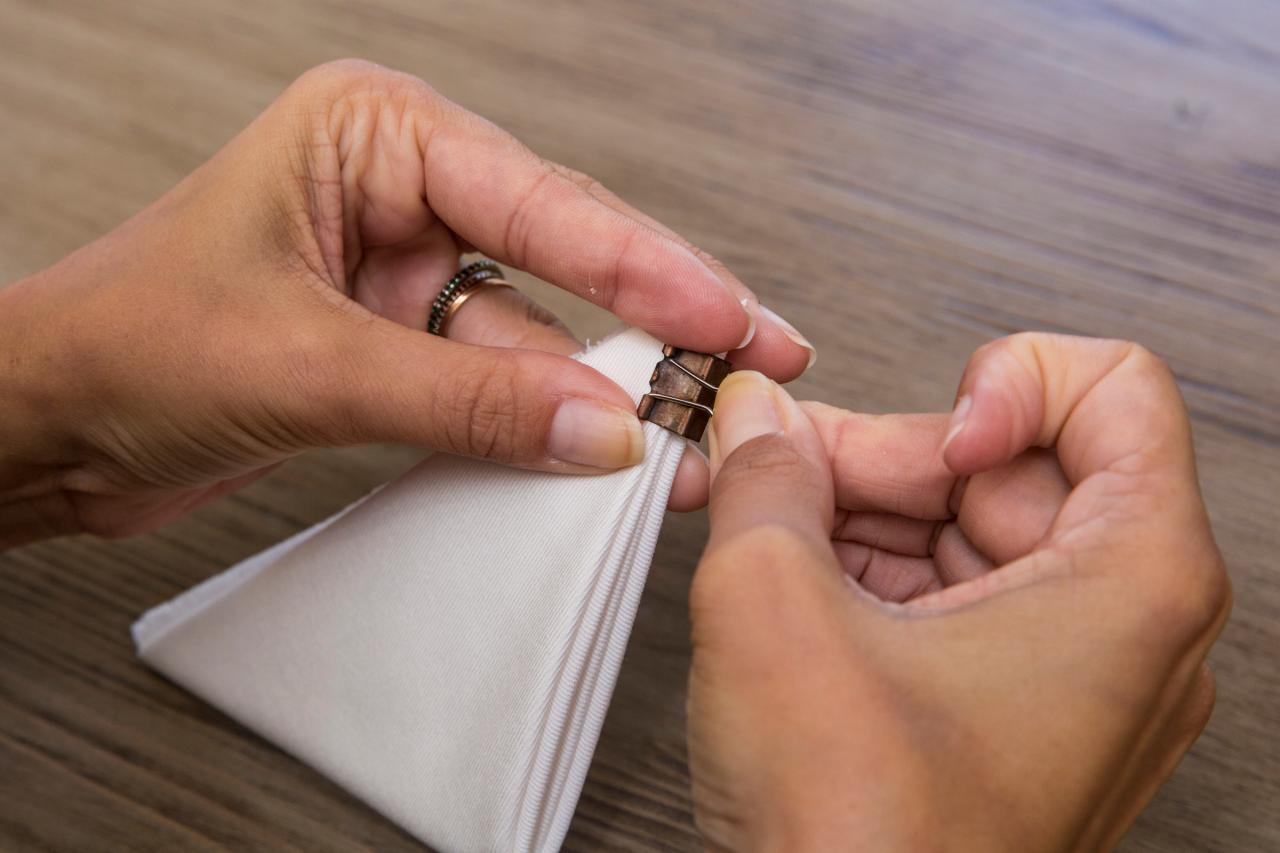
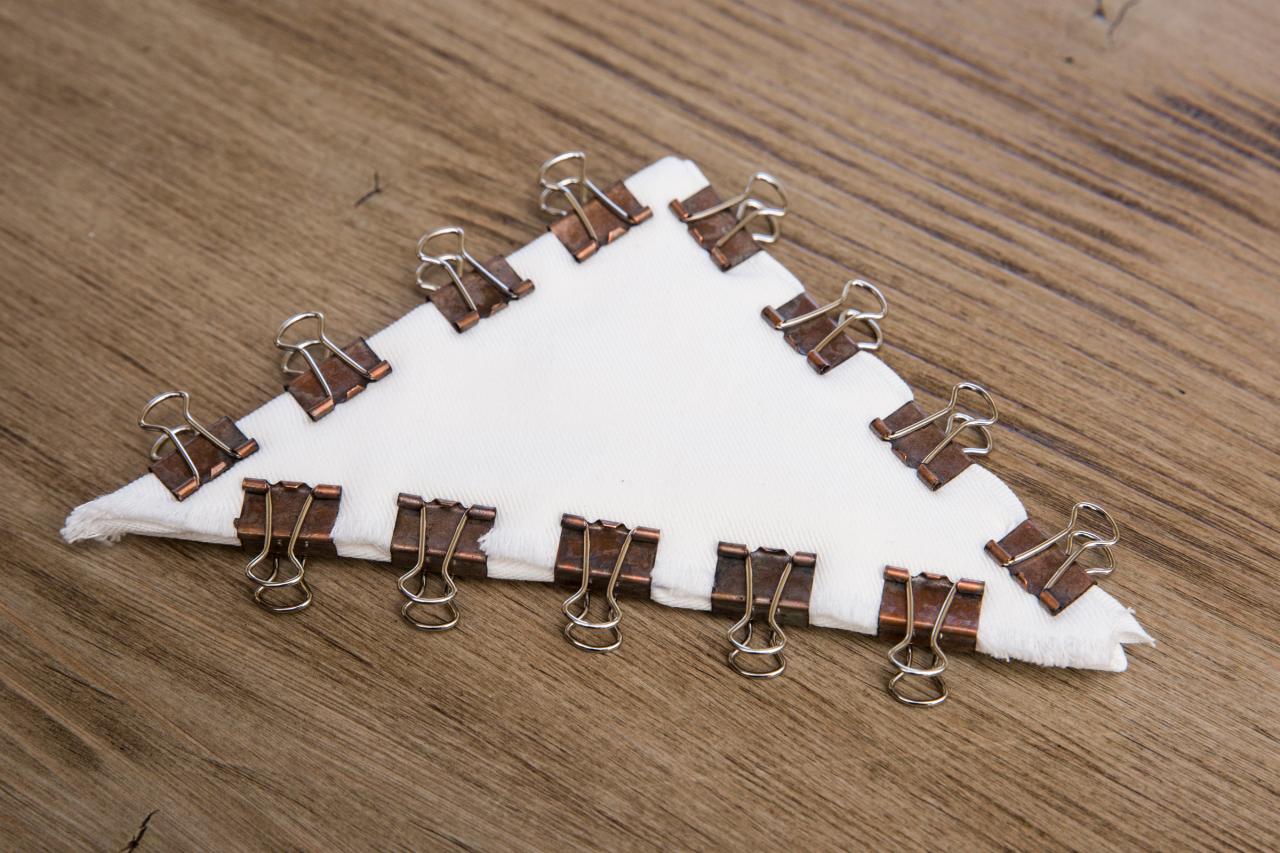
Step 3: Create Relief Pattern
Starting at one corner, place binder clips around the edges of the fabric triangle. Space them out an equal distance from each other. This example uses mini clips, but any size will do. Remember, where the clip is placed will resist fabric and remain white, so the size of your binder clip will dictate the outcome of the pattern.

Sam Zachrich

Sam Zachrich
Step 4: Mix Solution
When the fabric is bound and ready, it’s time to mix the dye. There are powder indigo kits online that have a few more steps and processes, using simple hot water fabric dye in navy blue can also achieve the same look.
Place the plastic container on an unopened trash bag or a piece of plastic in case of any spills and fill the plastic container with hot water. Be sure to wear rubber gloves so that your fingers do not turn blue. Then slowly pour the dye into the water and stir with a chopstick. Whatever is used to stir the fabric will turn a bit blue, so choose something like a chopstick or plastic spoon that can be thrown away after.
Sam Zachrich
Step 5: Place Fabric in Dye
When the dye is mixed, fully submerge the fabric triangle. You may have to hold it down with the chopstick until air bubbles leave and it settles to the bottom. Leave the fabric in the dye for at least 20 minutes. The longer the fabric is left in the dye the darker the color will be. For the darkest color blue, leave the fabric in the dye overnight. You can submerge multiple pieces of bound fabric at the same time, as long as they can sink fully.
Sam Zachrich
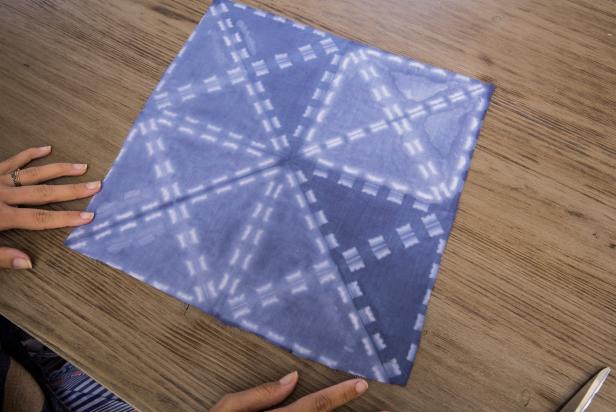
Step 6: Lay Flat to Dry
Remove the fabric from the dye mixture and take off the binder clips. They can be washed with soap and used again. Lay the fabric out flat to dry on a sheet of plastic or an unopened trash bag.

Sam Zachrich
Sam Zachrich
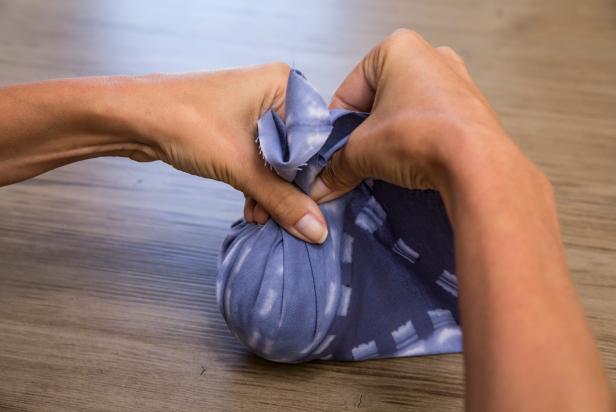
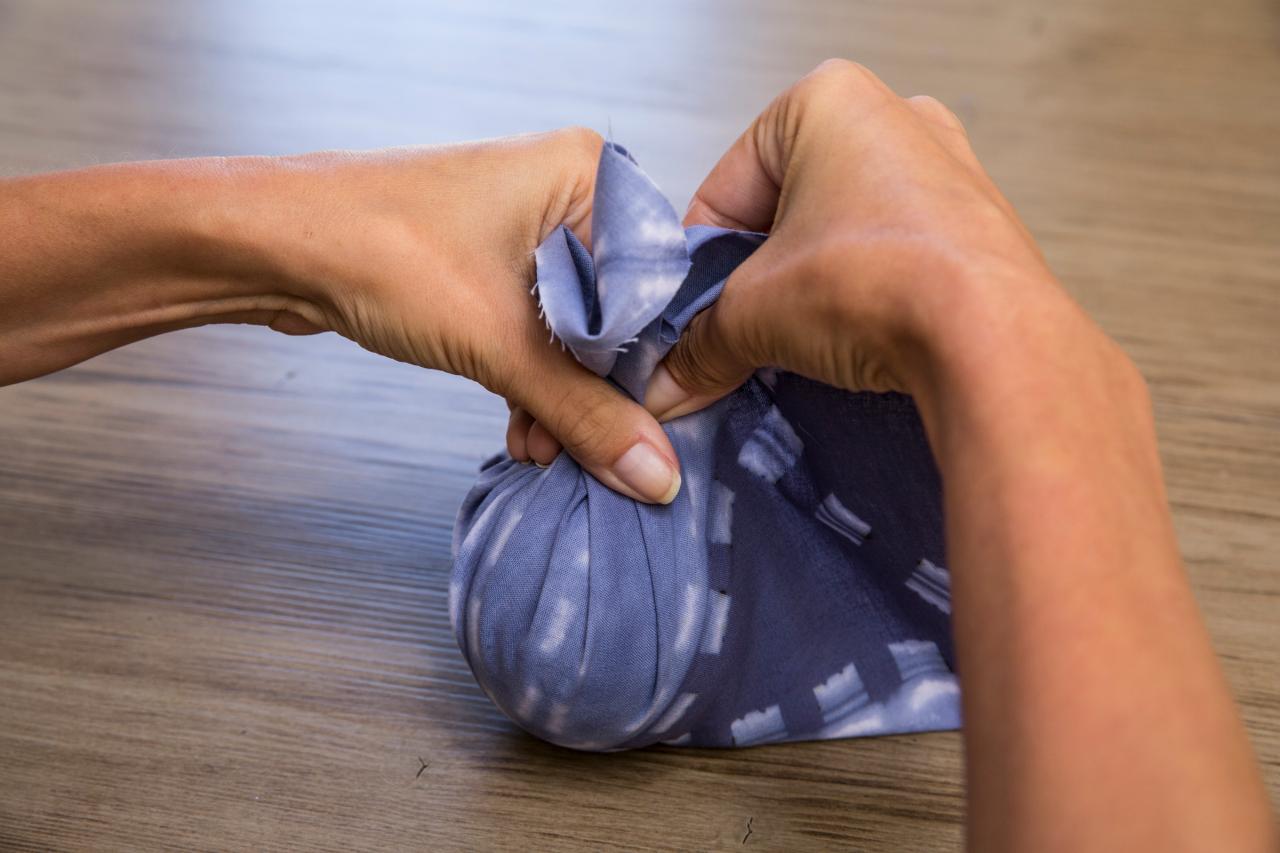
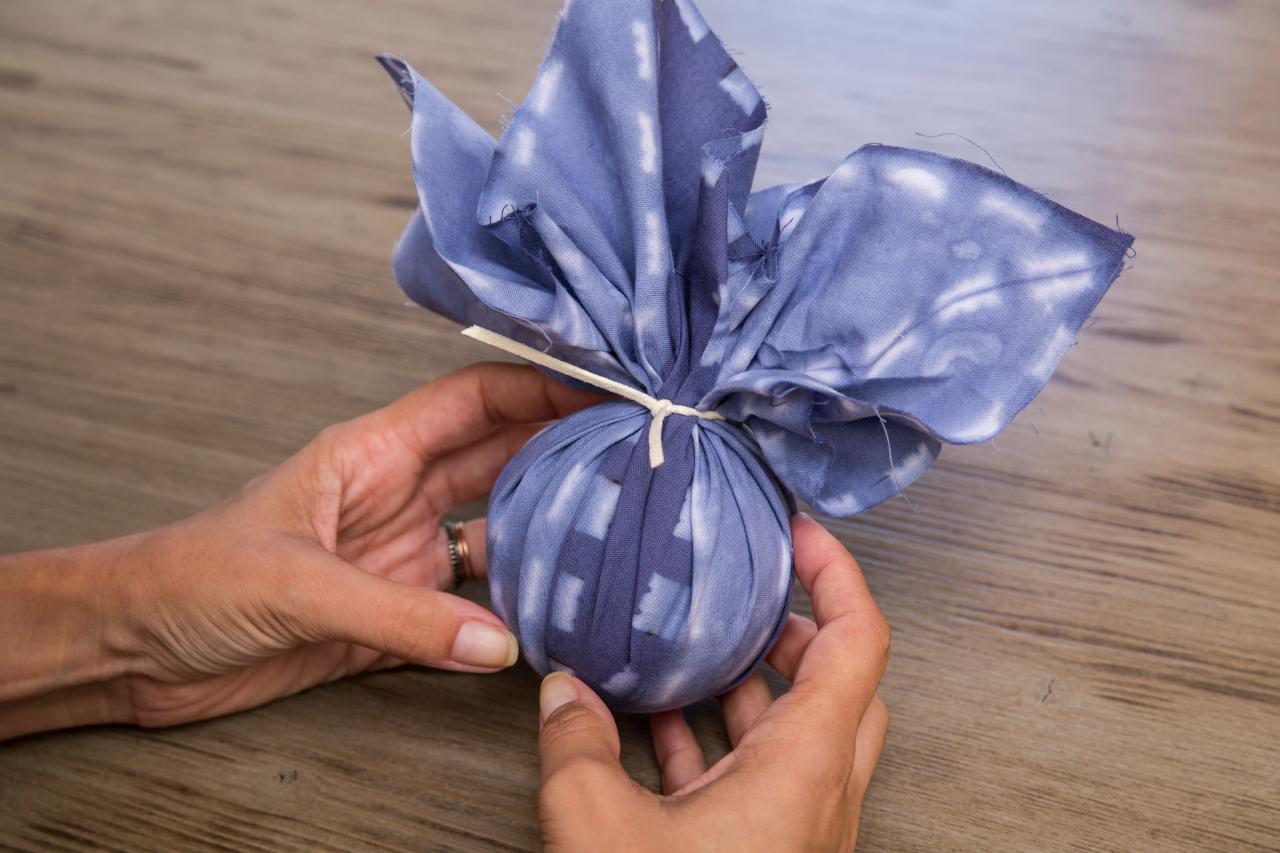
Step 7: Wrap Ornament
When the fabric has air dried, it can be wrapped around the ornament. Place the ornament in the middle of the piece of fabric and gather the fabric up and around the ornament in sections, bunching at the top. Place the fabric so your favorite parts of the pattern are visible.

Sam Zachrich

Sam Zachrich
Step 8: Tie It Closed
Wrap the suede ribbon around the fabric at the top and tie in place. Fold the top of the fabric back at the top and use another piece of ribbon and tie a loop to hang the ornament on the tree. See more of this constellation-theme Christmas tree >>


