


3 Spooky Halloween Mason Jar Crafts
Dust off those Mason jars for these spooky-fun craft projects.


Mason jars come in handy for our small storage needs, but they can also make for some fun craft projects this Halloween! If you're looking to spook up your favorite spaces, break out the jars to try these quick and inexpensive decorations.
Black Pumpkin Jar

What You'll Need
- black marker
- scissors
- black flat spray paint
- battery-operated tealight
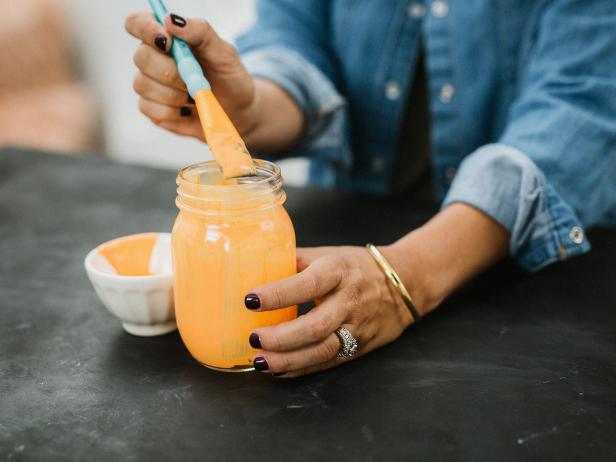
Step 1: Paint the Inside of the Jar

Carefully coat the inside of the Mason jar with orange stained glass paint. Let the jar dry completely.
Step 2: Draw + Cut a Spooky Face

Draw a spooky face on adhesive vinyl with a black marker, and cut the shapes out with scissors.
Step 3: Attach Cutouts

Remove the backing from the vinyl, and place the cutouts on one side of the Mason jar, sticky side down.
Step 4: Spray Paint Jar

Replace the lid, and spray paint the entire jar black.
Step 5: Remove Vinyl


After the spray paint dries, use scissors or your hands to peel the vinyl off. Place a battery-operated tealight inside.

Jar Lanterns

What You'll Need
Step 1: Paint the Inside of Mason Jar
Carefully coat the inside of the Mason jar with stained glass paint. Let the jar dry completely.
Step 2: Attach Handle
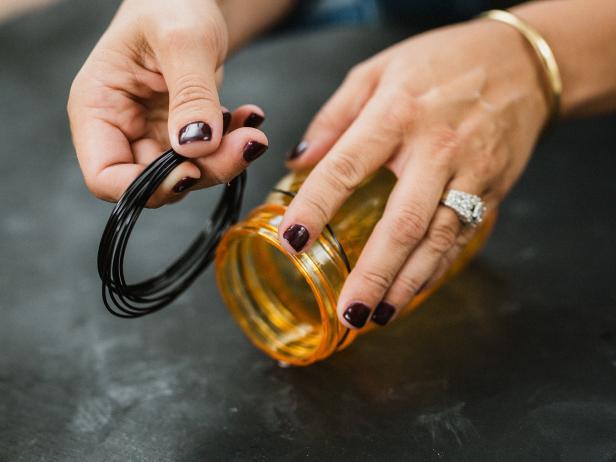
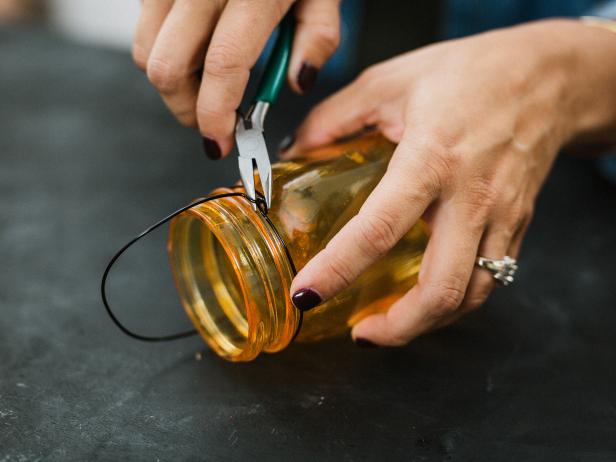
Wrap the black wire around the lid. As you wrap the wire, twist one end up using the pliers to secure. Use pliers to cut the other end of the wire, and loop it under the wire. Twist the end up to secure the handle.
Step 3: Soak Cheesecloth in Black Dye
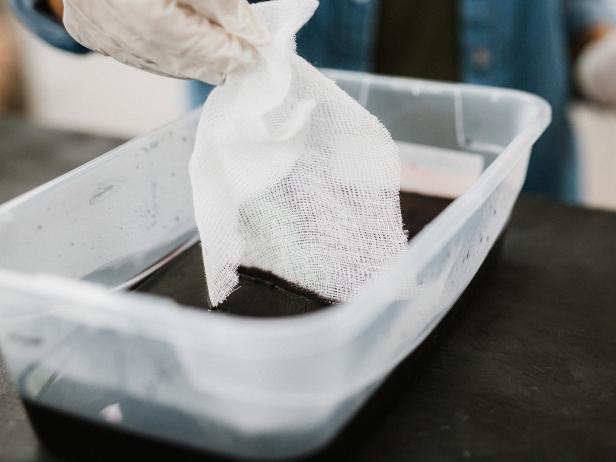
Wear gloves, and place a piece of cheesecloth in a container of black dye. Let the cloth soak for 10 minutes.
Step 4: Tatter Cheesecloth
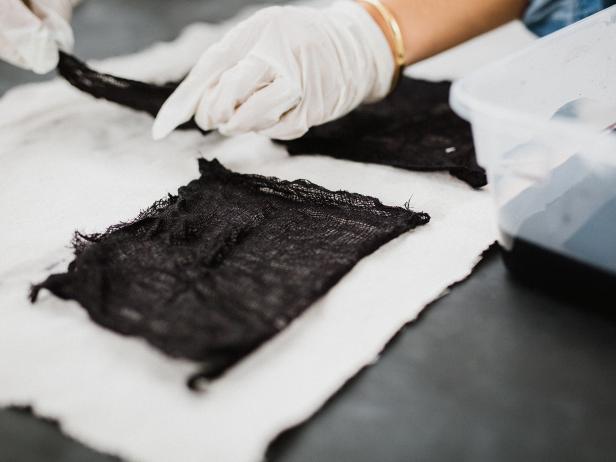
Scoop the cloth out with a spoon and wring out excess dye into the container. Let cloth dry on a paper towel. Once dry, cut into squares and tatter the ends.
Step 5: Add Tealight

Place a small battery-operated tealight inside the jar, then place a cheesecloth on top.

Zombie Jars

What You'll Need
- laminated photo
- double-sided tape
- doll hair
- scissors
- hot glue gun and sticks
Step 1: Attach Doll Hair

With double-sided tape, press strands of doll hair along the hairline of the person in the photo. Tape thicker strands towards the top of the photo and fold tape over to the back. Add moss pieces to the hair using a hot glue gun.
Step 2: Add Photo + Extra Moss

Fold the photo so it easily slides into a large Mason jar. Tuck in any loose hairs and add additional pieces of moss.
Step 3: Add Water to Jar

Pour water into the jar until it reaches about an inch below the brim.
Step 4: Add Two Drops of Food Coloring

Add two drops of green food coloring, and tightly twist the lid on the jar. Gently shake until the color spreads.


