


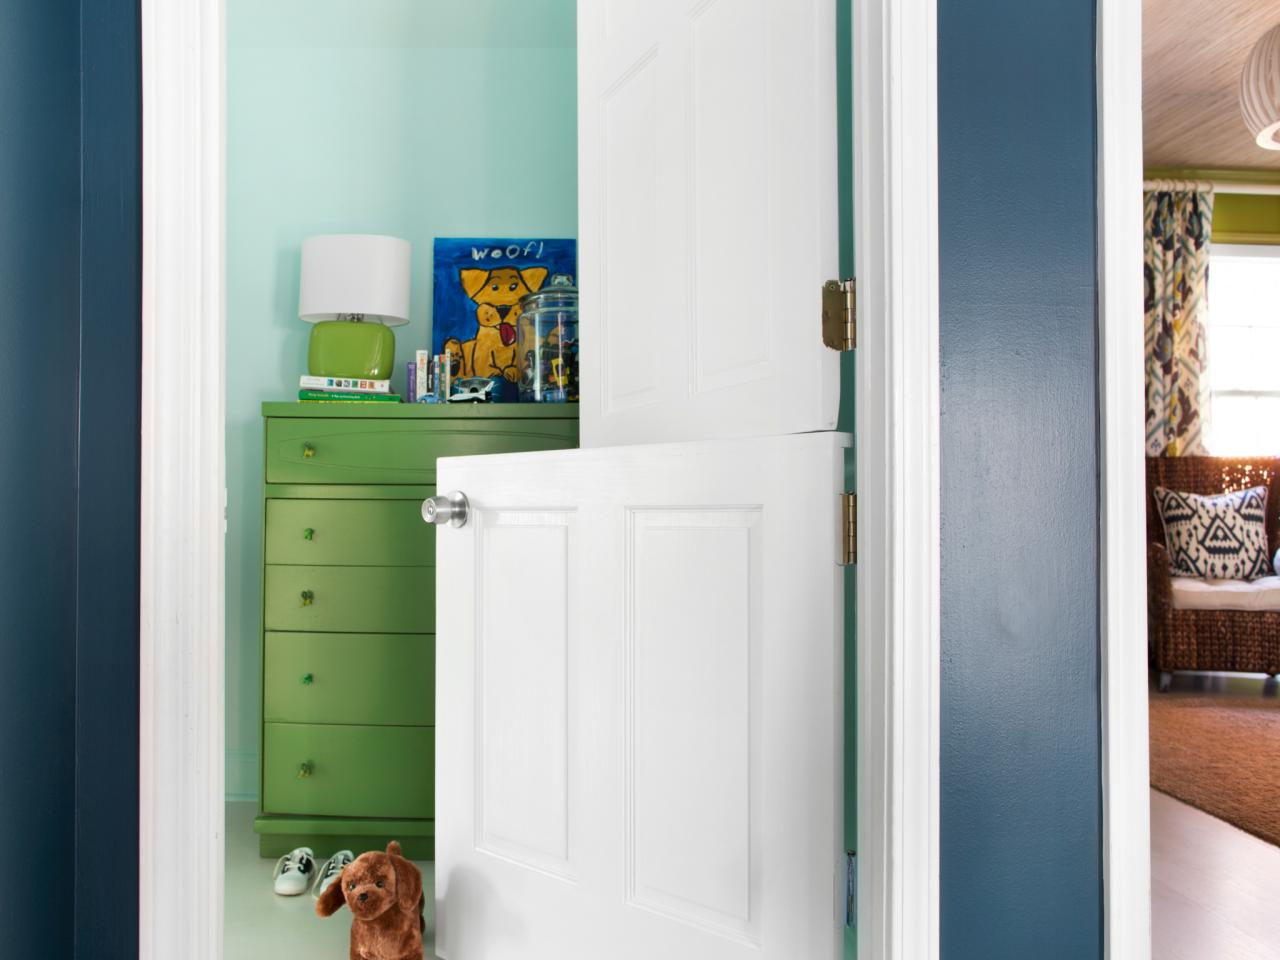
How to Make a DIY Interior Dutch Door


Dutch doors, also called double-hung doors or half doors, are divided in half horizontally so the bottom half can remain shut while the top half opens. Used in early New England as a way to let light in while keeping children close, the style works equally well for a modern-day kids' room. Modify an existing door to keep an eye on your child while they play or sleep safely in an enclosed space.
Materials Needed:
- wooden interior door
- 1 coordinating interior door hinge
- chisel
- measuring tape
- pencil
- woodworking router
- woodworking clamps
- circular saw
- orbital sander
- 6' long 1x6" pine plank
- wood glue
- nail gun
- nails
- drill
- hammer
- screwdriver
- screws
- quart of semigloss latex paint
- paintbrush or paint roller
- paint pan
- drop cloth
- damp cloth
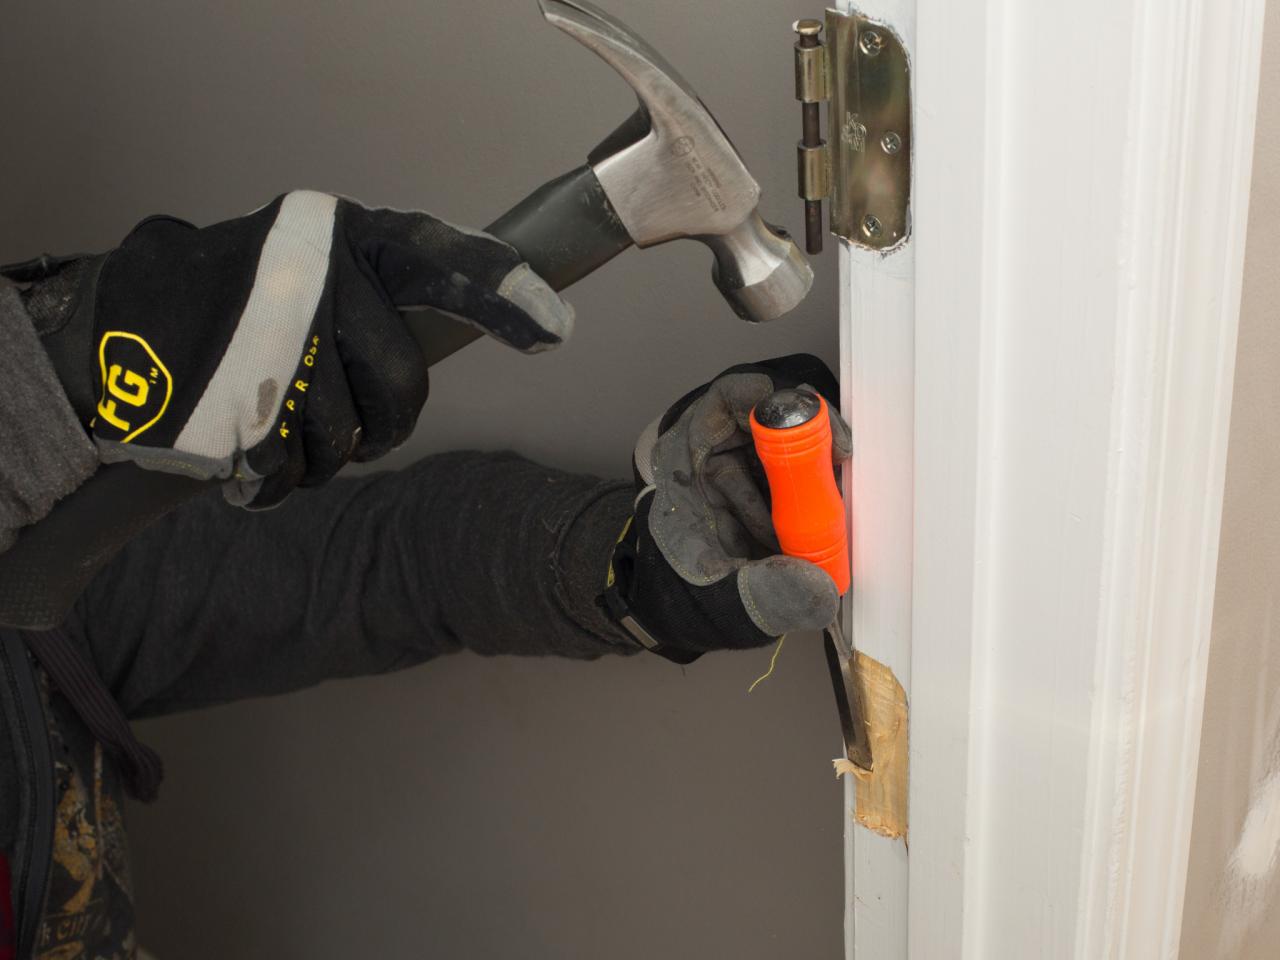
Remove Door
Loosen door from door frame by inserting screwdriver up through bottom of hinge, tapping each bolt with hammer until it comes loose. Remove bolts, then remove door.

Mark Door Frame for Additional Hinge
Dutch doors require four hinges to ensure proper, safe function: two to support the top panel and two to support the bottom panel. Since standard interior doors come with three hinges, only one additional hinge needs to be added. Once the original door is removed, place the new hinge up against door frame roughly 30” above the floor.
Tip: A great height for a Dutch door bottom panel to sit is 4’ above the floor. In order for the bottom panel to stand 4’ tall, the extra hinge should be installed with the top of the hinge standing 36” above the floor.

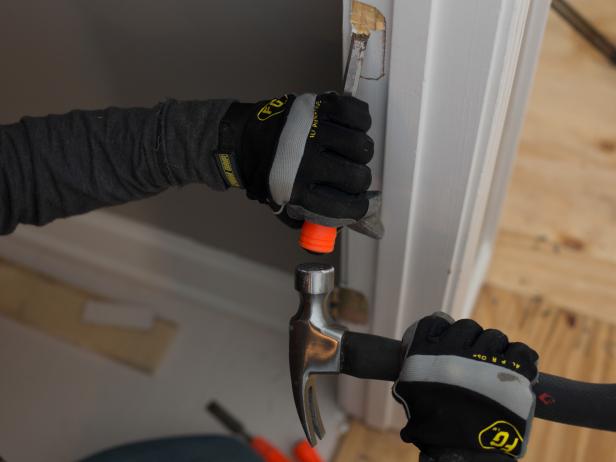
Chisel Door Frame
In order for the additional hinge to be properly installed, the door frame will need to be chiseled, allowing the hinge to sit flush with the surface of the door frame. Start with the chisel pointed downward along marked lines.
Tip: As you create an indentation in the wood surface, change the position of the chisel upward until the notched-out surface for hinge is complete.


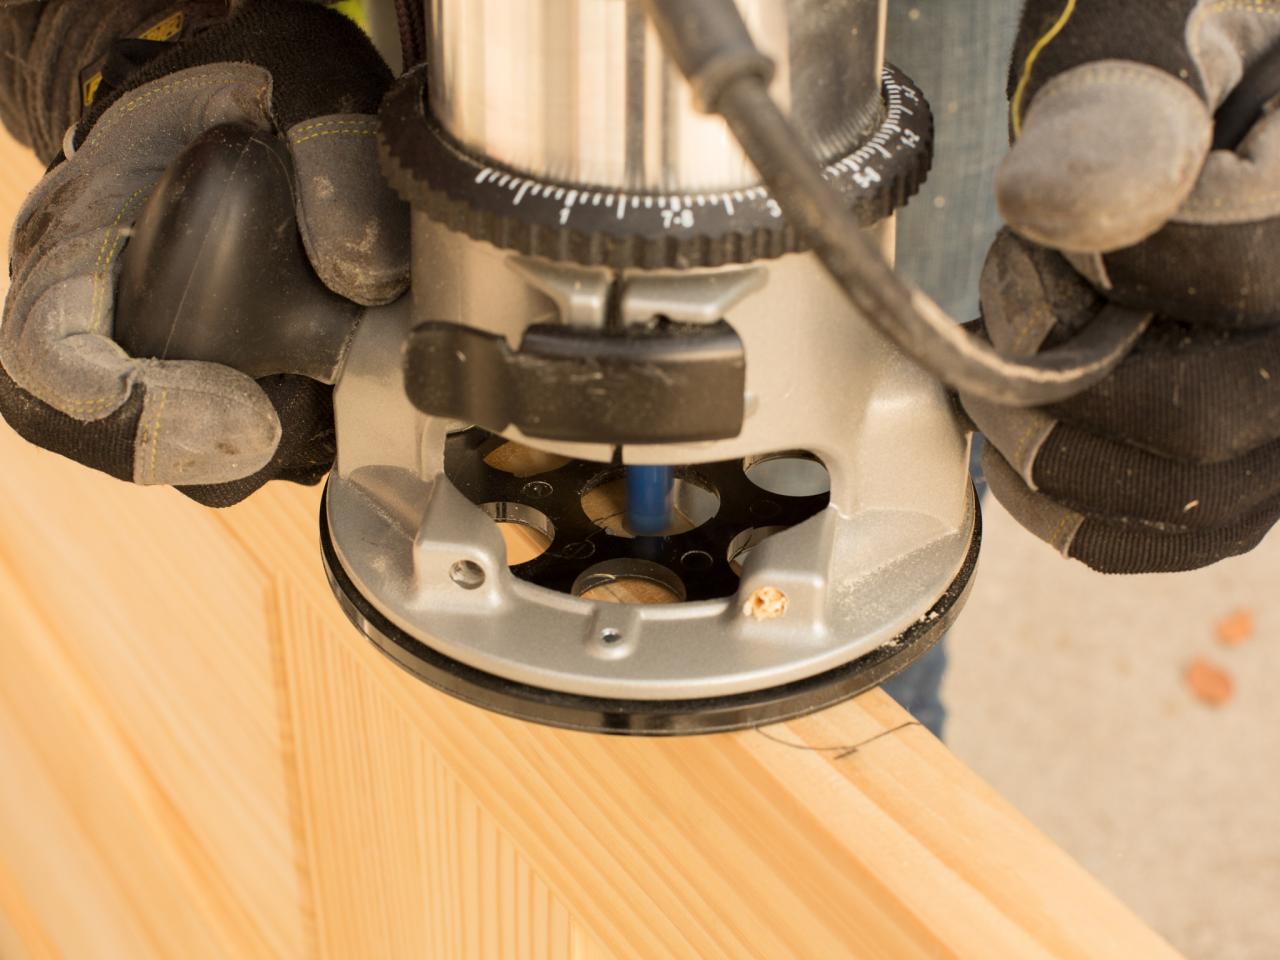
Use Router to Notch Fitting Into Door
Trace outline of hinge directly onto the side of the wooden door with pencil. Use woodworking router to notch out space for hinge.

Ensure Additional Hinge Fits
Do a dry fit with wooden door, ensuring the additional hinge fits perfectly into the chiseled door frame and the notched side of the door. If it fits perfectly, take the door back down and prepare to cut it in half. Should the hinge not fit perfectly, additional chiseling may need to be done to the frame and/or the side of the door.

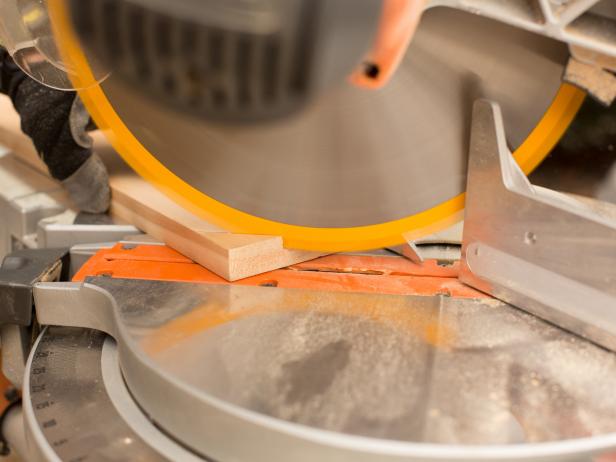
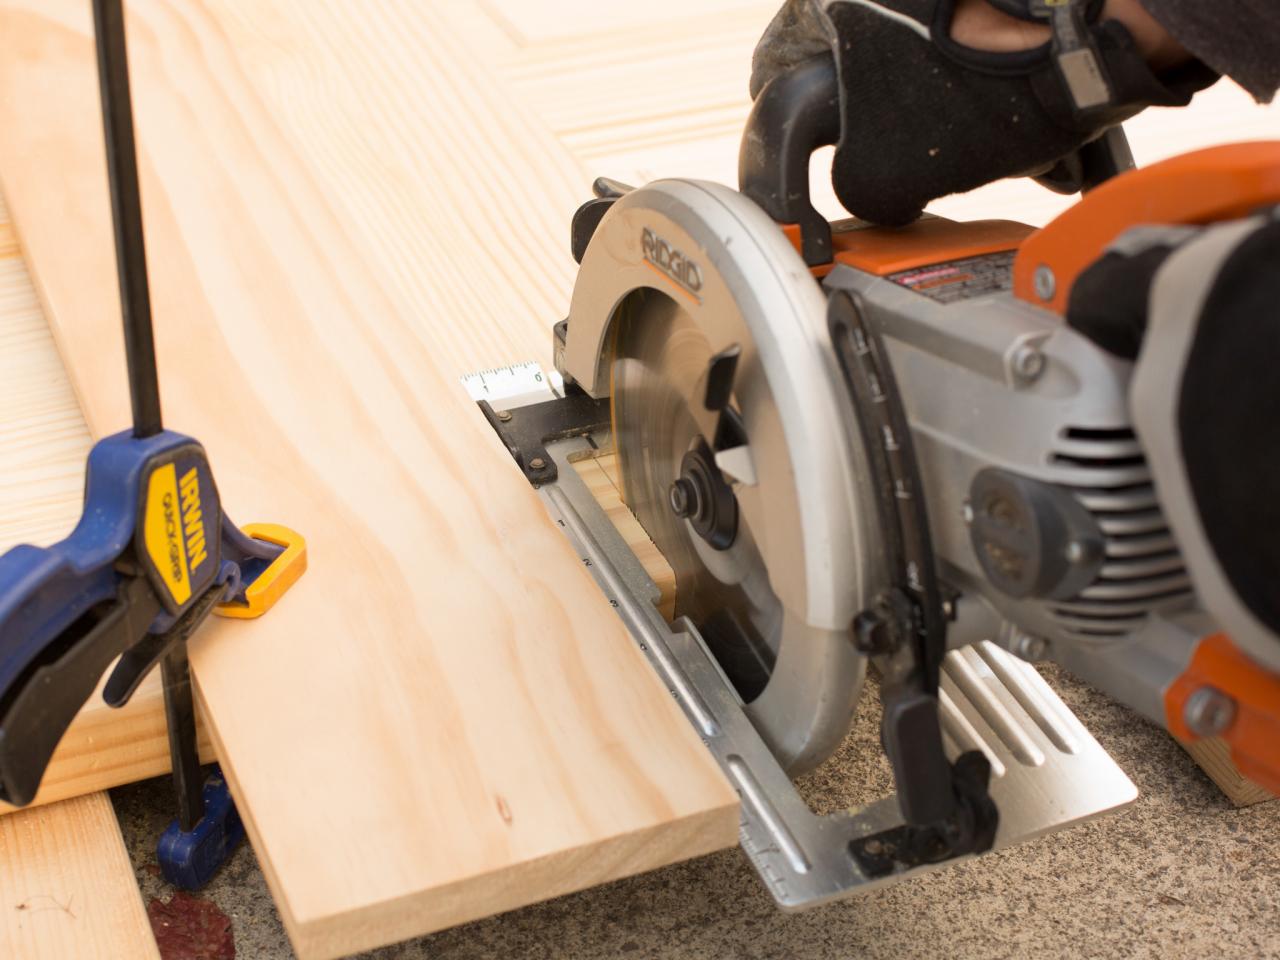
Cut Wooden Door in Half
Securely mark cut point of door with pine plank fastened tightly to the door with woodworking clamps, then use circular saw to cut the solid door into two panels: a top panel and a bottom panel.

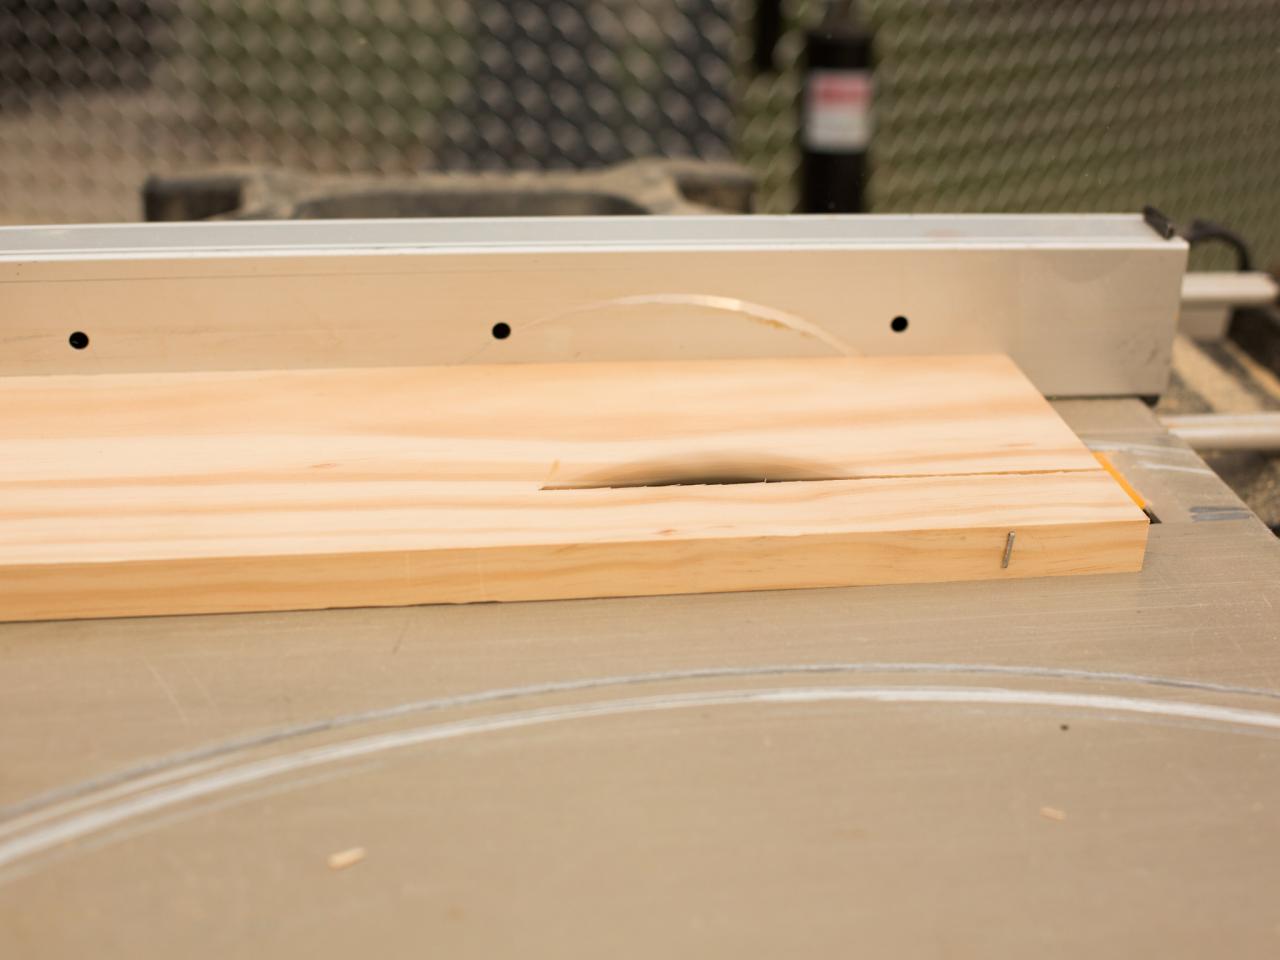
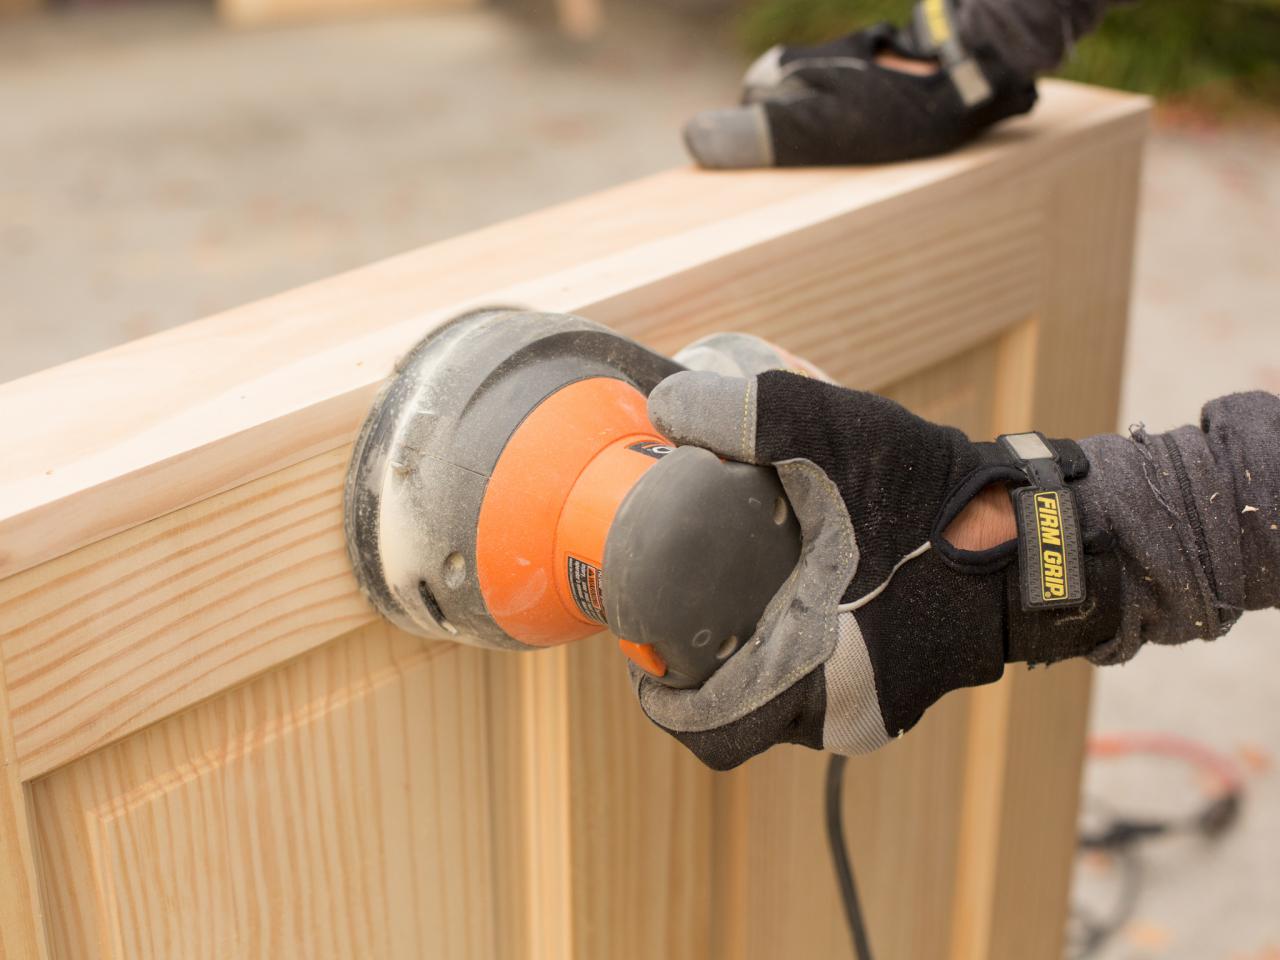
Sand Cut Edges
Use orbital sander to smooth out the rough edges made by the circular saw.

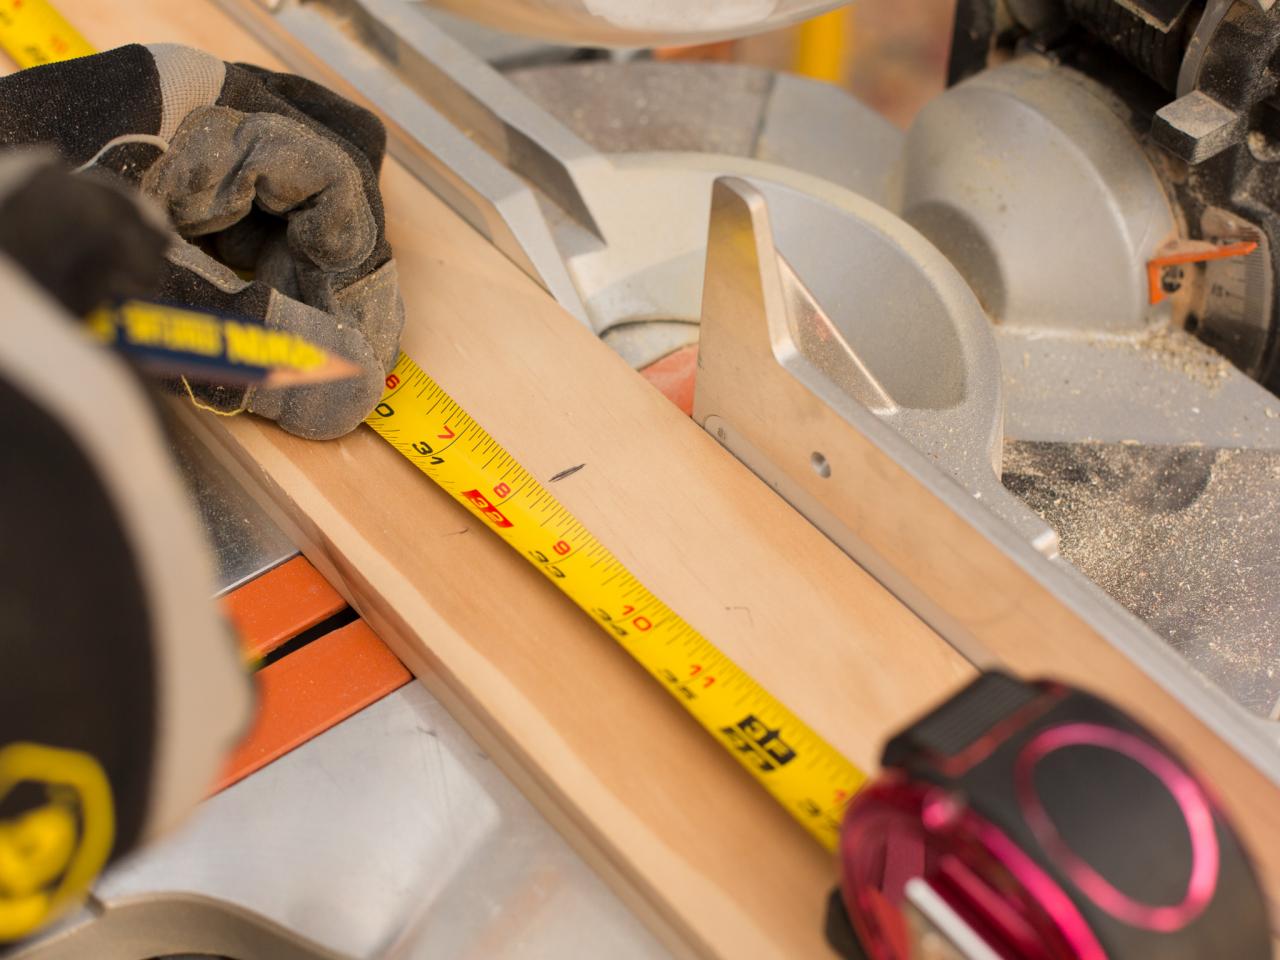
Cut Bottom Panel Ledge
Create a ledge along the top of the bottom panel from the 6’ long 1X6” plank. First, cut the width of the plank down approximately 1", slimming it down to a more practical width for opening and closing the door with ease. Next, measure, mark and cut ledge, mitering two corners at a 45 degree angle.
Tip: The angled cuts along the edges will keep the ledge from interfering with the opening and closing of the door.


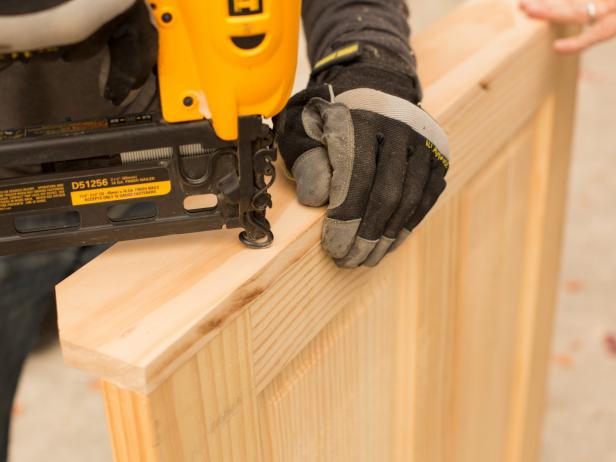
Attach Ledge to Bottom Panel
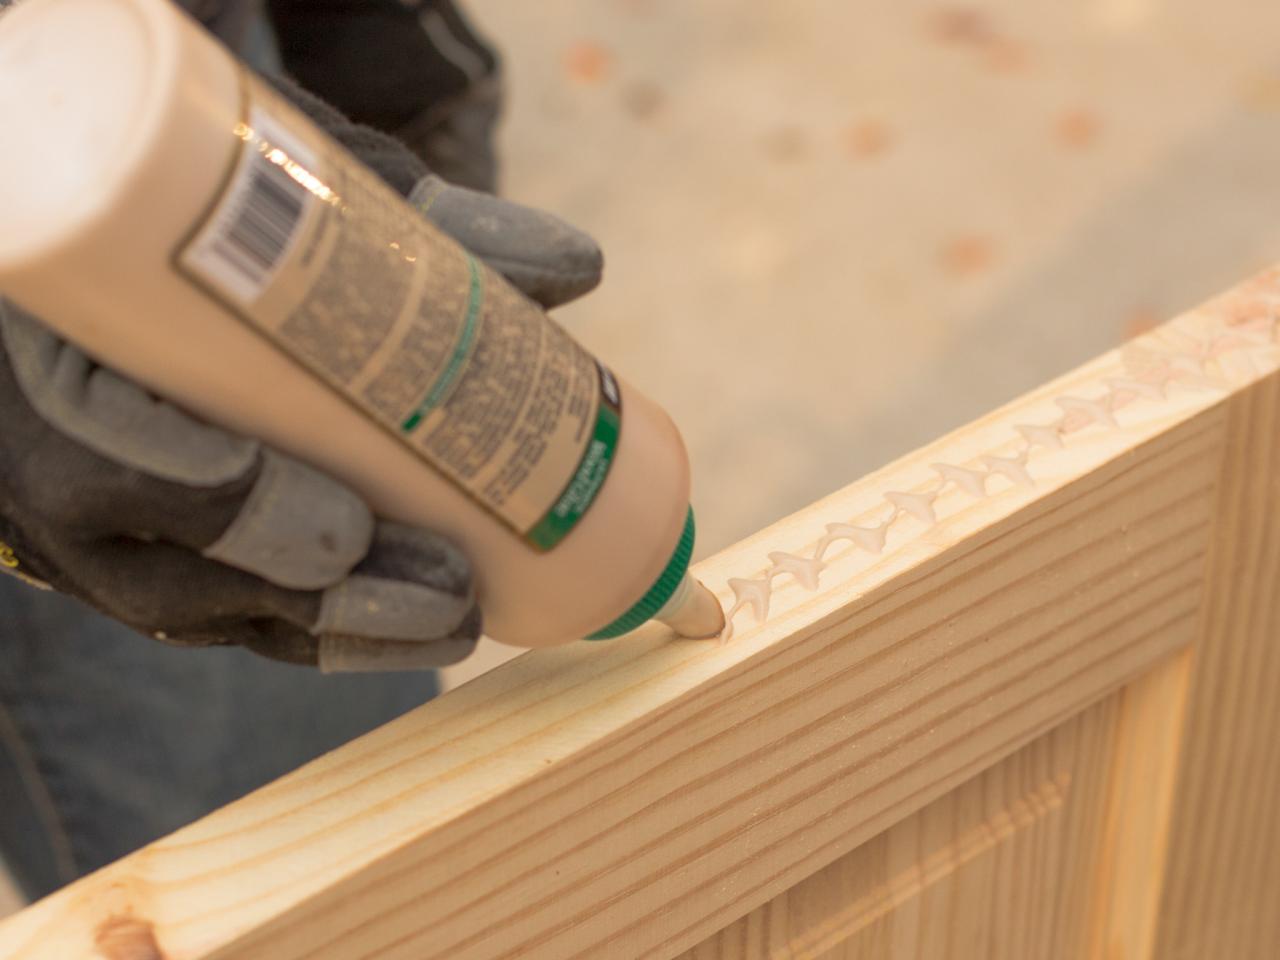
Add wood glue along the top edge of the bottom panel. Next, use nail gun and brads or nails to secure the ledge into place. Once secure, use orbital sander to smooth out all surfaces of the door. Wipe away dust with damp cloth, then paint using brush or roller. Let dry completely before installing.


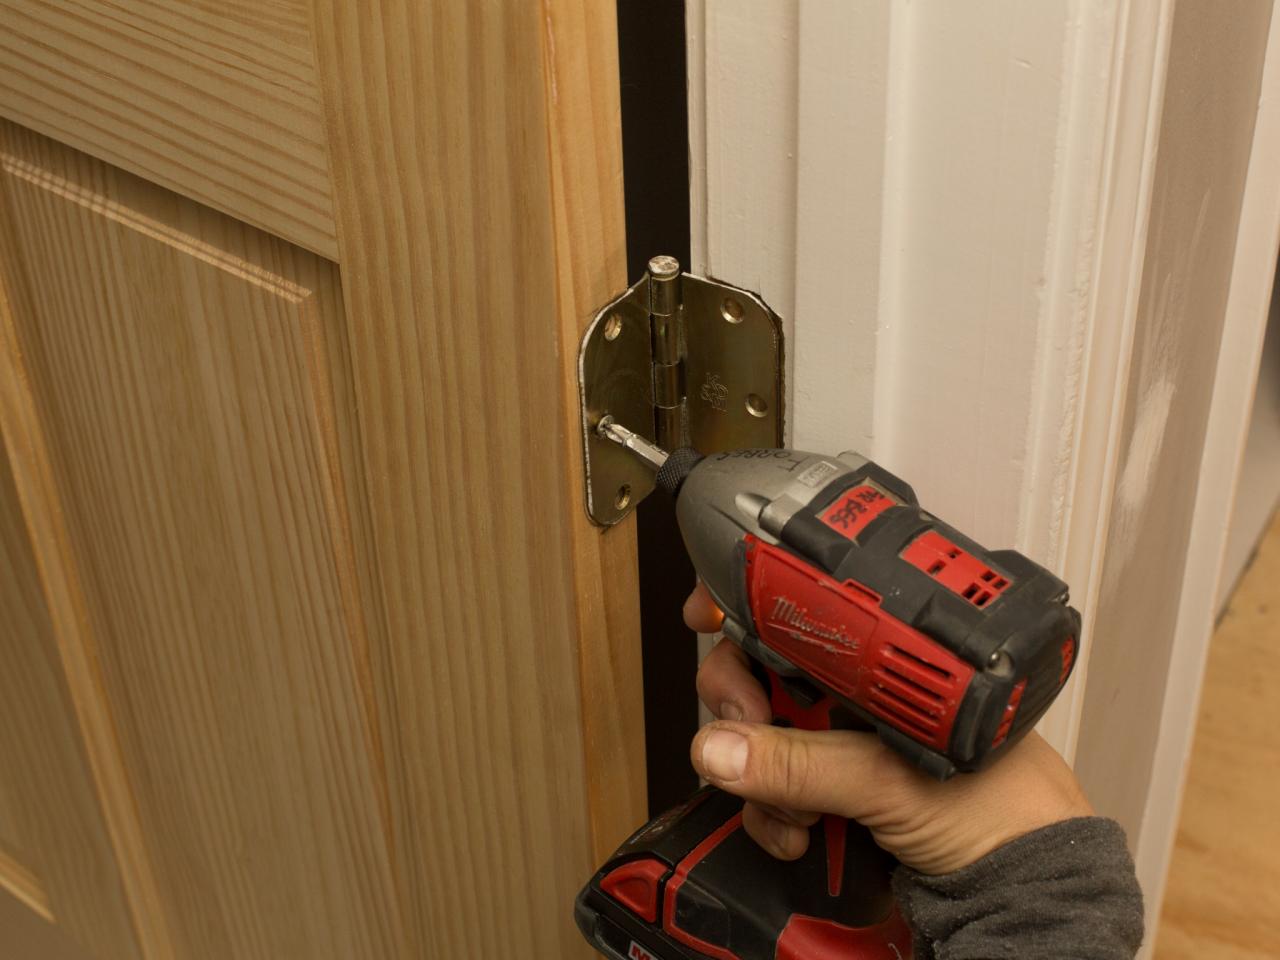
Install and Use Door
With the help of a friend, hold each of the two panels in place and use drill to attach to hinges with screws. Use and enjoy!


