


How to Load a Nail Gun
Nail guns are one of the most efficient and satisfying tools to use, but they require some precautions and a little bit of care. Here’s our primer on how to safely load and unload your nail gun before your next project.
Derek R. Trimble

A Note on Loading Mechanisms
Every tool manufacturer has its own loading mechanisms for its style of nail gun, so some of these steps will vary. Even though they’ll all slightly differ, the general step-by-step process will be the same and the safety rules will be nearly universal. Always consult your user’s manual before operating any power tool for the first time.
Step One: Inspect and Unload the Magazine
With the nail gun disconnected from the air source, you’ll want to inspect the magazine that holds the nails. Make sure your gun’s magazine is empty and free of any obstructions. It’s essential that your gun’s magazine opens and closes freely and that the magazine slot doesn’t have any nails in it. Starting with an empty magazine ensures that there are no jammed nails in the magazine prior to starting.
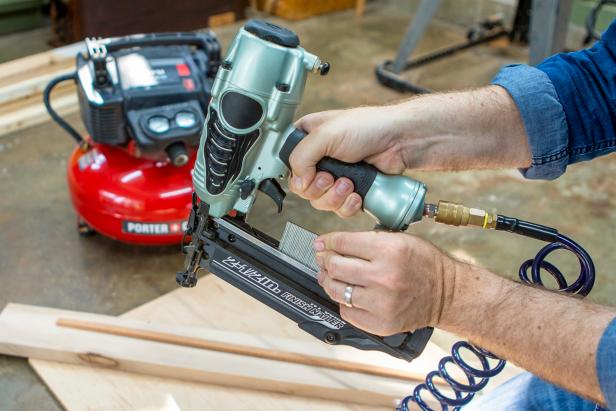
Step Two: Connect the Air Source
Now that you’re sure the magazine is clear, it’s safe to connect your tool to the air compressor. You’ll want to connect your tool to the air hose before loading because it’s possible that your tool’s driving mechanism might cycle and fire a nail upon connection. If that happens, you'll want your nail gun to be empty. It's not adviseable to load nails before making your connection. With the gun pointed in a safe direction, attach your air hose’s quick-connect valve to the 1/4” stud at the base of your gun’s handle.
Step Three: Load Your Nails
With the gun safely pointed away from yourself and others, pull the spring-loaded slide on the magazine backward until it locks into place. This slide will open the loading slot exposing the inside of the magazine so you can load nails in. Next, load a strip of nails that are the appropriate length and gauge for your model of nail gun. Make sure the nails are pointed outward toward the front of the gun and slide easily into place. Once the nails are in place, unlock the slide and let the spring push it, along with your nails into the firing mechanism.
At this point, your nails are loaded and the gun is ready to fire. All modern nail guns employ a two-step safety mechanism to prevent accidental discharge. Your gun should not fire a nail until the head is completely pressed against a surface and then the trigger is pulled. It’s very important to pay attention to where you’re pointing your nail gun and to keep your finger off the trigger until you’re ready to fire a nail.
Step Four: Finishing the Job
Once you’ve finished with your nail gun, it’s critical to store it properly. Disconnect the air supply's quick-connect valve from the 1/4” stud on the bottom of the gun. Press the purge valve on the gun to release any excess pressure stored in the gun. Next, press and fire the gun at a scrap of wood to ensure that it will no longer fire nails. Pull the spring-loaded slide backward to expose the remaining nails and remove them. Make sure your nail gun is completely emptied before storage.


