


How to Build a Rain Barrel System With a Wooden Stand
Don't let an abundant natural resource go to waste. Save water and money by building a rain collection system with our easy-to-follow instructions.
Drought-like conditions make it hard on the home gardener. Keeping up with the needs of your precious plants means water, water and more water. And if you’ve gone days without a good rain, all that water is coming out of your wallet.
Rain barrels collect rainwater from your roof by rerouting a section of your gutter’s downpipe into a nearby reservoir. They are fairly simple to install and once you have one set up, the Environmental Protection Agency estimates a single 55-gallon rain barrel can save you up to 1,300 gallons of water during the hot summer months. Just how much could you save? Here's some quick math:

Shain Rievley
- For every inch of rain that falls on a catchment area of 1,000 square feet, you can collect about 600 gallons of rainwater.
- For example, a home with outside dimensions of 27 x 37 feet with overhanging eaves of 1.5 feet at each wall has a total catchment area of 1,200 square feet [(27 + 3) x (37 + 3) = 1,200].
- For every inch of rain that falls on this roof, 720 gallons of water [(1,200 ÷ 1,000) x 600 = 720] of water can potentially be collected.
Note that rainwater catchment systems typically are 70 to 90 percent efficient; all systems lose some of the water because of spillage, wind, evaporation or other reasons.
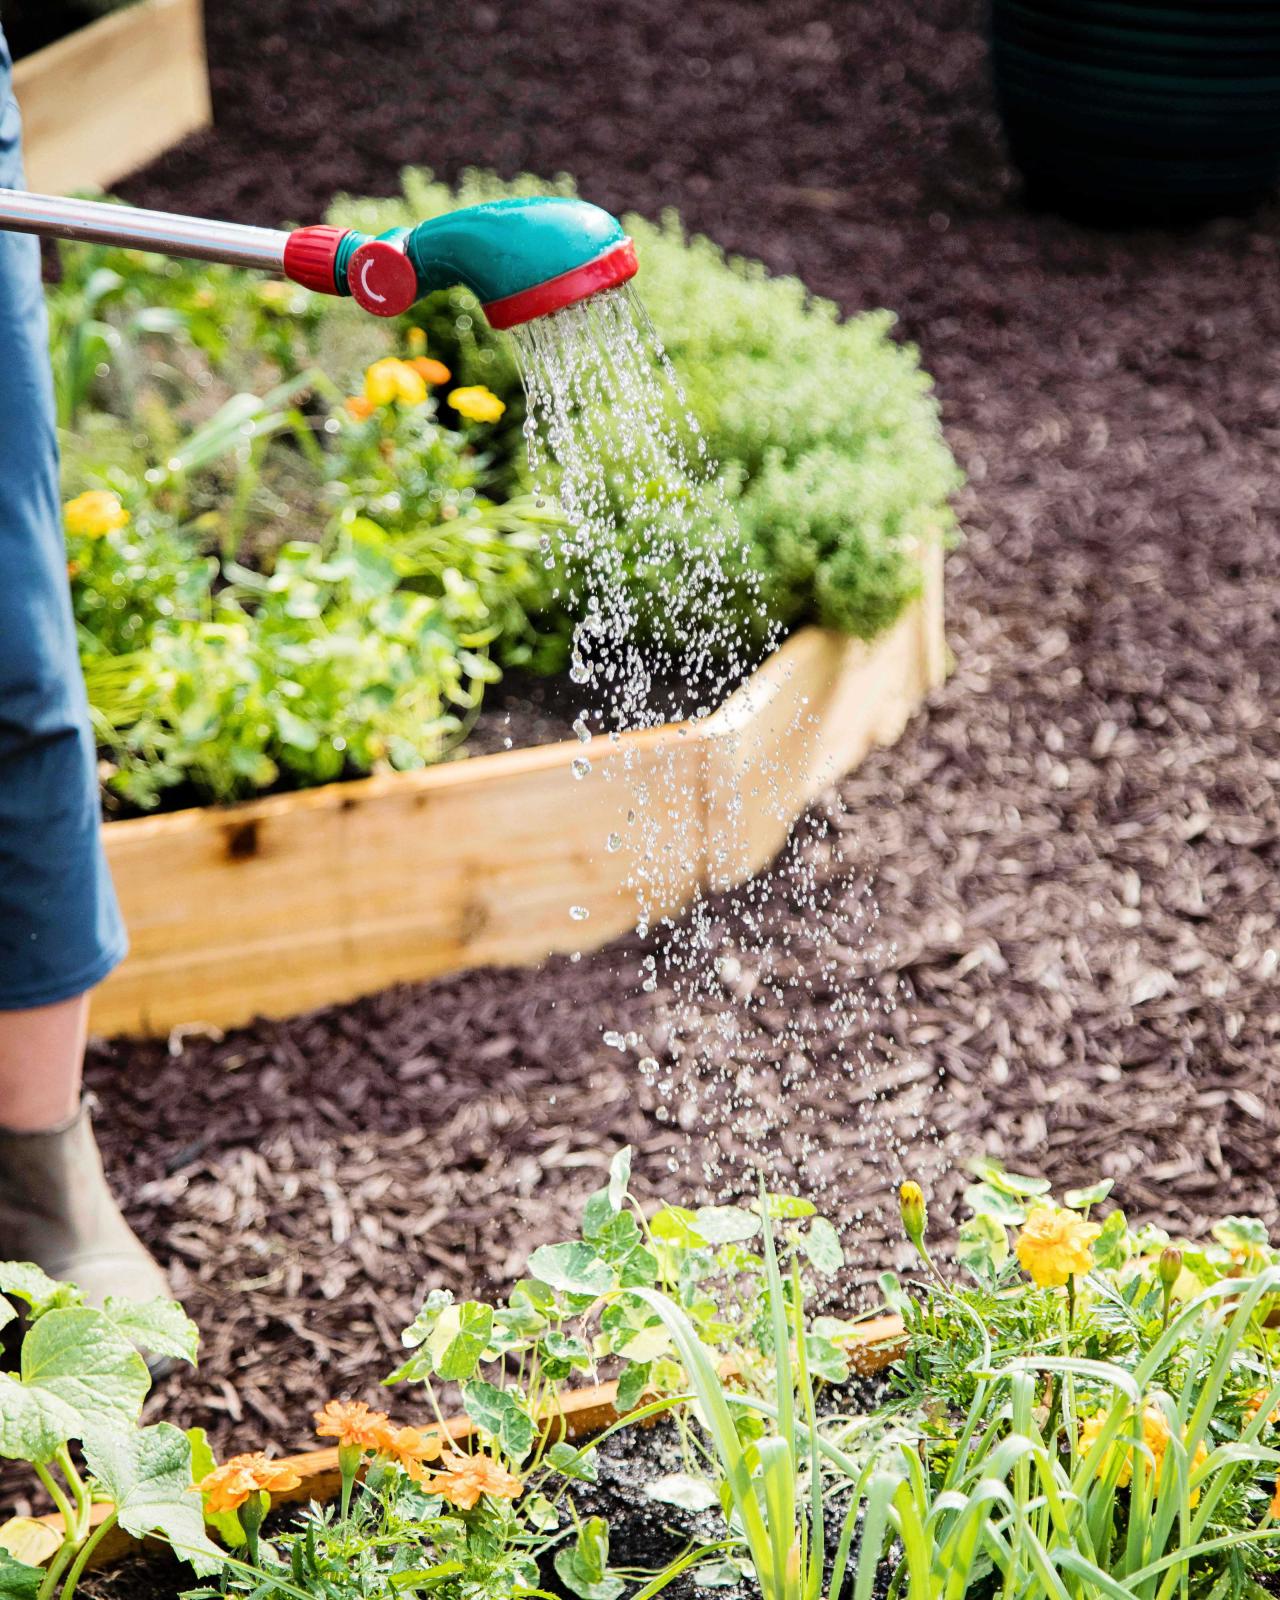
A common and easy-to-implement use for collected rainwater is watering outdoor landscaping. Rainwater is naturally good for plants. It doesn't contain the minerals, chlorine, fluoride and other chemicals that municipal water does, and it can be used directly from the rain barrel or cistern without special filtering. The simplest way to collect rain for landscape watering is to put a rain barrel under one of your home's downspouts.
Note: The Federal Government does not have any laws or restrictions regarding rainwater harvesting, but individual states may. Please check your local laws before starting this project.
Tools and Materials
- (3) 55-gallon closed-top plastic drums
- 2" flex-elbow
- 8 oz can of PVC cleaner
- 8 oz can of PVC cement
- rain barrel stand (or make your own)
- jigsaw
- drill
- 2-1/2” hole saw
- (4) 2-1/2” threaded male plumbing connector
- (4) 2-1/2” PVC elbow
- (2) 2-1/2” PVC tees
- (2) 2-1/2” x 5' PVC pipe
- 3/4" insert x spigot PVC adapter sched 40
- 2-1/2" socket x FNPT PVC female adapter sched 40
- 3/4” brass hose bib
- 2-1/2 oz. tube of clear silicone
- plumber’s tape

Shain Rievley
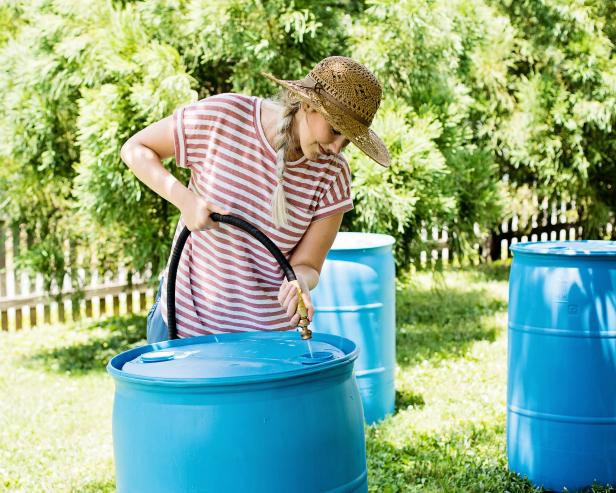
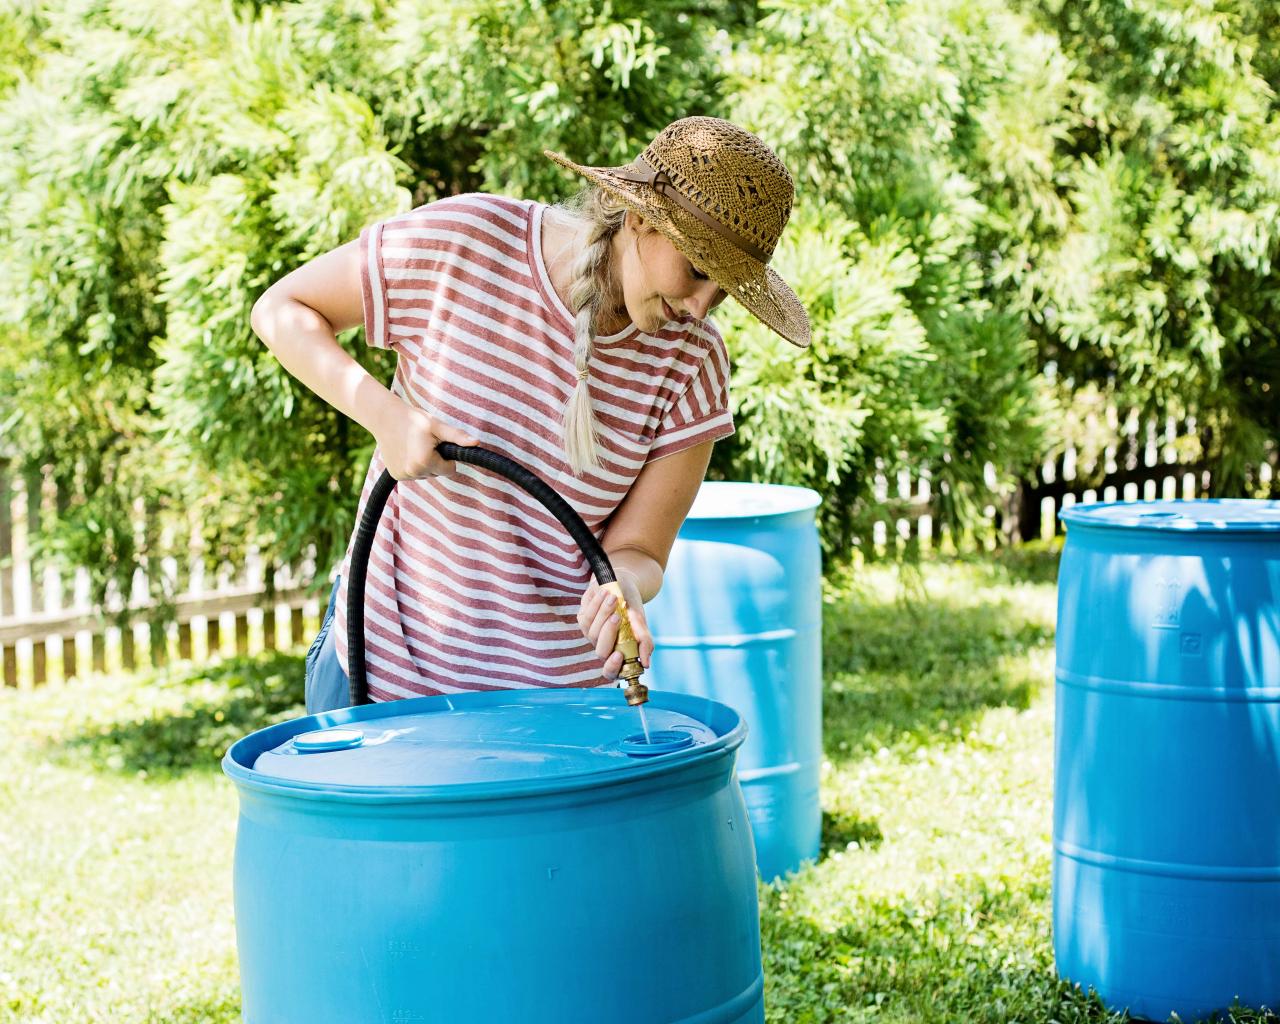
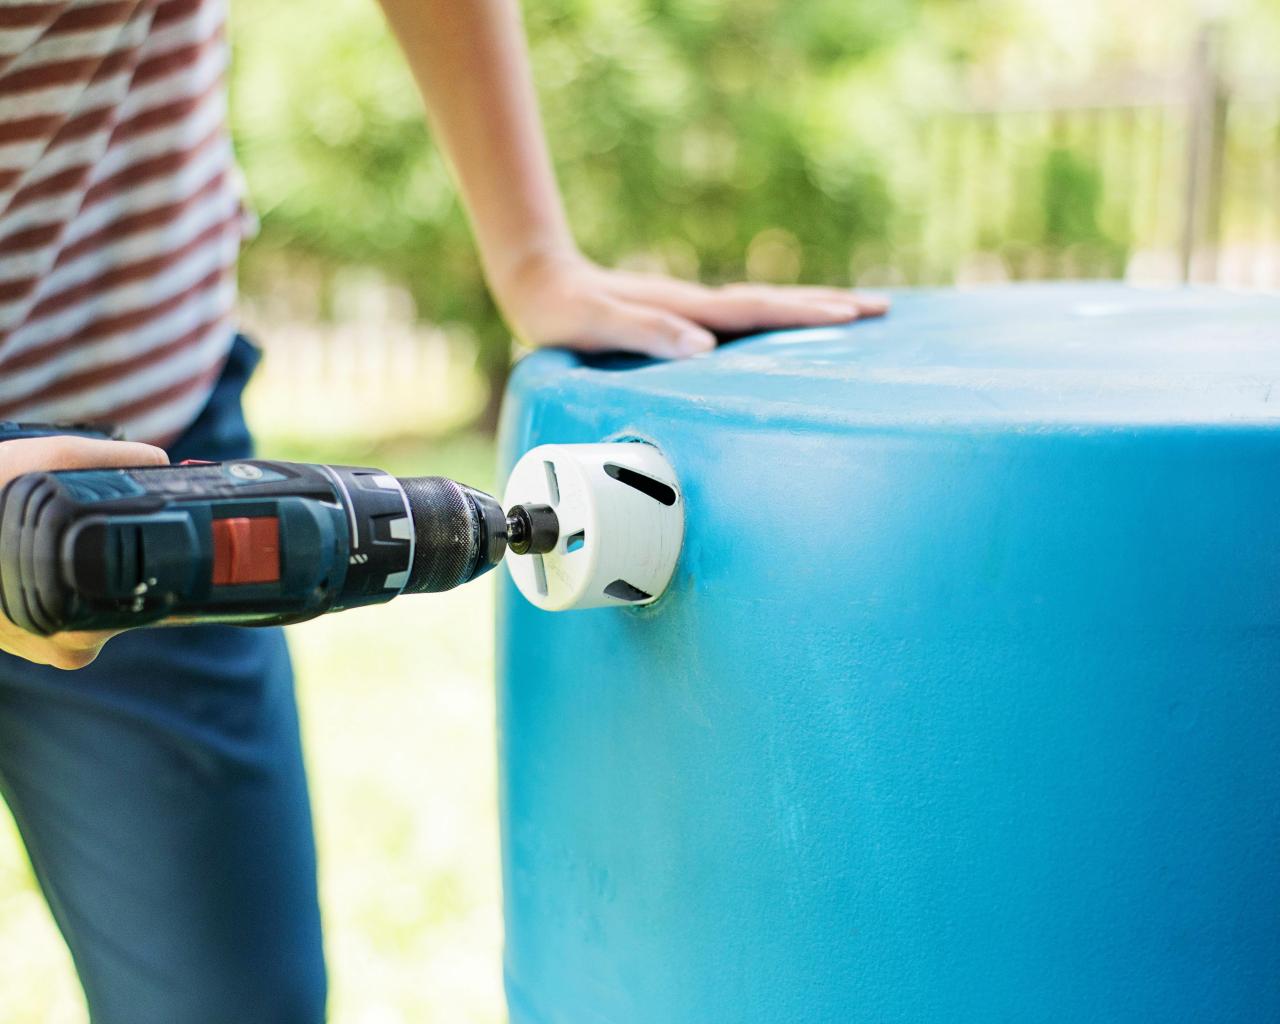
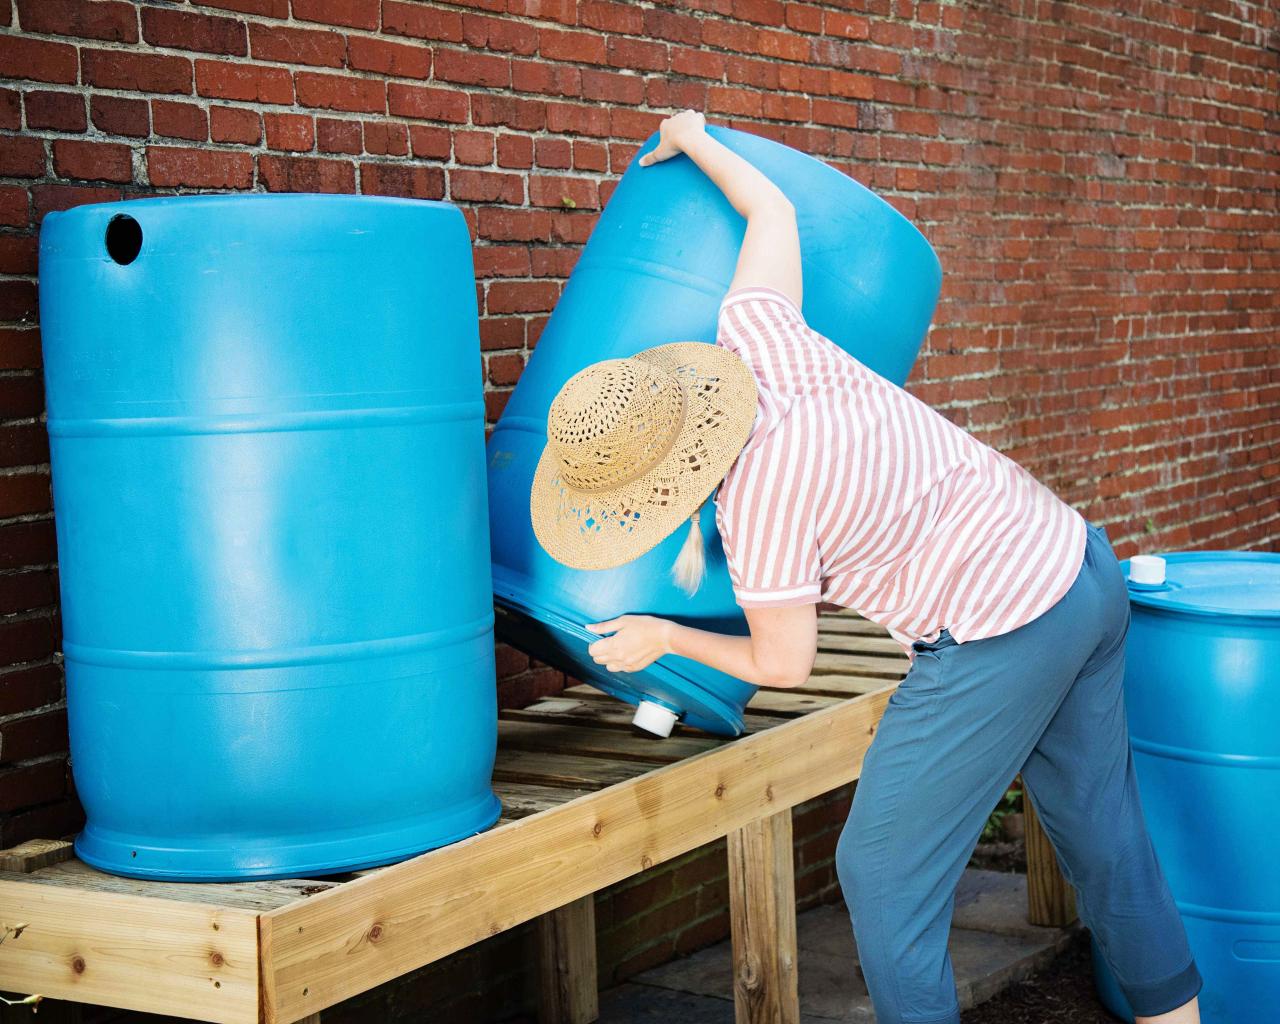
1. Prep Barrels
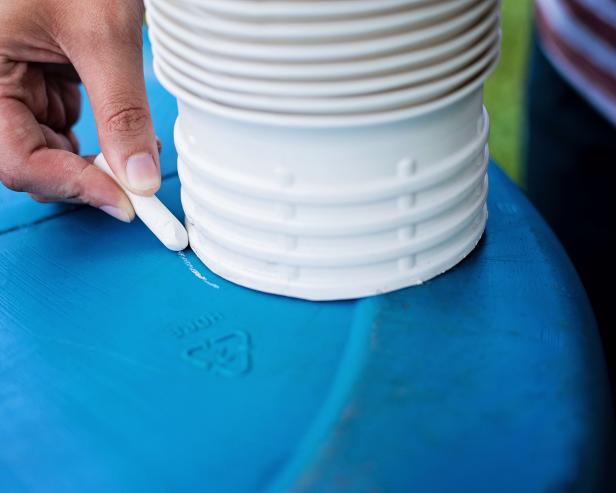
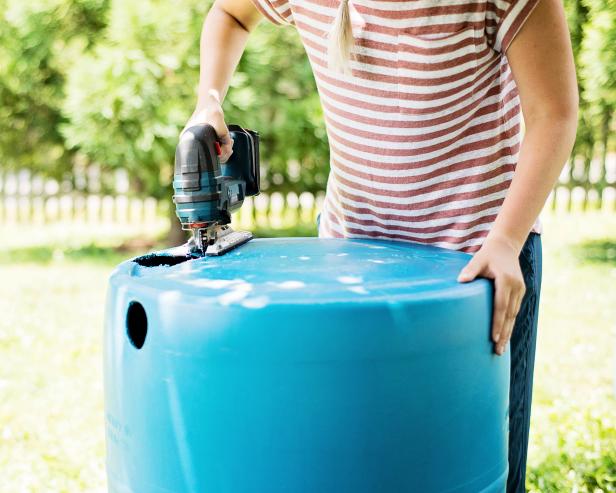
Start by thoroughly rinsing the barrels inside and out (Image 1). Turn the barrels upside down to drain and dry. On the bottom of one barrel, trace an opening for the downspout flex-elbow connector with chalk then cut out with a jigsaw (Images 2 & 3). This is where the rain will flow in from the roof. Next, use a hole saw to cut out a hole for overflow at the top of the barrel on the left side (Image 4). This allows excess rainwater to flow out of the barrel if it gets full.
Shain Rievley
Shain Rievley
Shain Rievley

Shain Rievley
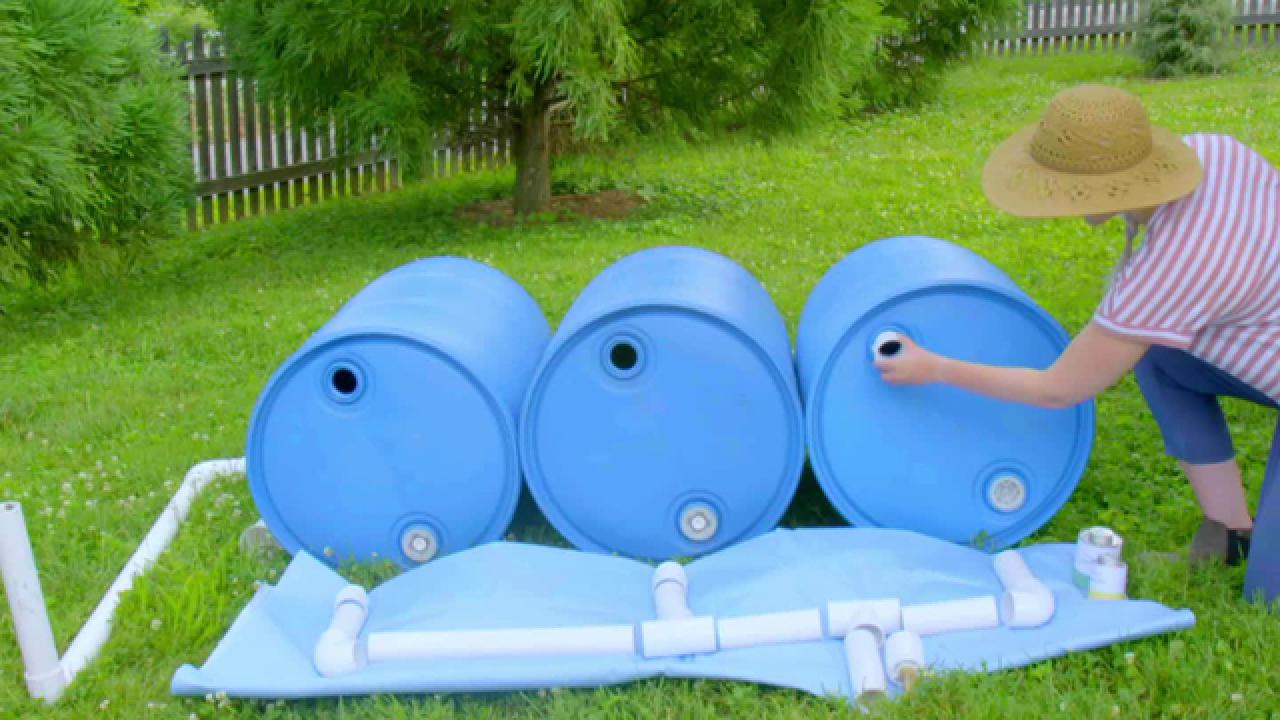
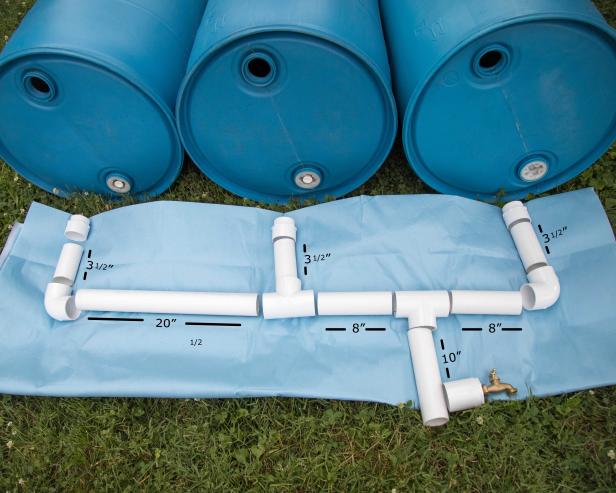
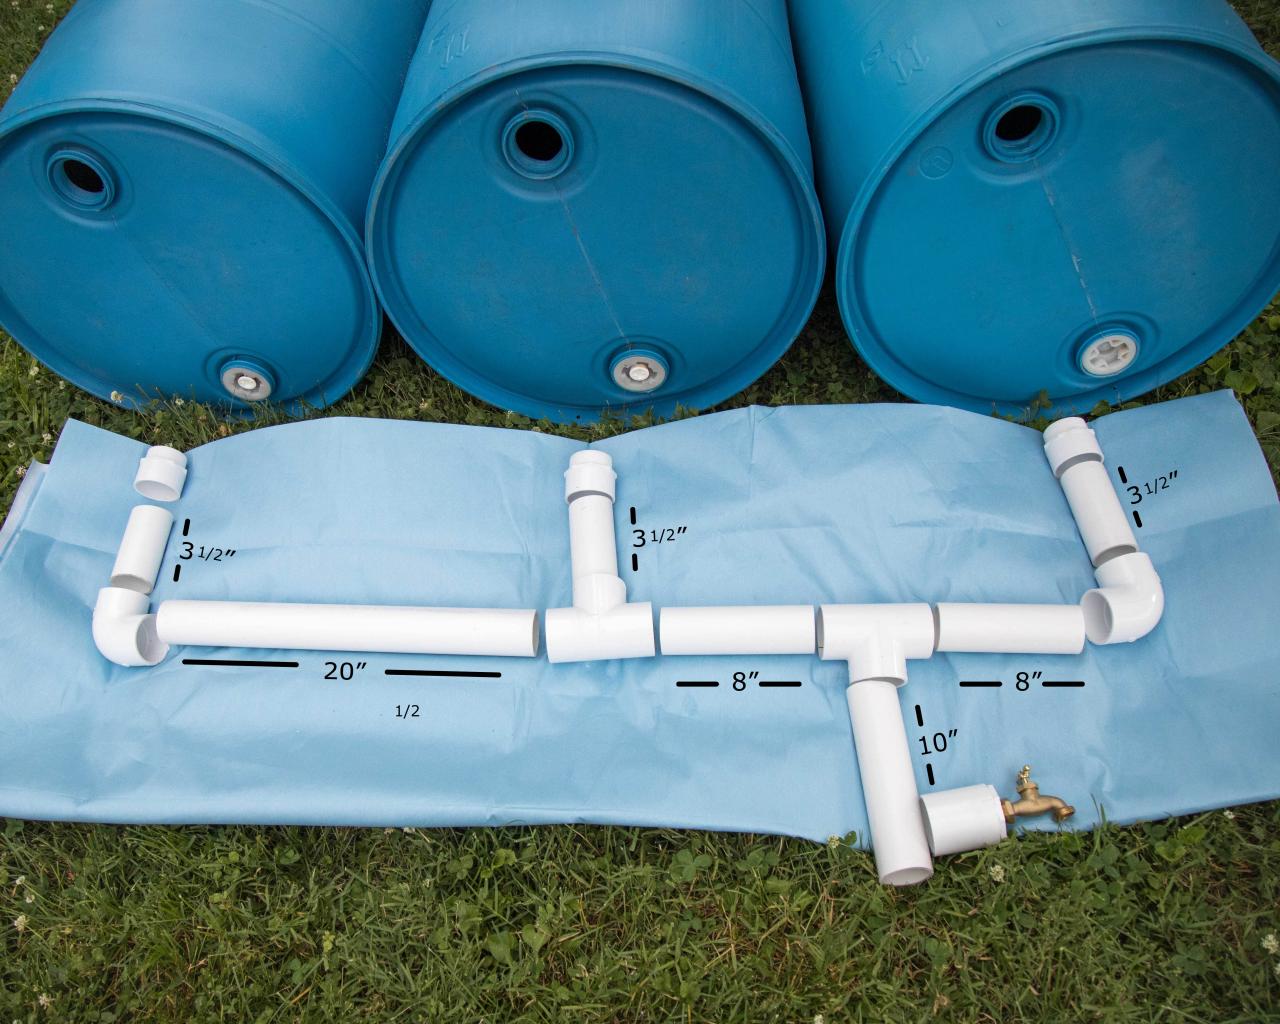
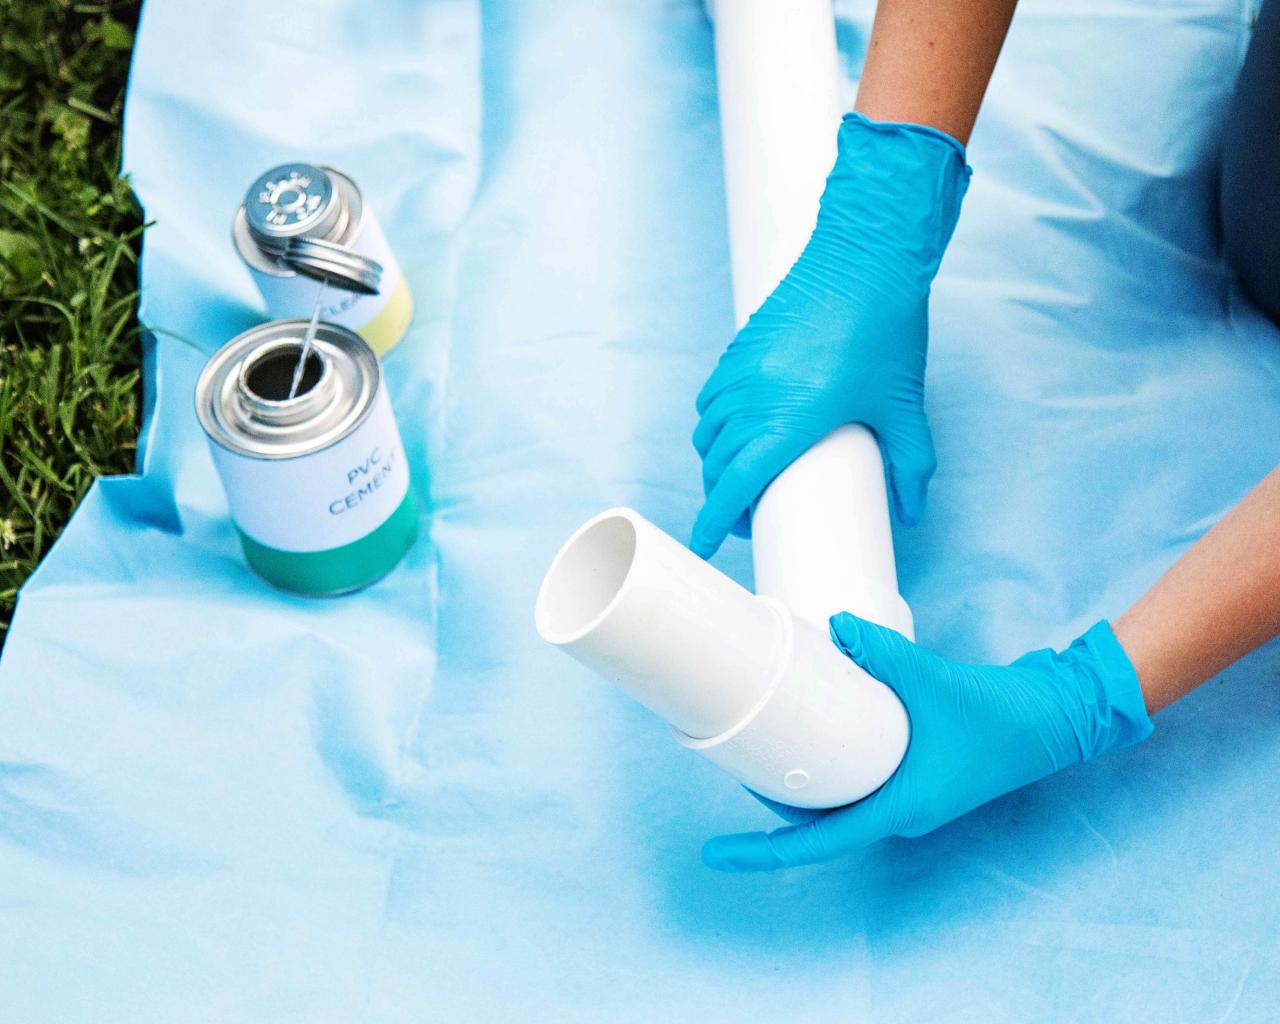
2. Attach PVC
Measure and cut the two PVC pipe pieces to create the "w" shape pipe system we made here. You'll cut these lengths: three 3-1/2-inch pieces, two 8-inch pieces, one 20-inch piece and one 10-inch piece. Lay the barrels on their sides and create a rough skeleton of how the PVC parts will be connected below the barrels (Image 1). This piping system will allow the water to flow from the first barrel up into the subsequent barrels. Secure the plumber's tape to the threads of the plumbing connectors, then screw them into the threaded openings on all three barrels (Image 2). Prep all PVC parts with PVC cleaner (Image 3). Finally, glue together the pieces as shown with PVC cement (Images 4 & 5).
Shain Rievley

Shain Rievley

Shain Rievley

Shain Rievley

Shain Rievley
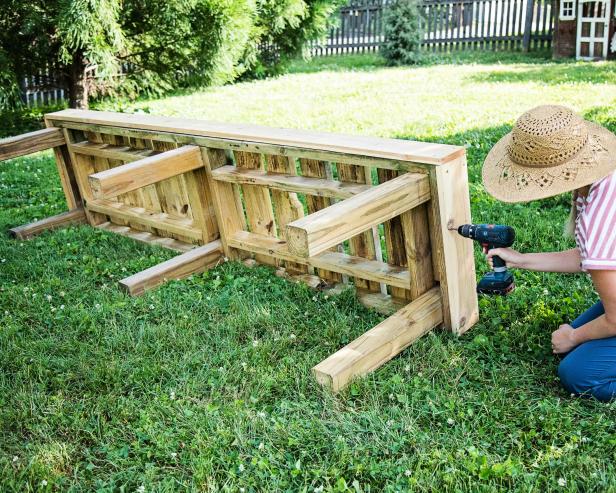
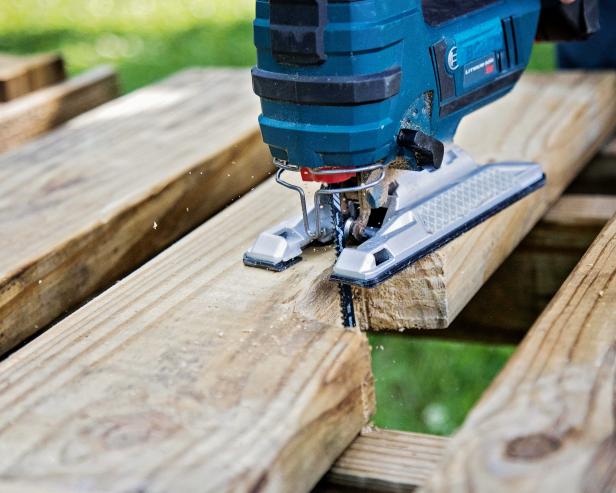
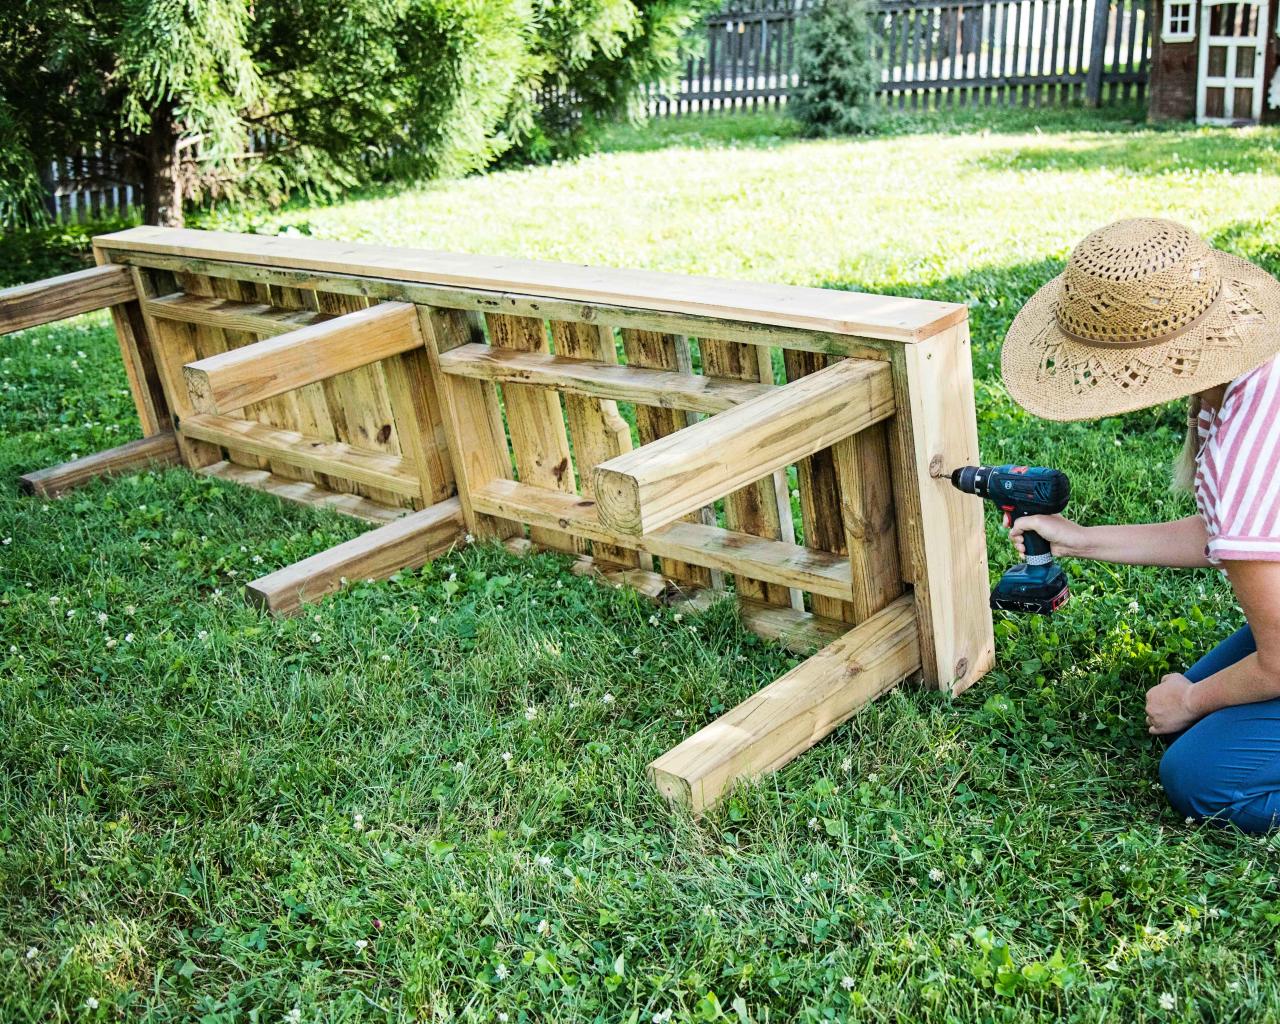
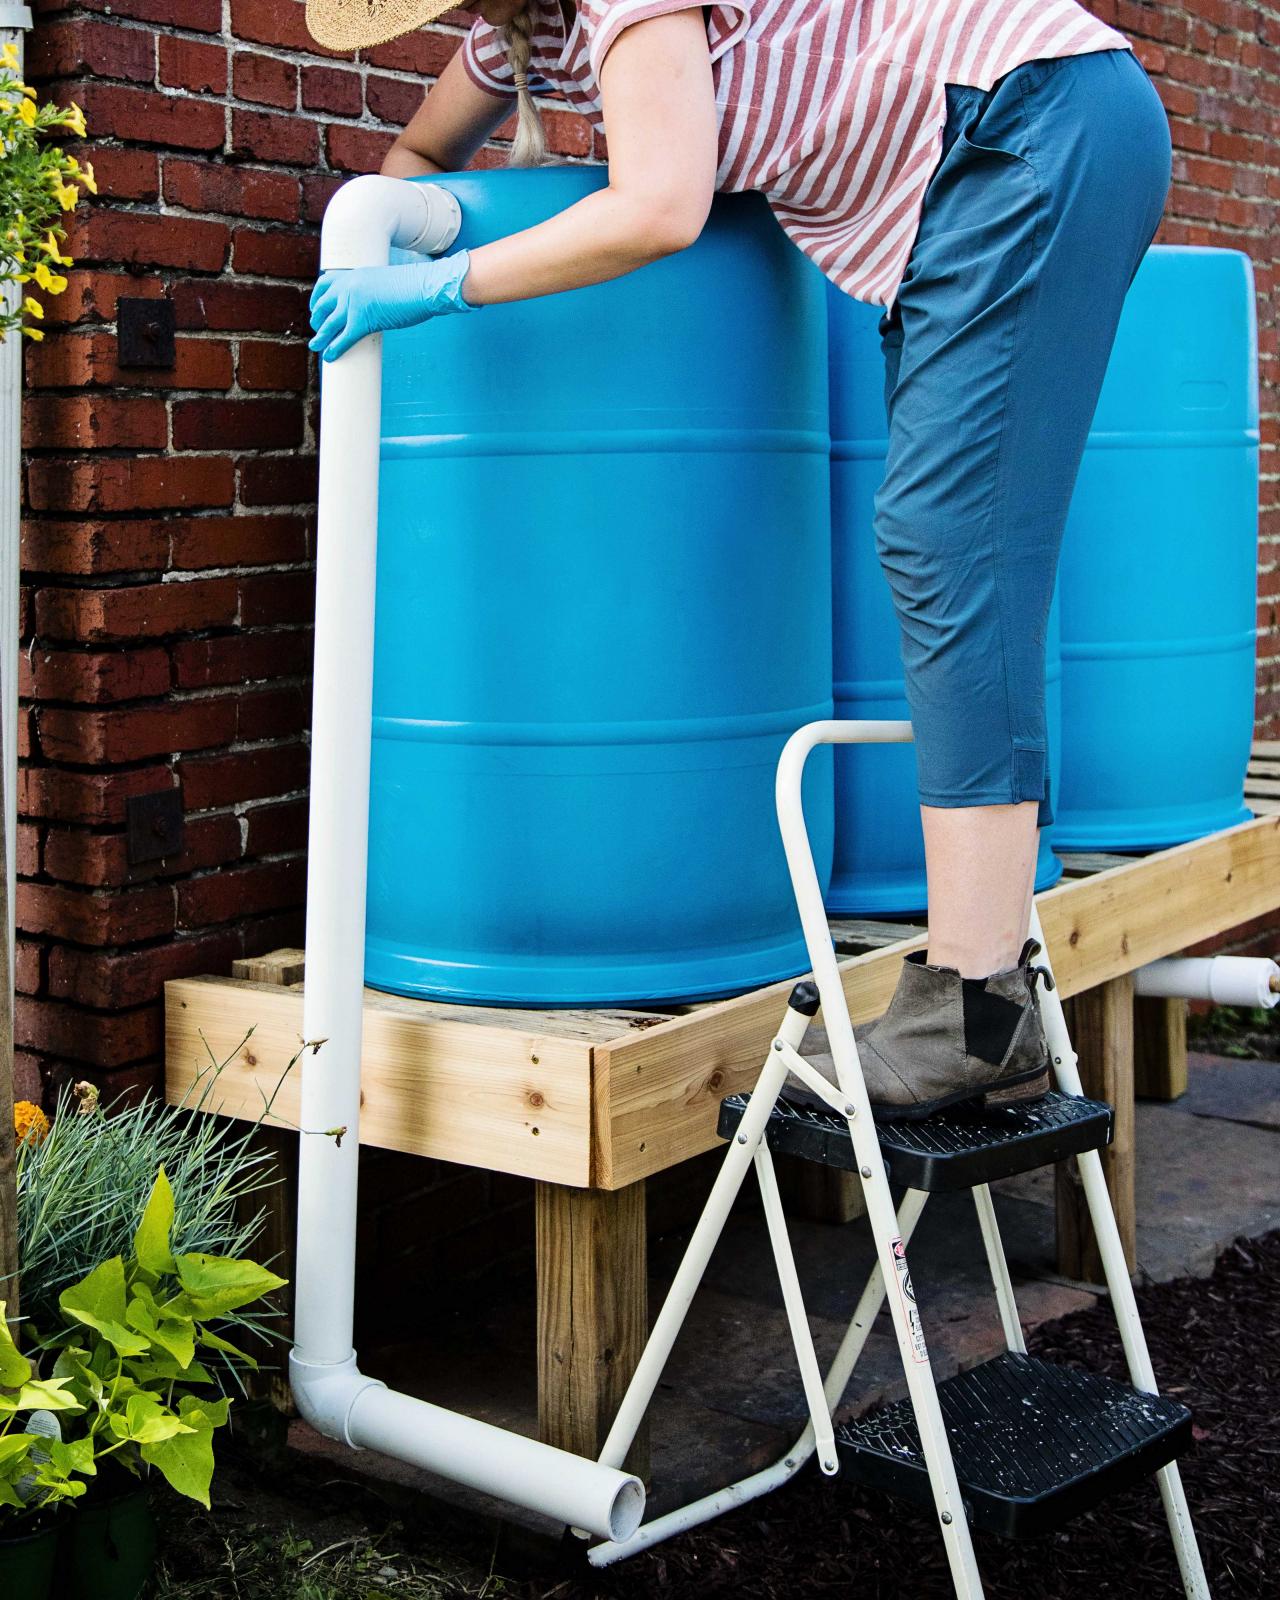
3. Build the Barrel Stand
Construct a sturdy barrel stand out of an outdoor-friendly wood such as cedar. We created our stand from 2x4s for the frame and top, 4x4 posts as legs and 1x6s as a border to give it a clean edge. Attach it all together with 3-inch outdoor wood screws (Image 1). Cut holes in the stand where PVC will go through (Image 2). No time to build? There are a variety of ready-made stand options you can buy online.
Shain Rievley
Shain Rievley
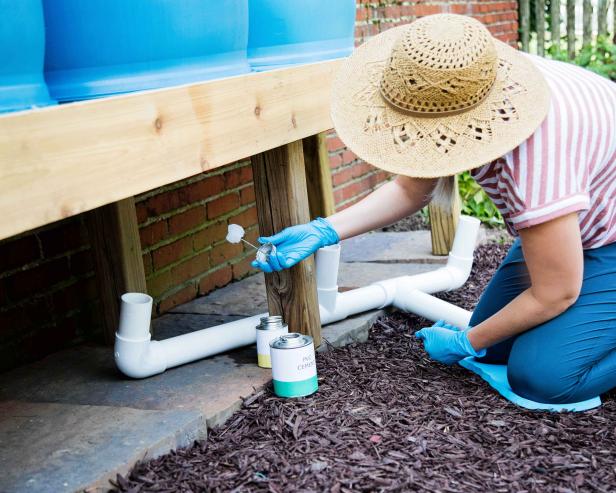
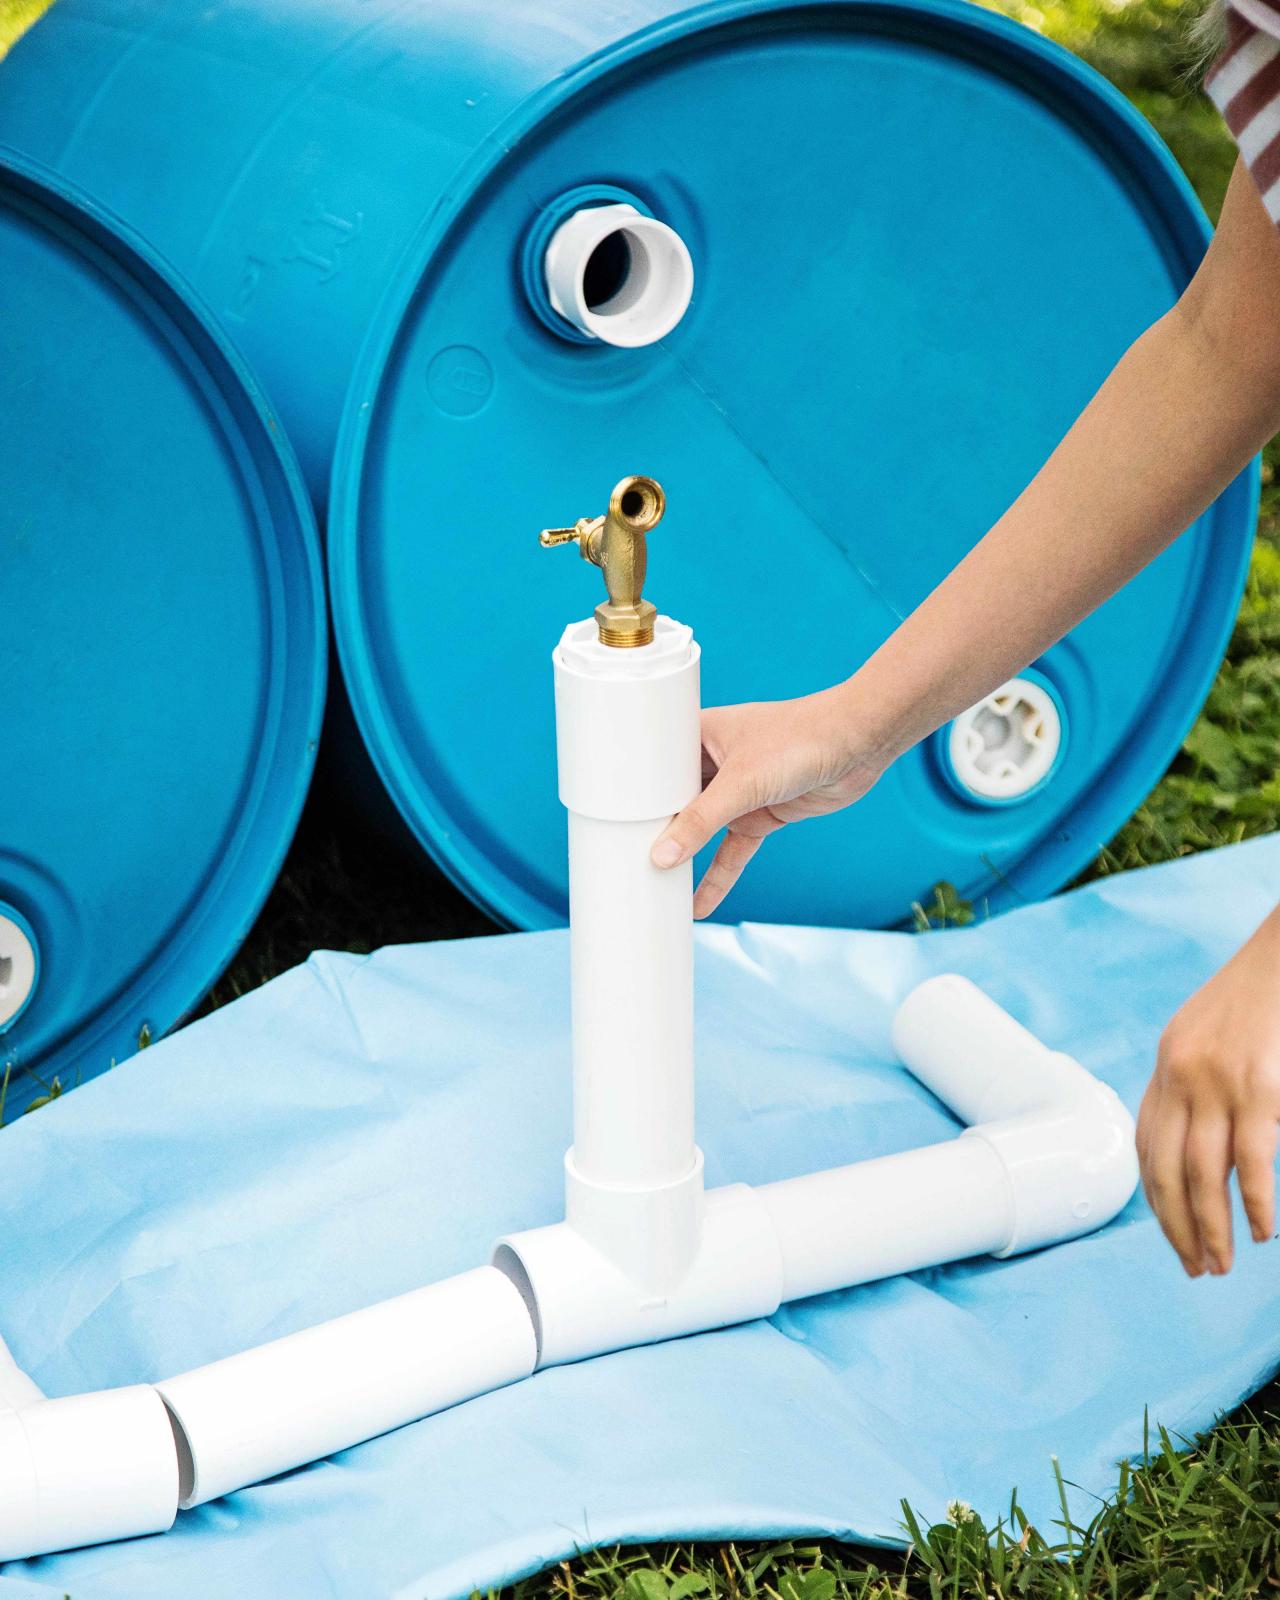
4. Attach Plumbing to Barrels
Turn the barrels upside down and align the PVC connectors with the holes you created on the stand (Image 1). Use PVC cement to glue the piping into place at connectors under the stand (Images 2 & 3).

Shain Rievley
Shain Rievley
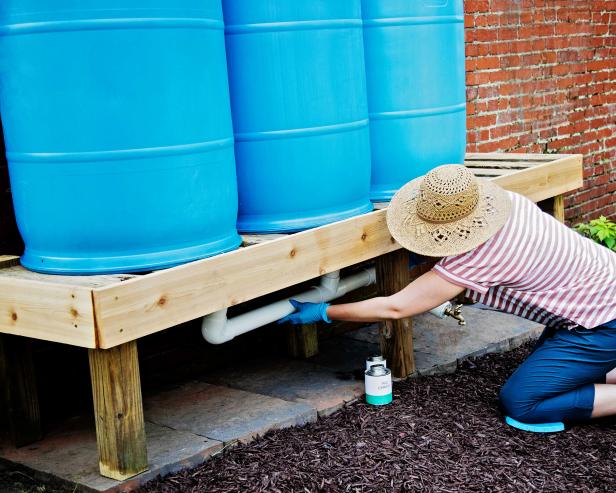
Shain Rievley
5. Secure Overflow and Gutter Pipes
Glue the overflow valve (made from two elbows and a length of PVC pipe) to the hole created on the left side of the first barrel (Image 1). Then, attach a flex-elbow from the gutter downspout to the hole in the top of the first barrel (Image 2). Lock in place with silicone to keep the system watertight (Image 3). Note: Make sure the overflow spout directs excess water away from your home's foundation when the rain barrels reach capacity.

Shain Rievley
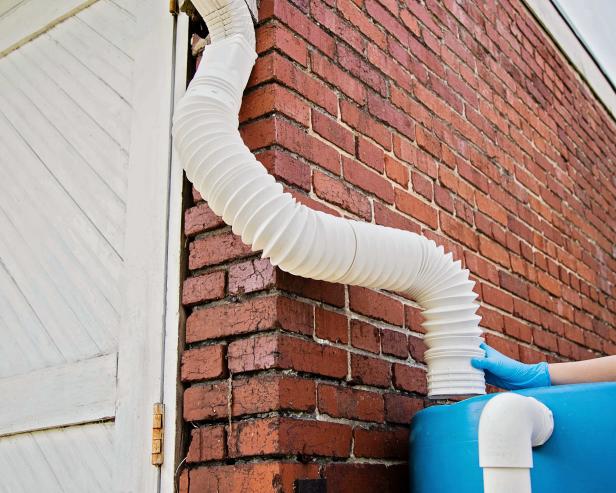
Shain Rievley
Shain Rievley
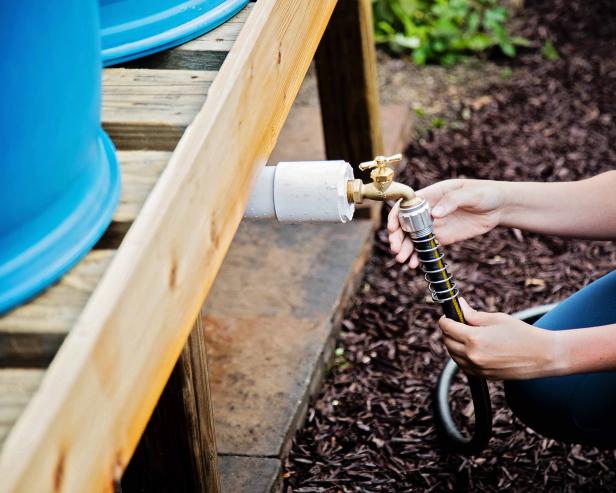
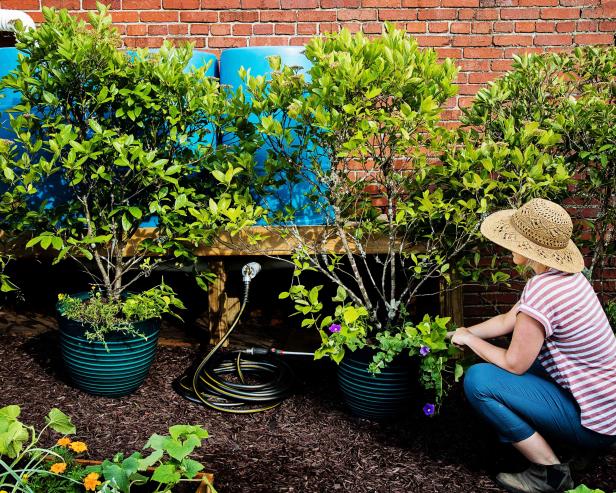
6. Attach Water Hose
When it's time to water, simply attach a hose to the spigot (Images 1 & 2). To conceal the rain barrels and create a more pleasing view, place large potted trees in front, leaving a space for the spigot to peak through (Image 3).
Shain Rievley
Shain Rievley
Shain Rievley
Health and Safety Considerations
-
Collected rainwater can be used for drinking, but it requires special filtration. The simplest and least expensive type is a microfiltration process that uses gravel, sand and charcoal. More expensive treatments include UV sterilization and ozonation. If rainwater is going to be collected for filtration and drinking, it's important to understand that many areas require that the filtration system be certified and that the water be tested regularly.
-
The water harvested from a rain barrel may contain harmful chemicals and bacteria from your roof. That means that it’s best to keep the rainwater out of your vegetable gardens. Note: If you can’t resist using the free water for your produce, water the soil and not the leaves and fruits to avoid contaminating them.
- When using the home's roof as the rainwater catchment area, select the roofing materials carefully. Stainless steel and galvanized steel with a baked-on enamel, lead-free finish are the best because they’re smooth, impervious and not treated with chemicals that will leach into the water. Poor choices include organic roofing materials such as wood shakes, clay tiles and concrete materials, because they'll support algae and mold growth, and wood shakes treated with preservatives can contaminate the water. Other poor choices include asphalt shingles, rolled roofing and porous or rough materials, because they'll hold more particulates such as bird droppings and heavy metals. Porous materials also absorb more rainwater, reducing the collection efficiency. If you treat your roof for pests or wood, be sure to unhook your rain barrel for at least two weeks.
- In addition to roofing materials, consider the materials used for the gutters, downspouts and piping. Avoid using lead-based solder in all metal-to-metal connections. Opt for piping made of roll or channel-formed copper, aluminum, stainless steel, galvanized steel or PVC to limit water contamination.
- Check with the local government about possible environmental contamination. If the home is in an area that produces heavy industrial pollution, the rainwater may be contaminated.
- Place rain barrels on level, stable ground. At maximum capacity, rain barrels will weigh quite a bit and will tip more easily on uneven ground.
- Monitor water collection. Check rain barrels regularly to make sure intakes and overflows aren't blocked with leaves or other debris that could limit collection or delivery. Make sure to routinely disassemble your rain barrel and remove any debris that may build up in the pipes or the barrel. Investing in a filter or screen can help keep it clean longer.
- The standing water in a rain barrel makes attractive real estate for mosquitoes. A filter can prevent mosquitoes from entering your rain barrel and laying eggs. If you already see mosquitoes in or around the barrel, the addition of a mosquito donut/dunk — a Bti pesticide — kills the larva but leaves water safe to use in your garden.


