


How to Make an Upholstered Holiday Banner
Cheerfully issue a Christmas greeting to all who enter your home with this unique upholstered holiday banner. Swap out the letters to easily craft more banners for birthdays, Thanksgiving, Halloween, Easter or any other occasion worth celebrating.

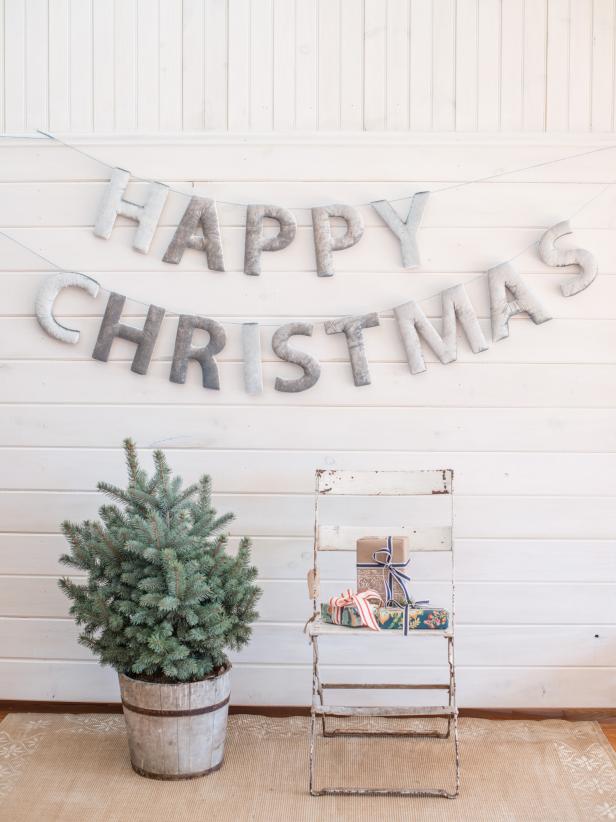
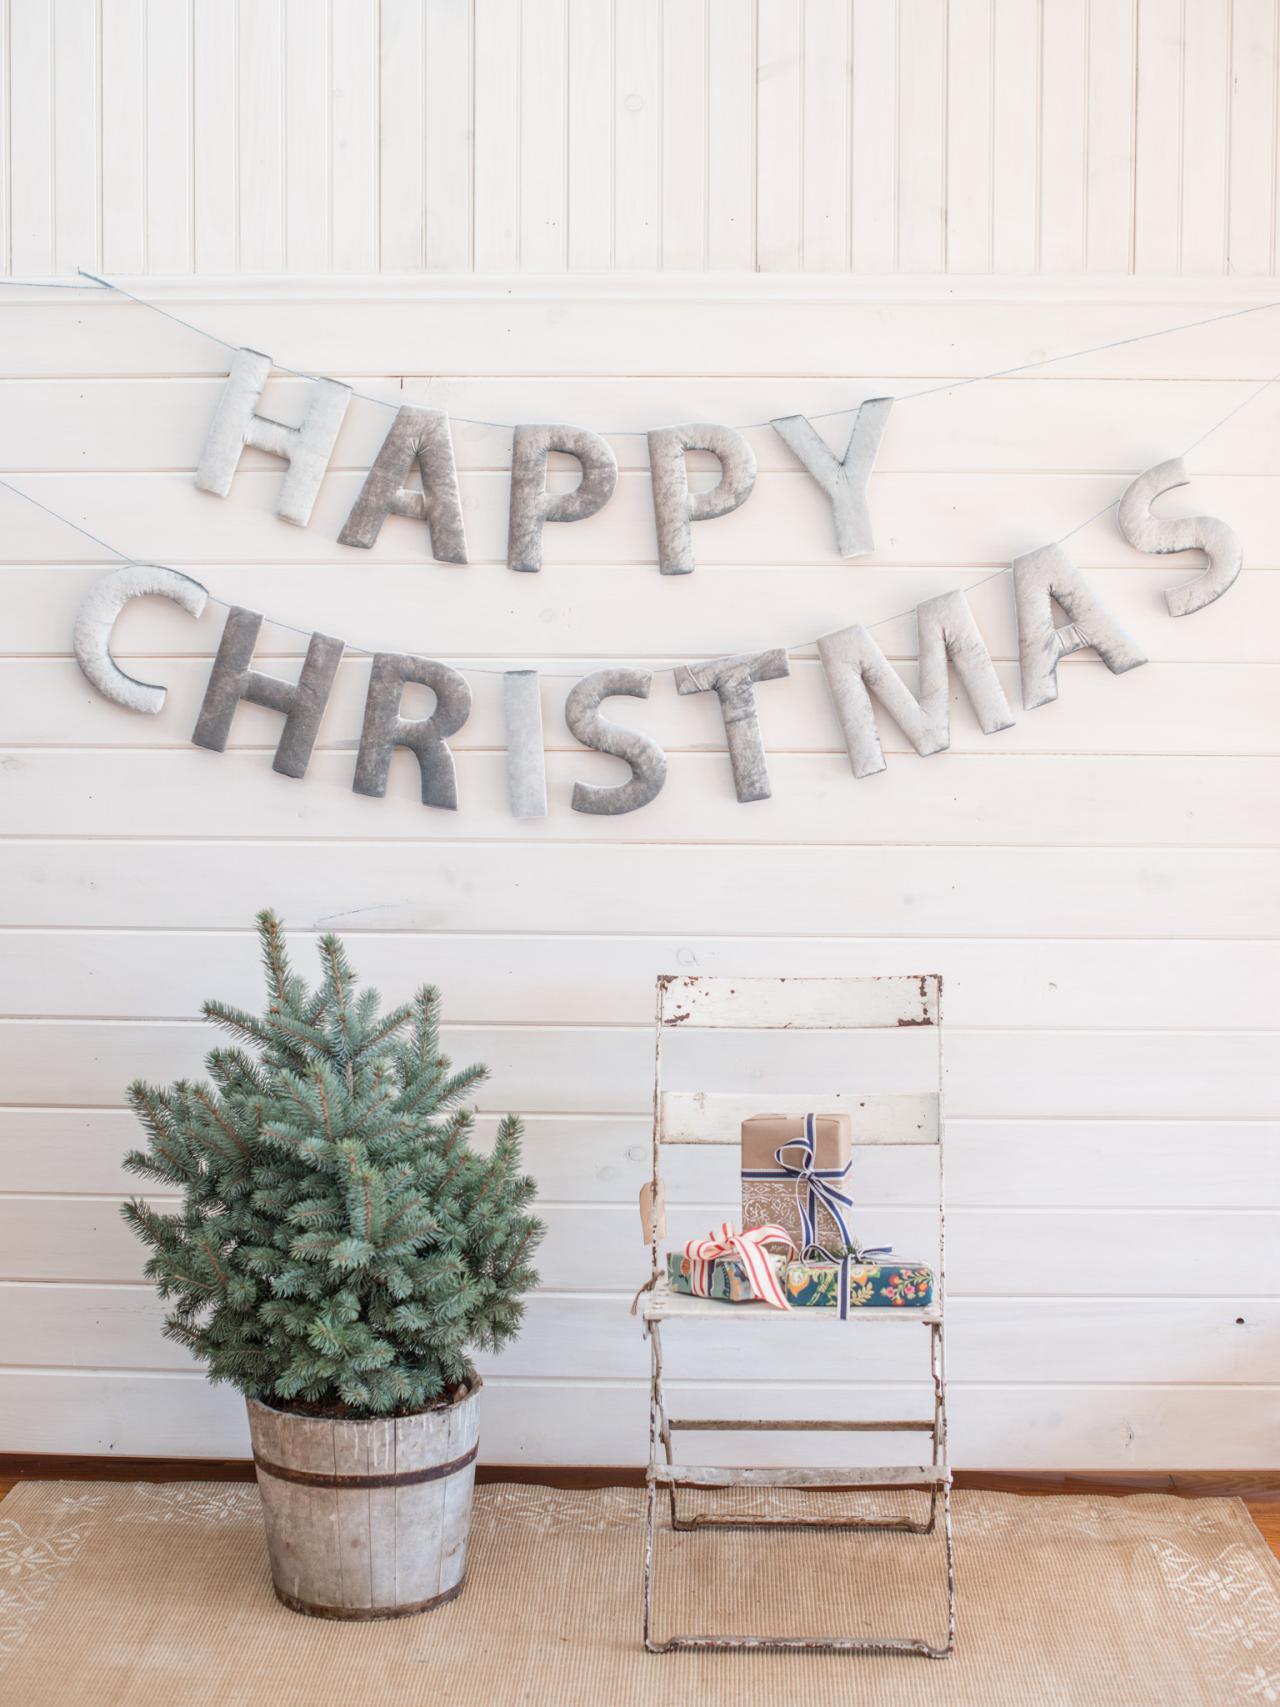
Upholstered Christmas Banner
Issue a Christmas greeting to all who enter your home with this unique upholstered letter banner. Also great for birthdays, New Years and any other occasion worth celebrating.

Photo by: Marian Parsons
Marian Parsons
Materials Needed:
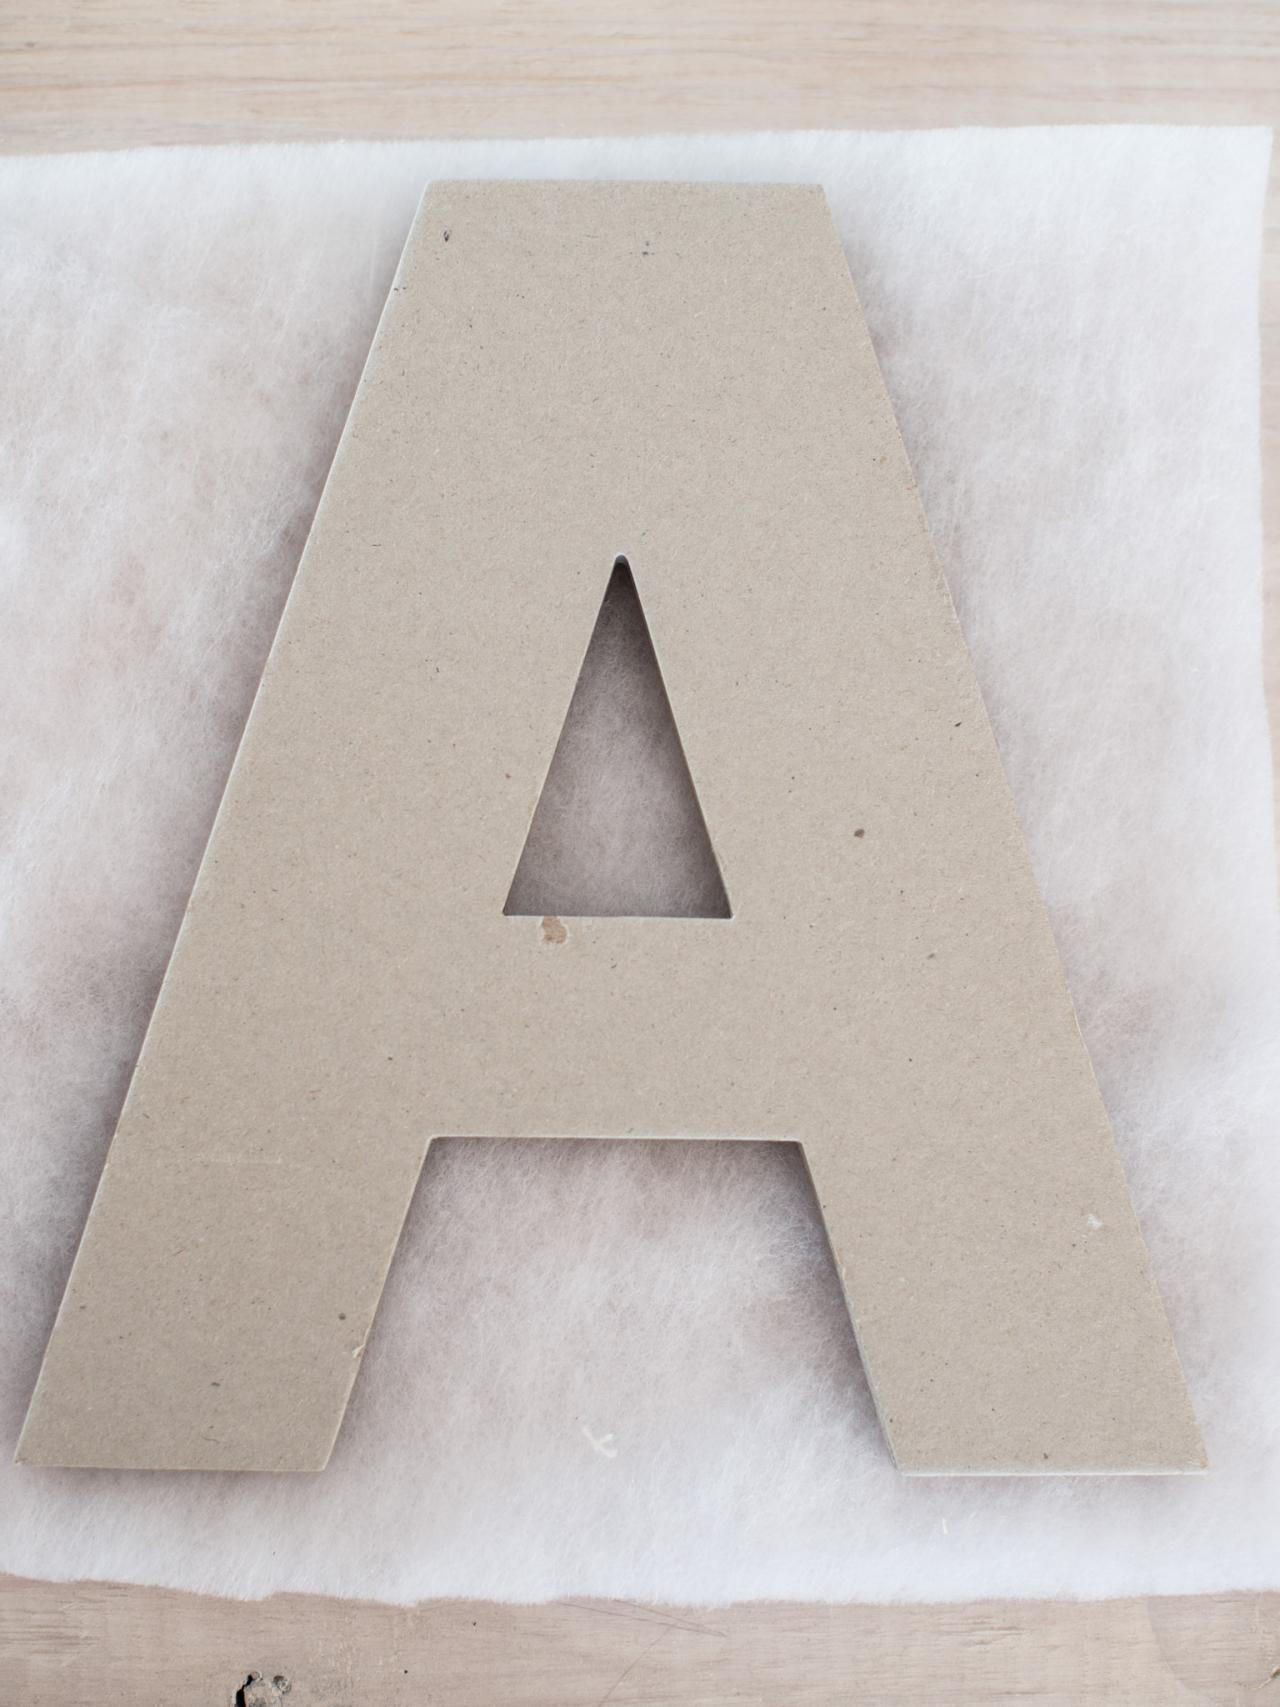
chipboard letters (thick enough to hold a staple)
fabric (enough to cover letters)
scissors
permanent marker
light polyester quilt batting
staple gun and staples (electric, manual or pneumatic)
twine, ribbon or string
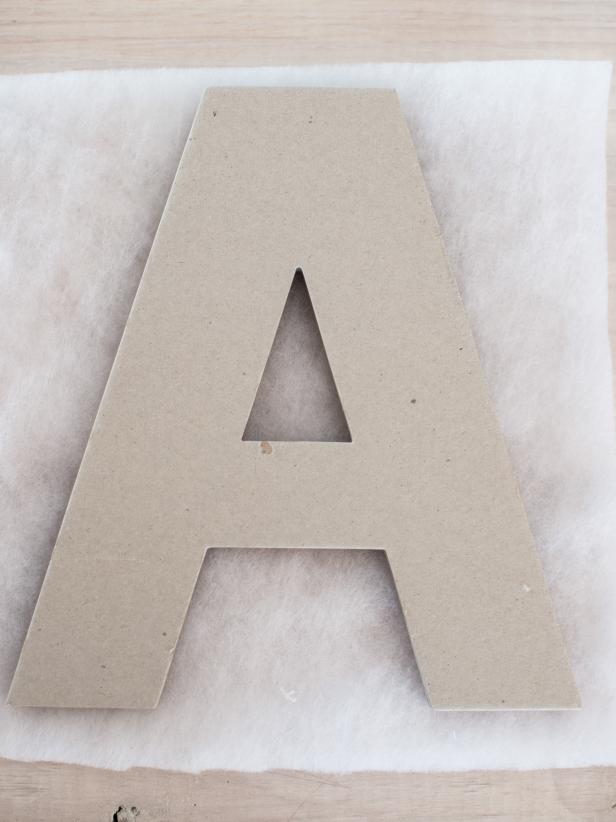
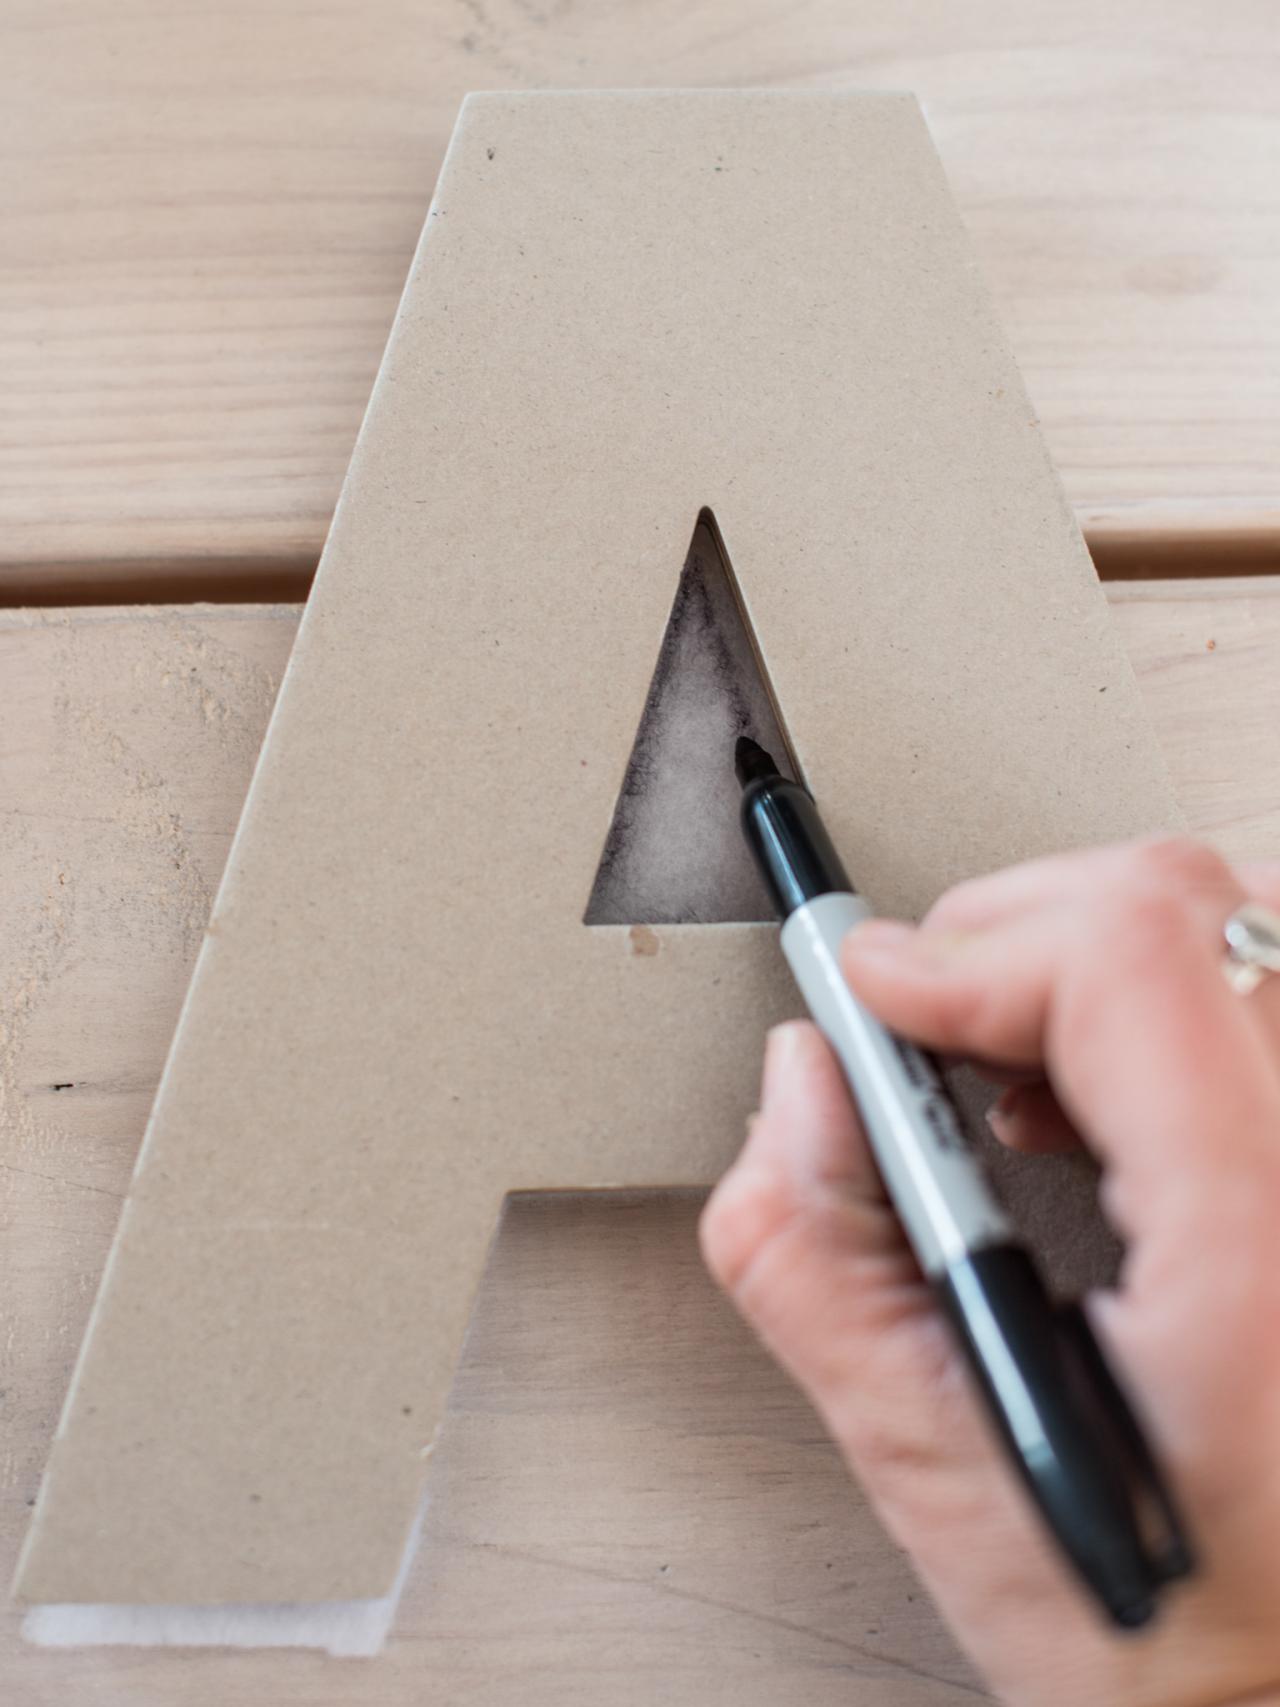
Trace and Cut Batting
Place each letter on one layer of lightweight quilt batting and trace the letter onto the batting with a permanent marker (Image 1). Use scissors to cut out each letter along drawn lines (Image 2).
Marian Parsons

Marian Parsons
Trace & Cut Batting
Place each letter on one layer of lightweight quilt batting and trace the letter onto the batting with permanent marker. Use scissors to cut out each letter along drawn lines.
Photo By: Marian Parsons
Trace & Cut Batting
Place each letter on one layer of lightweight quilt batting and trace the letter onto the batting with permanent marker. Use scissors to cut out each letter along drawn lines.
Photo By: Marian Parsons
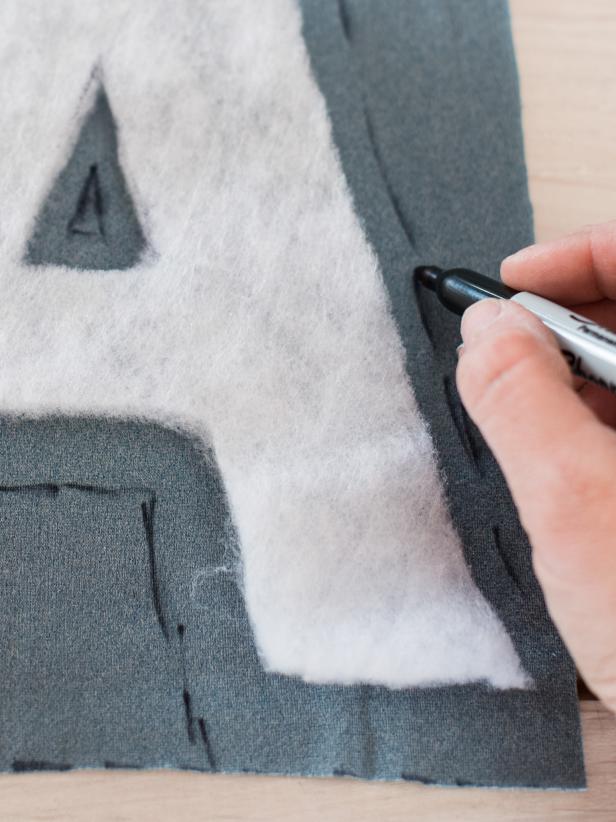
Trace and Cut Fabric
Use cut batting as a template to trace each letter onto fabric, leaving a 1/2" border to pull around the letter's sides in order to staple it in place. Make sure fabric is face down, so the letter is being traced in reverse (Image 1). This way, the letter will be facing the proper way once it's flipped over. For letters with a hole in the middle, cut a small hole and a few small slits that will allow the fabric to be pulled through. On a flat work surface, layer each letter fabric first, face down, followed by quilt batting, topped with the chipboard letter (Image 2).
Marian Parsons

Marian Parsons
Trace & Cut Fabric
Use cut batting as template to trace each letter onto fabric, leaving a 1/2″ border to pull around sides of the letter in order to staple it in place. Make sure fabric is face down, so the letter is being traced in reverse. This way, the letter will be facing the proper way once it’s flipped over. For letters with a hole in the middle, cut small hole and a few small slits that will allow fabric to be pulled through. On a flat work surface, layer each letter fabric first, face down, followed by quilt batting and then the chipboard letter.
Photo By: Marian Parsons
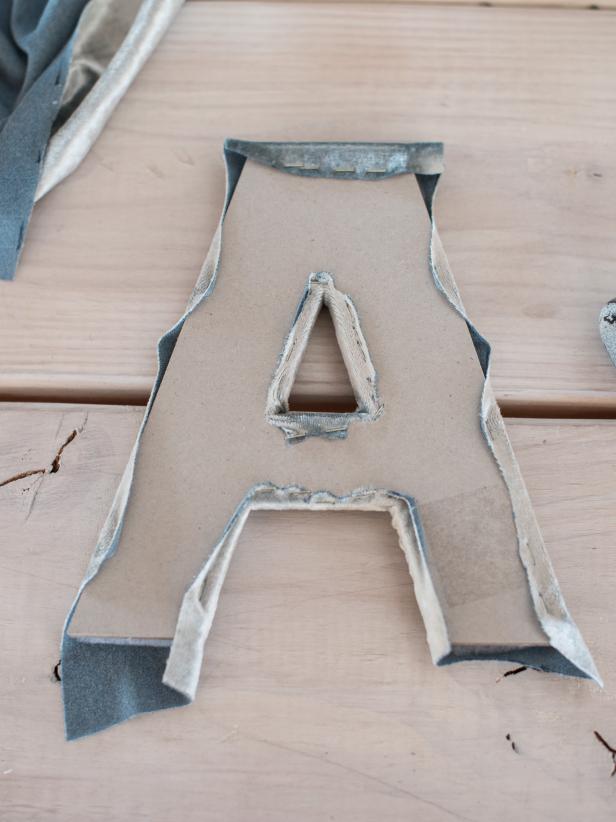
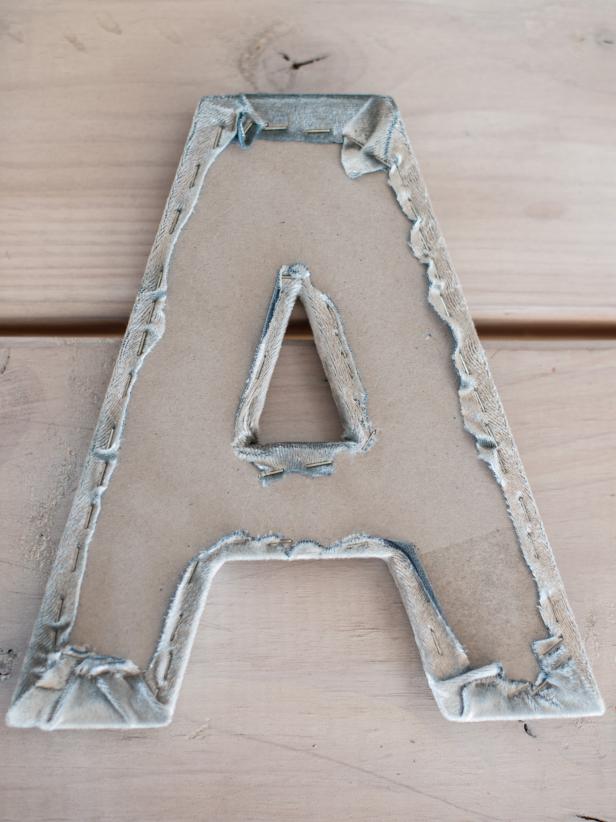
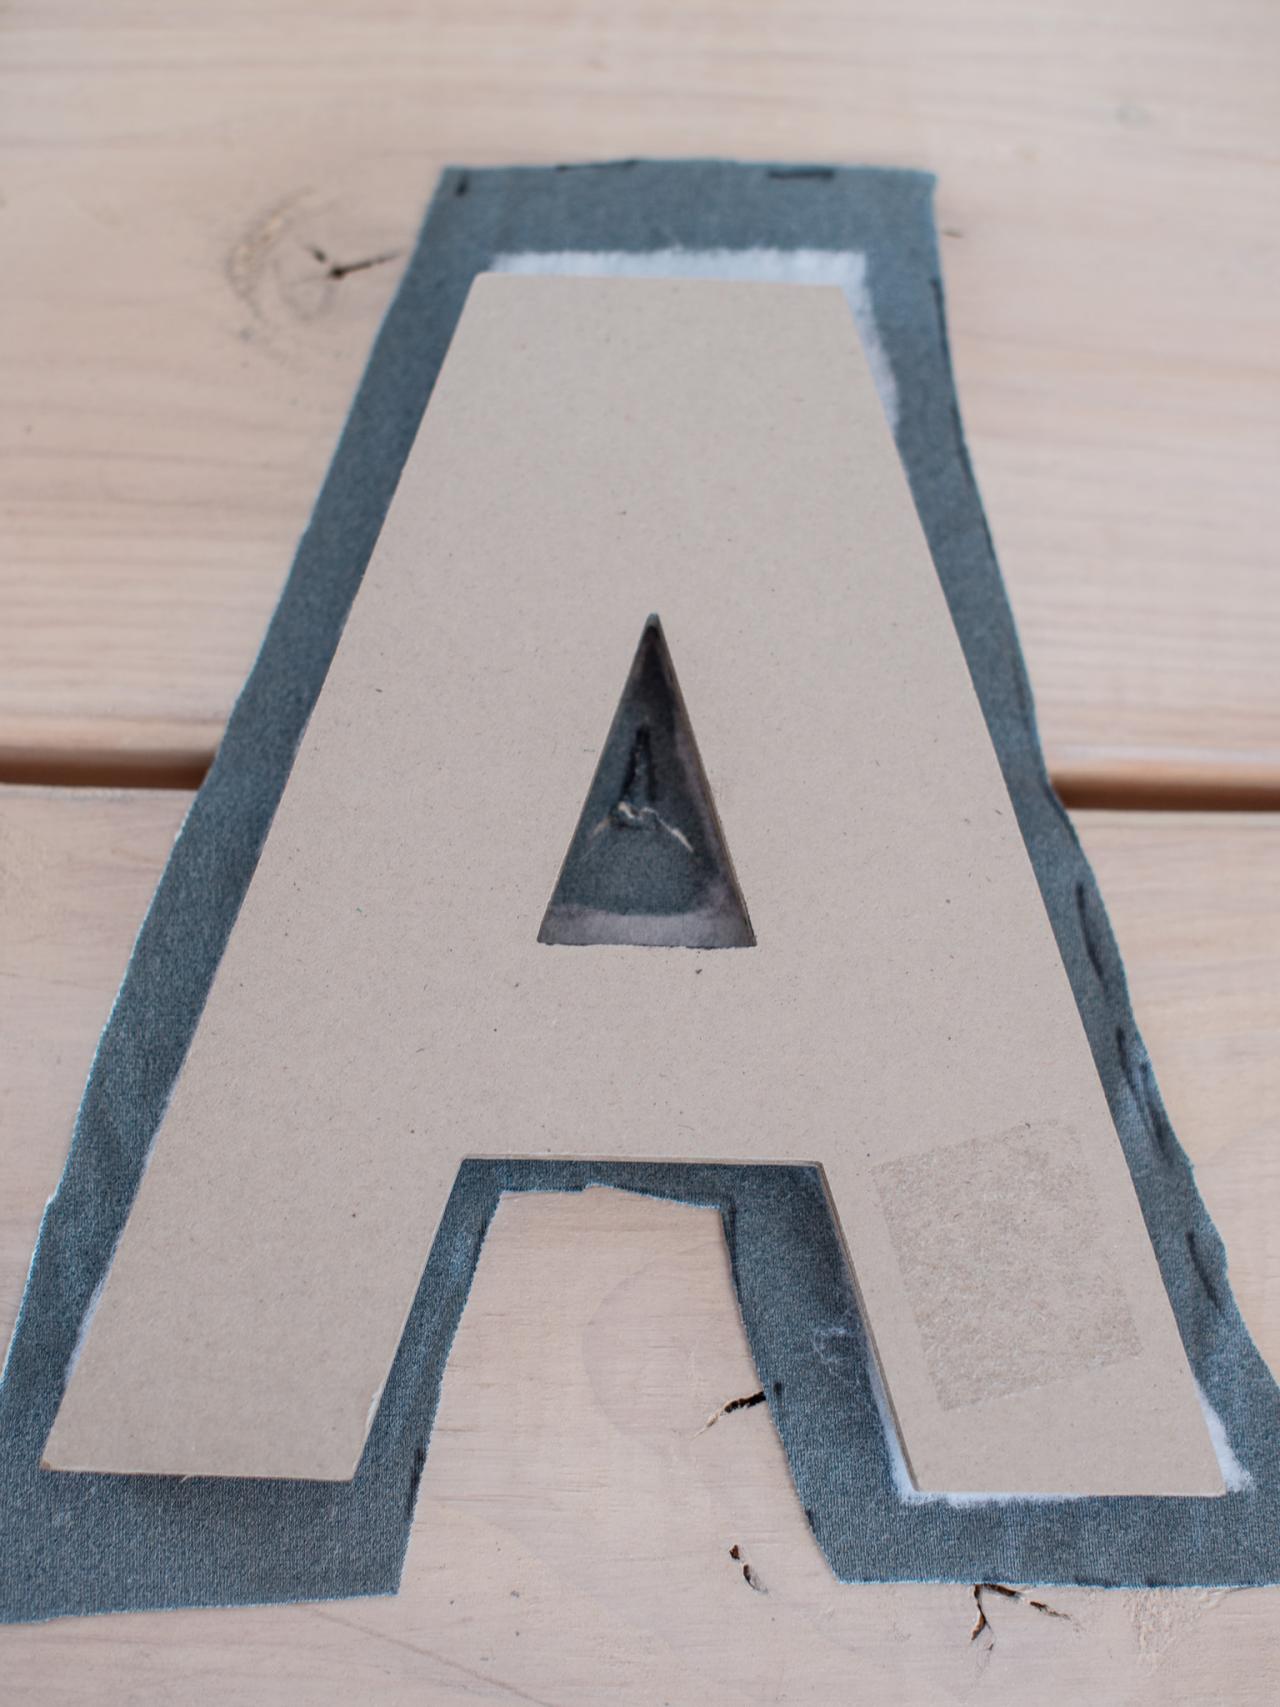
Upholster Letters
Pull excess fabric around the edges of each letter and secure to the back with staples (Image 1). Insert a few staples on all sides of the letter to get the fabric into the proper position (Image 2), then fill in the gaps with additional staples until fabric is tightly pulled around all sides (Image 3). This will prevent the fabric from shifting and will ensure a good fit. Once fabric is attached to the letter, trim excess, so the letter will lay flat against the wall when hung. Tip: Using a fabric with a little stretch to it will make the upholstery process a bit easier.

Marian Parsons
Marian Parsons
Marian Parsons
Upholster Letters
Pull excess fabric around edges of each letter and secure to the back with staples. Insert a few staples on all sides of the letter to get fabric into proper place, and then fill in the gaps with additional staples until fabric is tightly pulled around all sides. This will prevent the fabric from shifting and will ensure a good fit. Once fabric is attached to the letter, trim excess, so the letter will lay flat against the wall when hung. Tip: Using a fabric with a little stretch to it will make the upholstery process a bit easier.
Photo By: Marian Parsons
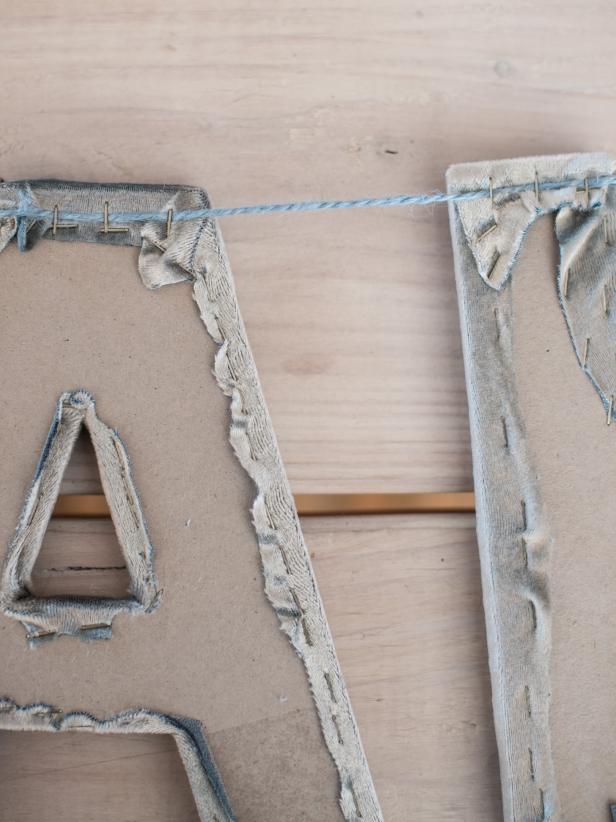
Create Banner
Cut a length of twine, ribbon or string that's long enough to attach letters together, creating a banner, plus an allowance on each side for hanging. Staple string to top back side of letters, making sure letters are evenly spaced (Image 1). Tip: Hot glue could also be used for this step. Hang your completed banner wherever family or holiday guests will gather (Image 2).
Marian Parsons
Marian Parsons
Create Banner
Cut length of twine, ribbon or string that is long enough to attach letters together, creating a banner, plus an allowance on each side to hang letter. Staple to top back side of letters, making sure letters are evenly spaced. Tip: Hot glue could also be used for this project.
Photo By: Marian Parsons
Upholstered Christmas Banner
Issue a Christmas greeting to all who enter your home with this unique upholstered letter banner. Also great for birthdays, New Years and any other occasion worth celebrating.
Photo By: Marian Parsons


