


How to Make a Metallic Rope Basket

DIY Rope Basket Filled With Green Plant
Combine rustic natural rope with metallic ribbon to create a trendy and versatile basket that's easier to make than you think. Use it in lieu of a gift bag and fill with seasonal fruit, baked goods or ornaments.

Materials Needed:
- heavy, natural rope
- tacky glue
- gold, metallic glitter ribbon
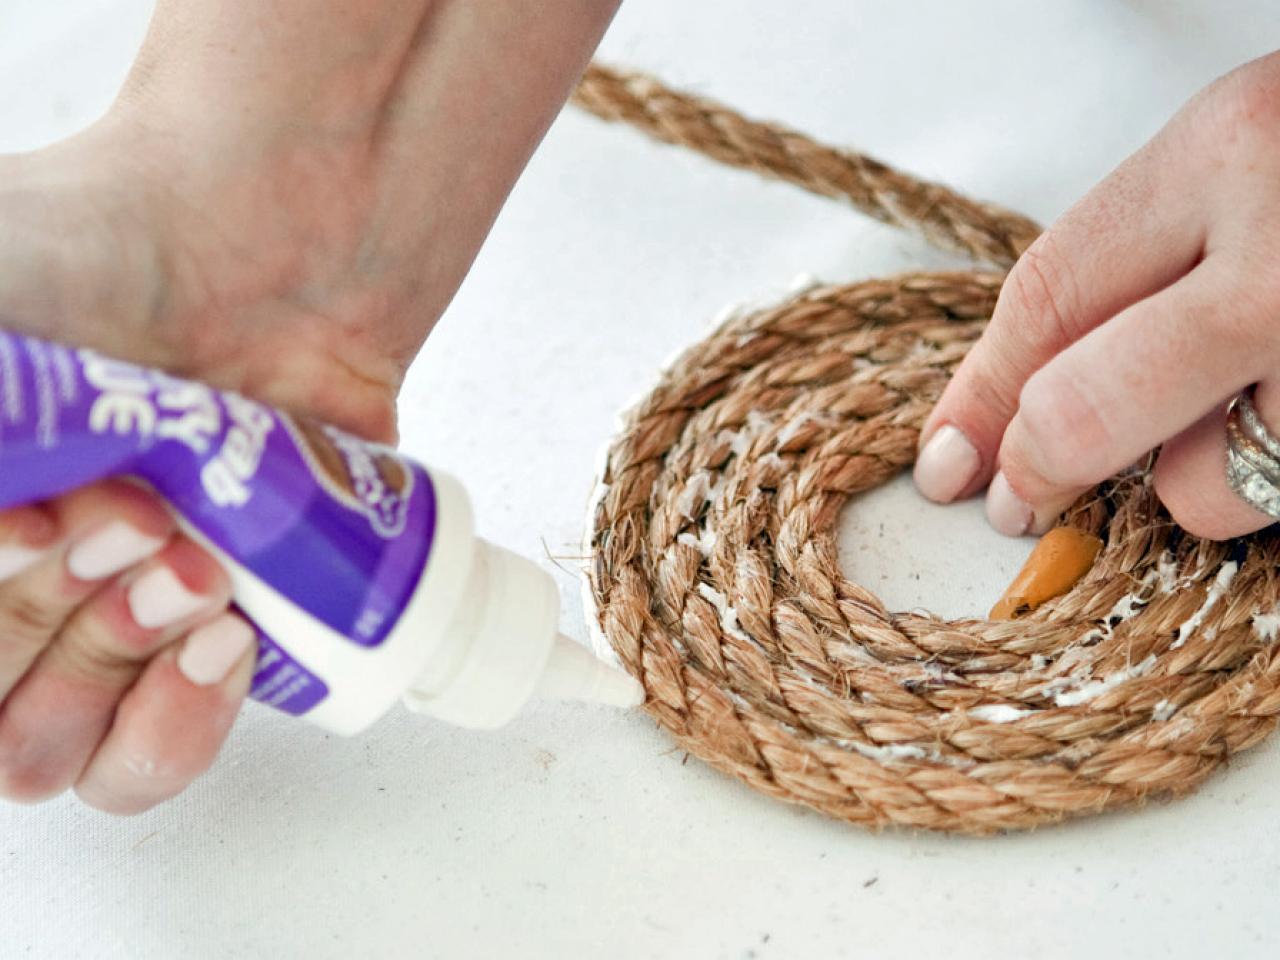
Create the Basket Base
Apply glue along the first 5 inches of the rope. Coil the rope on a flat surface, applying more glue on every inch of the rope. Keep coiling and adding more rope until you have the circumference of basket you prefer.
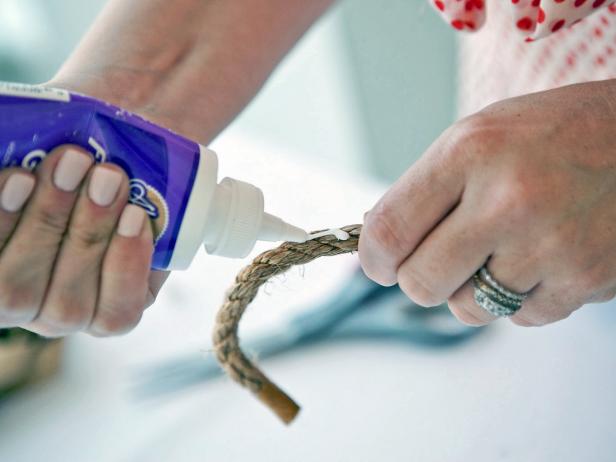

Glueing Rope
To create the base of your rope basket, apply glue along the first 5 inches of the rope.
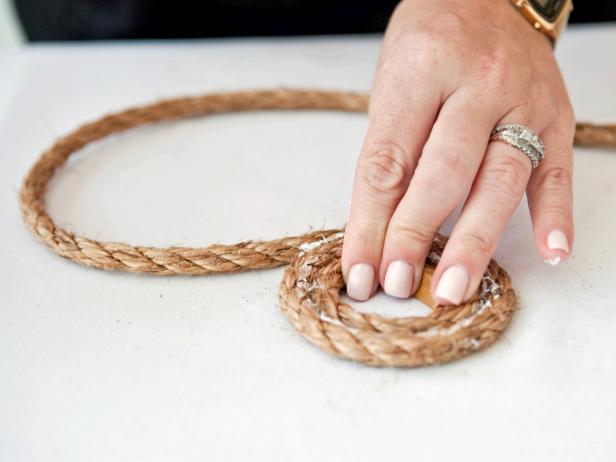
Coiling and Glueing Rope
To create the base of your basket, apply glue along the first 5 inches of the rope. Coil the rope on a flat surface, applying more glue on every inch of the rope. Keep coiling and adding more rope until you have the circumference of basket you prefer.
Glueing Coils of Rope Together
To create the basket's base, apply glue along the first 5 inches of the rope. Coil the rope on a flat surface, applying more glue on every inch of the rope. Keep coiling and adding more rope until you have the circumference of basket you prefer.
Start the Basket Sides
When your coil reaches a size you like, start gluing the rope on top of itself instead of next to itself. Keep adding glue.

Making the Sides of DIY Rope Basket
When your coil reaches a size you like, start gluing the rope on top of itself instead of next to itself to begin making the basket's sides. Keep adding glue.
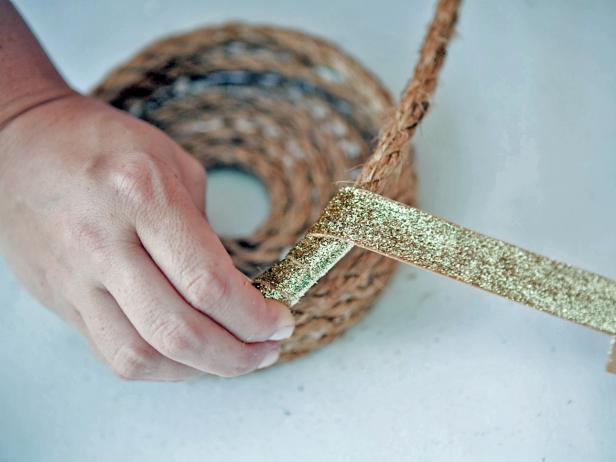
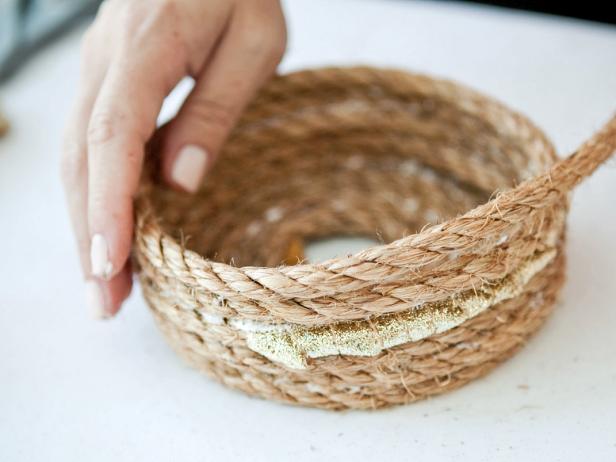
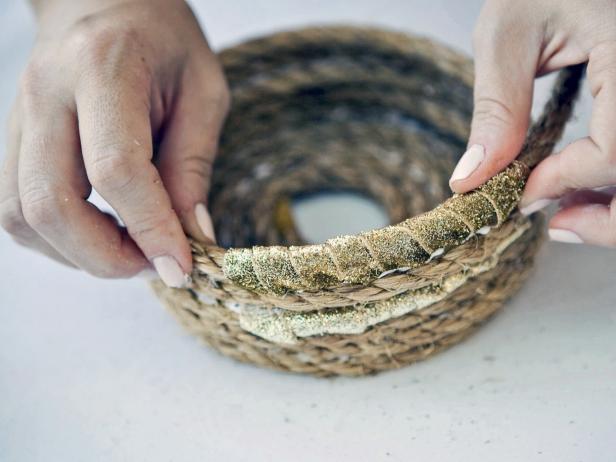
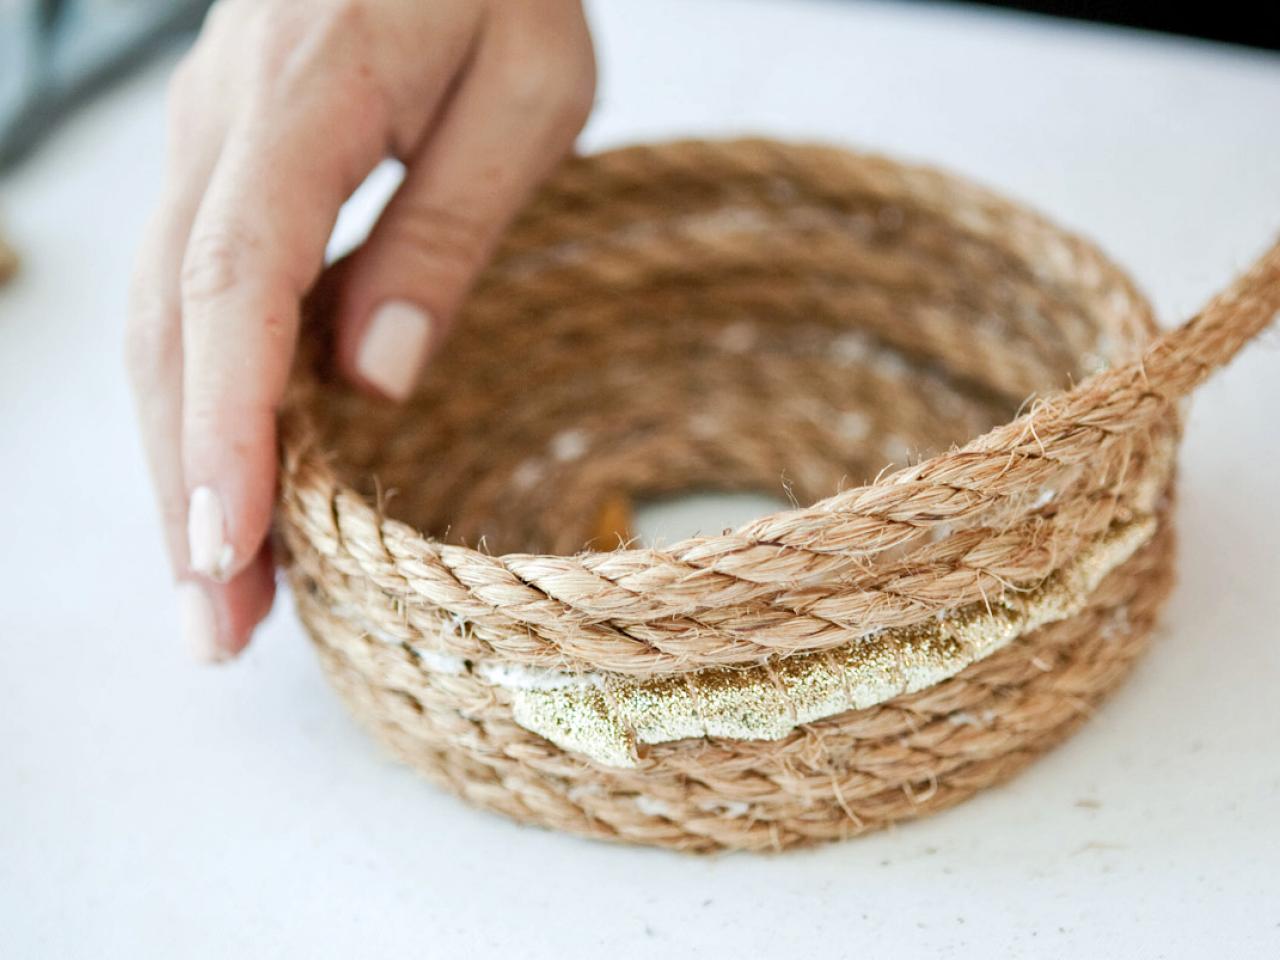
Add Metallic Ribbon
After a few rows of height, glue the ribbon onto the underside of the rope. Wrap the ribbon around the rope about 5 times. Glue the end of the ribbon to the underside of the rope.
After two more rows of rope, add another section of gold ribbon.
Add a few more rows of rope, a section of gold ribbon, and two more rows of rope. Keep adding rows of rope if you’d prefer a taller basket.
Tip: Wrap all the ribbon on the same side of the basket; this will be the display side of the finished product.
Adding Metallic Ribbon to Rope Basket
To add ribbon to the sides of your rope basket, after a few rows of height, glue the ribbon onto the underside of the rope. Wrap the ribbon around the rope about 5 times. Glue the end of the ribbon to the underside of the rope.
Wrapping Gold Ribbon Around Rope
To add metallic ribbon to your rope basket, after building up a few rows of height, glue the ribbon onto the underside of the rope. Wrap the ribbon around the rope about 5 times. Glue the end of the ribbon to the underside of the rope.
Wrapping Rope to Create Basket
When creating the sides of the basket, after two more rows of rope, add another section of gold ribbon. Add a few more rows of rope, a section of gold ribbon, and two more rows of rope. Keep adding rows of rope if you’d prefer a taller basket.
Wrapping Gold Ribbon Around Rope
To create the basket, add a few more rows of rope, a section of gold ribbon, and two more rows of rope. Keep adding rows of rope if you’d prefer a taller basket.
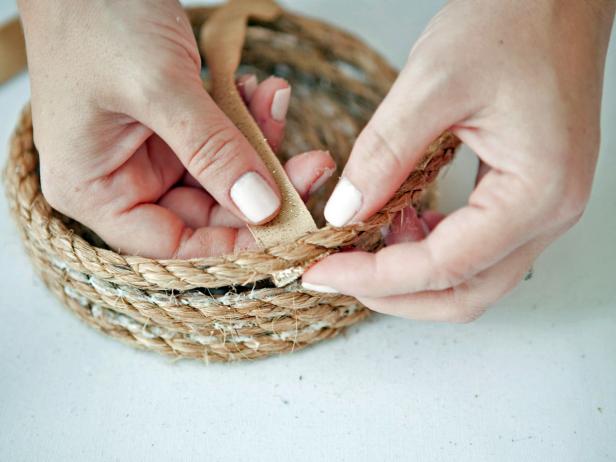
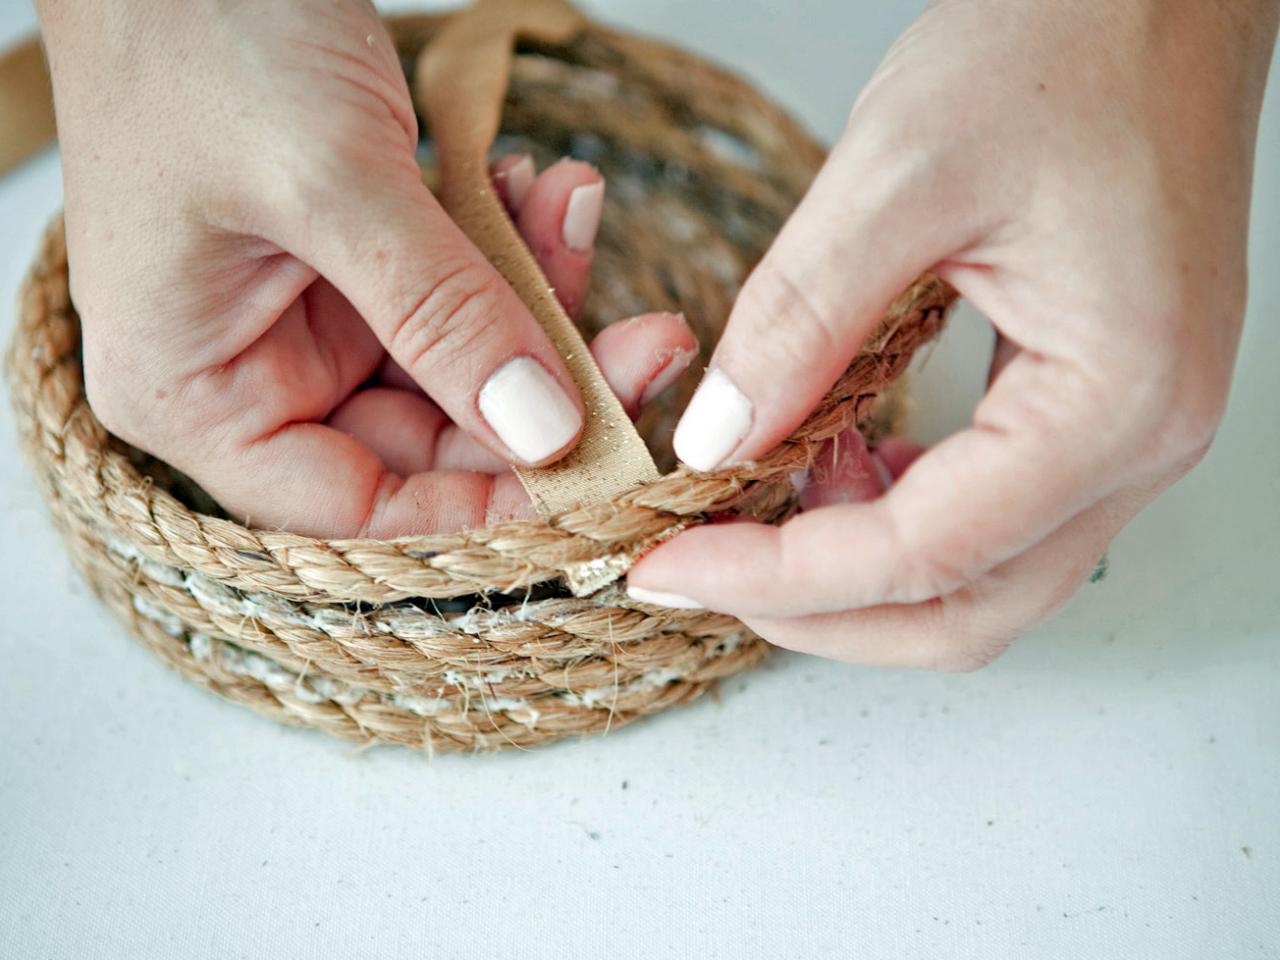
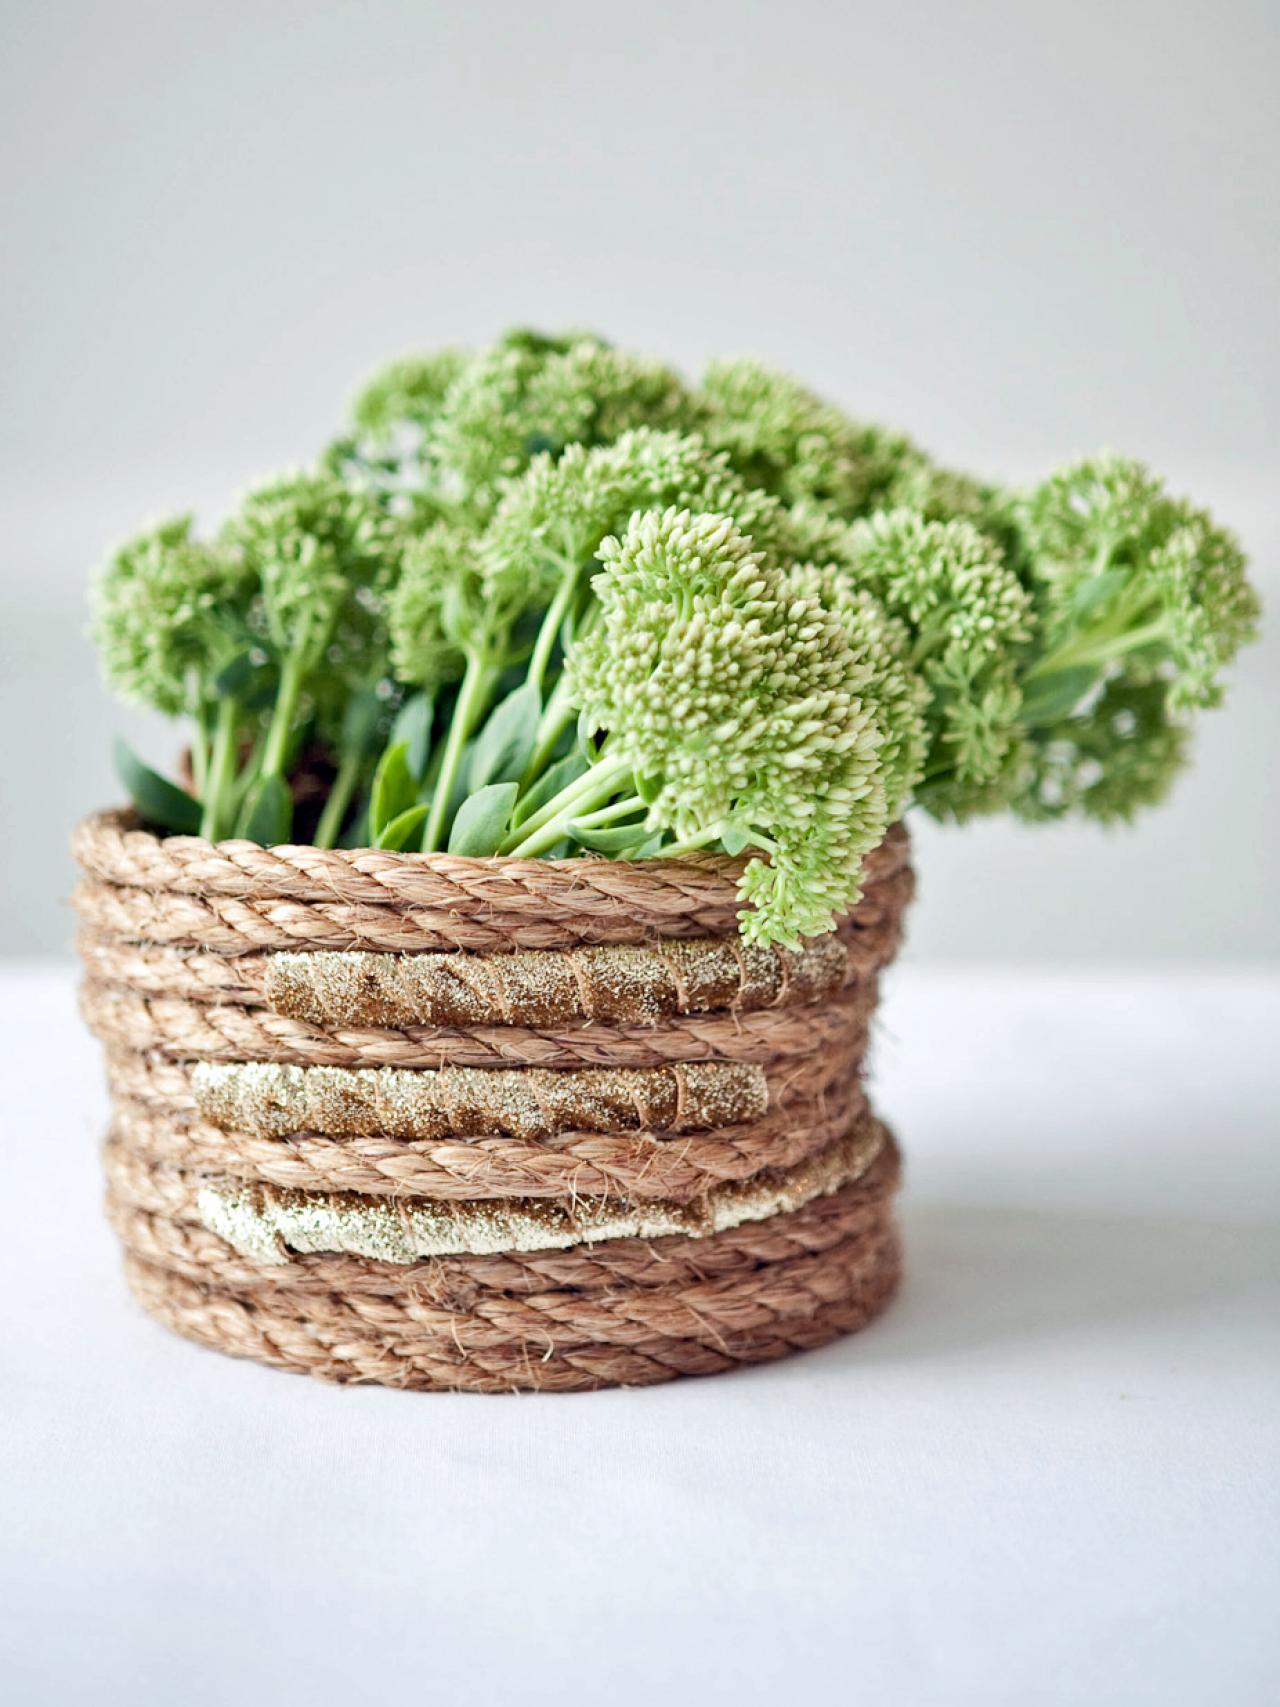
Finish and Display Basket
When your basket reaches the desired height, cut the rope on an angle at the back side of the basket. Brush on tacky glue to hold the fibers in place. Attach to the rim of the basket with more tacky glue.
Let dry completely, then fill and enjoy!

DIY Rope Basket Filled With Green Bouquet
When your basket reaches the desired height, cut the rope on an angle at the back side of the basket. Brush on tacky glue to hold the fibers in place. Attach to the rim of the basket with more tacky glue. Let dry completely, then fill and enjoy!


