


How to Make a Handmade Holiday Photo Card

Glitter-Covered Photo Holiday Card: Free Template
Embellish our free printable template with a favorite family photo surrounded by a glitzy, glittered frame to create a holiday greeting they'll treasure for many years to come. Make your own with our step-by-step instructions seen on HGTV.com.

Photo by: Picasa ©ten22 studio 2013
Picasa, ten22 studio 2013
Materials Needed:
- 3" x 3" photos
- white card stock
- scissors or paper cutter
- ruler/bone folder (optional)
- glitter
- glitter glue
- small paint brush
- foam dots
- Download: Photo Holiday Card Template
Print Template and Photos
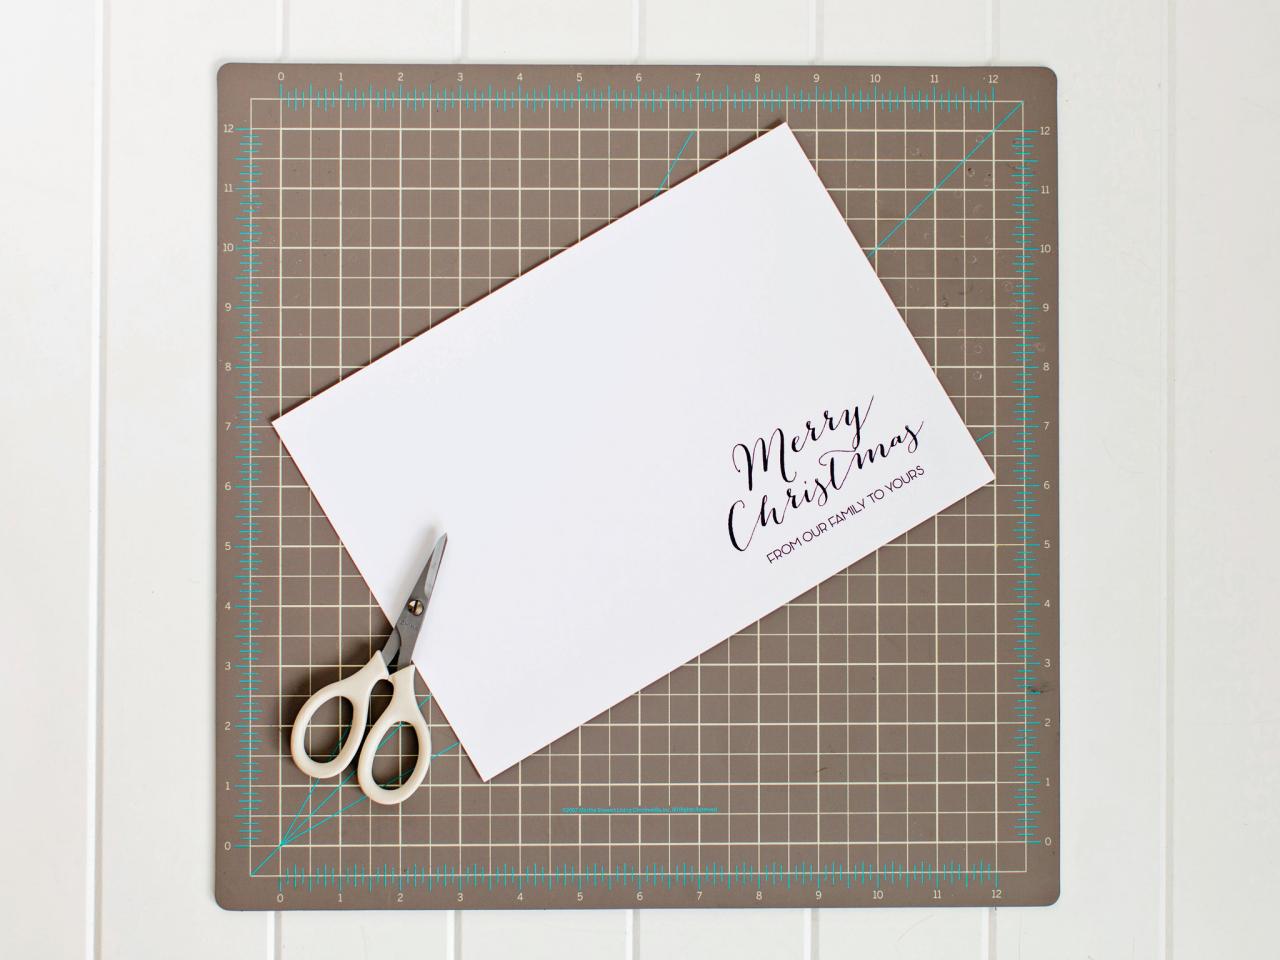
Download and print card template onto white card stock. Size and print 3" x 3" photos or order photos in this size from a photo lab. If possible, create a 1/8" white border around image. Cut out card design using scissors or paper cutter.

Printable Template for Family Photo Holiday Card
Download and print card template (http://hgtv.sndimg.com/HGTV/2013/10/29/original_tomkat-studio-printable-photo-holiday-cards.pdf) onto white card stock. Size and print 3" x 3" photos or order photos in this size from a photo lab. If possible, create a 1/8" white border around image. Cut out card design using scissors or paper cutter.
Photo by: Picasa ©ten22 studio 2013
Picasa, ten22 studio 2013
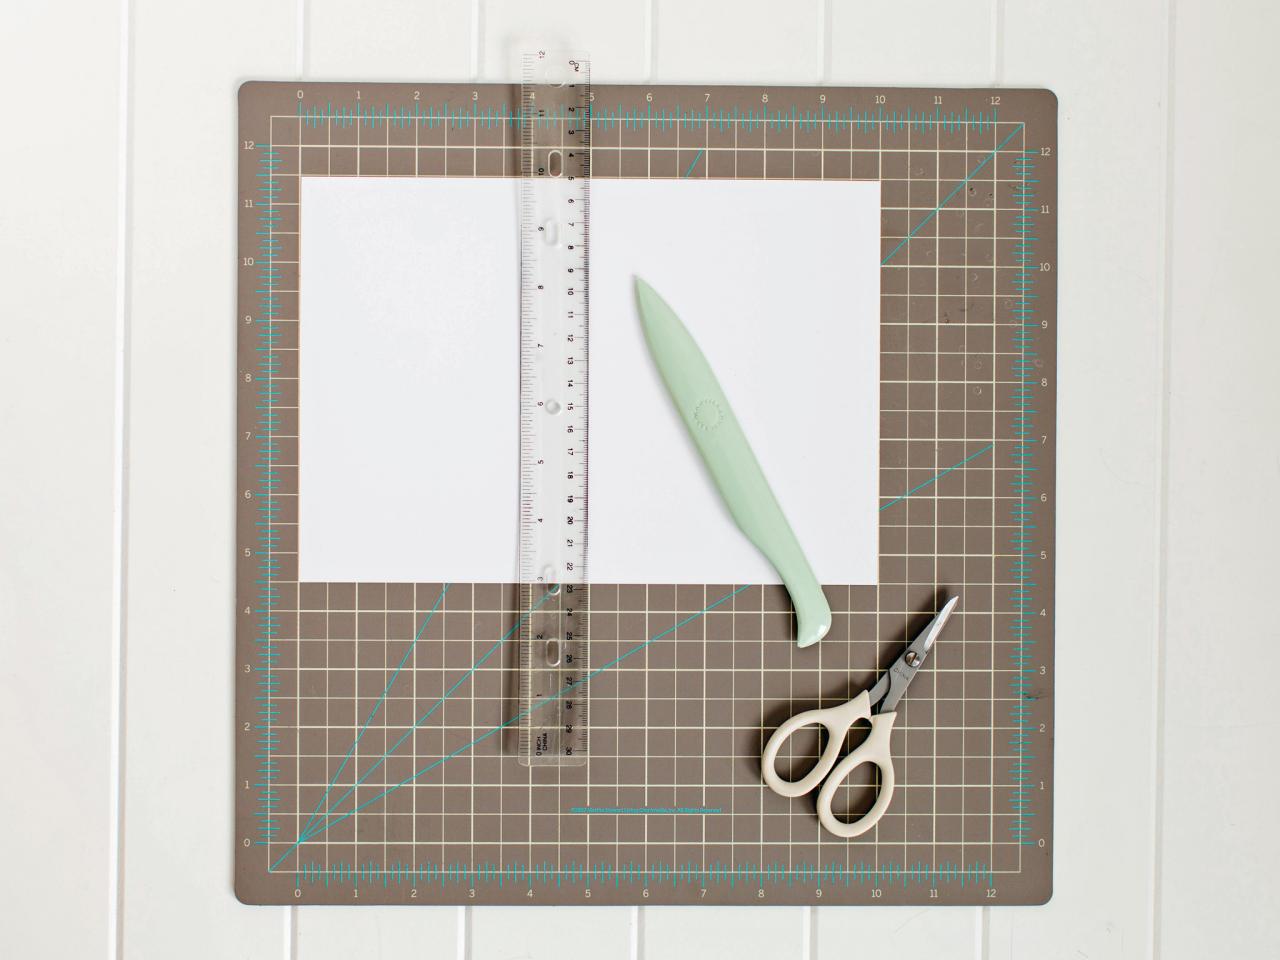
Fold Card
Use a ruler and bone folder to create a folding crease at 5" (middle of card). This creates a clean crease and makes it easier to fold correctly.

Ruler and Bone Folder to Fold Holiday Card
Use a ruler and bone folder to create a folding crease at 5" (middle of card). This creates a clean crease and makes it easier to fold correctly.
Photo by: Picasa ©ten22 studio 2013
Picasa, ten22 studio 2013
Glitter Edges of Photo
Use a small paintbrush to apply glitter glue to one edge of photo. Generously sprinkle glitter onto the glue, then tap off excess. Continue glittering each edge, one by one, until all edges are complete. Set photo aside and allow glue to dry.

Gluing Glitter Edges on Handmade Holiday Photo Card
Use a small paintbrush to apply glitter glue to one edge of photo. Generously sprinkle glitter onto the glue, then tap off excess. Continue glittering each edge, one by one, until all edges are complete. Set photo aside and allow glue to dry.
Photo by: Picasa ©ten22 studio 2013
Picasa, ten22 studio 2013
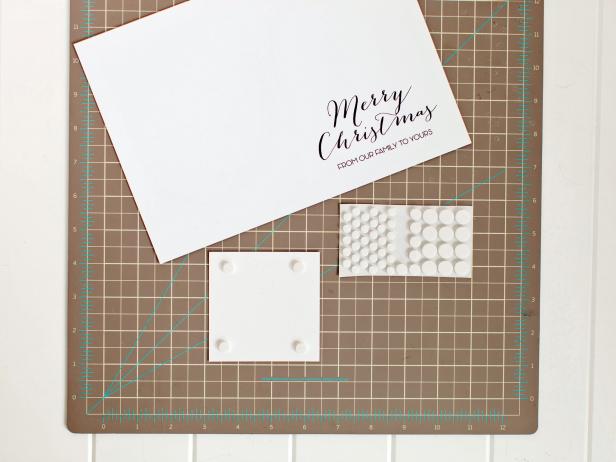
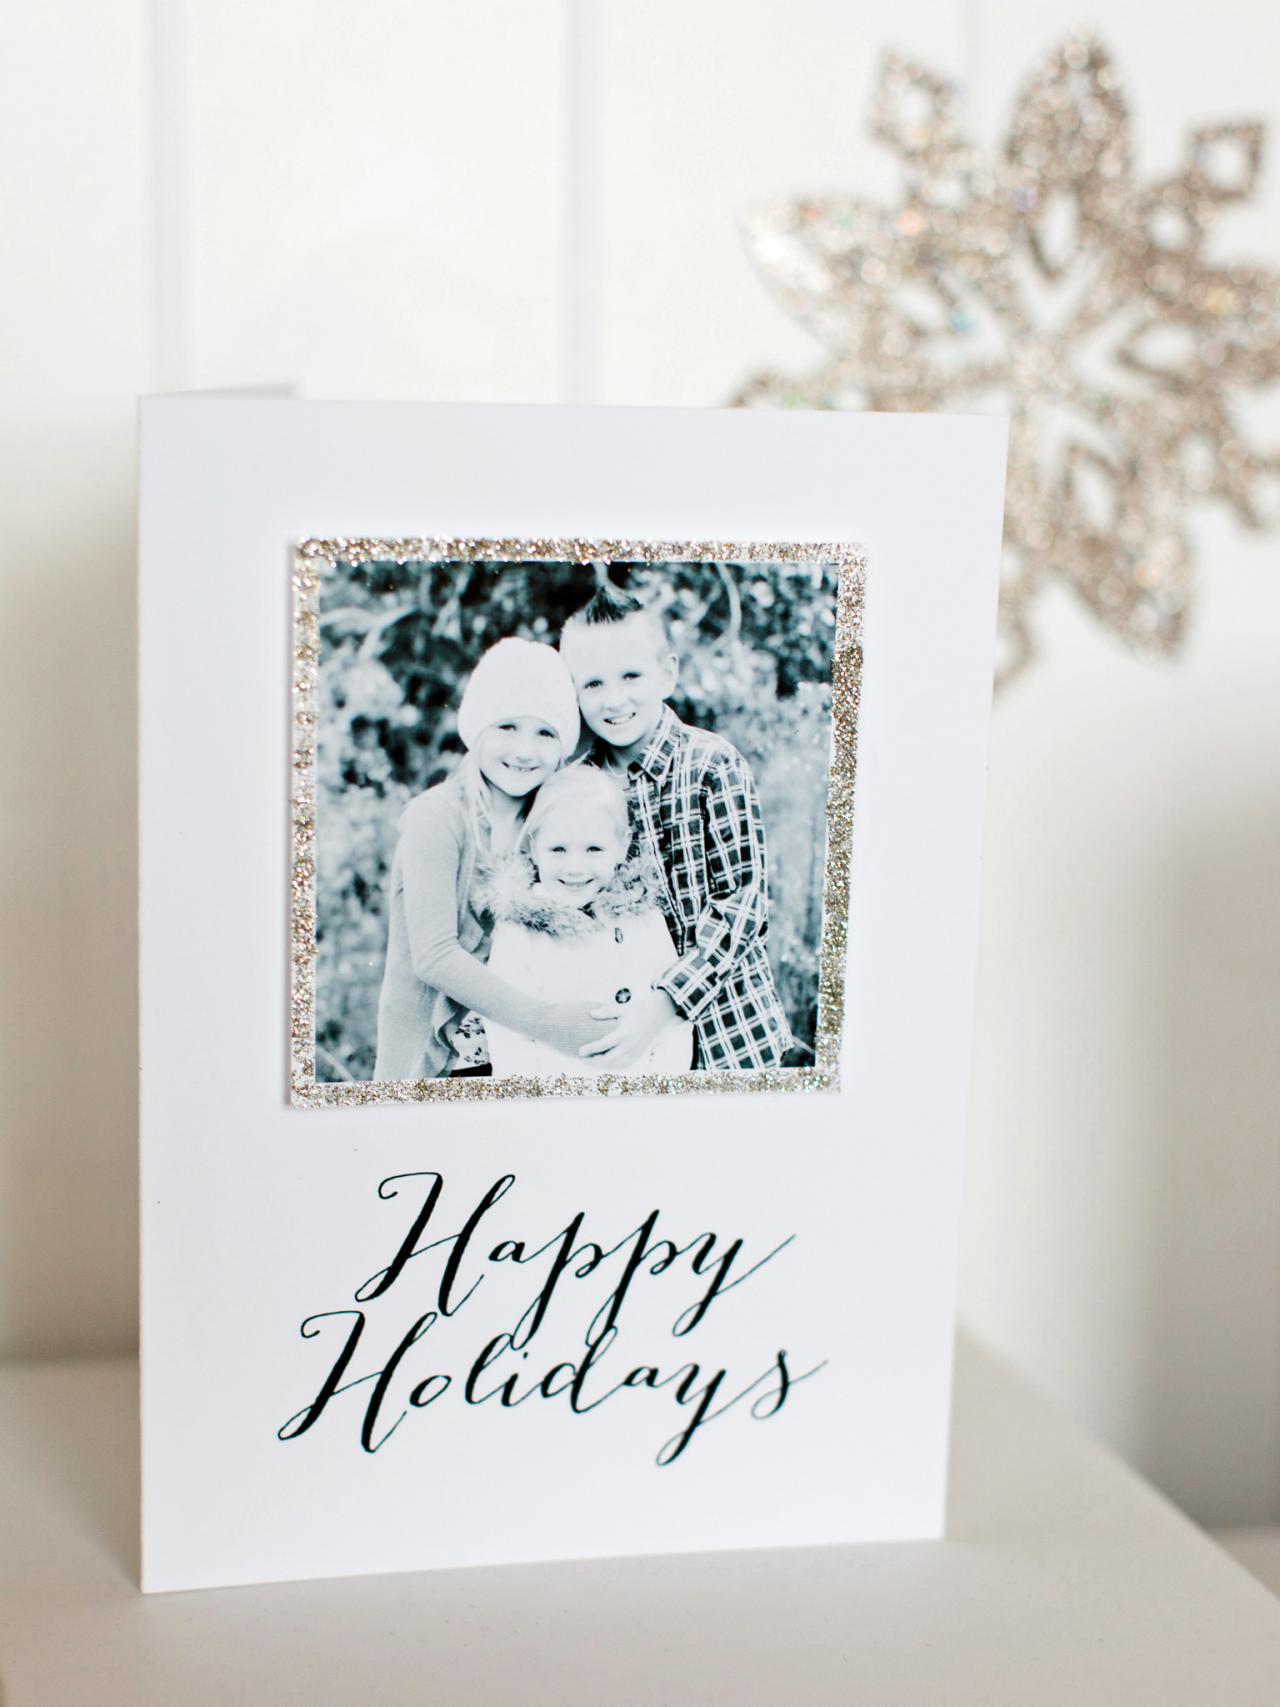
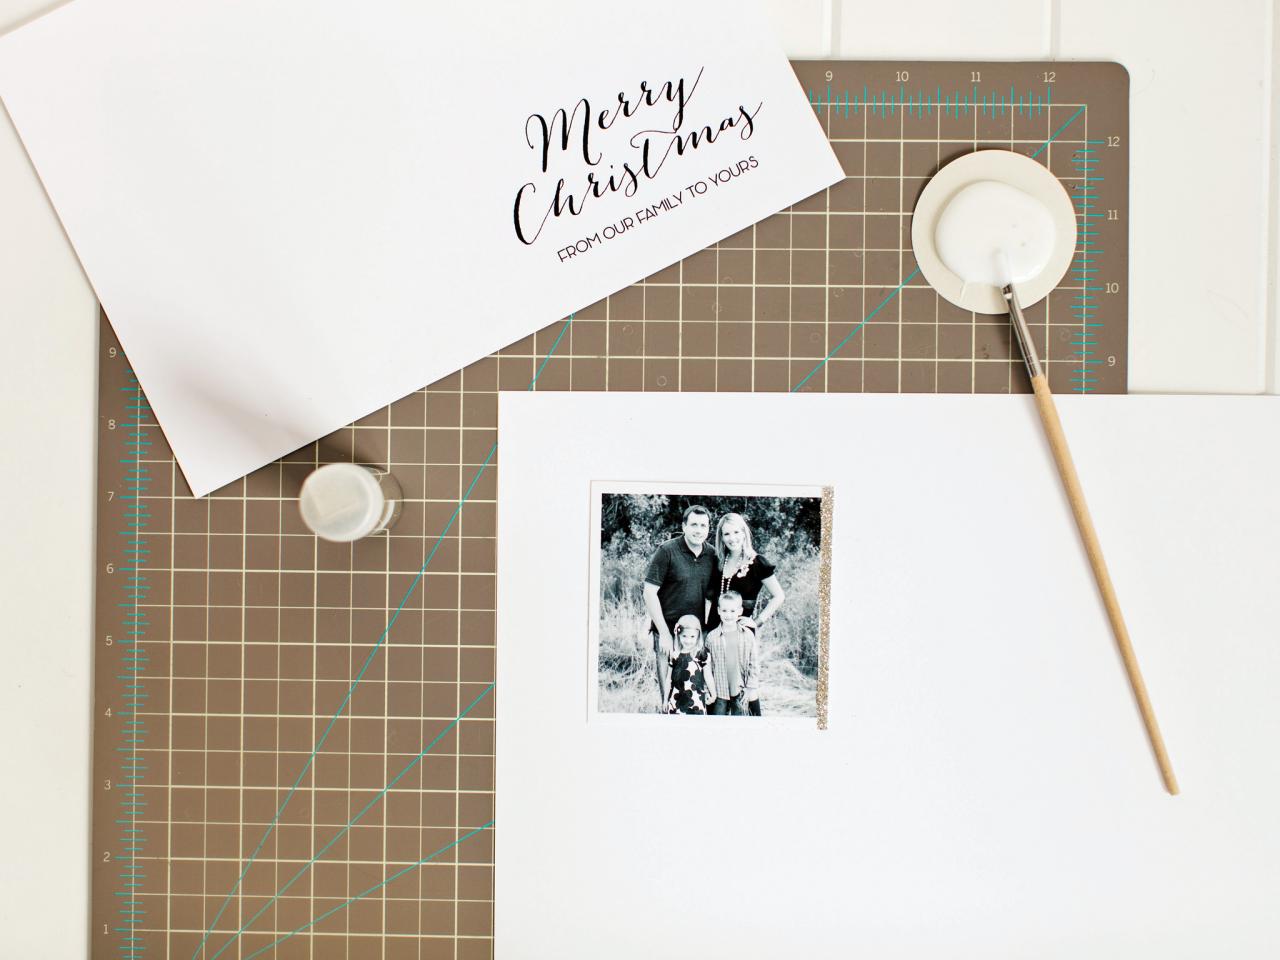
Attach Photo to Card
For dimension, add foam dots to the back of the glittered photo (Image 1) then attach it right above the greeting to the printed card template (Image 2). Tip: Follow the basic steps and instructions above to attach a 2" x 2" photo to this printable gift tag (Image 3).
Picasa, ten22 studio 2013

Picasa, ten22 studio 2013
Picasa, ten22 studio 2013
Adhesive Foam Dots for Homemade Holiday Card
For dimension, add foam dots to the back of a glittered family photo then attach it above the greeting of your printed card template.
Photo By: Picasa ©ten22 studio 2013
Handmade Holiday Card With Family Photo
Attach a family photo above the greeting of the printed card template (http://hgtv.sndimg.com/HGTV/2013/10/29/original_tomkat-studio-printable-photo-holiday-cards.pdf) for a charming personal touch.
Photo By: Picasa ©ten22 studio 2013
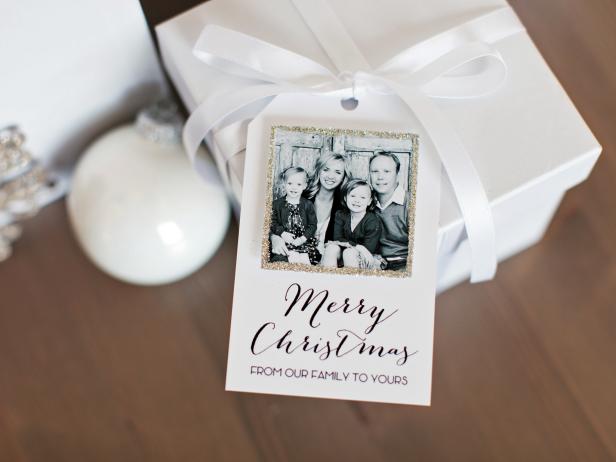
Custom Portrait Gift Tags
Create your own custom gift tags with a family portrait for a truly personalized gift.
Photo By: Picasa ©ten22 studio 2013


