


How to Create a Floor Plan and Furniture Layout for Your Living Room


Measure and Draw the Room
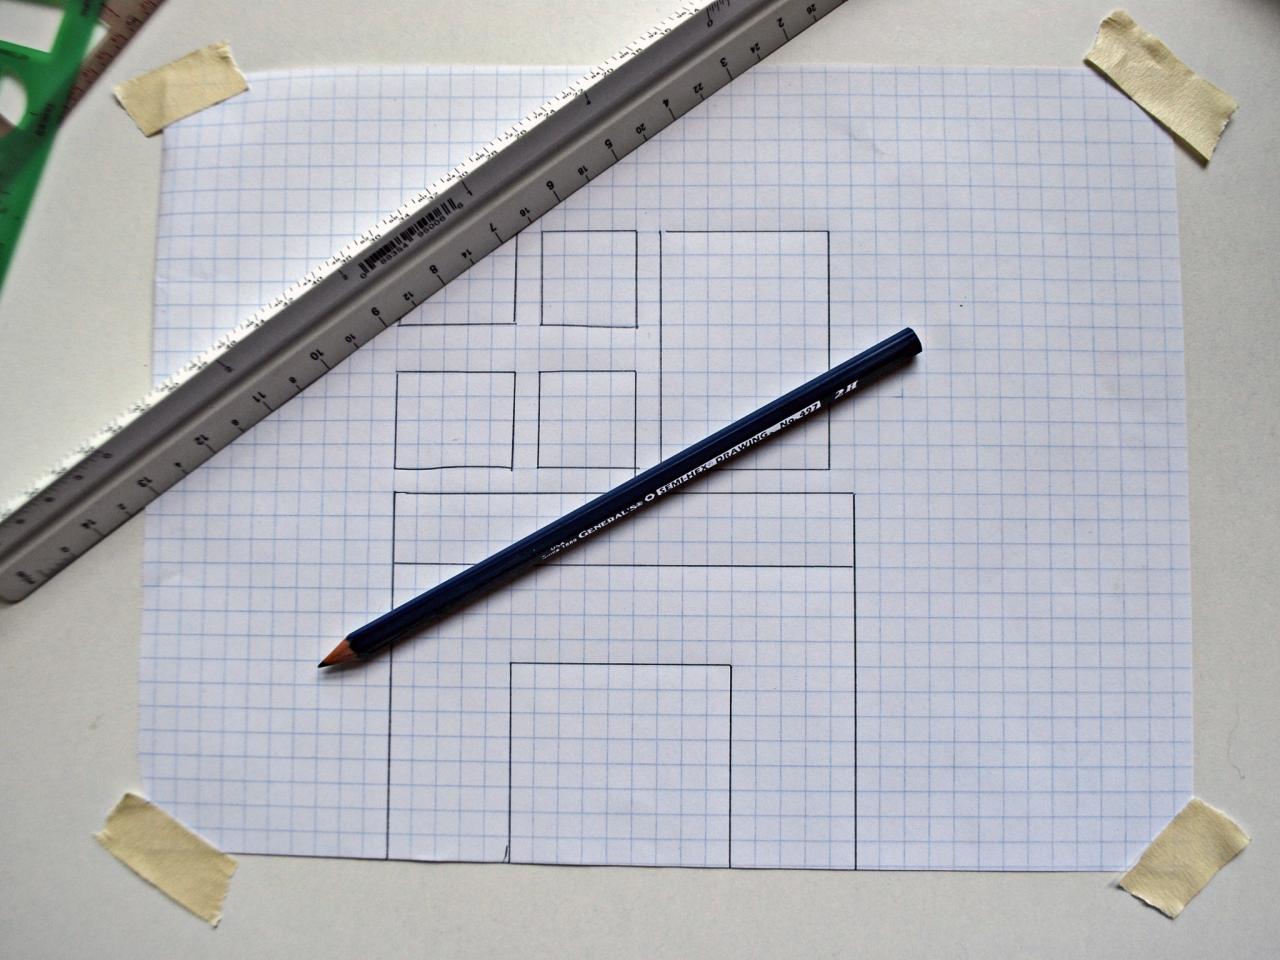
Using a tape measure, determine the length and width of your room. Also note any installations or built-in furniture pieces that cannot be moved. Using a ruler and pencil, add the boundaries of the room to your graph paper. One box on the paper represents one foot.
Once you have your four walls on paper, add the location and size of your doors and windows. When adding doors, mark the direction door opens to note the lost space.
Tip: Once you have a finished floor plan, it's a good idea to make a couple of photocopies so you can try different furniture layouts

Formulate Your Floor Plan
With your completed floor plan in hand, it's time to answer four questions that will help you figure out the ideal floor plan for you.
Question 1: Where are the balance lines of this room?
This is super easy to do. Simply take out your floor plan and draw a pair of lines that cut each wall in half. These are the balance lines of a room and they divide the room into 4 equal-sized areas. In order to have a balanced room, the visual weight of the furniture on one side of the room should be about the same as the weight of the furniture on the opposite side of the room.
Question 2: What are the traffic patterns?
In essence what you are asking is "Where can I not place any furniture because it will be in the way of the natural flow of people as they move about the room?" Add 36 inches of clearance in front of every door opening. Allow 12 inches to 15 inches of clear space in front of windows.
Question 3: What is the focus of the room?
This is the simplest question to answer. When you enter the room, what is the most important feature of the room that calls out for attention? All major furniture arrangements should be designed around that item. Some rooms have an existing focal point, like a fireplace. If your room doesn't have a natural focal point, you must create one. Try a large-scale piece of art, a gallery wall, or a console and television.

Question 4: Where is the axis?
Since we have positioned all of the furniture in relation to the focal point, the last piece of the puzzle when it comes to furniture arrangement is to not forget the walls. If the fireplace is your focal point, draw a line that runs floor to ceiling through the center of it on the floor plan.
In order to find your axis, simply draw an imaginary line that runs floor to ceiling from the center of your focal point. The purpose of this axis is to give you a line along which you can add decoration, such as a mirror or piece of artwork above the fireplace.
To take things a step further, extend the axis line to the wall opposite the focal point to create the same visual weight. In our fireplace example, you could perhaps feature a wall of bookcases flanked by chairs.

Start Arranging
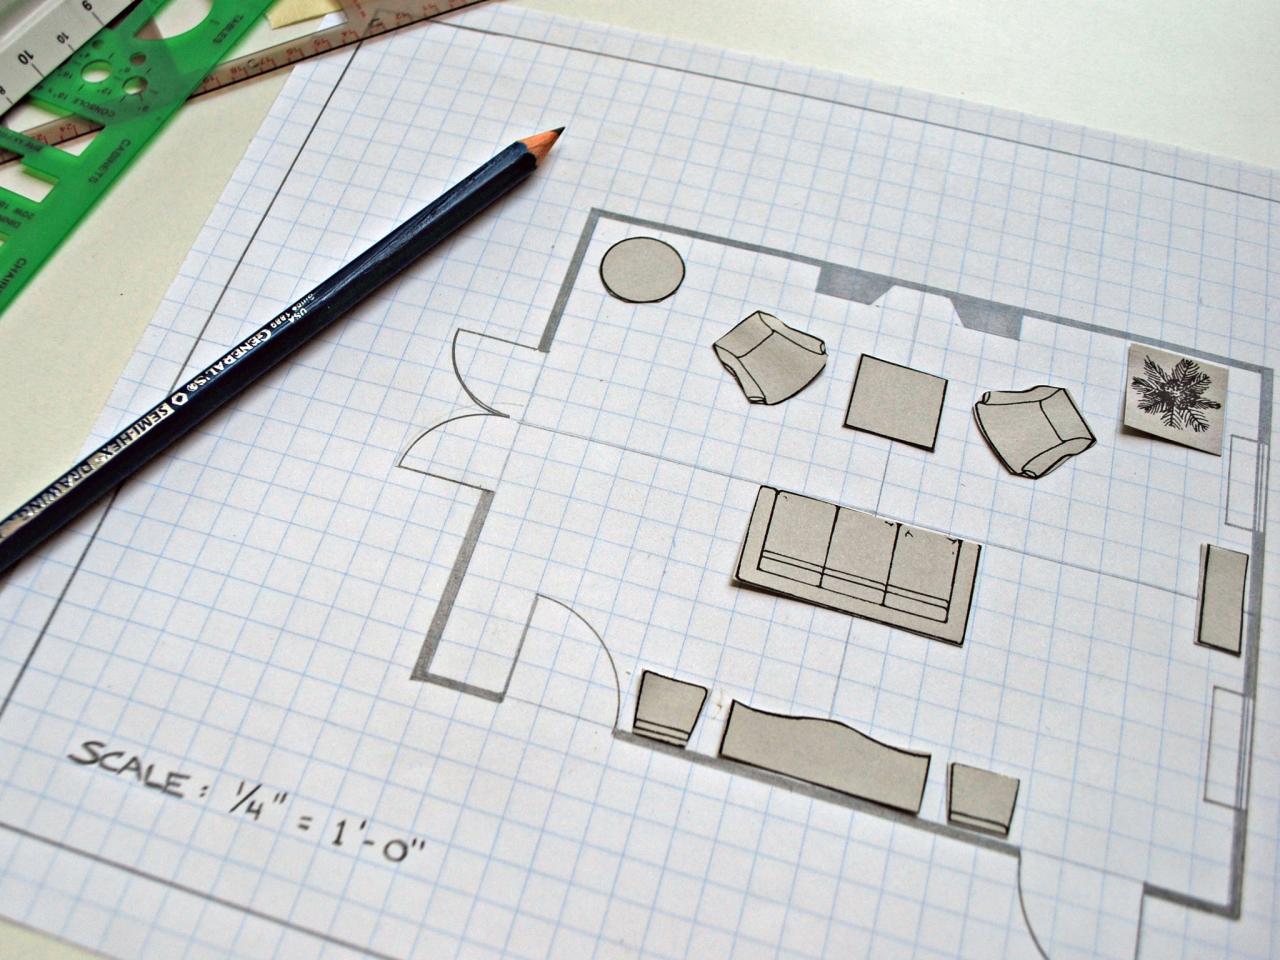
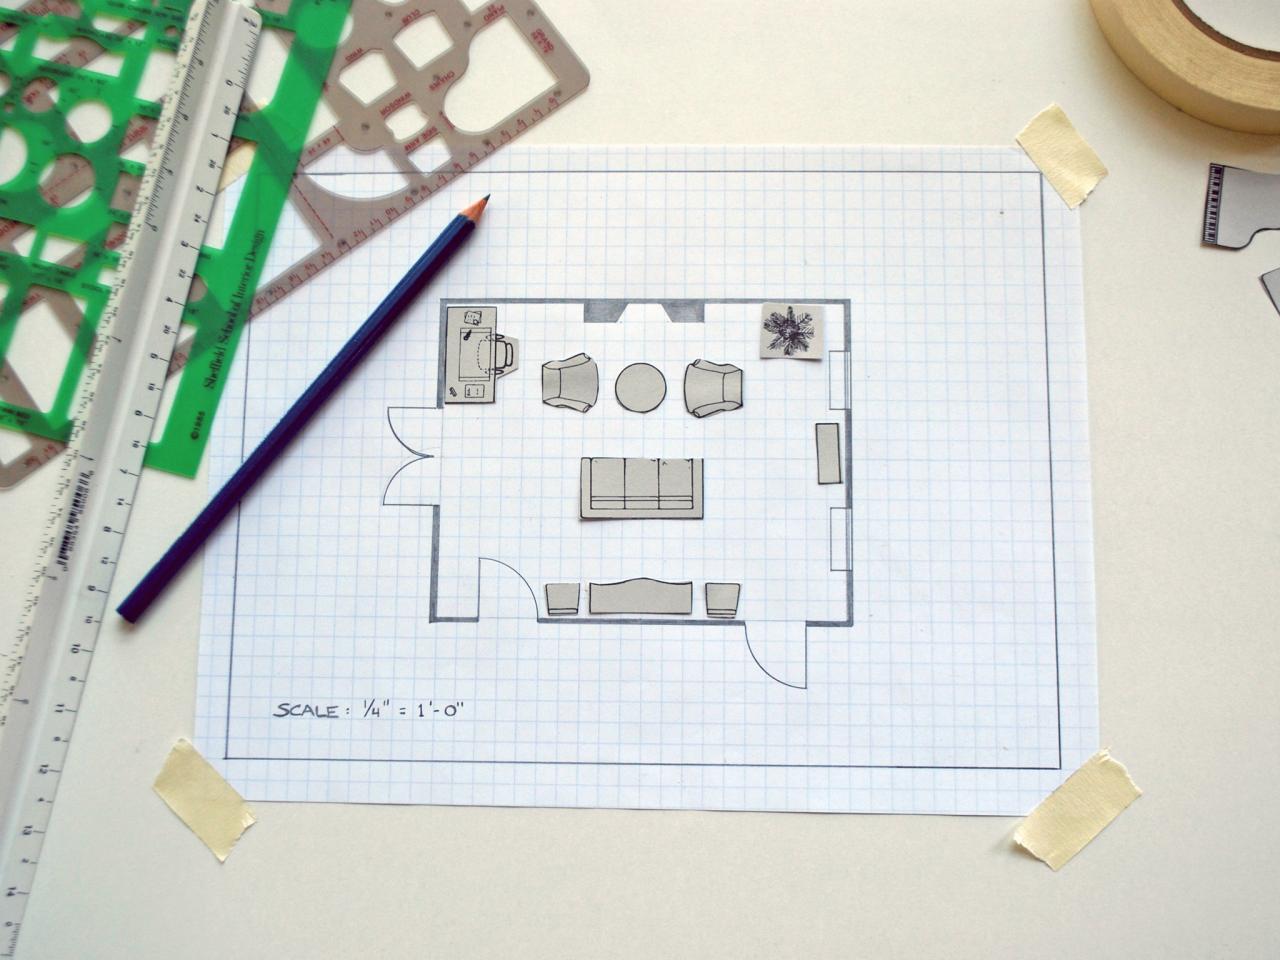
Draw paper scale models of your furniture, or search for printable versions online. To draw your own, use the same scale of 1 box equals 1 foot to cut out shapes for your furniture pieces.
Before ordering new furniture or moving around existing pieces, use some painters tape to map out the arrangement on your actual floor. This will help you double-check that everything will actually fit the way you envision it.


