


How to Make a Sputnik-Shaped Solar Chandelier
Need a chandelier for your outdoor dining space, but don’t want the expense of running electricity? Craft a space-age light fixture using solar landscape lighting and wood dowels.

Skill Level: Intermediate
Estimated Time: 1/2 day
Estimated Cost: $50

Gary Payne
Tools and Materials
- (6) solar landscape lights
- 1/2” poplar dowel
- 3/4” poplar dowel
- 1-1/2” poplar dowel
- drill with a 3/4” and a 1/2” paddle bit
- wood glue
- wood-to-metal glue
- spray paint
- painter’s tape
- miter saw
- small eye hook
- measuring tape
- straight edge
Step 1: Cut Center Rod

Gary Payne
Measure and cut the 1/2” dowel to 12 inches to be the center rod of the chandelier.
Step 2: Cut Connectors
Measure and cut the 1-1/2” dowel into three 4” pieces to use as connectors.
Step 3: Cut Arms

Gary Payne
Measure and cut the 3/4” dowel into two 16” pieces and one 13" piece to use as the arms. Then measure and cut the same-size dowel into two 1-1/2” pieces to use as the end caps.
Step 4: Drill First Connector Hole

Gary Payne
Use a drill with a 1/2” paddle bit to make a hole in each of the three connector pieces for the center rod to slide through.
Step 5: Drill Second Connector Hole

Gary Payne
After the 1/2” hole has been drilled, flip to the other side of the connector and roll the connector between 1/16 to 2/3 rotation and drill a 3/4” hole using a paddle bit. The three connectors should have unique 3/4” hole placement so the arms will branch out in different directions.
Step 6: Assemble

Gary Payne

Gary Payne
Gary Payne
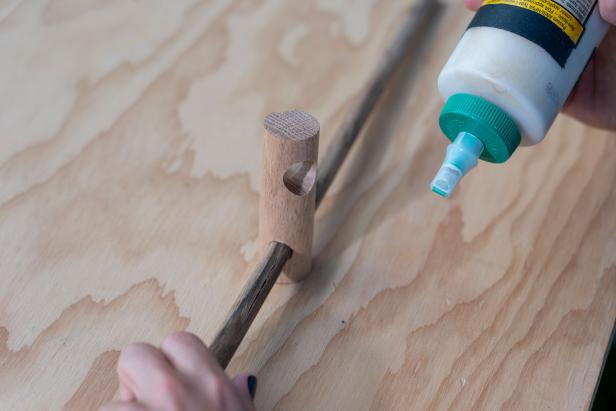
Insert the connectors onto the center rod. Insert the arms into the connectors. Arrange the arms and connectors however you like and then use wood glue to hold everything in place.
Step 7: Add End Caps

Gary Payne

Gary Payne
Drill divots about 1/2” deep into the end caps, using the 1/2” paddle bit. Glue the caps onto the ends of the center rod.
Step 8: Prep for Paint

Gary Payne

Gary Payne
Disassemble the solar landscape lights so the rods are separate from the globes and tops. Cover the solar indicator with painter’s tape so you do not get any paint on them.
Step 9: Paint

Gary Payne
Gary Payne

Gary Payne
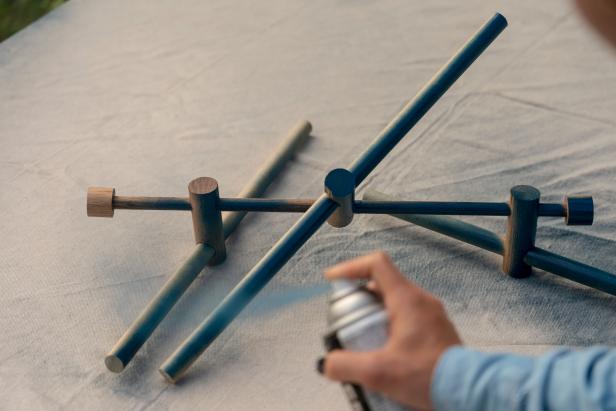
Spray-paint the rods and tops of the solar lights as well as the wood dowels of the chandelier. Let dry.
Step 10: Attach Light Rods to Dowel

Gary Payne

Gary Payne

Gary Payne
Use a wood-to-metal glue to attach the rods of the lights onto the arms of the chandelier and let dry. Reassemble the globes and light tops onto the metal rods on the chandelier.
Step 11: Attach Hanging Hardware

Gary Payne
Add an eye hook to the end cap that will be at the top for hanging.

Gary Payne


