


Christmas Craft: Upcycled Tabletop Trees
Turn old sweaters and other festive fabric into tabletop trees you can display year after year.


As cute as they are practical, these holiday fabric trees put old clothing to use in a completely new way. Look for holiday sweaters with specific themes or in holiday colors with interesting textures. Consider other fabrics, too, such as men’s shirting or a wooly scarf. The repurposing possibilities are endless.
Materials Needed:
- fabric tree template
- scissors
- ruler
- pencil
- 20"x30"x3/8" cork-backed, foam core board
- craft knife
- 3/8" ribbon
- white craft glue
- old sweaters or other holiday-themed clothing
- marker
- 1/2 yard of felt
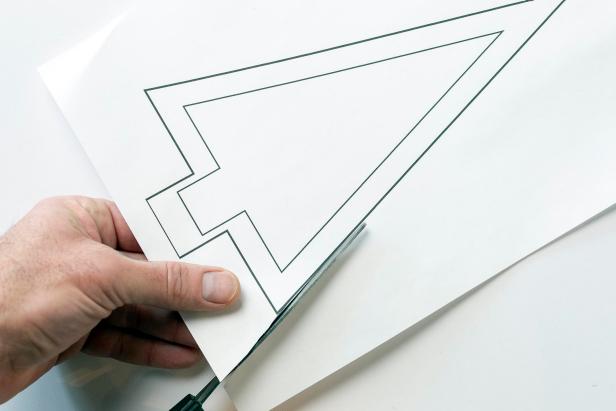
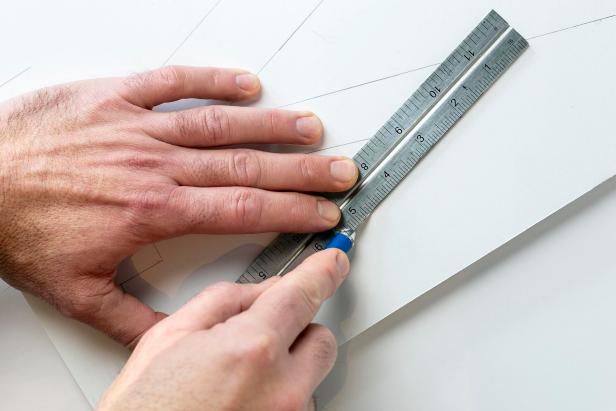
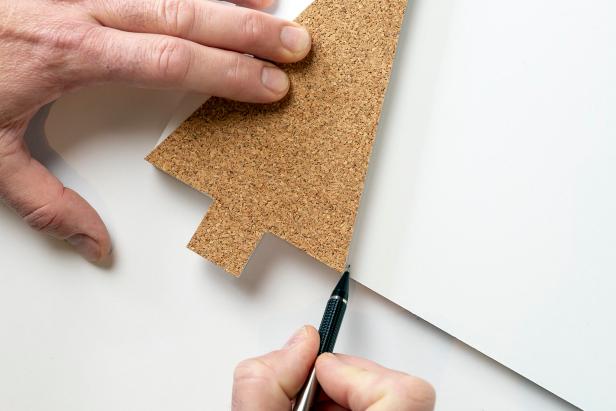
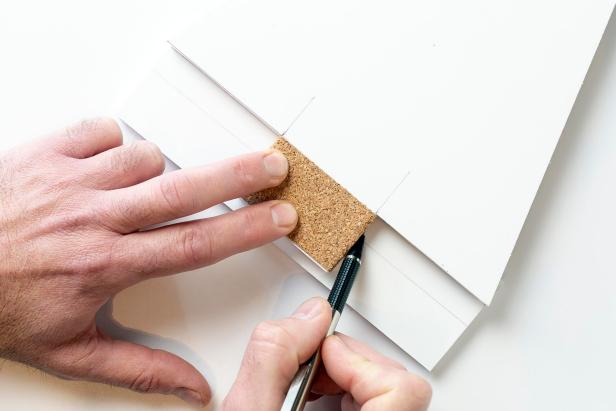
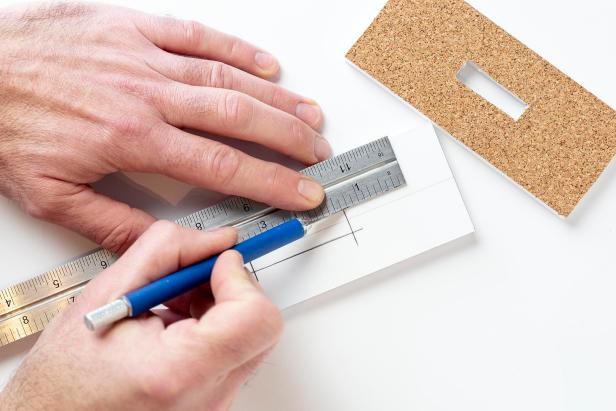
Cut Out Trees
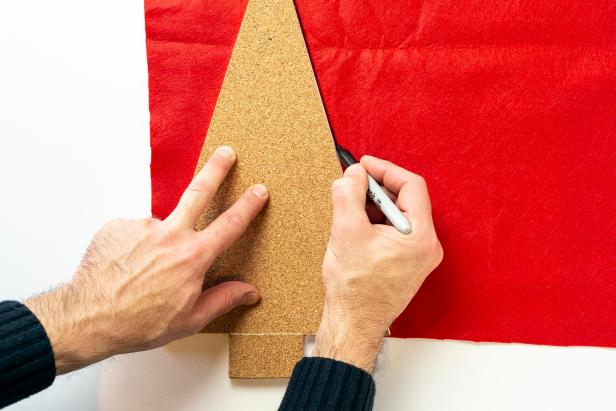
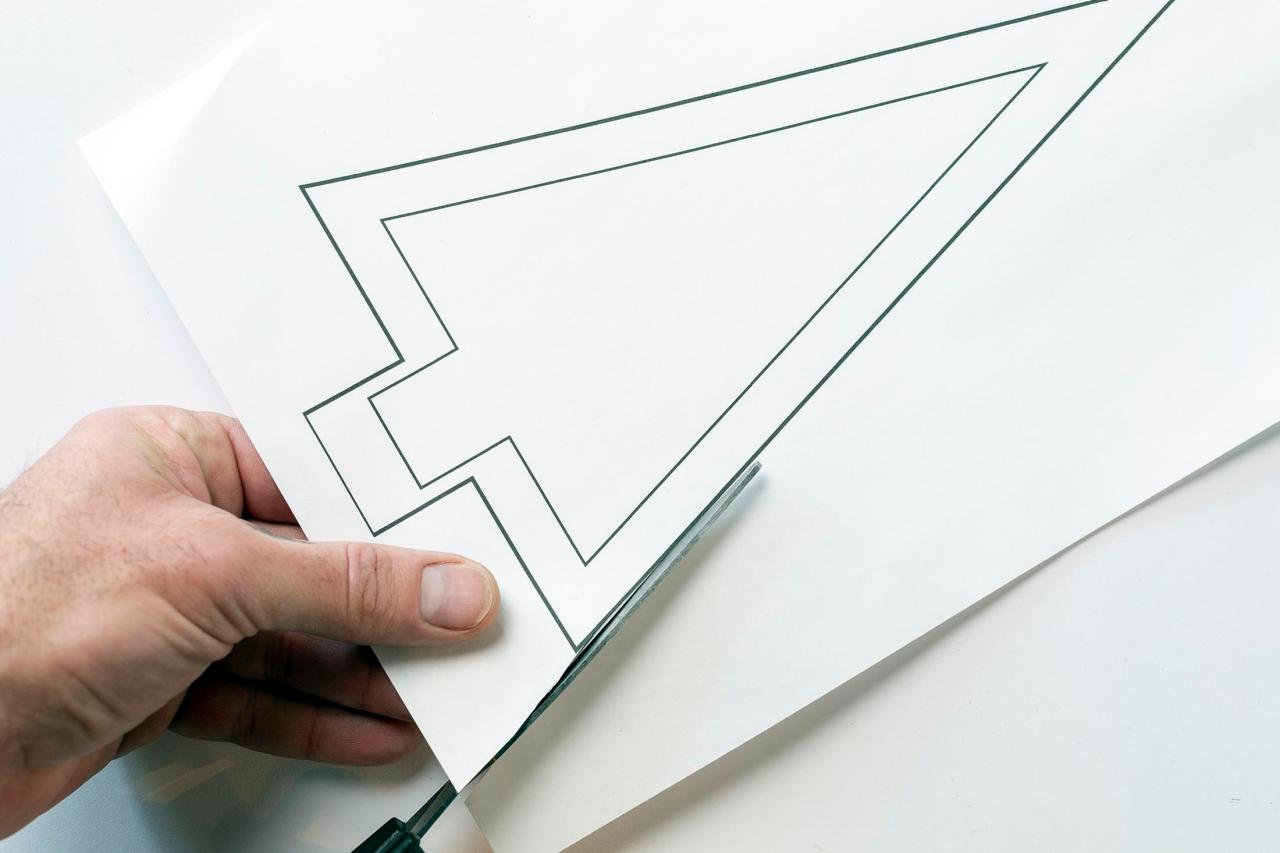
Print out template, then cut along the outside outline (Image 1). Lay a ruler against each line of the triangle portion of the tree and make an outline against the ruler on foam core. Make the trunk 1/2" wider than each side of the template (Image 2). Remove the ruler and draw another outline around the template on foam core to create another size of tree, leaving the trunk the size of the template. Cut the template to the smaller outline (Image 3). Lay the ruler against each line of the triangle part of the tree and make an outline against the ruler on foam core to create a third tree. Make the trunk 1/2" wider than each side of the template. Remove the ruler and draw an outline around the cutout template to create another tree, leaving the trunk the size of the template. Use a craft knife and the ruler to cut out trees from the foam core (Image 4).


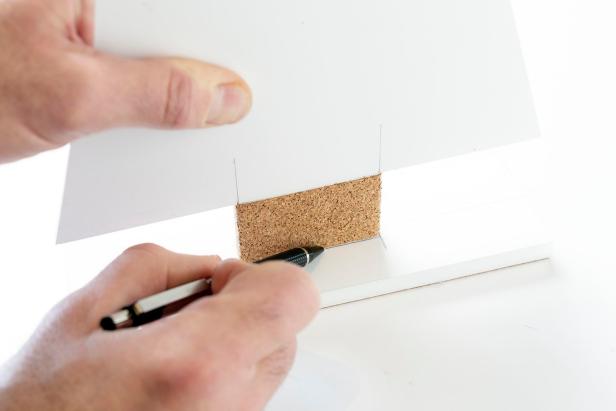
Create Base
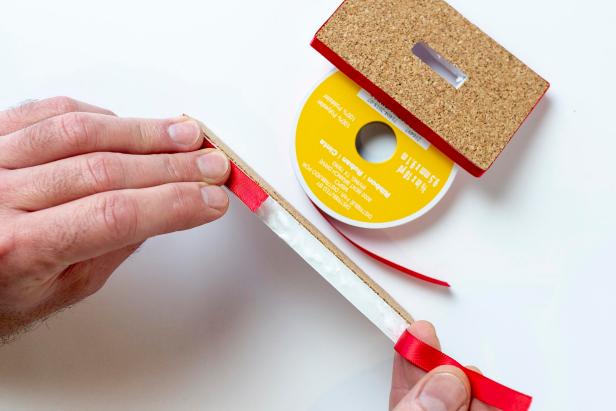
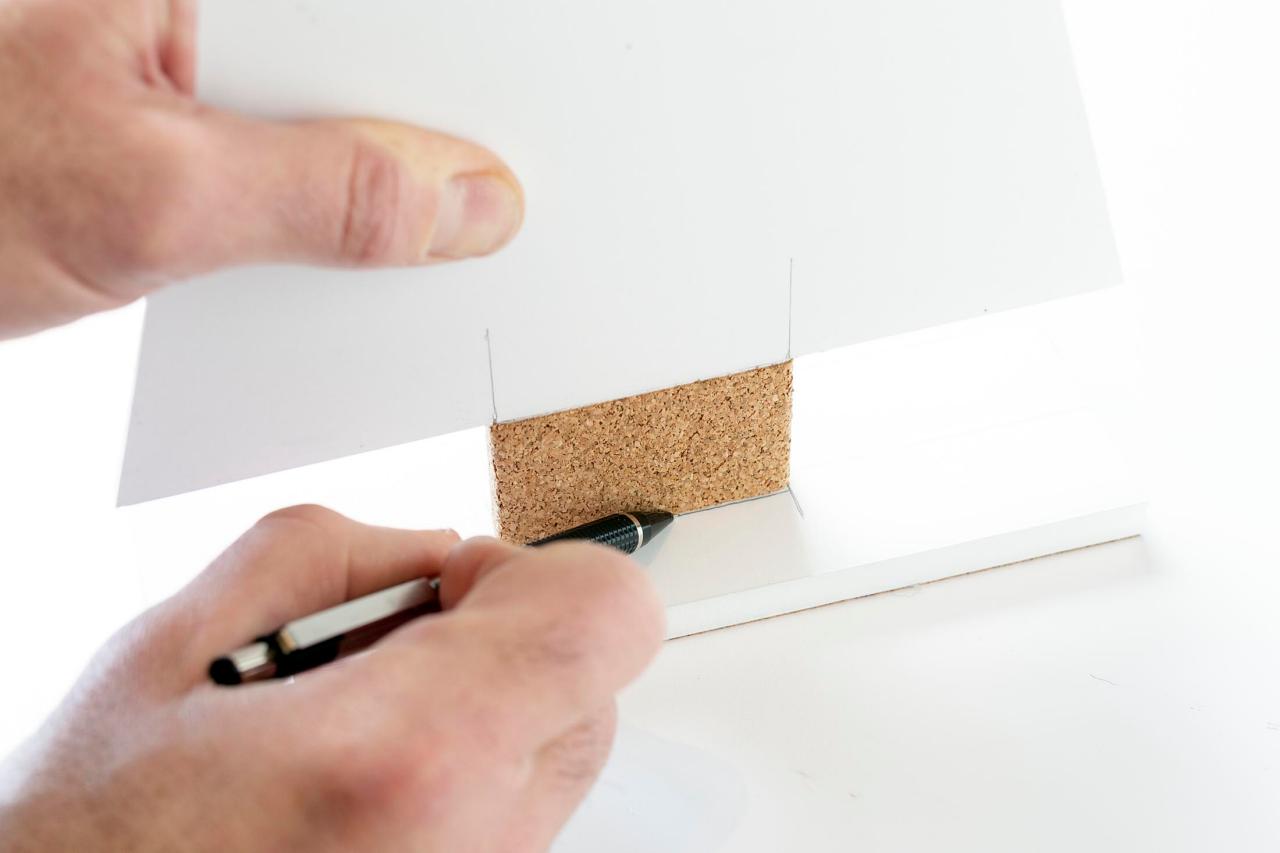
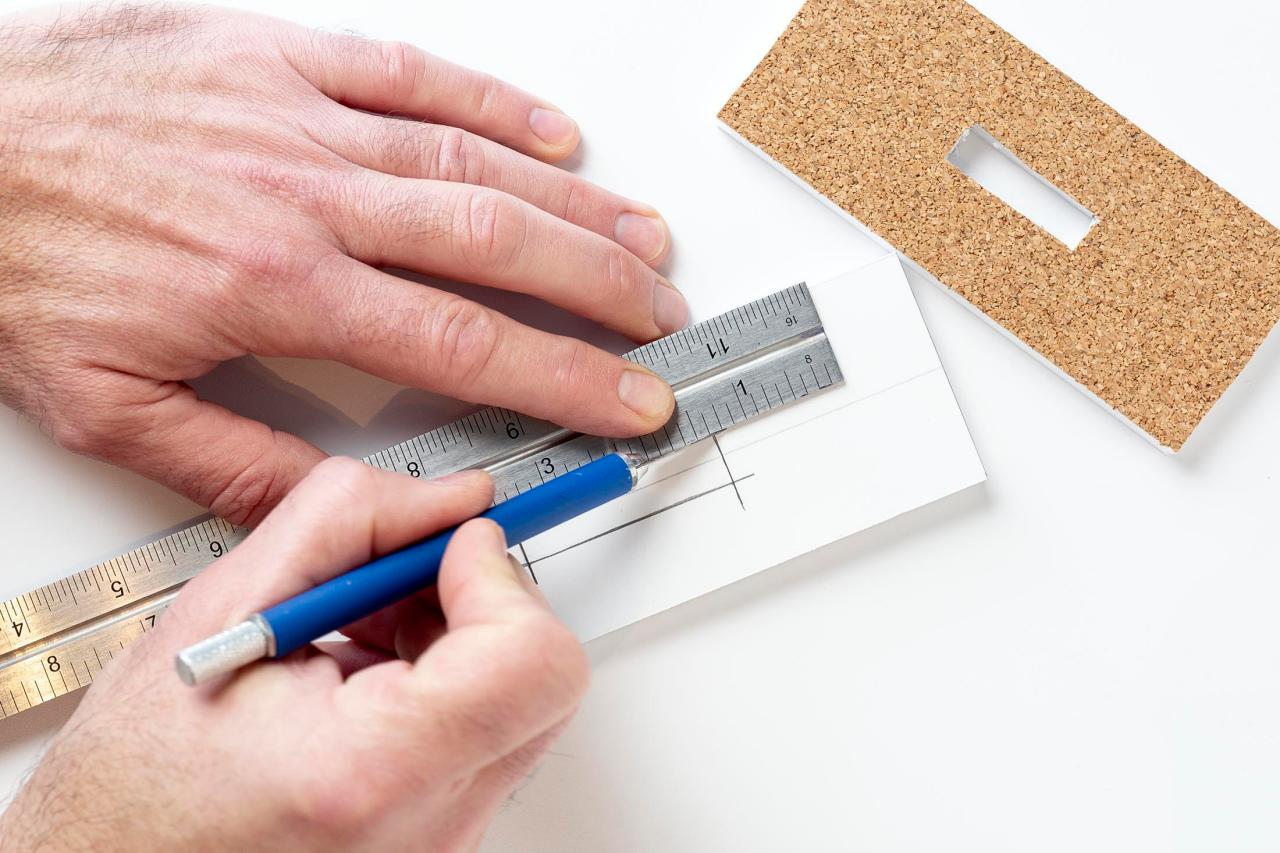
Lay the base of the triangle part of each tree against the edge of the foam core. Mark the foam core at each end of the base of the triangles on the white side of the foam core (Image 1). Make rectangles for each tree that are the length of the base of the triangles and 1-1/2" wide. Cut out the rectangles and mark them with a line lengthwise at 3/4", dividing it in half. Lay the base of the tree on its corresponding rectangle and mark lines on both sides of the trunk (Image 2). Center the base on the long line of the rectangle and between the two trunk lines you have drawn, standing up. Mark lines on the rectangle at the front and back of the trunk (Image 3). Use a ruler and craft knife to cut out the inner rectangle you have outlined (Image 4) and carefully pop out the inner rectangle. Cover the edge of the rectangle in glue and wrap it with 3/8" ribbon, overlapping the ends a bit (Image 5).
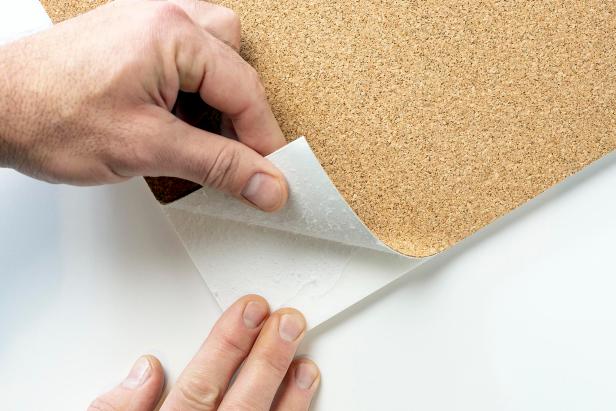
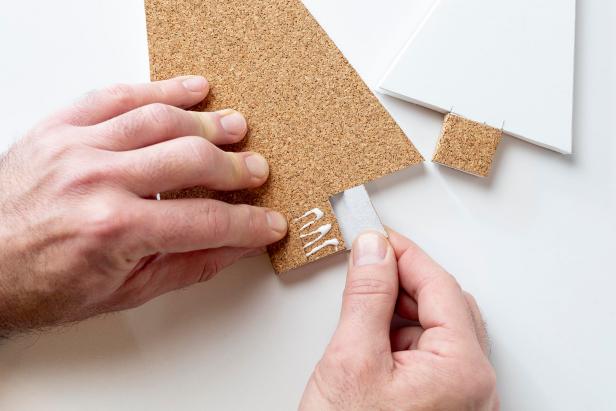
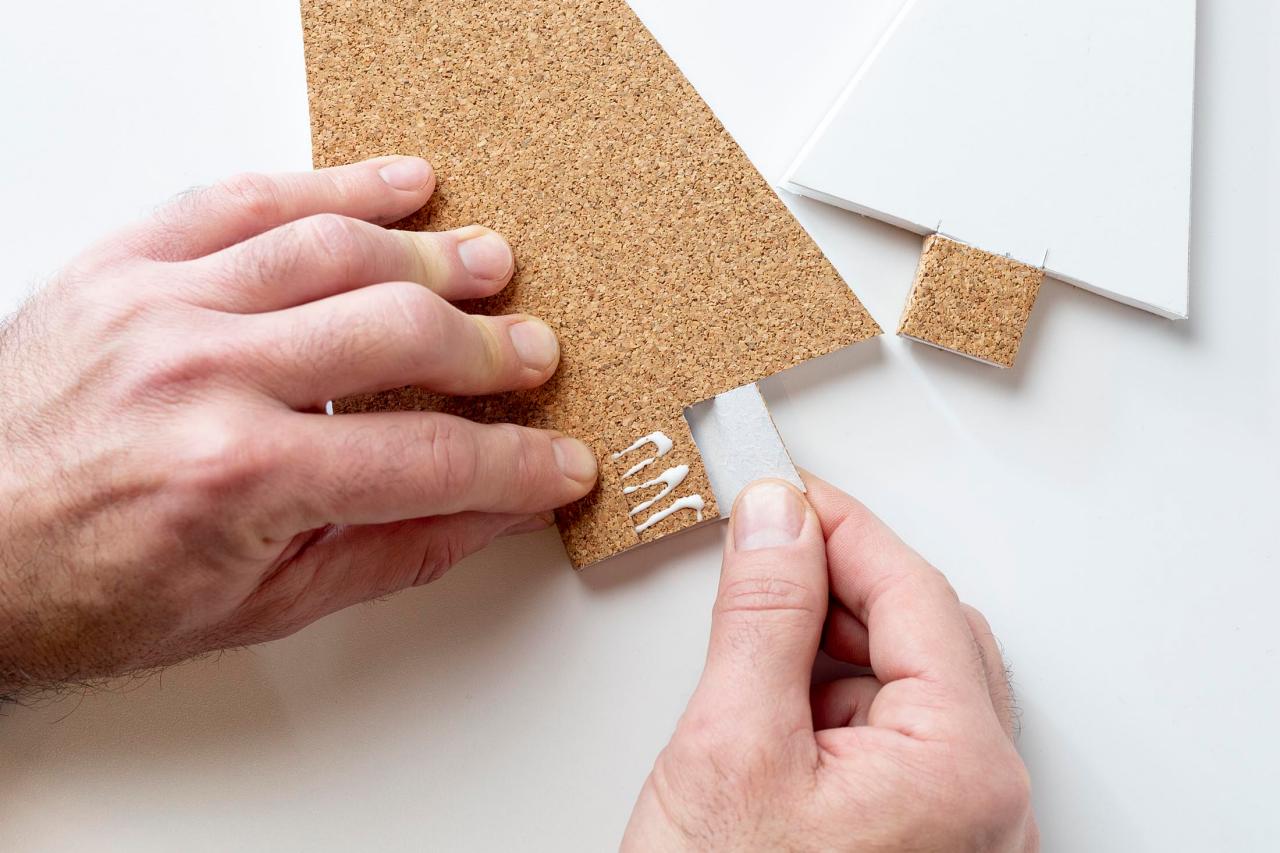
Wrap Trunks
From the remaining foam core board, gently peel back the cork backing (Image 1). Cut strips that are the height of each trunk and long enough to wrap around the trunk. Add glue to all sides of the trunk and wrap the cork strip around the trunk with the ends on the back cork side of the tree (Image 2). Allow the glue to harden before proceeding.
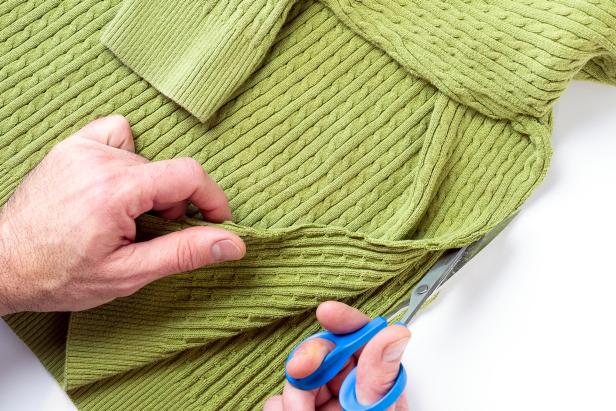
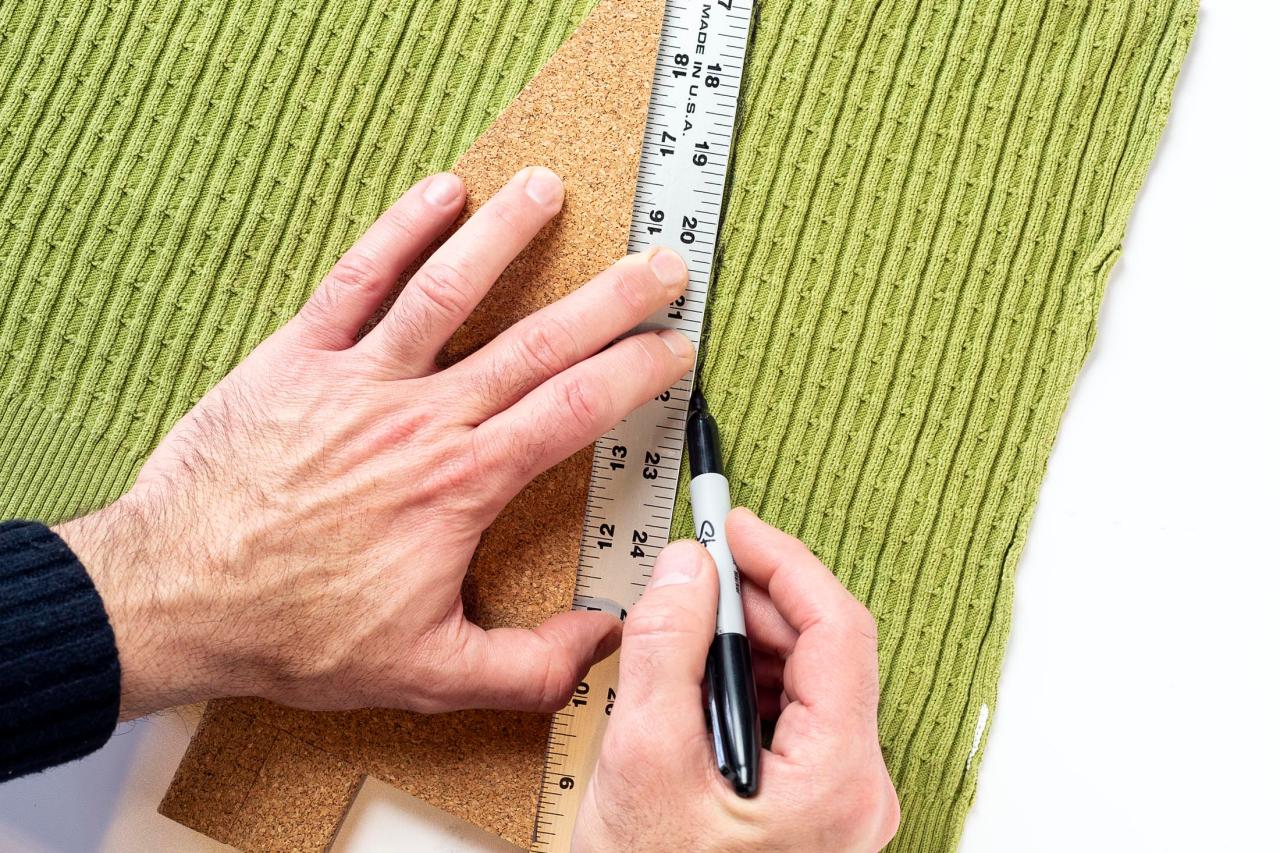
Cover Front
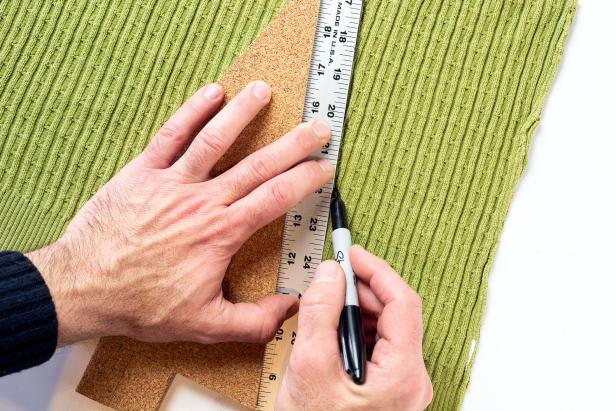
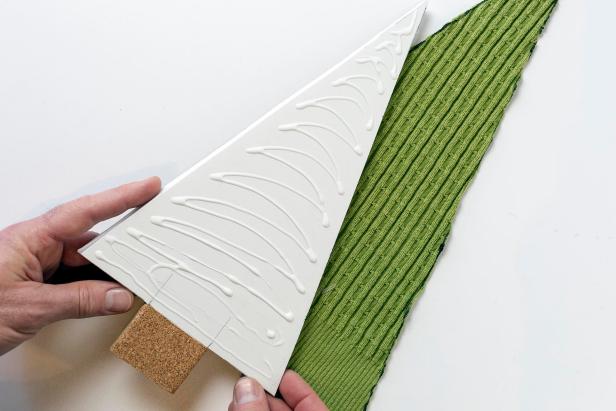
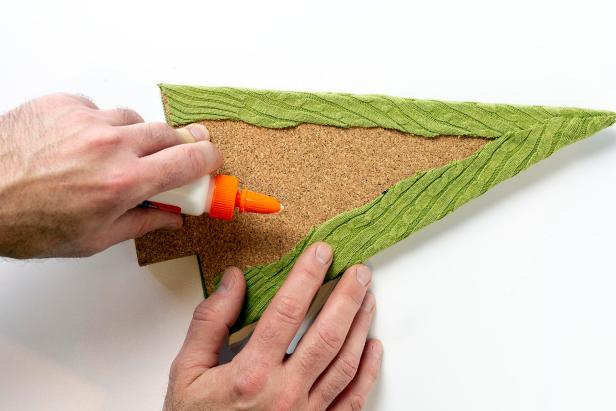
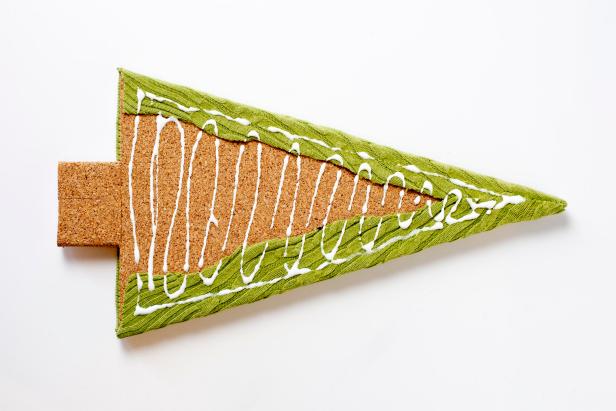
Cut away a piece of an old sweater or other holiday-themed fabric to use (Image 1). Consider the ribbing along the bottom or other elements of the garment that you wish to include. Lay a tree on the selected fabric piece and place a ruler on each side of the triangle shape of the tree. Make an outline on the outside of the ruler with a marker (Image 2). Add glue to the white side of the tree, turn it over, center it on the fabric, and press it in place (Image 3). Fold the edges of the fabric over to the back of the tree and secure with white glue (Image 4). Where the fabric overlaps, press it together with more glue and allow to dry. Then cut away any excess with scissors.
Create a Clean Edge
If you wrap the fabric around the base of the tree you will need to cut a notch on both sides of the trunk in the front. Then lift the notch at the trunk, fold it under and add a bit more glue to hold it in place. Then wrap the fabric around the bottom of the tree.

Cover Back
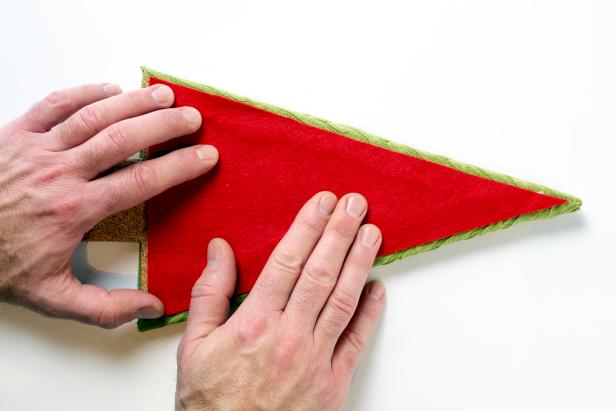
Draw an outline of the triangle shape of each tree on felt (Image 1). Cut the outline out of the fabric about 1/4 inch smaller than the outline all the way around. Add a generous amount of glue to the back of the tree, staying within 1/4 inch from the edge (Image 2). Place the felt cutout on the glue and press in place.
Attach Base
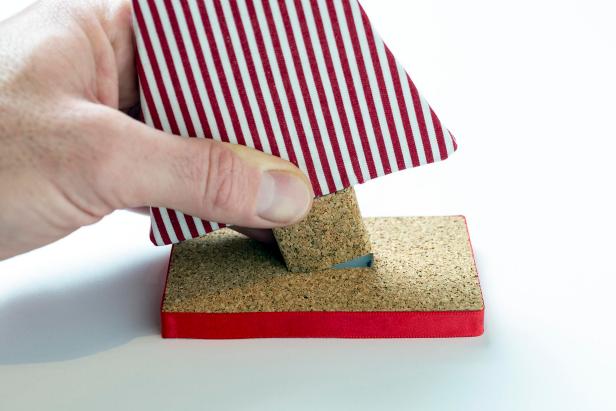
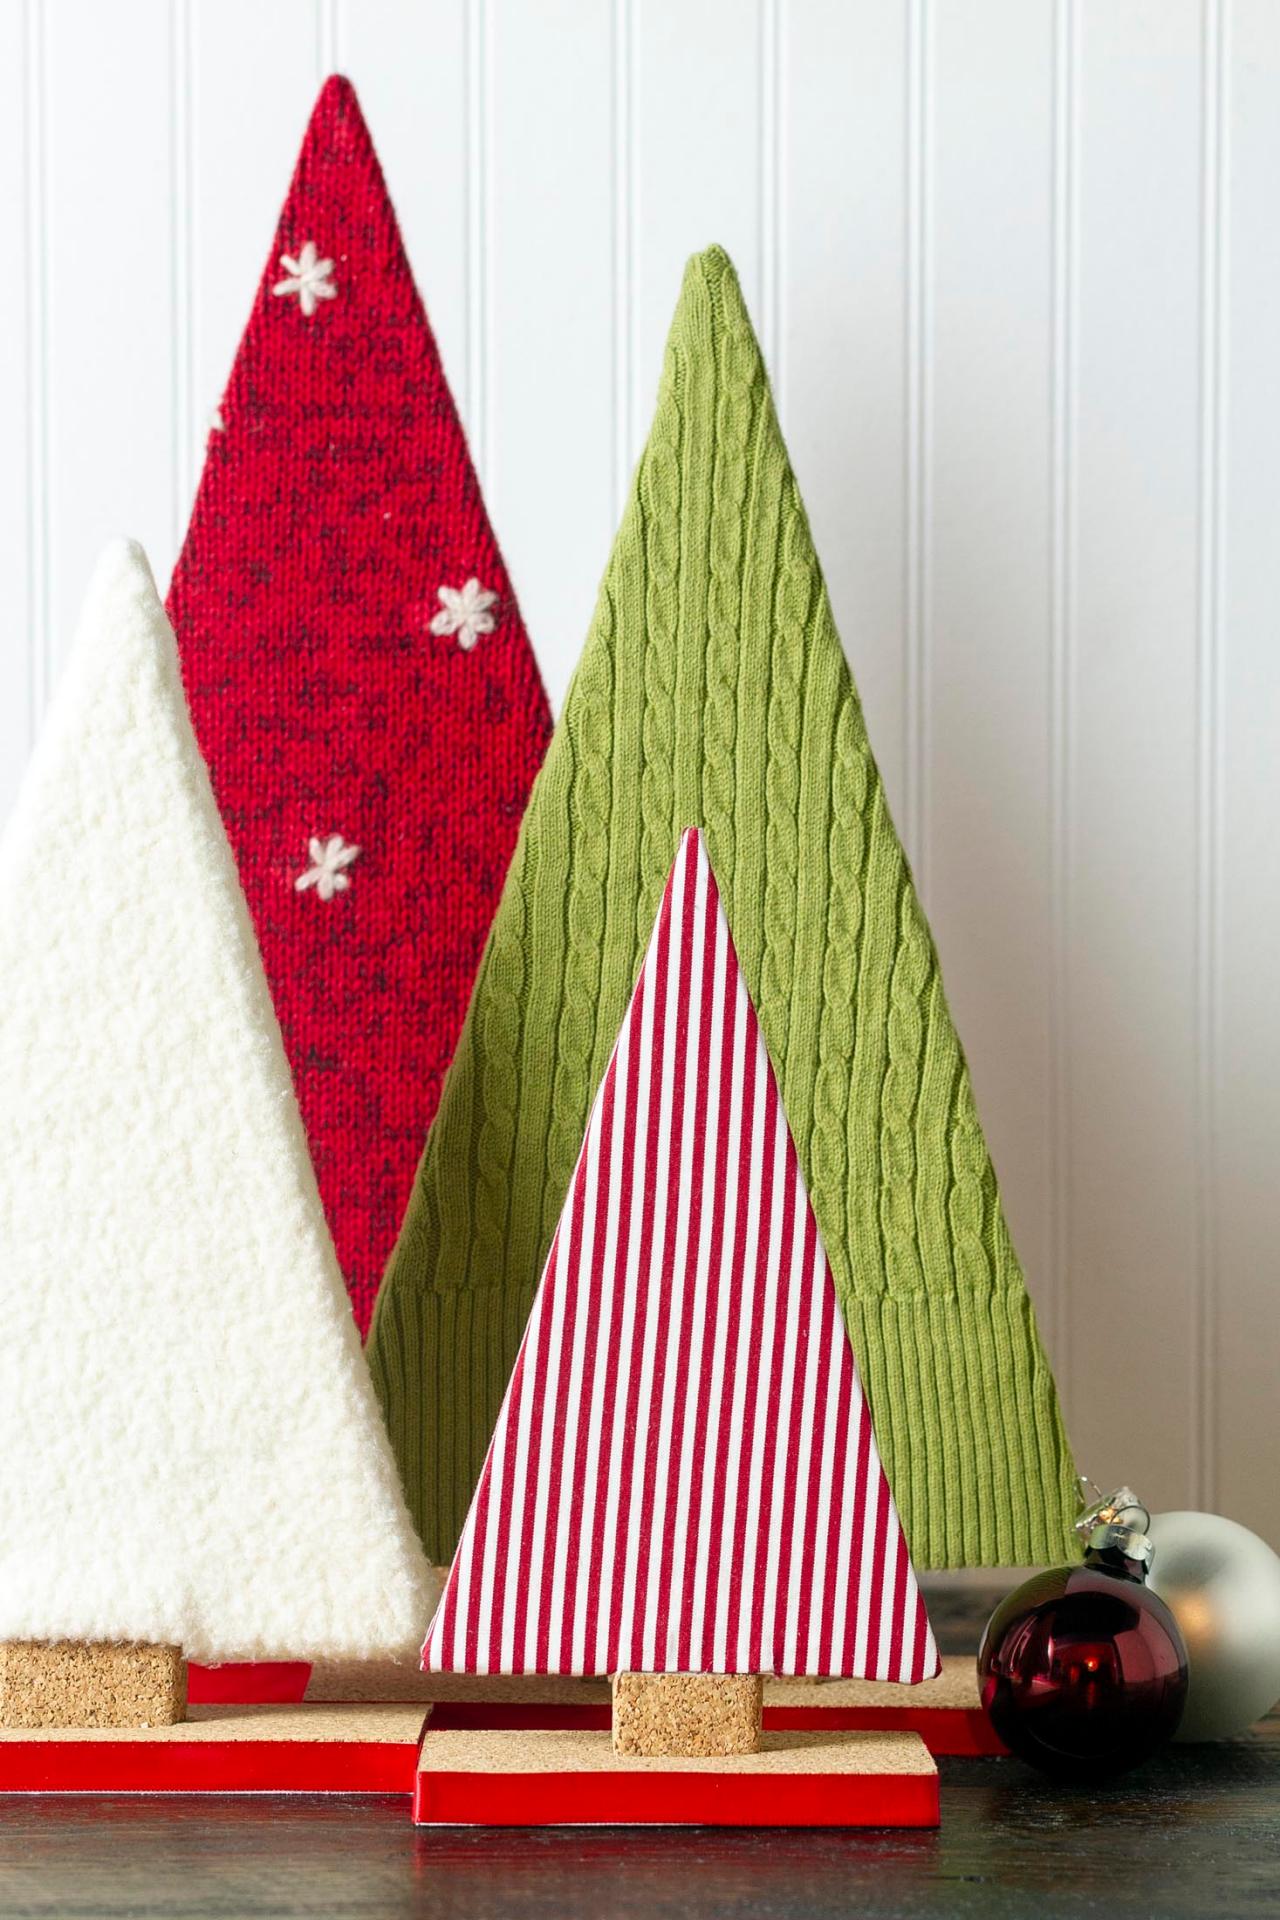
Gently press the trunk of the tree into the hole of its corresponding base (Image 1). Note: You can glue it for a more permanent solution, but it will work without gluing and allow you to store the trees completely flat at the end of the season. Proudly display your finished trees (Image 2).


