


How to Install an Electric Underground Fence for Pets
Save on installation costs by learning how to run your own "invisible" home fence for the containment and safety of your furry BFF.

The decision to install underground wire fencing prior to adopting a new dog was an easy one. On a street with a lot of foot traffic and a backyard with plenty of wildlife, our main goal for the fence is to offer safety and security for our new pet. To buy and install your own hidden wire fence is reasonably affordable at around $300, depending on the length of wire you need to encompass your property. Alternatively, a professional installation could run you $2 per linear foot (or more). For our 850-foot loop, we did it ourselves in order to save $1,700. Side note: Did you know you can allegedly train cats using this method, too? I’m pretty sure that’s why they created the laughing cat emoji.

How to Install an Underground Wire Fence For Your Pet
Learn the DIY way to install an underground "invisible" fence around the edge of your yard.
Photo by: Emily Fazio
Emily Fazio
Materials and Tools:
- measuring tape
- 18-gauge wire
- pet containment product with collar
- PVC conduit
- shovel (or trencher or simple edger)
- wooden paint stirrer
- extra flags
- cut-off saw (optional)
- driveway sealant (optional)
Step 1: Measure Your Property
Before you order your product of choice, measure your property's circumference to determine how much wire you need. Use a 100' tape measure for this, and walk the path you intend to install your underground wire.
If you’re looking to block out islands within your yard, such as around a pool, garden or landscape, measure the distance from the nearest edge of the property, inward towards the island, fully around the island, and then back out the same path towards the outer loop. The wires you place leading to and from the island will be twisted together, which negates the charge. When twisted, the pet can still cross over the wire but will remain restricted from the island itself.
Price out the wire you need. Most common lengths are between 250-1,500 feet, but longer is available too.

How to Install an Underground Wire Fence For Your Pet
Learn the DIY way to install an underground "invisible" fence around the edge of your yard.
Photo by: Emily Fazio
Emily Fazio
Step 2: Order Product and Test the Wire
If your standard kit comes with a traditional 15-gauge wire, consider upgrading to an 18-gauge wire. The more durable the wire, the less likely it is to get damaged during installation or from burrowing animals.
Test the wire first by hooking both ends of the wire into the electrical box and testing for a beep-zap. If the product or wire is damaged, it’s better to know before you install it underground.
Step 3: Cut Across Your Driveway
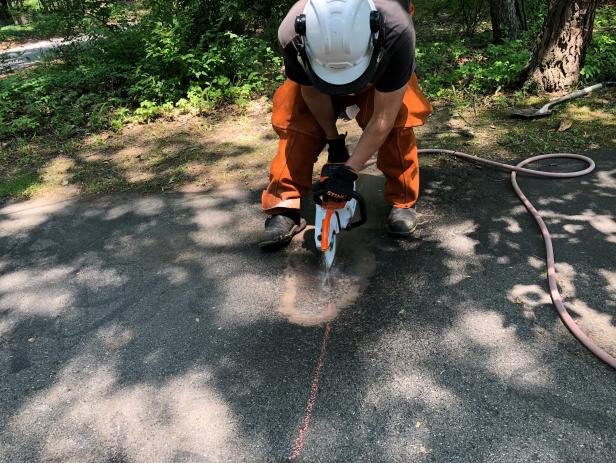
If you have a concrete or asphalt driveway, rent a cut-off saw (or hire someone with one) to make cutting a crevice clean and easy.
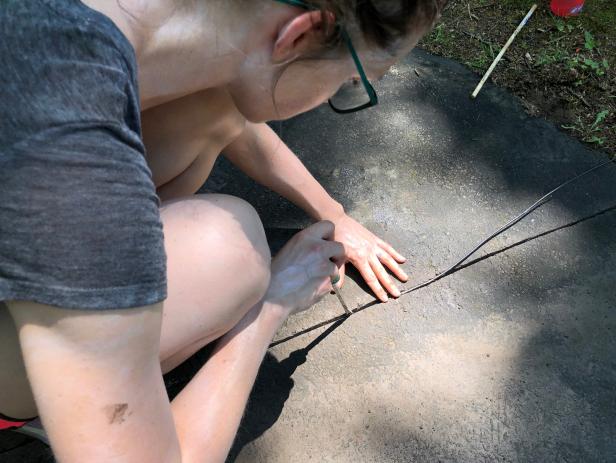
When you’re using a tool like this, take your time and score the top layer first. After the top layer has been notched, check to see if the cut is wide enough for your wire. Our 18-gauge wire required a slightly wider trench. Run the saw over the line again 2-3 times to deepen it (You want the wire to sit about an inch below the surface if possible), and widen it if necessary. Once you've buried the wire, apply a sealant into the crack to help prevent deterioration. The sealant products that come in a squeeze bottle with a nozzle are perfect for this application.
Do you have a gravel driveway? Thread the wire through a length of an old rubber garden hose or PVC piping before burying it.
Emily Fazio
Emily Fazio
How to Install an Underground Wire Fence For Your Pet
Learn the DIY way to install an underground "invisible" fence around the edge of your yard.
Photo By: Emily Fazio
How to Install an Underground Wire Fence For Your Pet
Learn the DIY way to install an underground "invisible" fence around the edge of your yard.
Photo By: Emily Fazio
Step 4: Bury the Wire
Putting the wire underground is the easiest part of the installation and the most physically taxing. You can rent a trencher to make it easier, but a spade shovel or a simple manual edger works, too. We were able to dig and install our 850-foot length of wire by hand (no trencher) in one afternoon.
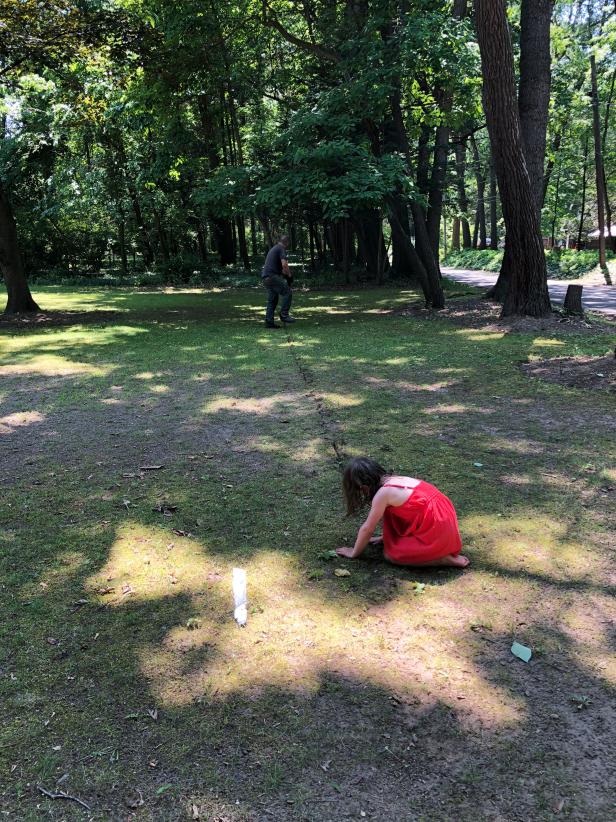
Unroll an excess length of wire where you will plug it in the electrical box, then extend the wire along the first 50 feet of the path as a guide. Create a straight trench 3”-6” deep, and bury the wire as you go (Image 1). The wire needs only to be below the surface, but it’ll be more protected if it is deeper. The fastest thing to do is have one person cutting the trench and a second person putting the wire into the cut soil.
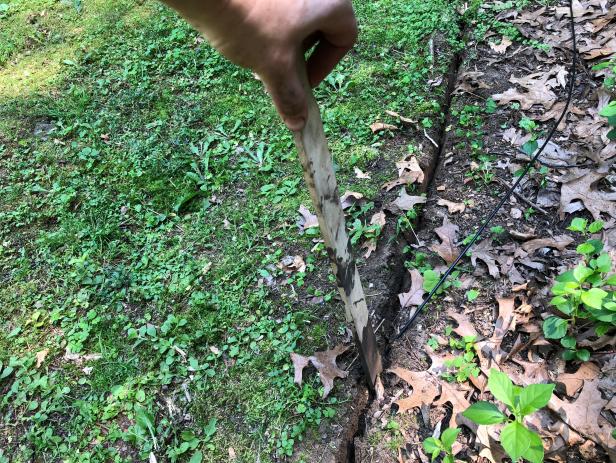
In most areas, I was able to nestle the wire close to the earth and pin it in position with landscaping staples. In areas where the coverage wasn’t as thick, I cut a trench with the shovel and buried the wire just under the surface so that it isn’t a tripping hazard for wildlife. Use a blunt object like a paint stick to help plunge the wire into the narrow trench without damaging it (Image 2). Place the flags about every 10’ as you go.
Emily Fazio
Emily Fazio
How to Install an Underground Wire Fence For Your Pet
Learn the DIY way to install an underground "invisible" fence around the edge of your yard.
Photo By: Emily Fazio
How to Install an Underground Wire Fence For Your Pet
Learn the DIY way to install an underground "invisible" fence around the edge of your yard.
Photo By: Emily Fazio
Step 5: Address Exposed Areas
Rodents and other wildlife can nibble the wire if it is easily visible and accessible, such as in areas where the wire is coming up from the ground near the plug. To deter pests and protect against weather, use pieces of PVC conduit piping to guard any ground-level wires. We ran our wire through a garage wall and up directly into the mechanism that plugs into the wall, so there's no visible wire.

How to Install an Underground Wire Fence For Your Pet
Learn the DIY way to install an underground "invisible" fence around the edge of your yard.
Photo by: Emily Fazio
Emily Fazio
Step 6: Set it Up and Train Fido
Follow official training docs for the best success. Your pup will become accustomed to the warning beeps, and with any luck, will remain safely in the boundaries set by the fence.

How to Install an Underground Wire Fence For Your Pet
Learn the DIY way to install an underground "invisible" fence around the edge of your yard.
Photo by: Emily Fazio
Emily Fazio


