


Upcycle PVC Pipe Into Budget-Friendly Bathroom Storage
Repurposed plumbing fixtures make modern storage for your toilet tissue or other bathroom accessories.

Budget-Friendly Bathroom Storage Using PVC Pipe
Repurposed plumbing fixtures make modern storage for your toilet tissue or other bathroom accessories.

Photo by: Sam Henderson
Sam Henderson
Materials Needed
(12) 4" PVC couplings
PVC cement
150- and 220-grit sandpaper
(4) 2x4 scrap boards at least 20" long
clamps
(2) 1/2" x 4" x 15-1/4" wood or MDF boards
finishing nails
wood glue
paint or stain as desired
drill
(3) 3/4" screws
2 screws and anchors for hanging
Prep PVC
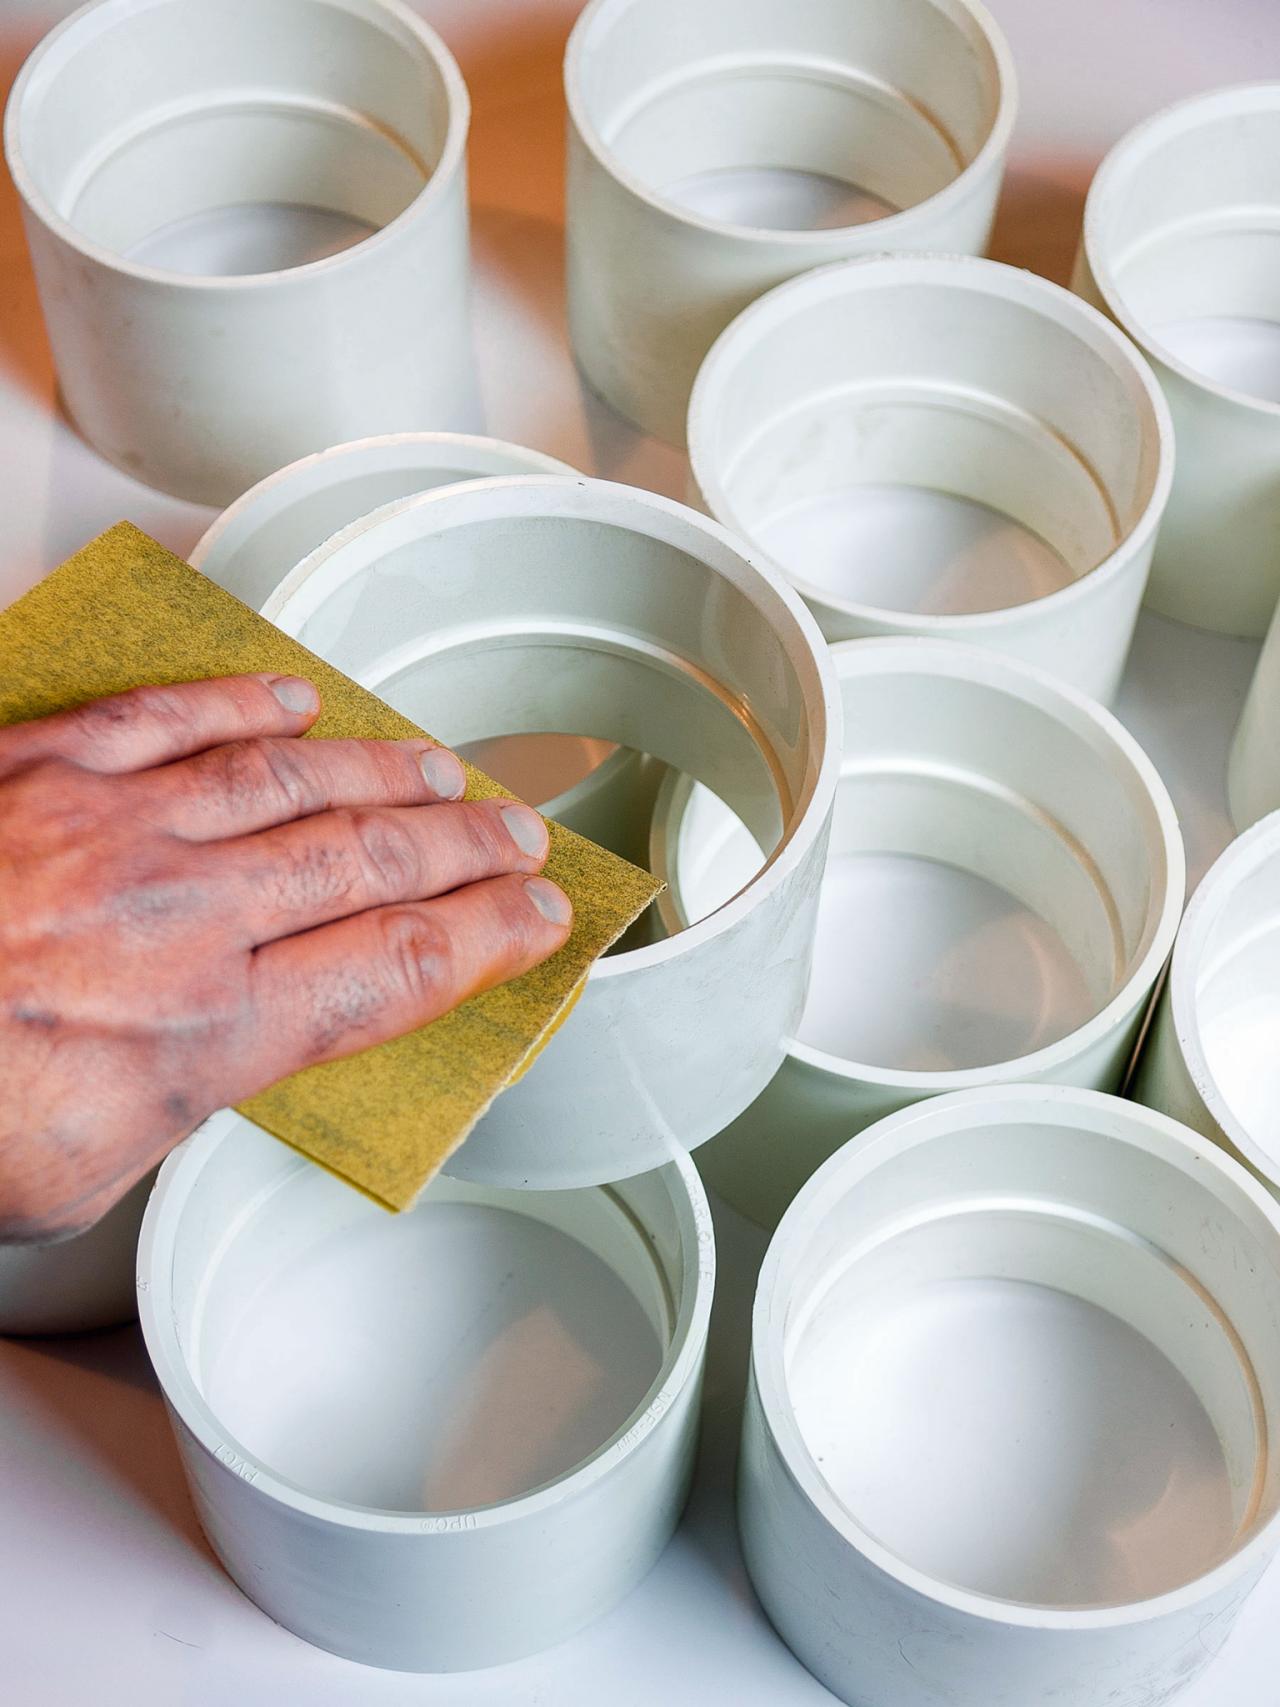
Begin by sanding the couplings’ edges with 150-grit sandpaper to remove any irregularities and smooth out the sharp factory edges. Repeat sanding with the 220-grit sandpaper for a silky smooth finish. Rinse and dry the couplings. Note: One end of the couplings will likely be embossed with product information. Turn that end to the back and sand only the non-embossed end which will face front.

Use Sandpaper to Smooth Out PVC Couplings
Begin by sanding the edges with the 150 grit sandpaper to remove any irregularities and smooth out the sharp factory edges. Repeat sanding with the 220 grit sandpaper for a silky smooth finish. Rinse and dry the couplings. Note: One end of the couplings will likely be embossed with product information. Turn that end to the back and sand only the non-embossed end which will face front.
Photo by: Sam Henderson
Sam Henderson
Create PVC Coupling Grouping
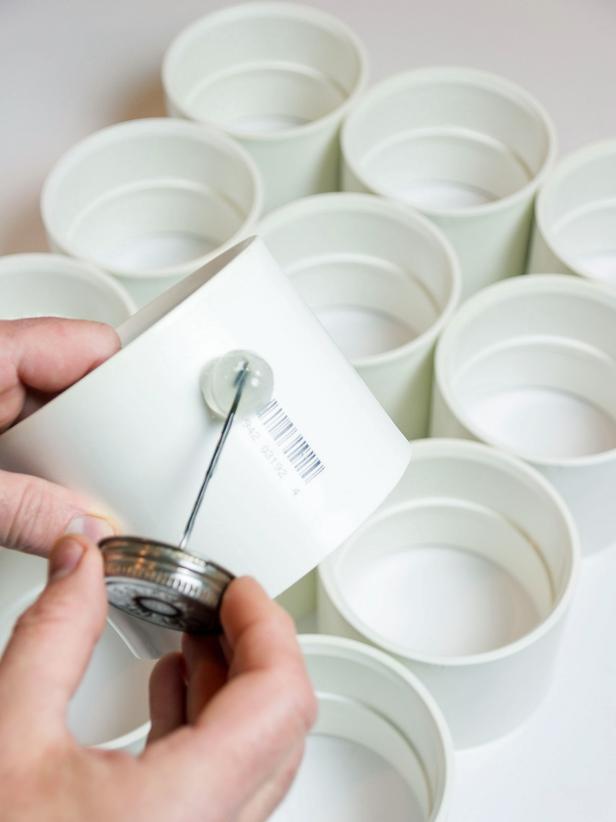
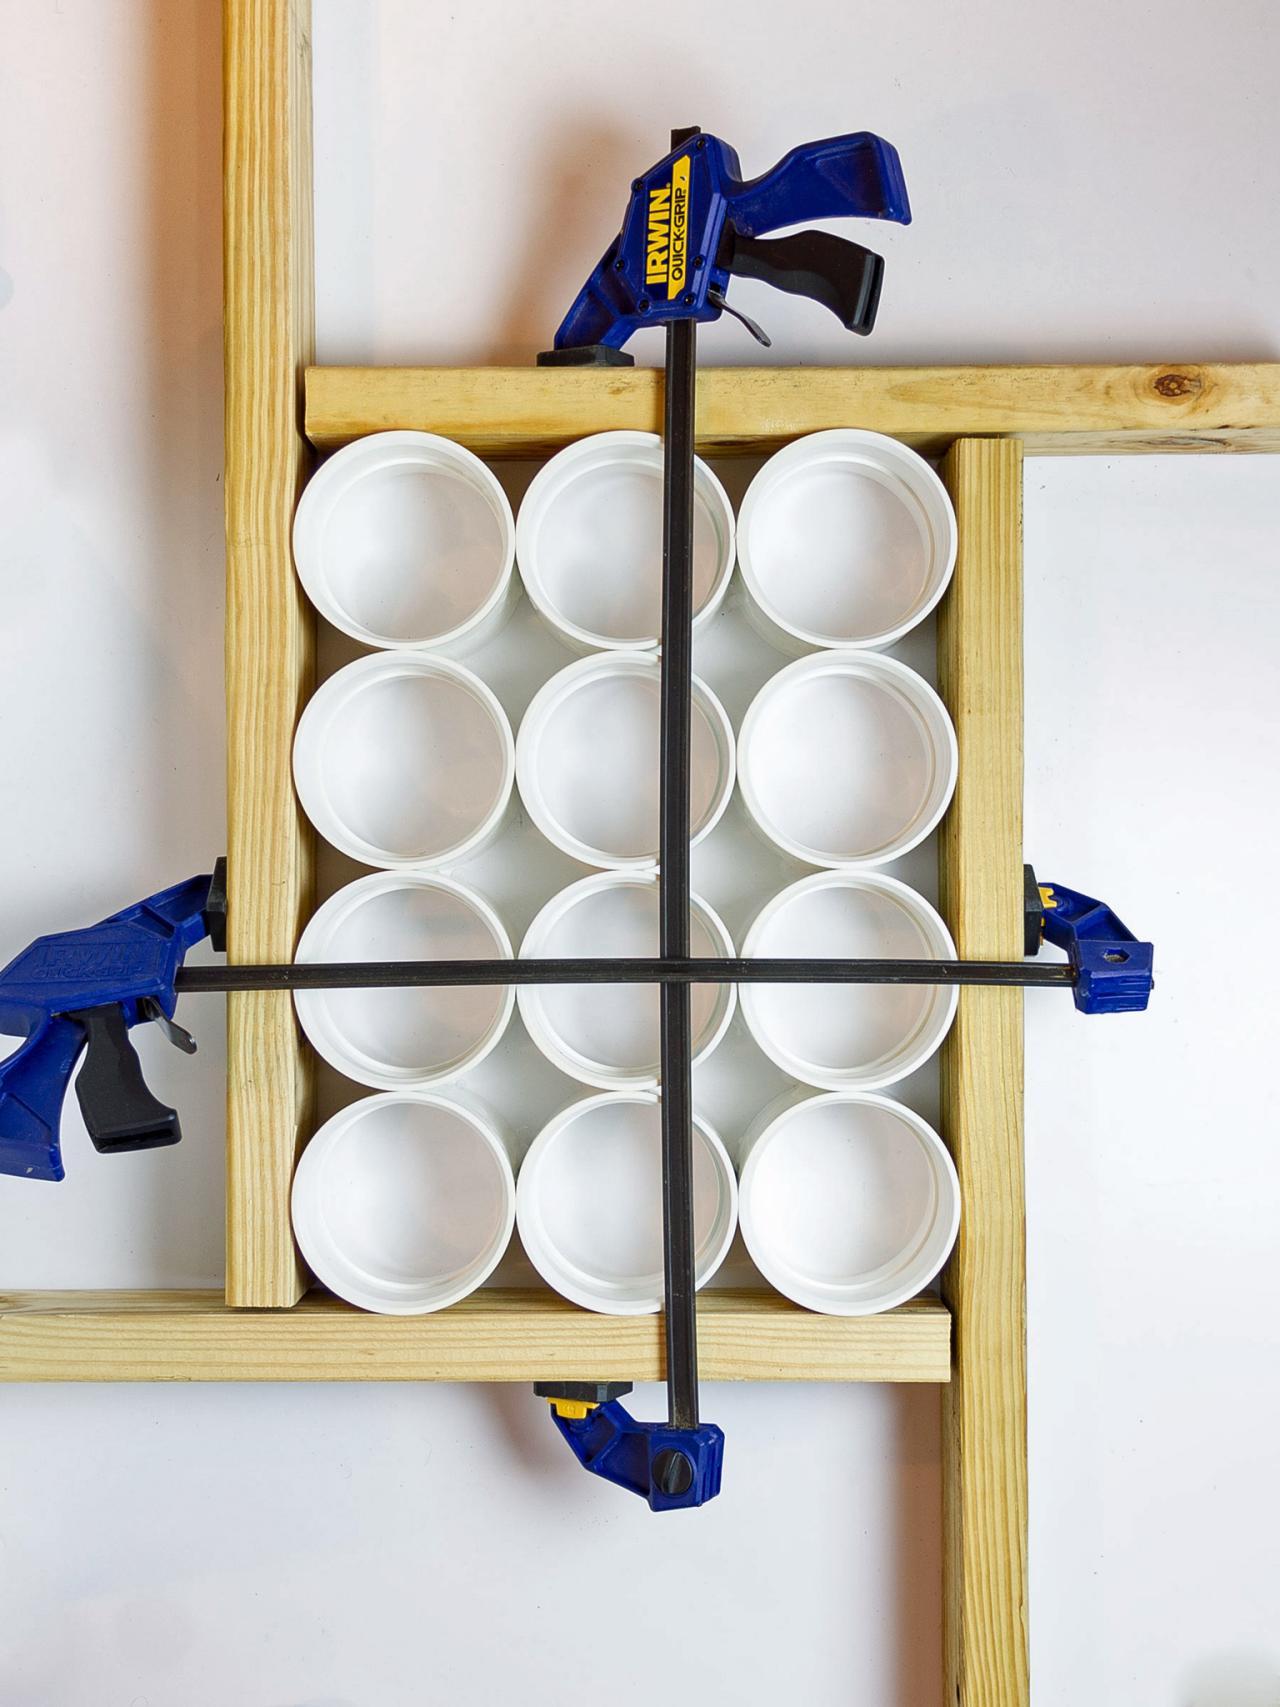
Arrange the couplings on a flat surface with the printed barcodes on the sides facing inward and in a spot that will be connected to another coupling to hide the printing (Image 1). Have the scrap boards and clamps nearby. Apply a generous bead of PVC cement in a line on the side of a coupling where it will connect with another coupling (Image 2). Press the coupling in place and repeat for all other spots where couplings will touch each other. Immediately place the scrap boards in place and secure tightly with clamps (Image 3). Use a carpenter's square as necessary to make sure that the corners are at 90-degree angles. Allow to dry for 8 hours or overnight.

Sam Henderson
Sam Henderson

Sam Henderson
Arrange PVC Couplings
Arrange the couplings on a flat surface with the printed barcodes on the sides facing inward and in a spot that will be connected to another coupling to hide the printing.
Photo By: Sam Henderson
Glue Couplings Together With PVC Cement
Apply a generous bead of PVC cement in a line on the side of a coupling where it will connect with another coupling. Press the coupling in place and repeat for all other coupling sides where the couplings touch each other.
Photo By: Sam Henderson
Carpenter's Square Around Couplings for Drying
Immediately place the scrap boards in place and secure tightly with clamps. Use a carpenter's square as necessary to make sure that the corners are at 90-degree angles. Allow to dry for 8 hours or overnight.
Photo By: Sam Henderson
Create Shelf
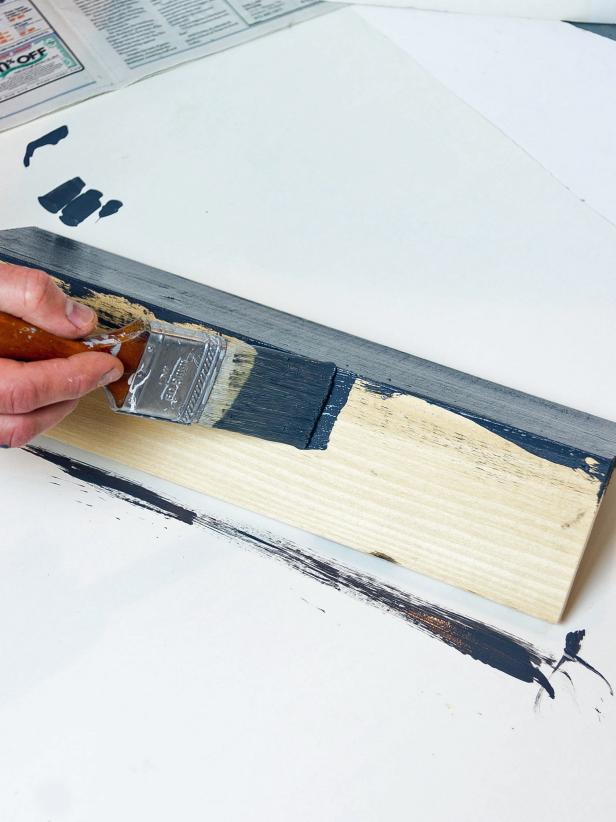
Make a shelf for the top of the storage piece by cutting two pieces of 1/2" x 4" wood or MDF (if you plan to paint it) to 15-1/4" (Image 1). Add a bead of wood glue to the narrow edge of one of the boards. Press it against the flat side of the other board making an 'L' shape. Secure with at least 5 finishing nails through the flat side and into the narrow edge (Image 2). Sink nail heads slightly with a nail set. There is no need to fill these nail holes as they will be on the back of the shelf. Paint or stain and varnish the shelf as desired to coordinate with your decor (Image 3). Allow to dry completely before proceeding.

Sam Henderson

Sam Henderson
Sam Henderson
Use Saw to Cut Wood for Shelf
Make a shelf for the top of the storage piece by cutting two pieces of 1/2" x 4" wood to 15-1/4". MDF is fine for a painted finish.
Photo By: Sam Henderson
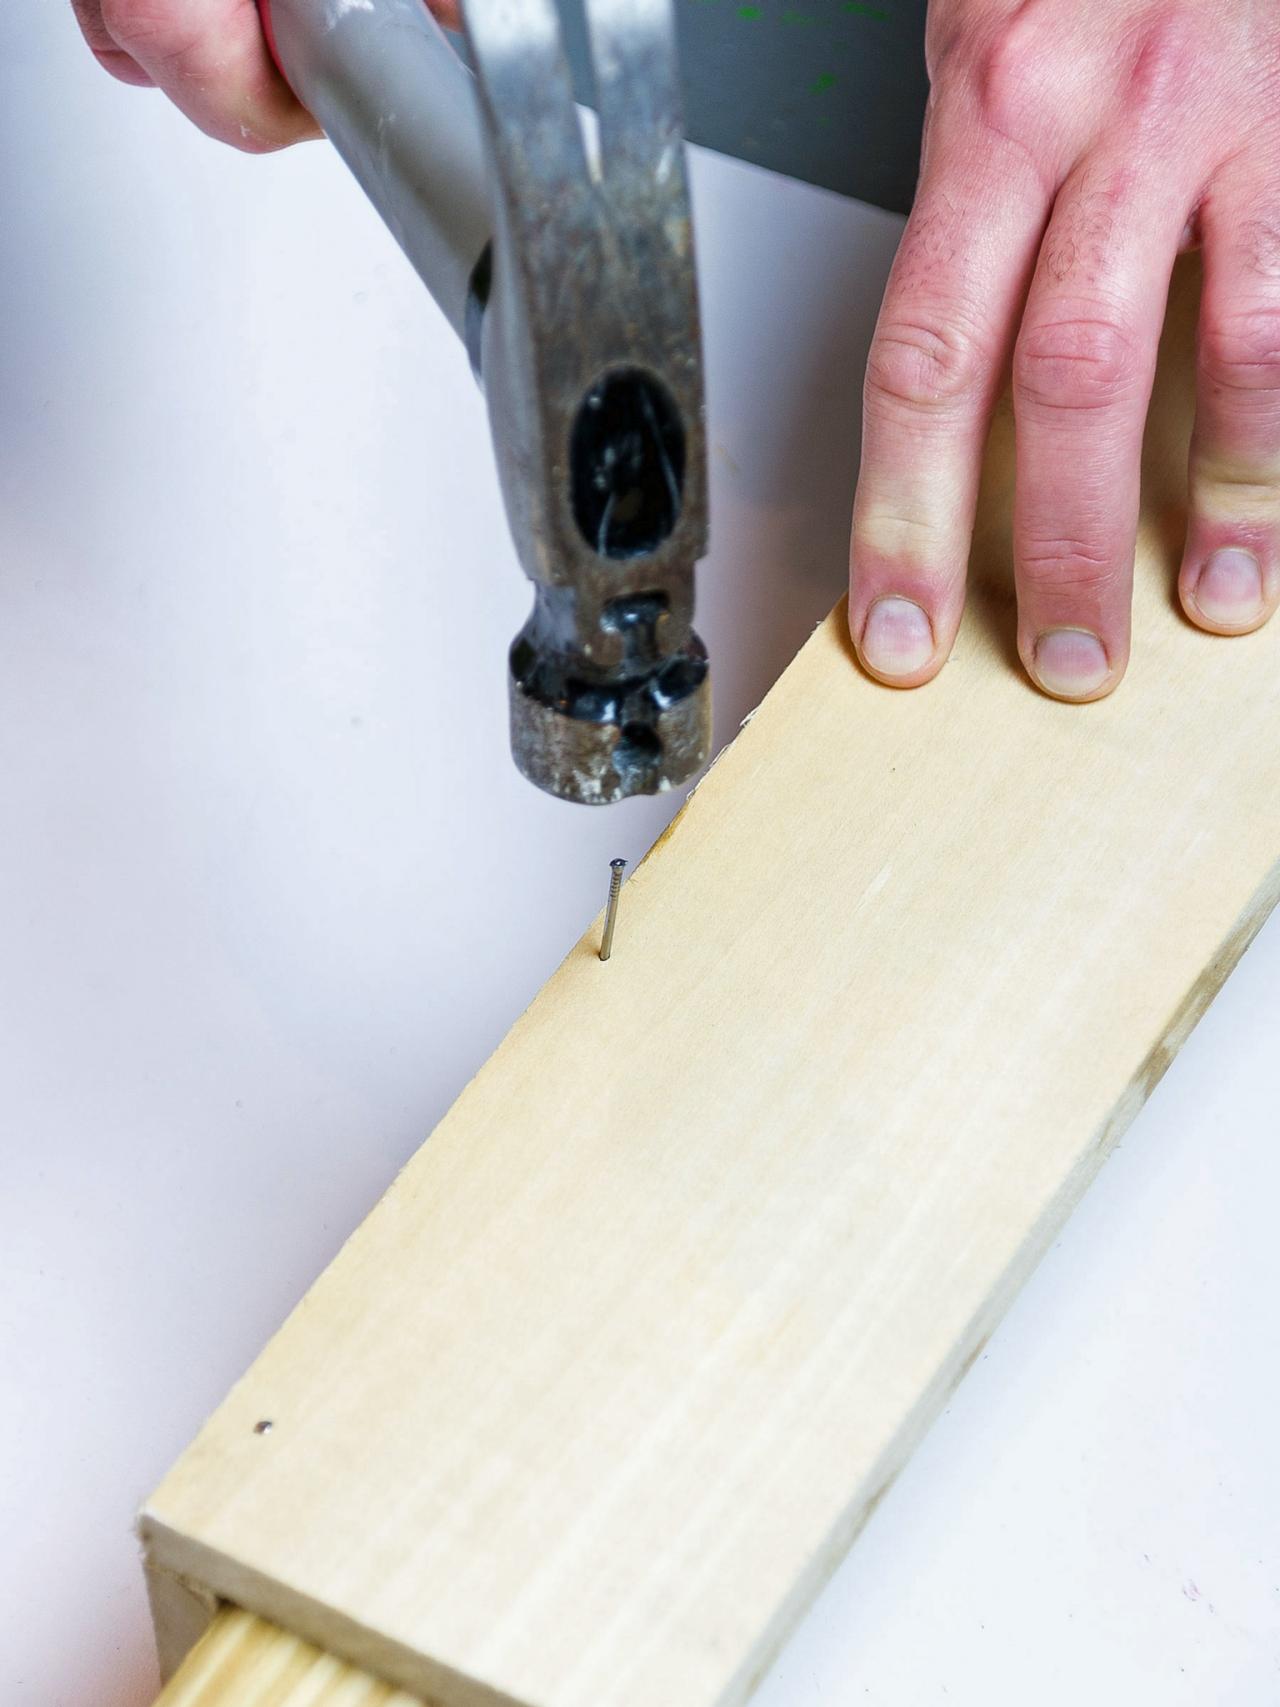
Hammer in Finishing Nails for Back of Shelf
Add a bead of wood glue to the narrow edge of one of the boards. Press it against the flat side of the other board making an ‘L’ shape. Secure with at least 5 finishing nails through the flat side and into the narrow edge. Sink nail heads slightly with a nail set. There is no need to fill these nail holes as this will be the back of the shelf.
Photo By: Sam Henderson
Paint or Stain Shelf for Bathroom Storage
Paint or stain and varnish the shelf as desired to coordinate with your decor. Allow to dry completely before proceeding.
Photo By: Sam Henderson
Attach Shelf to Couplings
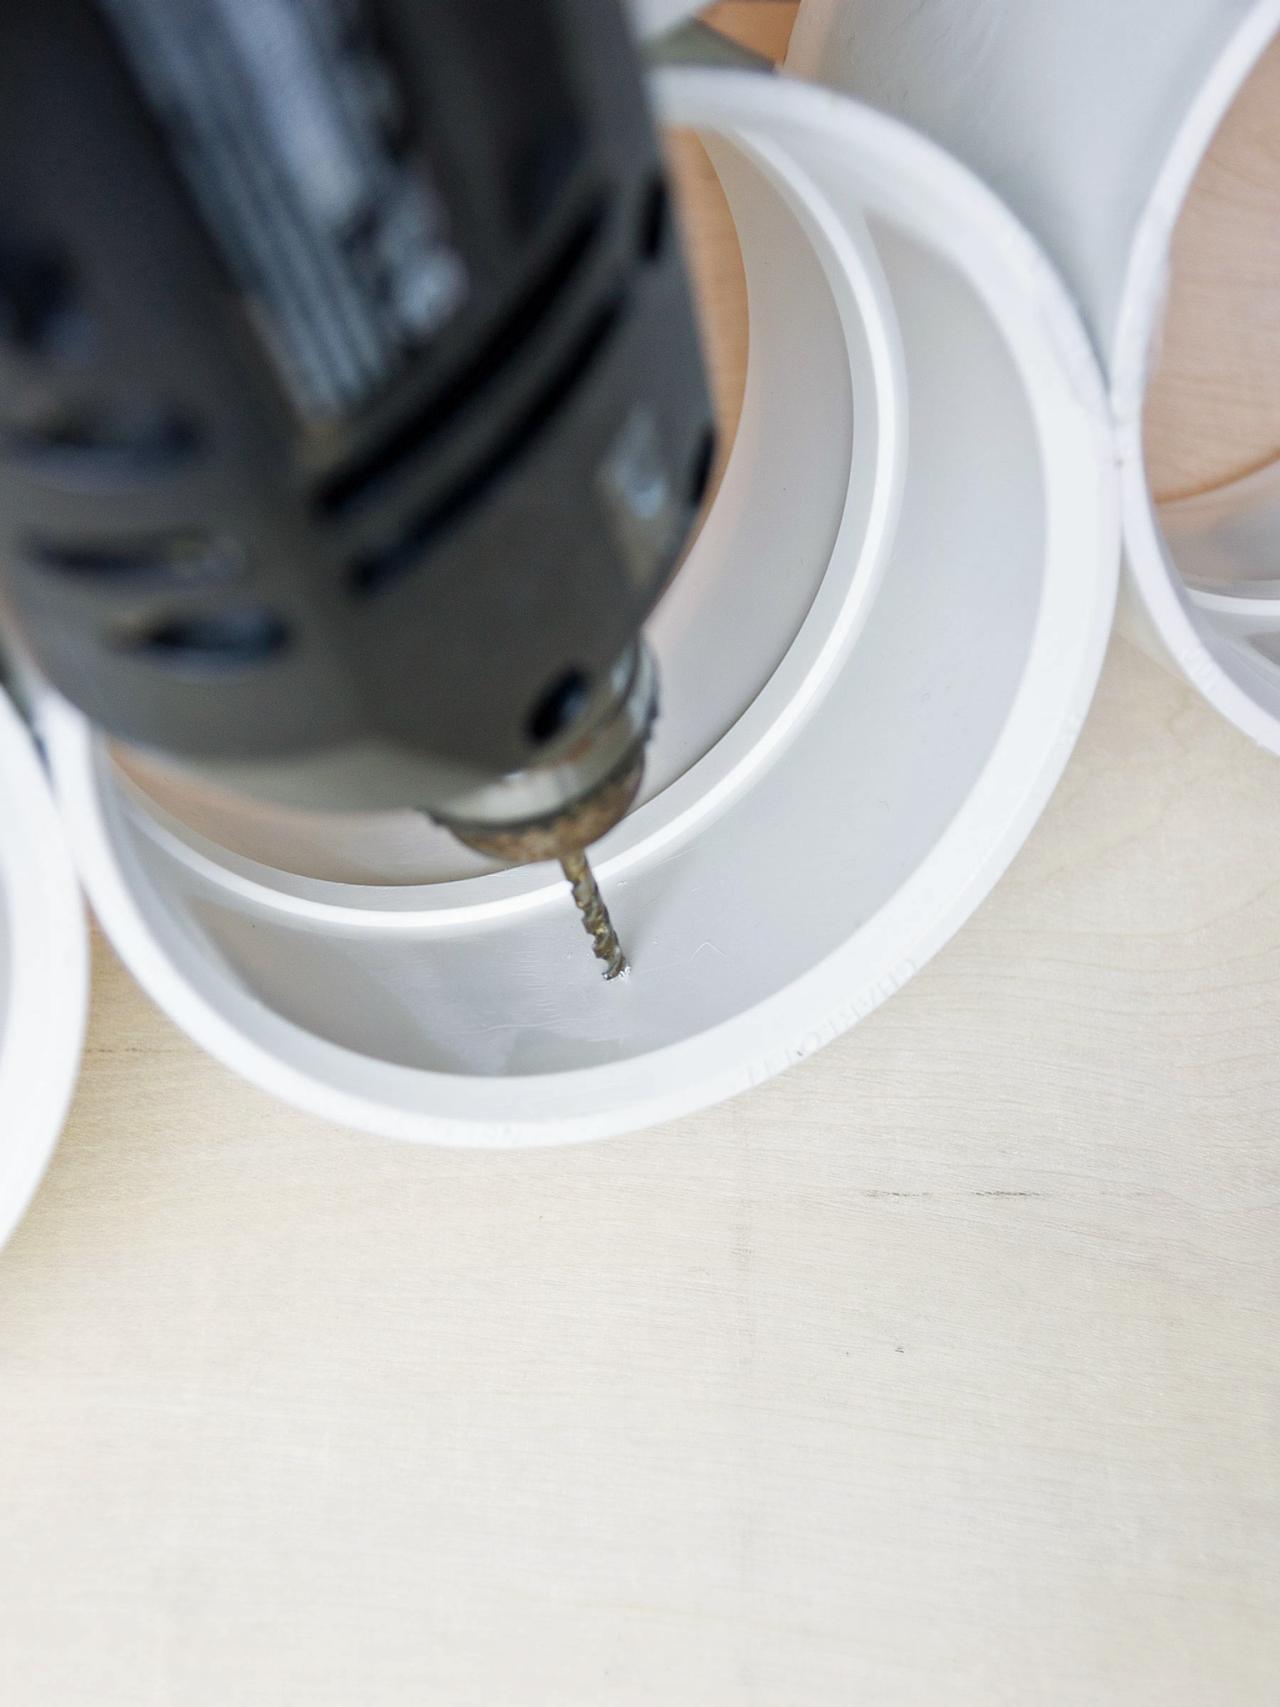
Remove the clamps and boards securing the PVC grouping. Ensure that all joints are secure. Stand the PVC couplings up on one of the smaller sides on a piece of scrap wood with the back of the couplings facing you. That will be the top row. Drill a hole in the center of each of the couplings on the top row in the center and about an inch from the back. Now turn the PVC couplings on their side and place the shelf against the top row with the back of the shelf facing you. Use 3/4" screws through the PVC couplings' top row and into the bottom of the shelf to secure it in place.

Drill Hole in PVC Couplings for Bathroom Storage
Remove the clamps and ensure that the joints are all secure. Stand the PVC couplings up on one of the smaller sides on a piece of scrap wood with the back of the couplings facing you. That will be the top row. Drill a hole in the center of each of the couplings on the top row in the center and about an inch from the back.
Photo by: Sam Henderson
Sam Henderson
Add Anchors and Hang Shelving Unit
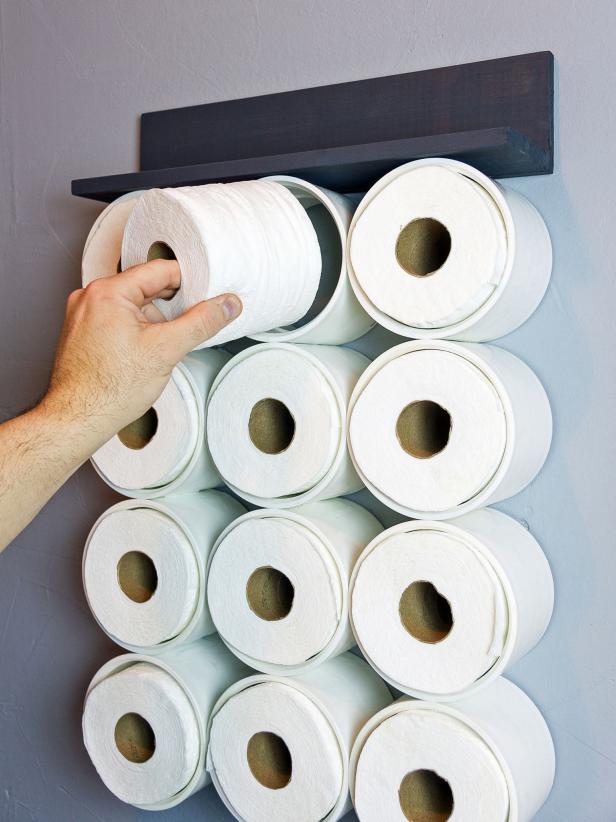
Determine where the unit will go on the wall. Make a small mark with a pencil at the top of the shelf in the center. Measure down 7" from there and make another small mark. Measure 2-1/2" from that mark to the right and to the left. Use a level to make sure they are even. Make a mark at both spots. Install a wall anchor and a screw with at least 1-1/2" of the screw sticking out at both of the marked spots (Image 1). Place the top row of the couplings over the two screws to hang. Fill the couplings with toilet paper or other bathroom accessories and use the top shelf to store smaller bathroom necessities (Images 2 and 3).

Sam Henderson
Sam Henderson

Sam Henderson
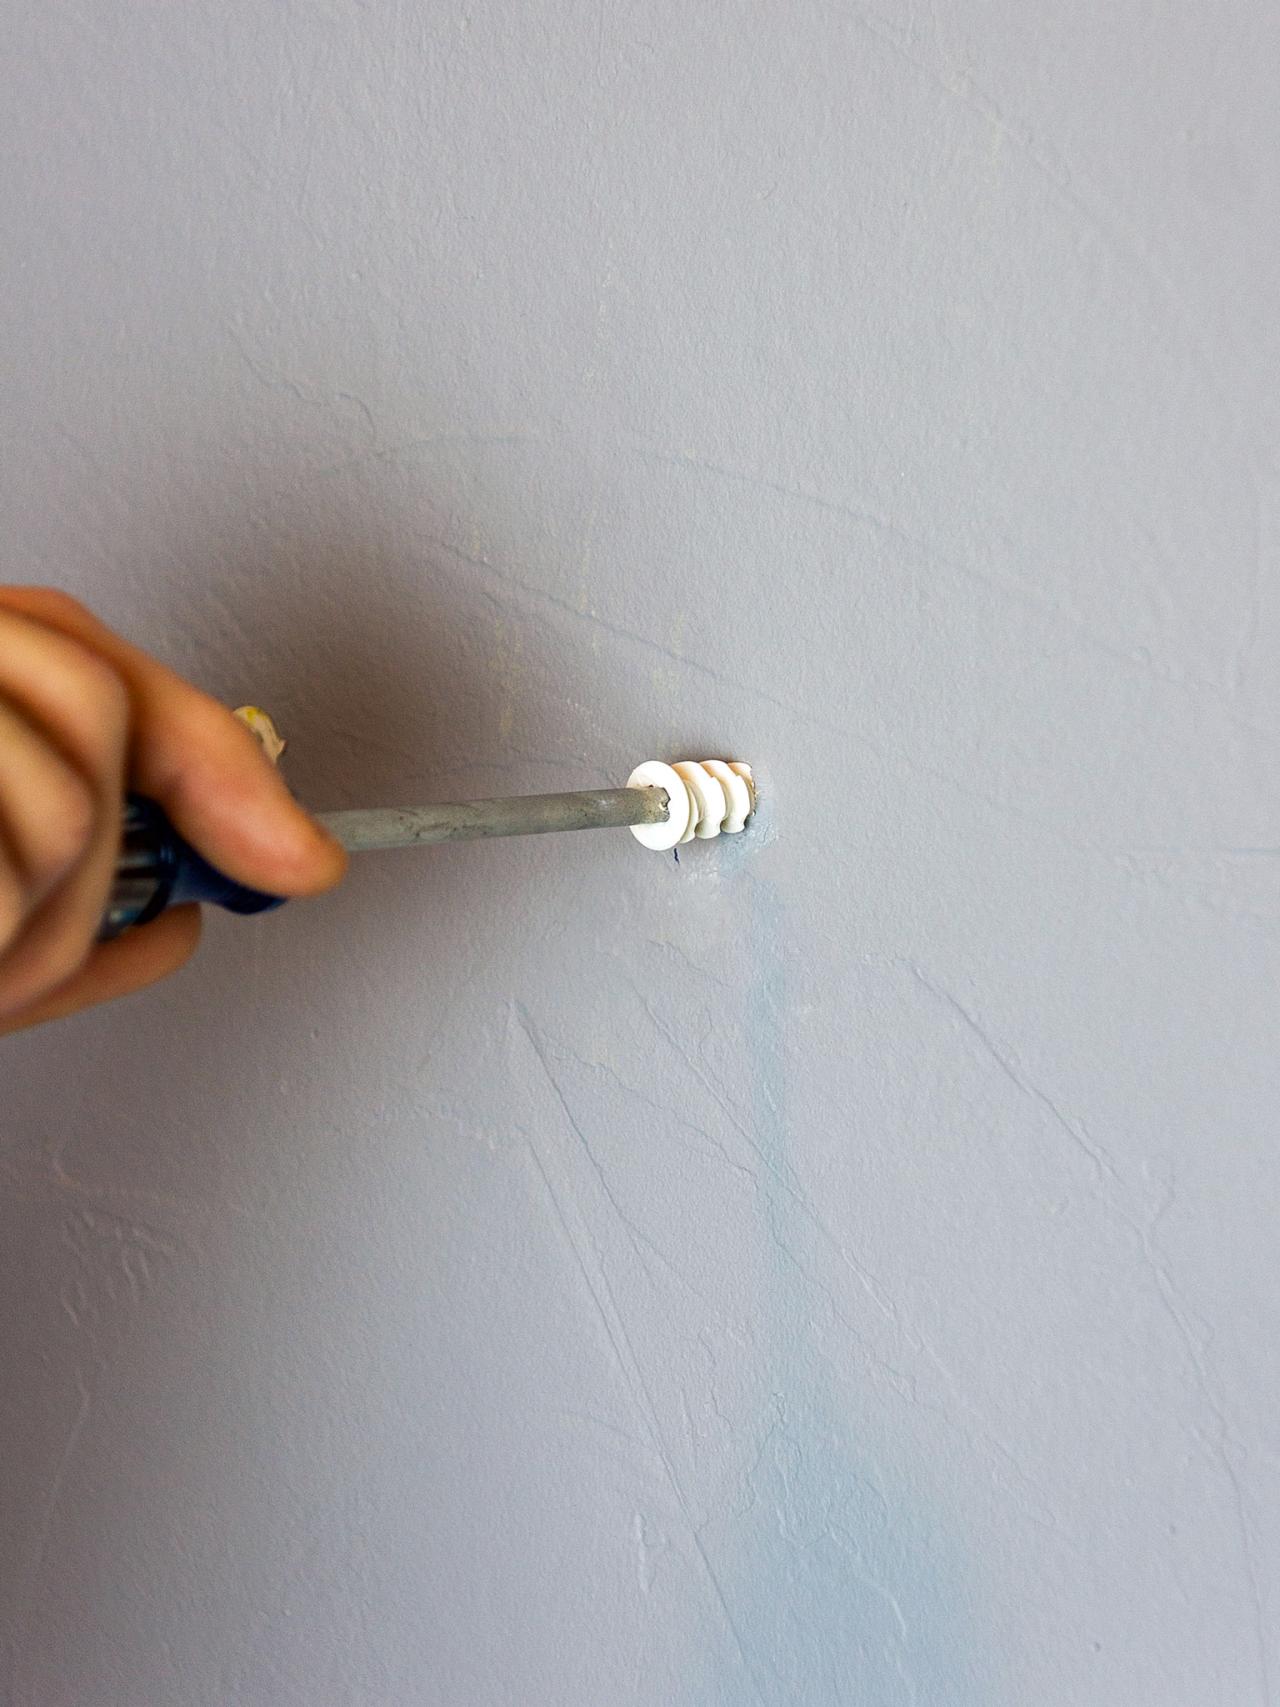
Install Wall Anchor and Screw
Determine where the unit will go on the wall. Make a small mark with a pencil at the top of the shelf in the center. Measure down from there 7” and make another small mark. Measure 2-1/2” from that mark to the right and to the left. Use a level to make sure they are even. Make a mark at both of those spots. Install a wall anchor and a screw with at least 1-1/2” of the screw sticking out at both of the marked spots.
Photo By: Sam Henderson
Fill Couplings With Toilet Paper
Place the top row of the couplings over the two screws to hang. Fill the couplings with toilet paper or other bathroom accessories, and merchandise the top shelf as desired.
Photo By: Sam Henderson
Budget-Friendly Bathroom Storage Using PVC Pipe
Repurposed plumbing fixtures make modern storage for your toilet tissue or other bathroom accessories.
Photo By: Sam Henderson


