


Make Draperies and a Wooden Cornice for a Shower

Cornice Board Shower Curtain in Traditional Bathroom
A blue-and-yellow damask shower curtain hangs from cornice board, adding architectural detail to this traditional bathroom. Marble subway tiles create the shower surround, while marble square tiles are used on the floor. A large open shelf provides plenty of storage.

Materials Needed:
- approximately 5-6 yards of 54"-wide decorator fabric for an average 5' tub and 7' ceilings
- two flat twin bed sheets (to use as lining, optional)
- coordinating all-purpose cotton thread
- tape measure
- clear quilting ruler
- pencil
- scissors
- seam ripper
- sewing machine with automatic button hole foot and setting
- pins
- iron and ironing board
- 2 shower stall liners
- 2 sets shower curtain rings
- 5' x 1/4" dowel rod
- closet rod holder
- piece of 3/4" MDF cut to desired height of cornice x width of tub opening (cornice front)
- two 1" x 3" pine boards cut to desired height of cornice (sides)
- one 1" x 3" pine board cut to width of shower/tub opening (cornice top)
- pocket-hole jig (optional)
- drill equipped with drill and driver bits
- 1 1/4" and 2" wood screws
- stud finder
- primer
- paint
- white trim caulk and caulk gun
- 2 1/2" angled sash brush and/or 6" foam roller
- trim and/or crown molding (optional)
- finish nailer with nails (or hammer and finish nails, optional)
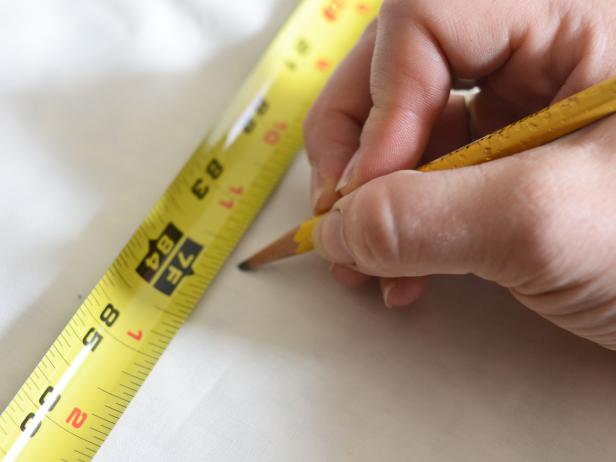
Measure Curtain and Lining Panels
Prewash fabric and twin sheets. Use tape measure to determine length from floor to desired height of shower curtain rod. Add 15 inches for header and hem allowance. Transfer measurement to fabric. Use quilting ruler or square and yardstick to draw straight line across fabric panel. Mark line with pencil, then cut across marked line. Repeat with second curtain panel, being careful to match up design so it's level across both panels.

DIY Shower Curtains
Prewash fabric and twin sheets. Use tape measure to determine length from floor to desired height of shower curtain rod. Add 15 inches for header and hem allowance. Transfer measurement to fabric. Use quilting ruler or square and yardstick to draw straight line across fabric panel. Mark line with pencil, then cut across marked line. Repeat with second curtain panel, being careful to match up design so it's level across both panels.
Photo by: Marian Parsons
Marian Parsons
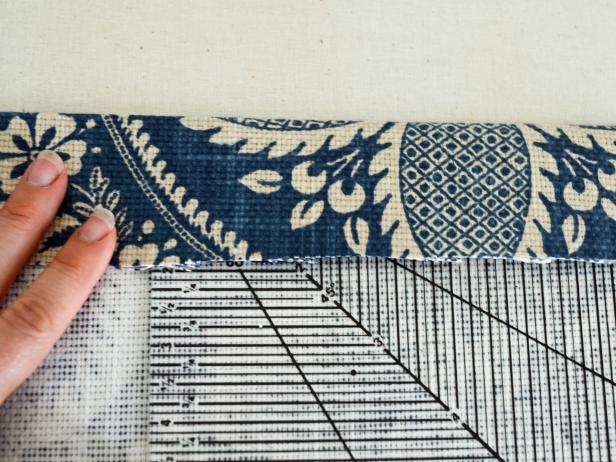
Fold and Press Hem
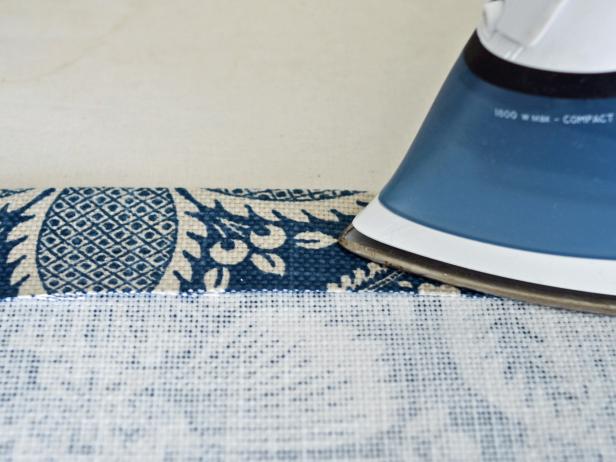
Place fabric on ironing board wrong-side up. Fold bottom edge of fabric panel over 3 1/2 inches and press (Images 1, 2). Fold fabric over again, press and pin in place (Image 3). This creates a 3 1/2-inch double hem. Sew hem and remove pins (Image 4).
Marian Parsons
Marian Parsons

Marian Parsons
Marian Parsons
Instructions fro DIY Shower Curtain
Place fabric on ironing board wrong-side up. Fold bottom edge of fabric panel over 3 1/2 inches and press.
Photo By: Marian Parsons
Fold and Press Hem
Fold bottom edge of fabric panel over 3 1/2 inches and press.
Photo By: Marian Parsons
Fold and Press Hem to Make Shower Curtain
Fold fabric over again, press and pin in place to create a 3 1/2-inch double hem.
Photo By: Marian Parsons
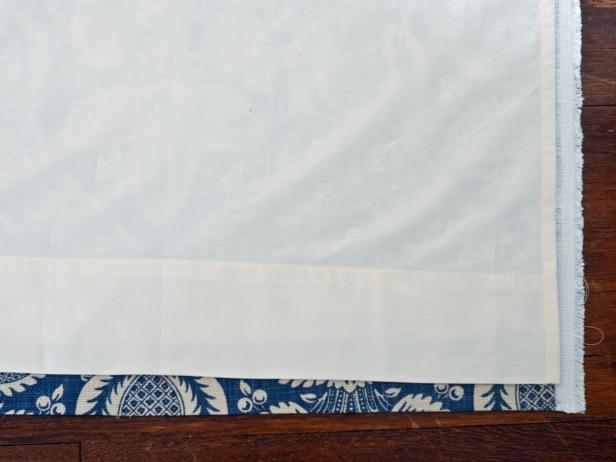
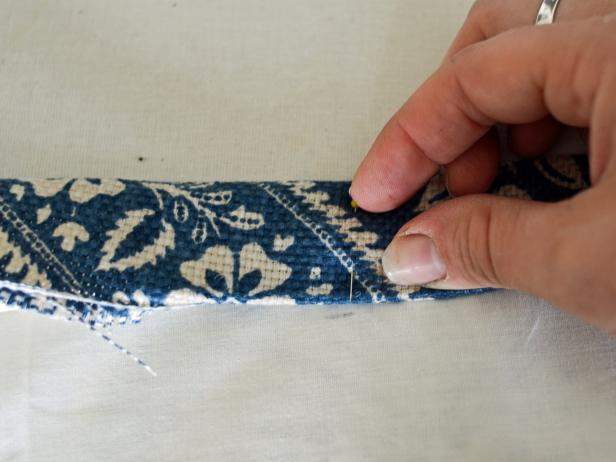
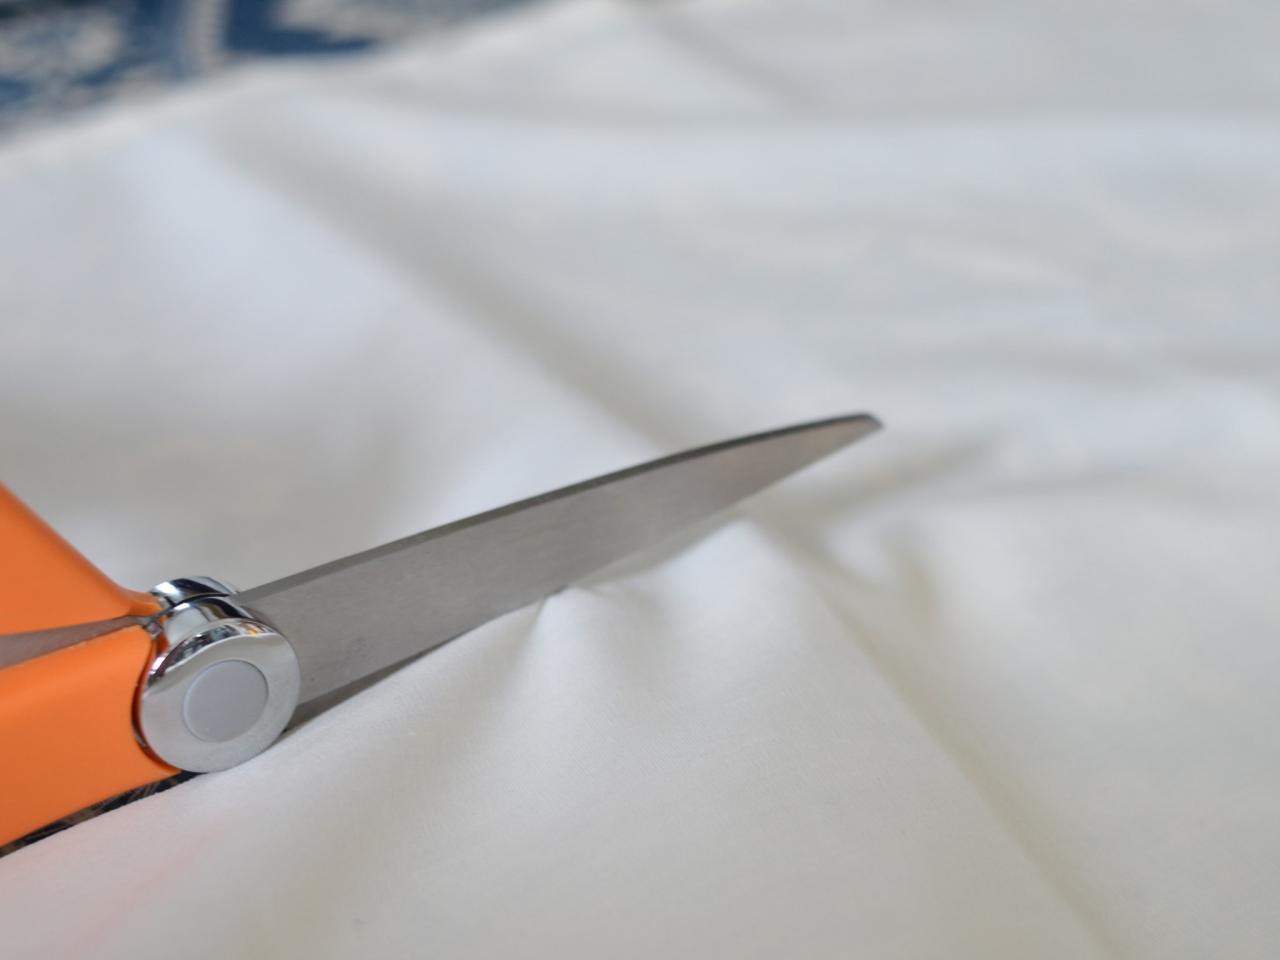
Connect Panel and Lining
Spread fabric on floor or work surface, right side facing down. Place twin bed sheet/lining on top, right side facing up and top of sheet at bottom of panel to act as a hem. Line up bottom of lining about 1 inch higher than bottom of fabric panel. Smooth both fabrics out, removing all wrinkles and folds (Image 1). Pin fabric to lining in a few places to hold them together. Twin sheet will be wider and longer than fabric panel, so trim excess with sharp scissors (Image 2).
Marian Parsons

Marian Parsons
Connect Panel and Lining of Custom Shower Curtain
Spread fabric on floor or work surface, right-side facing down. Place twin bed sheet/lining on top, right side facing up and top of sheet at bottom of panel to act as a hem. Line up bottom of lining about 1 inch higher than bottom of fabric panel. Smooth both fabrics out, removing all wrinkles and folds .
Photo By: Marian Parsons
Connect Panel and Lining
Pin fabric to lining in a few places to hold them together. Twin sheet will be wider and longer than fabric panel, so trim excess with sharp scissors.
Photo By: Marian Parsons
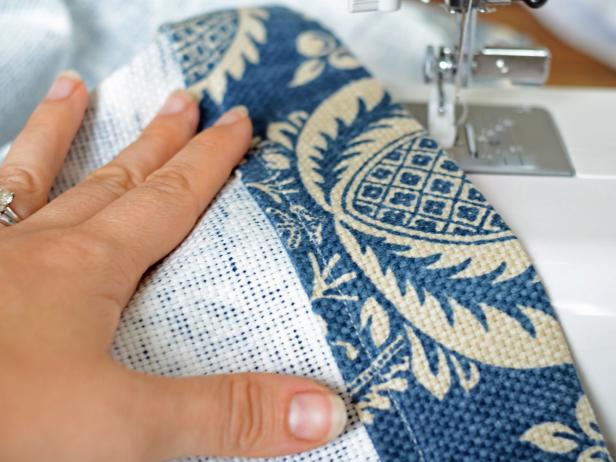
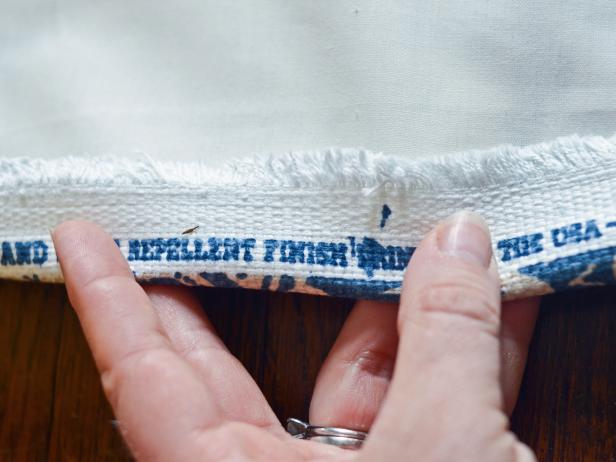
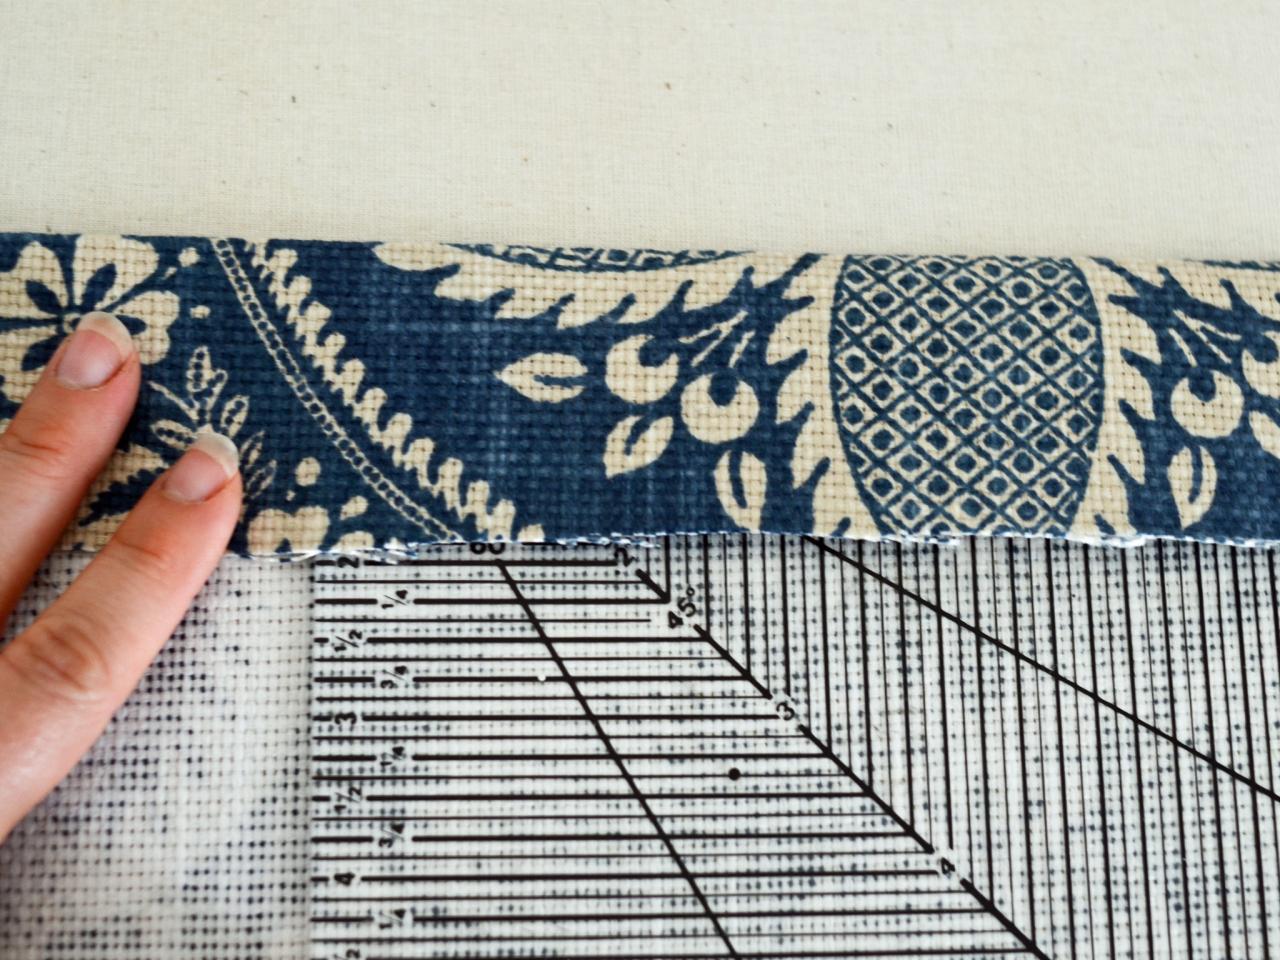
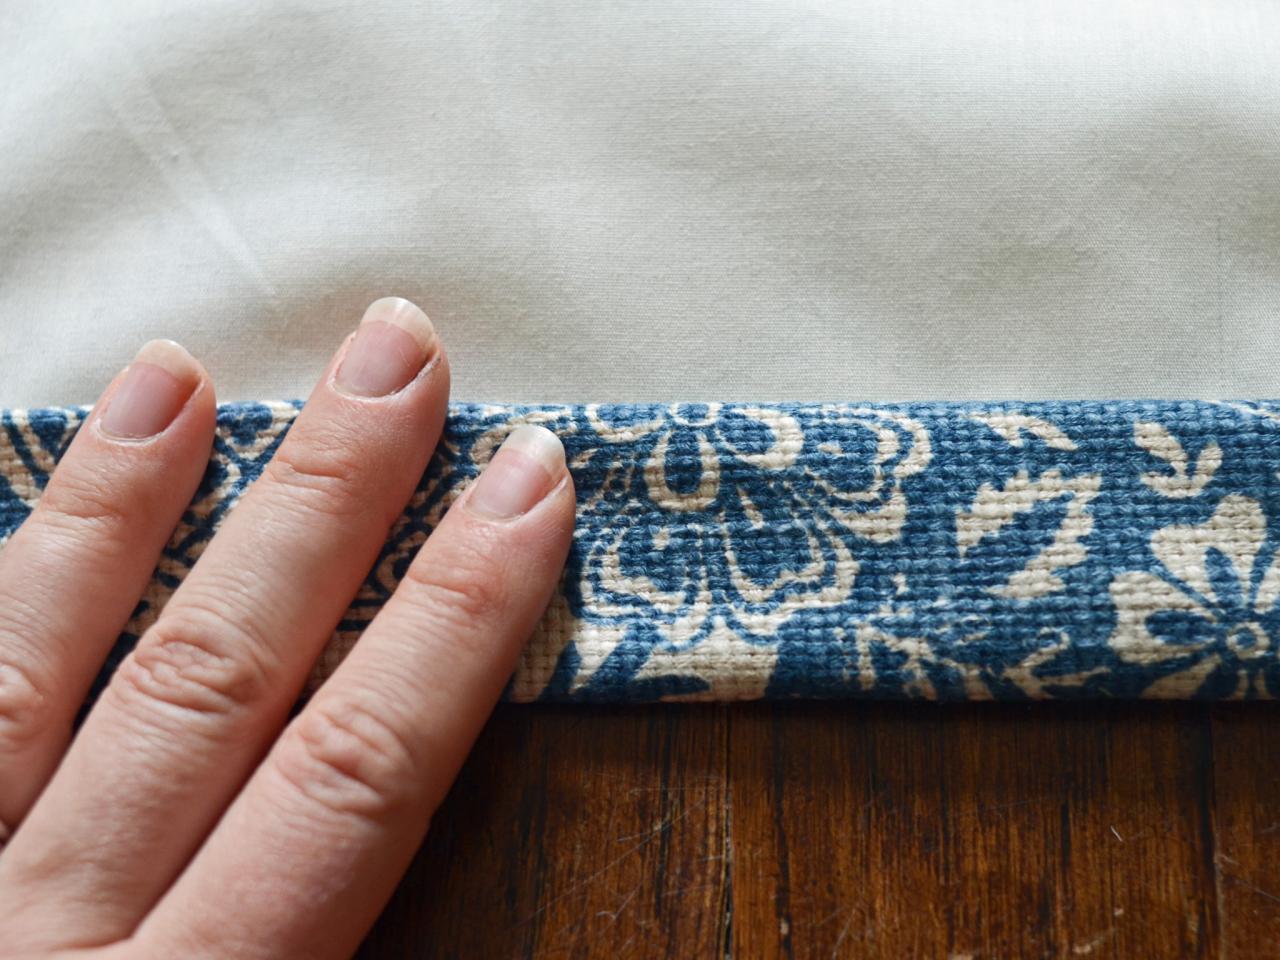
Sew Sides
Fold side edge of fabric panel and lining over one inch (Image 1). Fold over another inch to create a double folded edge with hidden raw edges (Image 2). Pin into place and press (Image 3). Repeat on other side. Sew sides and remove pins (Image 4).
Marian Parsons

Marian Parsons

Marian Parsons
Marian Parsons
Fold Edge to Sew Shower Curtain Hem
Fold side edge of fabric panel and lining over one inch.
Photo By: Marian Parsons
Instructions for DIY Custom Shower Curtain
Fold over another inch to create a double folded edge with hidden raw edges.
Photo By: Marian Parsons
Hem Shower Curtain Top
Lay shower curtain on work surface with lining facing up. Double-check measurements to ensure curtain length lines up with curtain rod height. Take rings into account when measuring. It's a good idea for curtains to hang about 1 inch off floor so they don't soak up water. Mark where bottom of hem should be along top of curtain (Image 1). Fold fabric over in a double hem. Press and pin in place (Image 2). Sew and remove pins.
Marian Parsons
Marian Parsons
Hem Shower Curtain Top
Lay shower curtain on work surface with lining face up. Double-check measurements to ensure curtain length lines up with curtain rod height. Take rings into account when measuring. It's a good idea for curtains to hang about 1 inch off floor so they don't soak up water. Mark where bottom of hem should be along top of curtain.
Photo By: Marian Parsons
Hem Shower Curtain Top
Fold fabric over in a double hem. Press and pin in place. Sew and remove pins.
Photo By: Marian Parsons
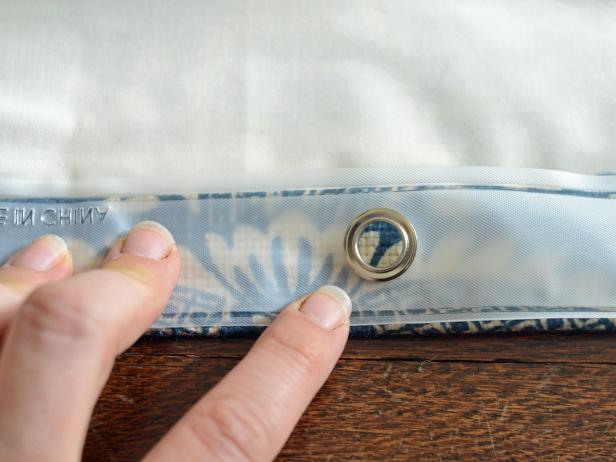
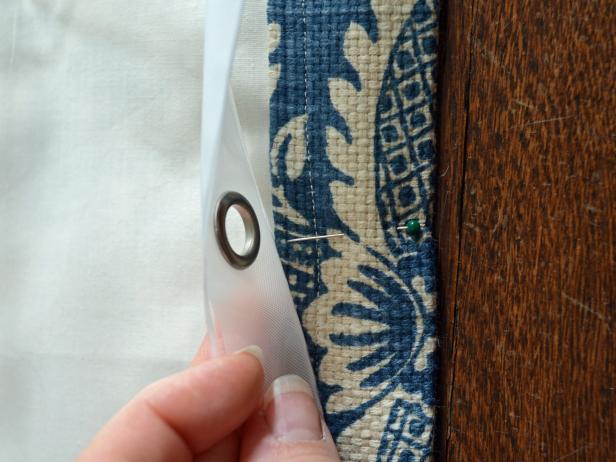
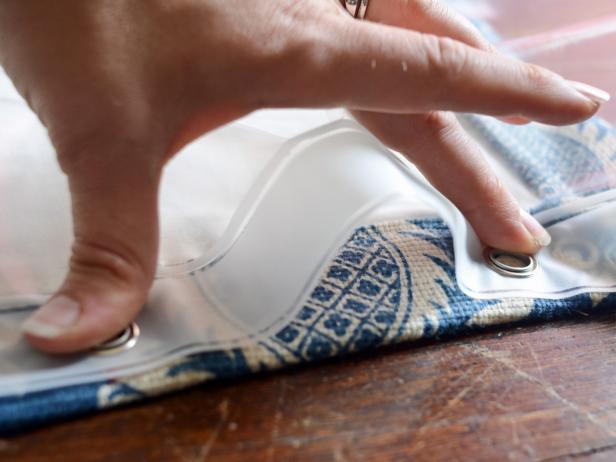
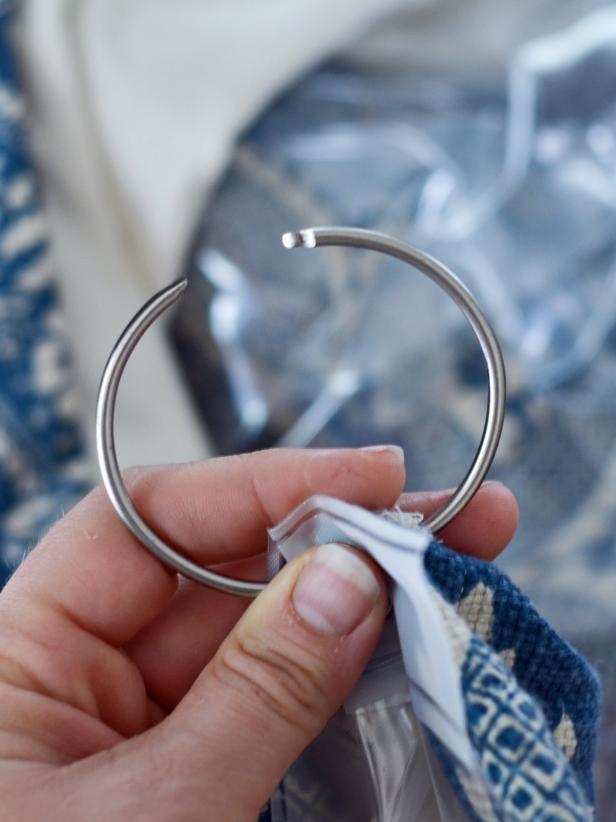
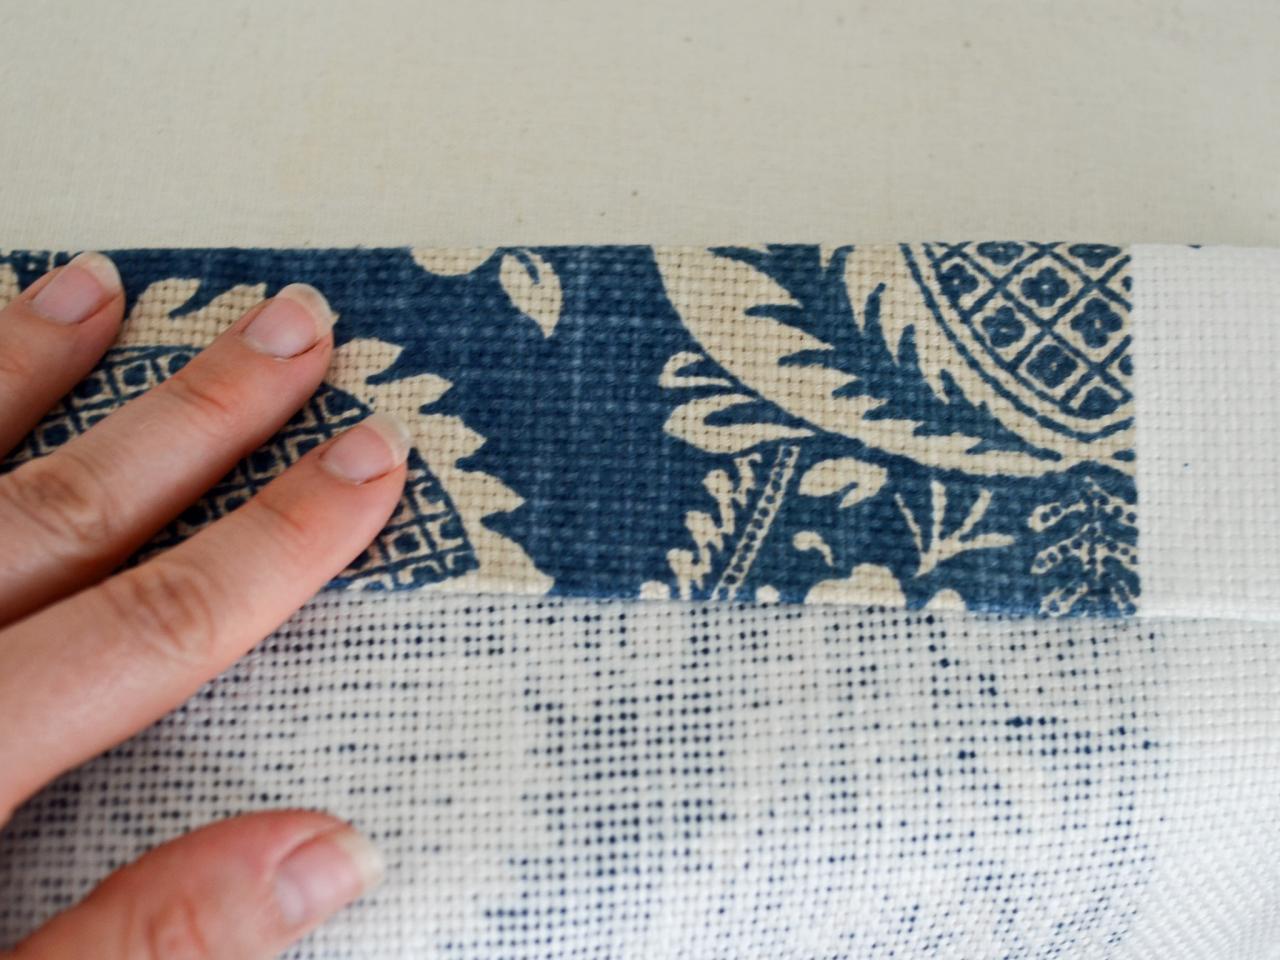
Mark Holes for Curtain Rings
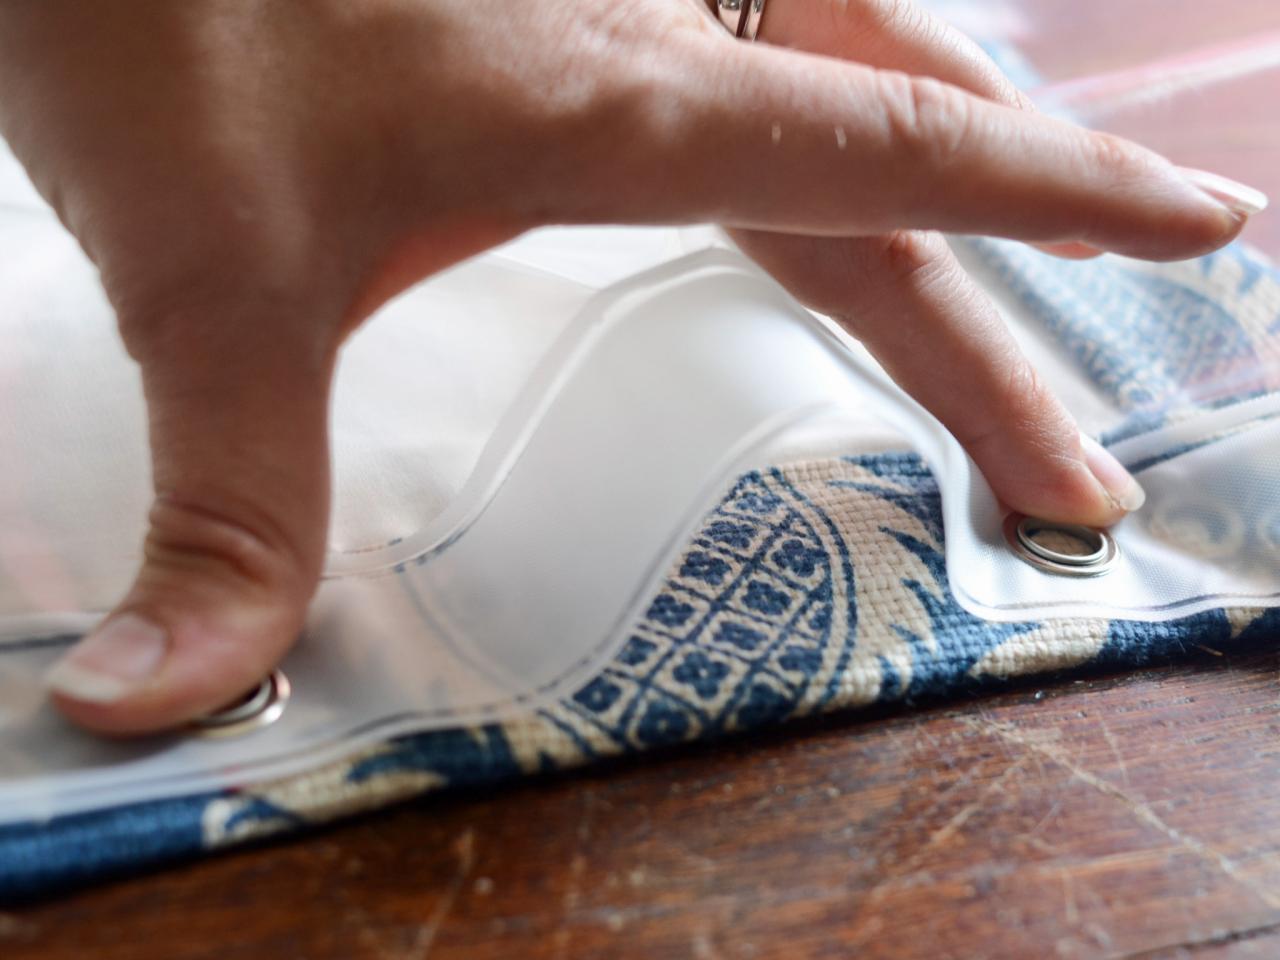
Line up top of shower curtain liner with top of curtain panel (Image 1). Mark where grommet holes are with a pin. If shower curtain liner is slightly larger than curtain panel, position two grommet holes closer together, allowing shower curtain liner to gap slightly (Images 2, 3).
Marian Parsons
Marian Parsons
Marian Parsons
Instructions for DIY Custom Shower Curtain
Line up top of shower curtain liner with top of curtain panel.
Photo By: Marian Parsons
Instructions for DIY Shower Curtains
If shower curtain liner is slightly larger than curtain panel, position two grommet holes closer together, allowing shower curtain liner to gap slightly.
Photo By: Marian Parsons
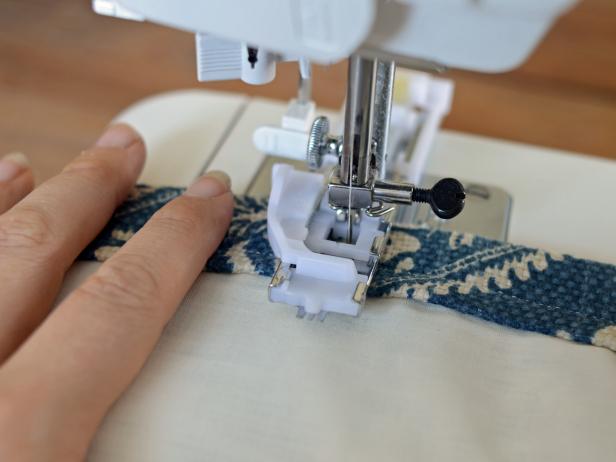
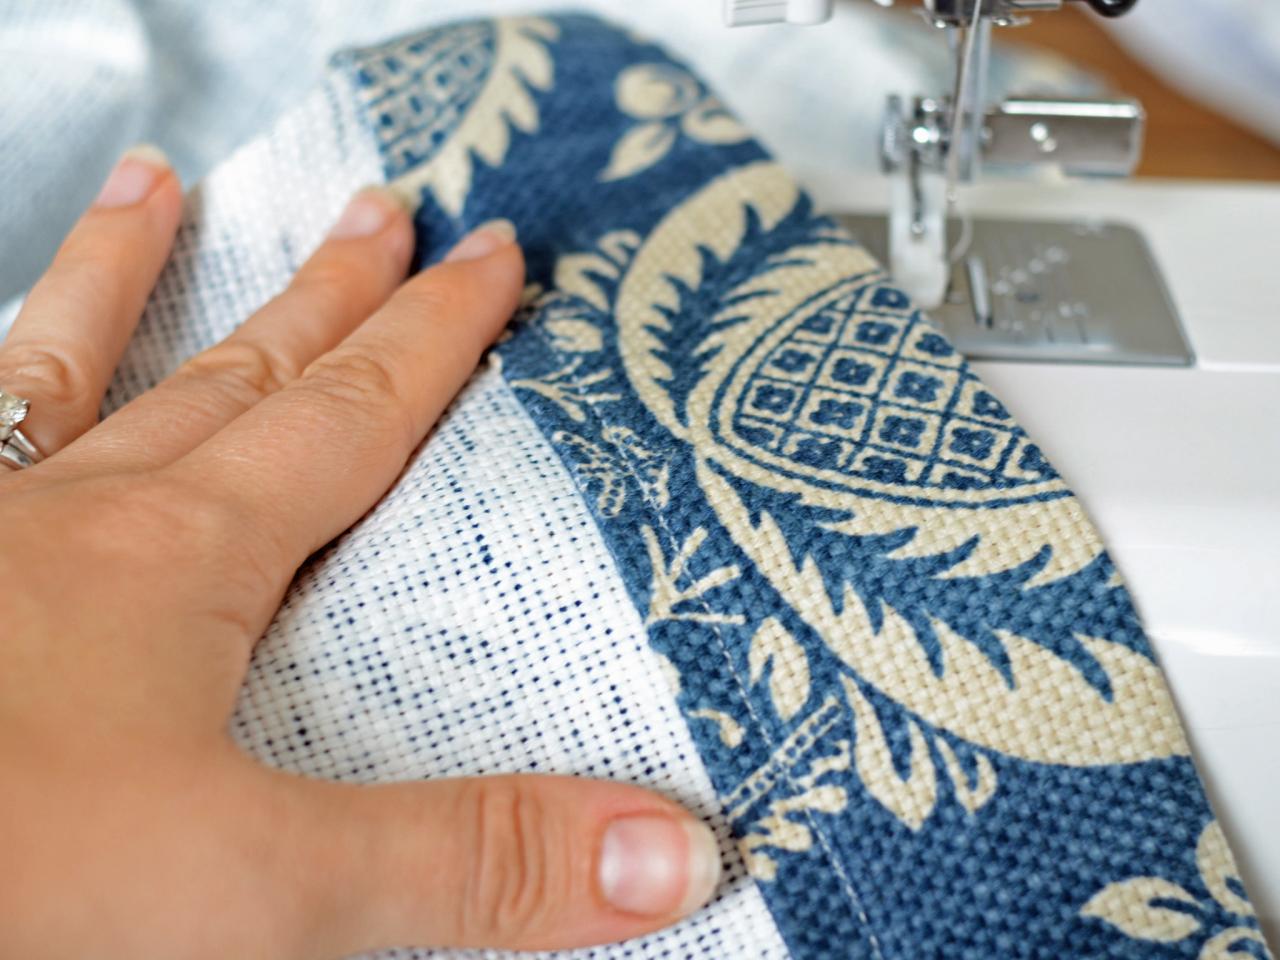
Create Shower Curtain Ring Holes
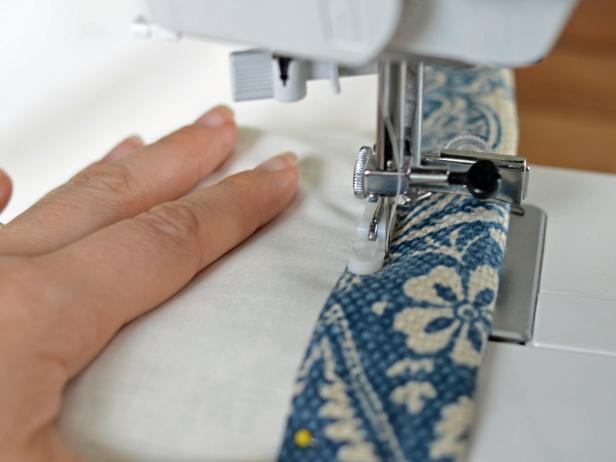
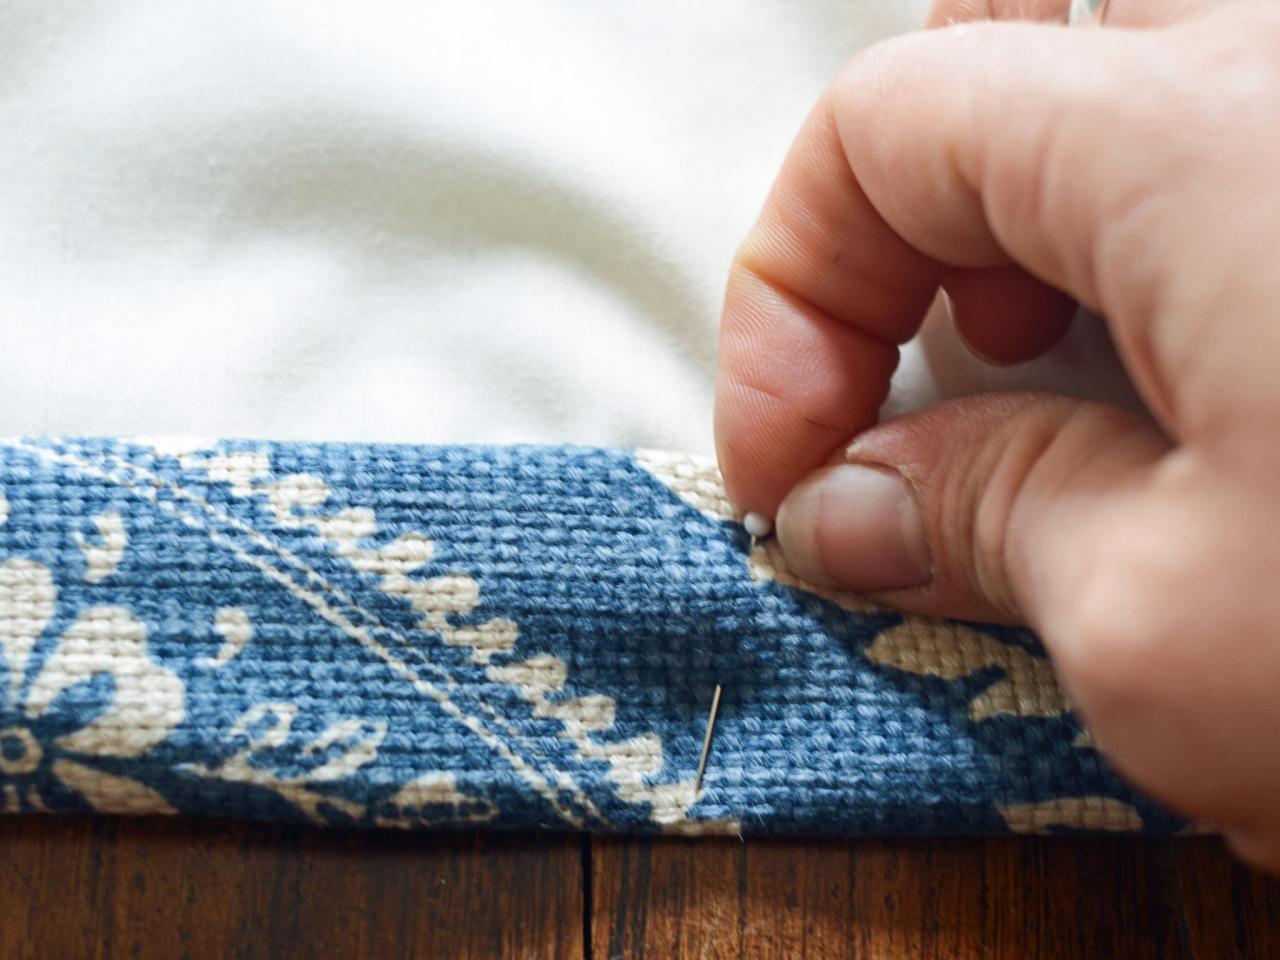
Equip sewing machine with button hole foot and set to automatic button hole settings. Make button hole approximately 1/2-inch long at each pin mark (Image 1). Use seam ripper to create opening inside button hole for curtain rings (Image 2). Trim all threads. Repeat steps 2–7 on second curtain panel.
Marian Parsons
Marian Parsons
Create Shower Curtain Ring Holes
Equip sewing machine with button hole foot and set to automatic button hole settings. Make button hole approximately 1/2-inch long at each pin mark.
Photo By: Marian Parsons
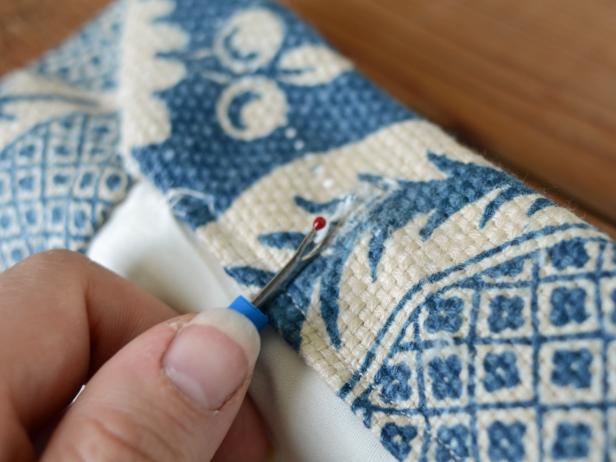
Creating Shower Curtain Ring Holes
Use seam ripper to create opening inside button hole for curtain rings. Trim all threads.
Photo By: Marian Parsons
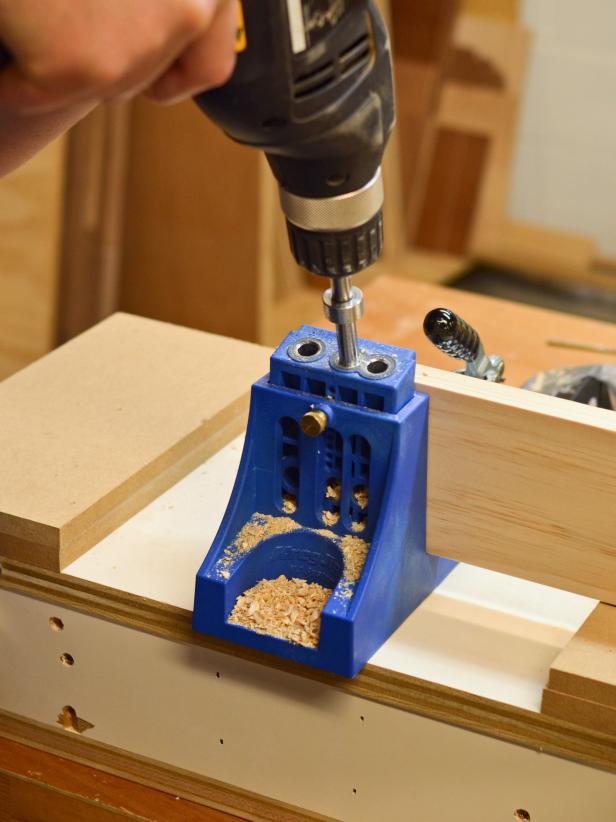
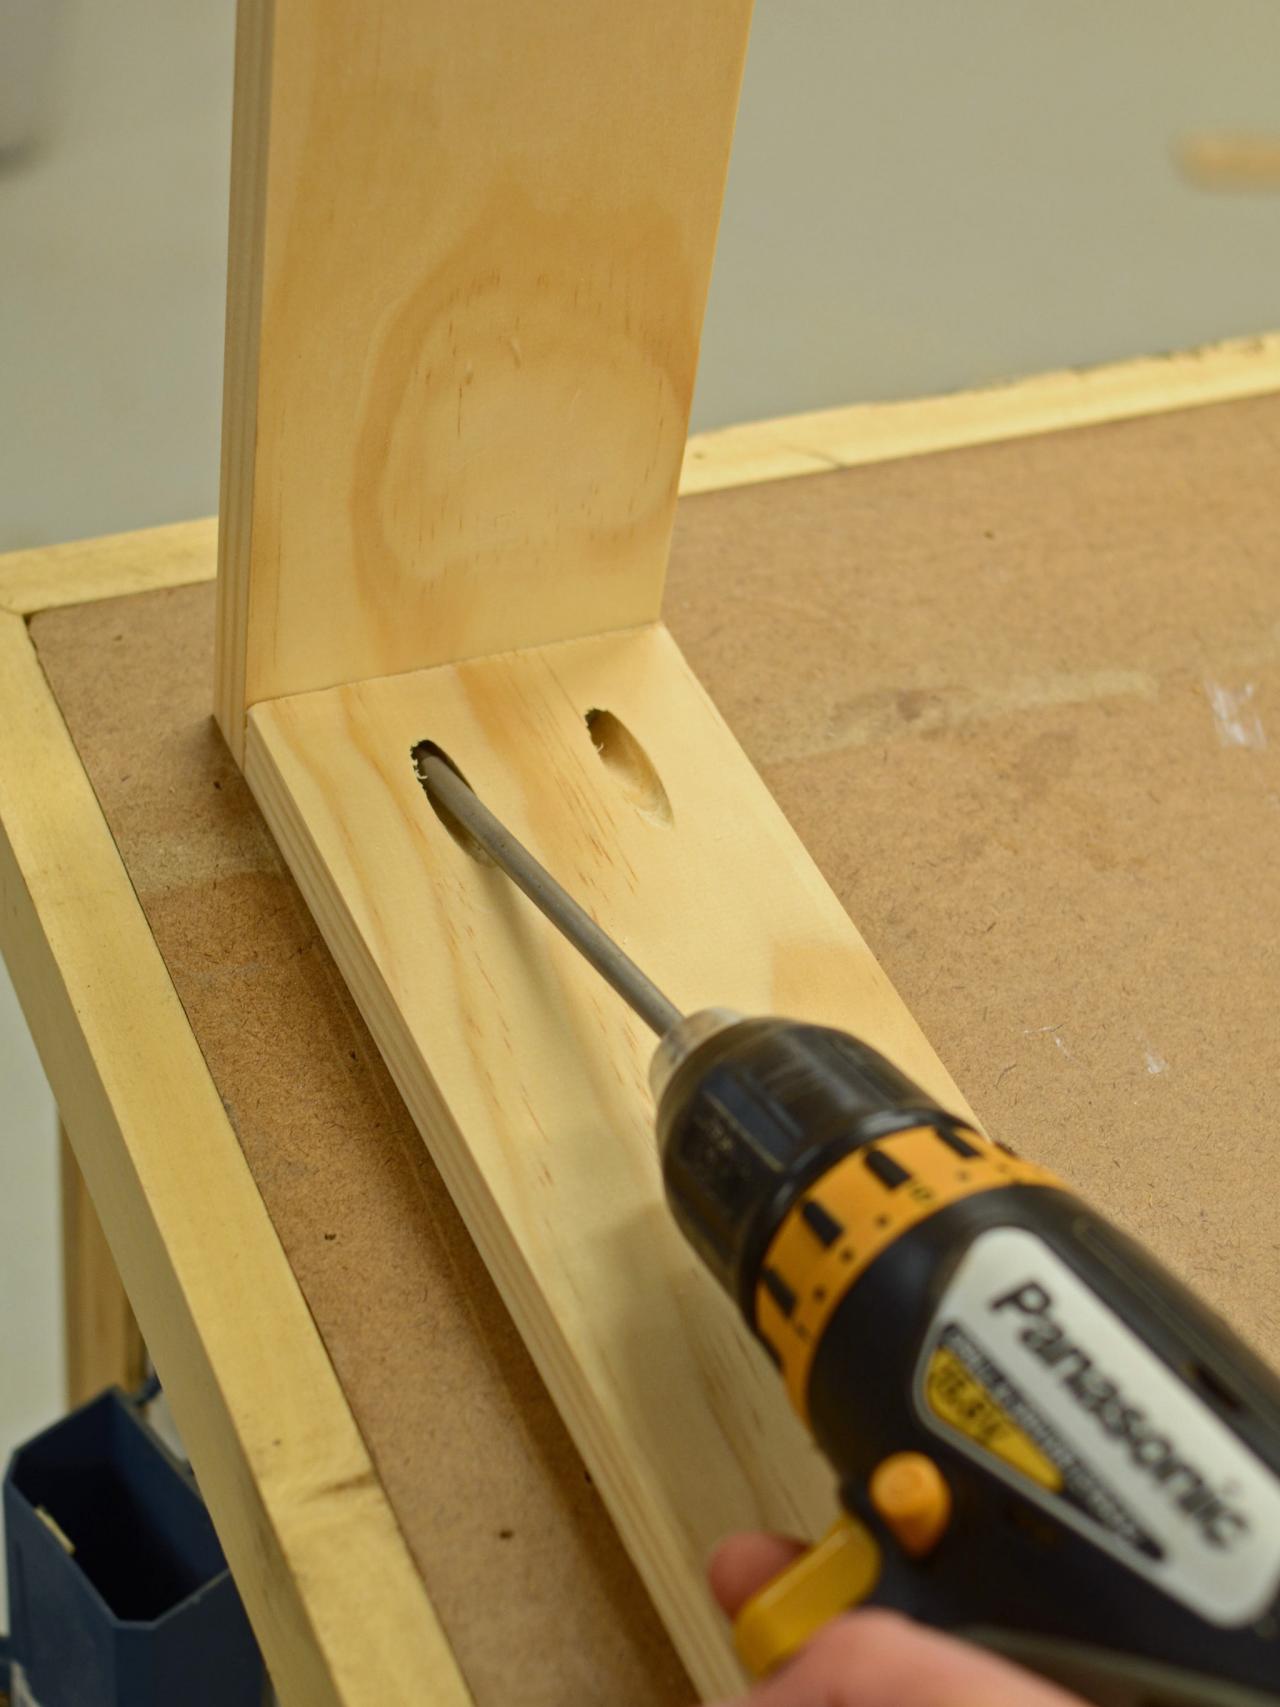
Assemble Top and Sides of Cornice
Assemble pine boards cut for sides and top in a U shape and use pocket-hole jig to drill angled holes through top into side pieces of cornice (Image 1). Secure together with 1 1/4-inch wood screws through pocket holes. Tip: Adjust measurement of side pieces to achieve desired look and rod height.

Assemble Top and Sides of Cornice
Assemble pine boards cut for sides and top in a U-shape, and use a pocket-hole jig to drill angled holes through top into side pieces of cornice. Secure together with 1 1/4-inch wood screws through pocket holes. Tip: Adjust measurement of side pieces to achieve desired look and rod height.
Photo by: Marian Parsons
Marian Parsons
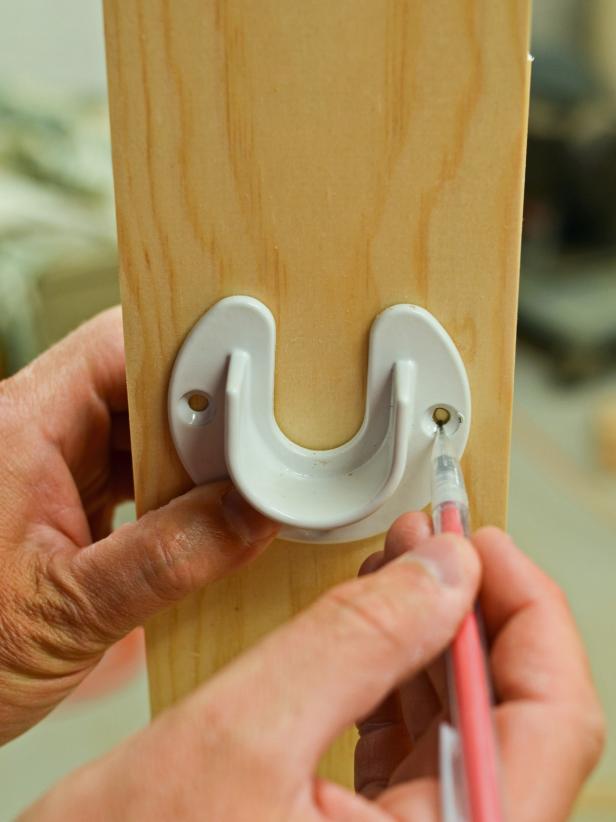
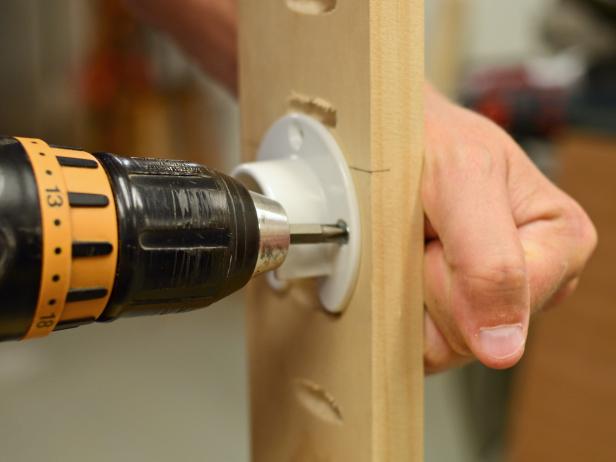
Attach Rod Holder
Determine proper placement of rod holder based on desired rod height. Mark holes with pencil (Image 1), pre-drill holes and attach rod holders to interior of side pieces with screws (Image 2).
Marian Parsons
Marian Parsons
Instructions for DIY Custom Shower Curtain
Determine proper placement of rod holder based on desired rod height and mark with a pencil.
Photo By: Marian Parsons
Attach Rod Holder With Drill
Determine proper placement of rod holder based on desired rod height. Mark holes with pencil, pre-drill holes and attach rod holders to interior of side pieces with screws.
Photo By: Marian Parsons
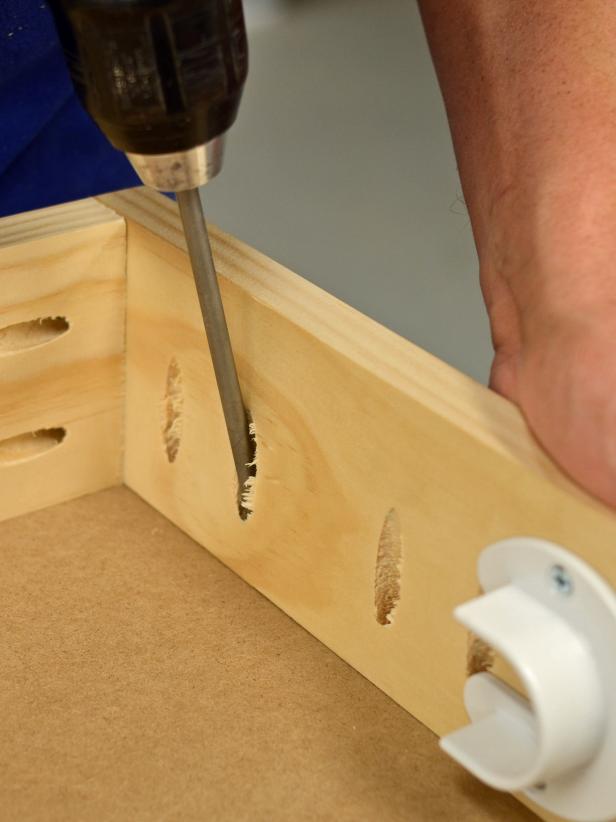
Attach Front Panel
Drill pocket holes into top and side pieces through to front (Image 1). Use 1 1/4-inch wood screws to attach front to top and sides through pocket holes (Image 2). Place a pair of screws about 2 inches apart every 8 inches for stability. Tip: Wood pieces can be nailed and glued together or screwed directly through one piece into another if a pocket-hole jig isn't available.
Marian Parsons
Marian Parsons
Drilling
Drill pocket holes into top and side pieces through to front.
Photo By: Marian Parsons
Instructions for DIY Shower Cornice
Use 1 1/4-inch wood screws to attach front to top and sides through pocket holes. Place a pair of screws about 2 inches apart every 8 inches for stability. Tip: Wood pieces can be nailed and glued together or screwed directly through one piece into another if a pocket-hole jig isn't available.
Photo By: Marian Parsons
Prime and Paint Cornice and Rod
Apply primer with a 6-inch foam roller and/or a 2 1/2-inch angled sash brush to cornice and rod. Once primer is dry, apply 1-2 coats of paint in same manner. Tip: Plastic rod covers are available and can be used in lieu of paint.
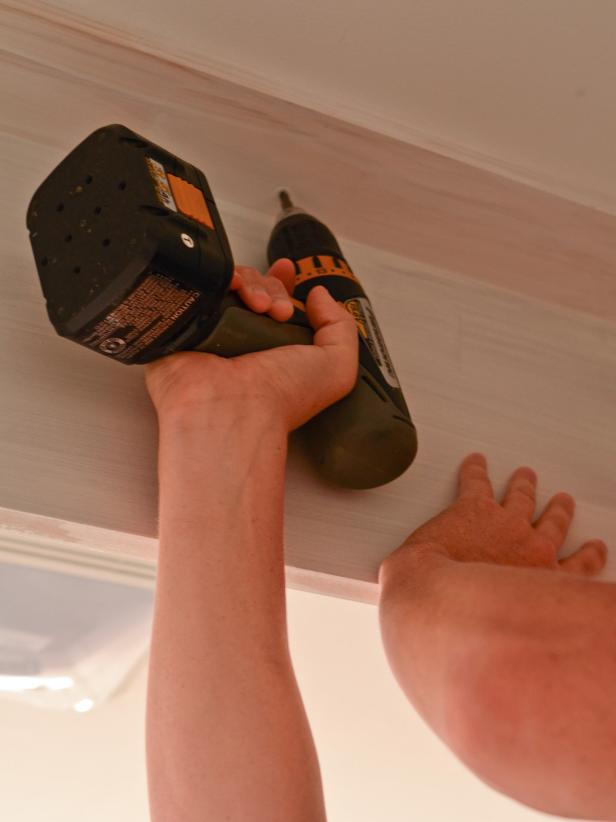
Install Cornice and Hang Curtains
Install by inserting 2 1/2-inch wood screws through cornice into ceiling joists and/or wall studs (Image 1). It may be necessary to secure cornice with wall anchors or to add ceiling supports from an attic space if joists and studs aren't in the right place. Shower curtains can get pulled on, so make sure cornice is installed properly and very securely. It will not be safe if it is just screwed into drywall. Insert dowel rod into rod holder and hang shower curtains from rings (Image 2). Caulk any gaps between wall and cornice with white trim caulk and caulk gun.
Marian Parsons
Marian Parsons
Install Cornice
Install by inserting 2 1/2-inch wood screws through cornice into ceiling joists and/or wall studs (Image 1). It may be necessary to secure cornice with wall anchors or to add ceiling supports from an attic space if joists and studs aren't in the right place. Shower curtains can get pulled on, so make sure cornice is installed properly and very securely. It will not be safe if it is just screwed into drywall.
Photo By: Marian Parsons
Hang Shower Curtain With Rings
Insert dowel rod into rod holder and hang shower curtains from rings. Caulk any gaps between wall and cornice with white trim caulk and caulk gun.
Photo By: Marian Parsons
Install Crown Molding/Trim
As an option, add crown molding or trim to top and/or of cornice by cutting trim to proper dimensions and attaching with a nail gun or hammer and nails (Image 1). Tip: Cornice can also be upholstered, covered with wallpaper or made with a paneled front.

Install Crown Molding/Trim
As an option, add crown molding or trim to top and/or bottom of cornice by cutting trim to proper dimensions and attaching with a nail gun or hammer and nails. Tip: Cornice can also be upholstered, covered with wallpaper or made with a paneled front.
Photo by: Marian Parsons
Marian Parsons


