


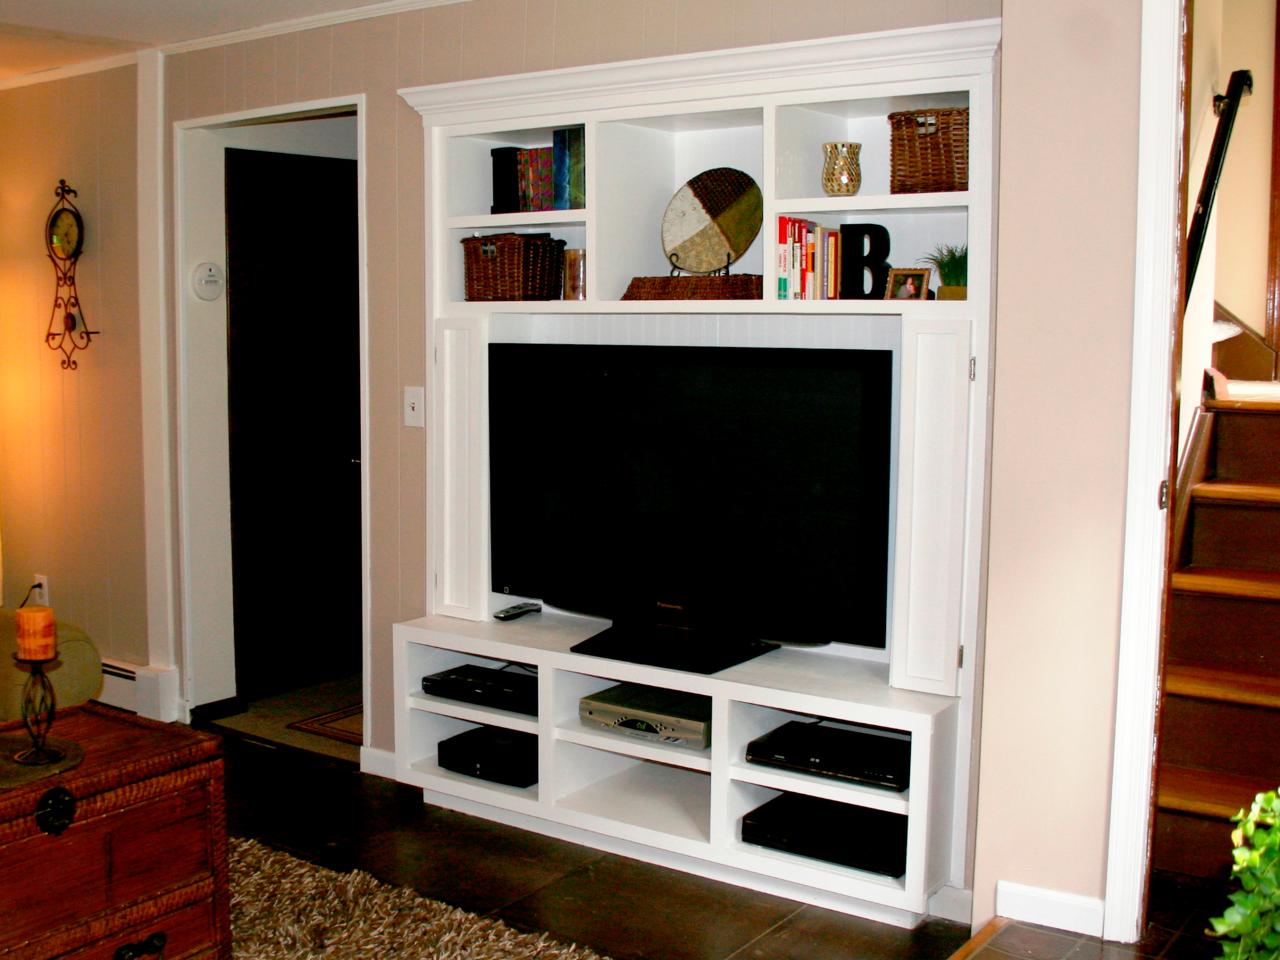
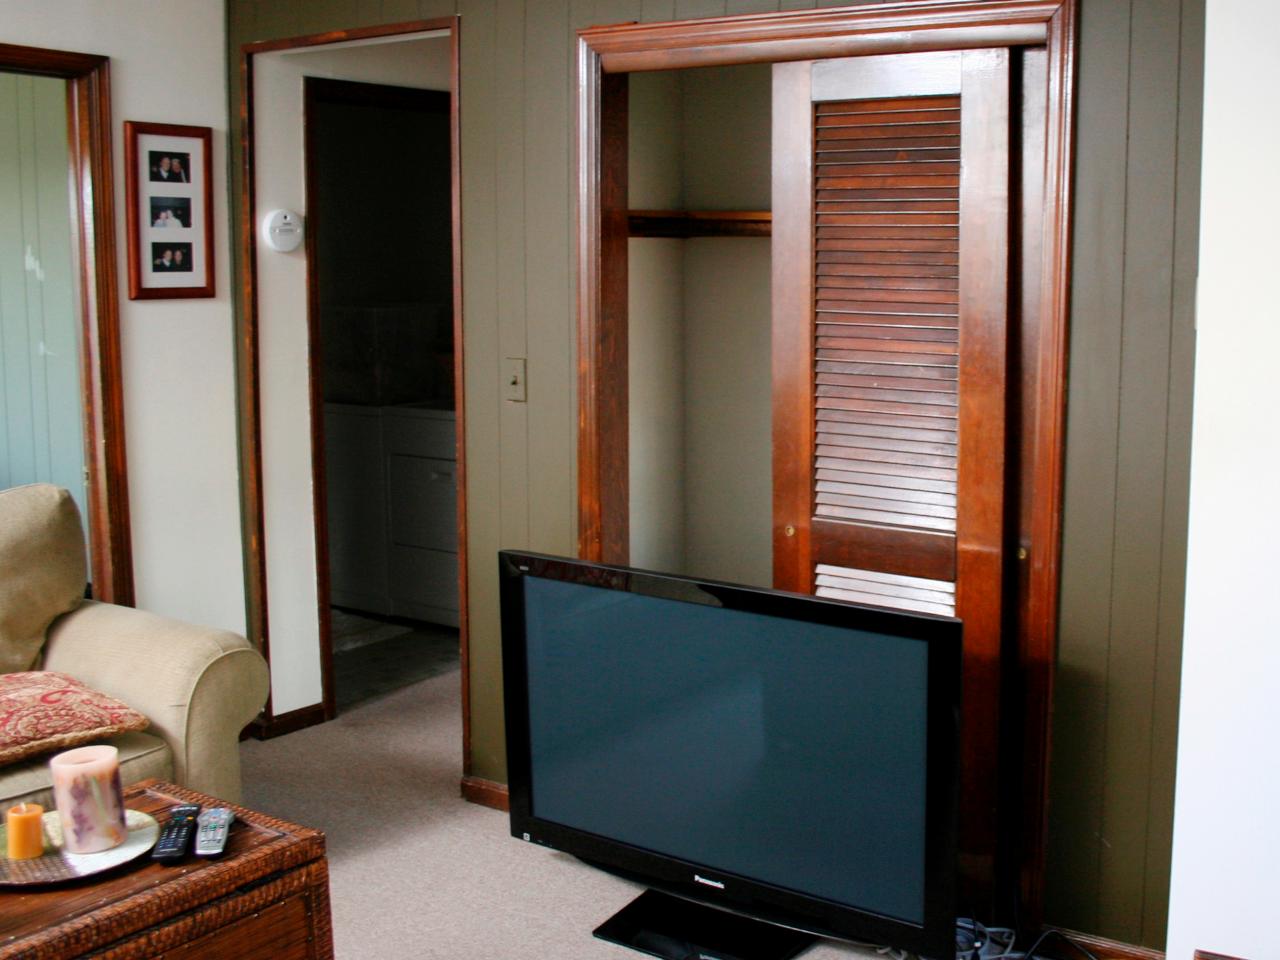
Turn a Closet into a Built-In Entertainment Center

Tools and Materials:
air compressor and hoses
bar clamps
caulking gun
dust masks and safety glasses
finish nailer and a framing nailer
hammer
level
screw gun
3/4” birch plywood
1x6 poplar boards
white gloss paint and painting supplies
reciprocating saw and a jab saw
one 14” access door
eight sets of face-frame Euro hinges
beadboard plywood
3-1/4” crown molding
two cabinet doors for DVD towers
Steps:

1. Remove the closet door. If necessary, demo the walls surrounding the closet door. Make sure there are no electrical or plumbing lines behind the wall. We removed 6 inches from each side of our door opening.

2. Use a reciprocating saw to cut away the drywall and studs. Reinstall a stud in the cavity on each side of the wider opening so the new cabinets will have some support. Our final opening is 60 inches wide.
3. If you can, cut an access panel in the back of the closet. This way you will be able run cables and wiring to the appropriate place and have easy access to the back of your media equipment. Be sure to stay between the studs.

4. Layout the cabinet and make a cut list. We built our cabinet in three sections. Our bottom unit will hold video and stereo components. It measures 60” wide, 24” high and 22” deep. On top of that, on either side of the bottom unit, there will be two towers for DVD storage; they will be 11” wide, 48" high and 8” deep. (Our middle unit is shallow with a false back.) The TV will sit in between the two side towers. Our top unit is the same width and depth as the bottom unit, adjust the height accordingly.
5. We are using paint-grade birch plywood and solid poplar to make our cabinet. Cut out all the pieces. Use a table saw for the long rips and a circular saw or miter saw for the crosscuts. Assemble the cabinet using a finish gun and glue. There are two options for finishing the edge of the plywood: edge banding or face frames. We’re going with face frames. Cut the poplar 1x2s to length. Use glue and Brad nails to attach them to the plywood edges. When the cabinets are assembled, test fit everything before taking it into the house.
6. Prime and paint the each piece of the cabinet.
7. Install the base cabinet. Use shims to make sure it is level. Nail or screw the cabinet to the sides of the old doorframe. Screw or nail the two side towers to the base unit and to the door frame. Install the beadboard false back behind the TV compartment by nailing a cleat to the back of each side towers. Then nail the beadboard into the cleats from the front.
8. Drill access holes in the beadboard for the TV cables and wiring. Cut holes in the top of the base unit to be able to run cables from the components to the TV.
9. Install the top unit on top of the two towers. Glue and nail into place.
10. Install doors on the DVD storage towers.

11. Trim out the entire unit with molding.
12. Fill and seal all the nail holes, caulk the corners and sand it all smooth. Touch up the paint.


