


3 Adorable Tree Skirts Made From Drop Cloths
Upgrade your outdated tree skirt and save some serious cash this holiday season by handmaking your very own with an inexpensive drop cloth.


Tree skirts are surprisingly expensive for a decorative item you'll only use one month out of the year. And if you’re looking to find a fashionable one and still stay under budget, well … good luck. Fortunately, simple drop cloths (usually used for protecting surfaces when painting) can be very inexpensive, and with just a few crafty tweaks, they make the perfect tree skirt.
Pleated to Perfection

Jalynn Baker
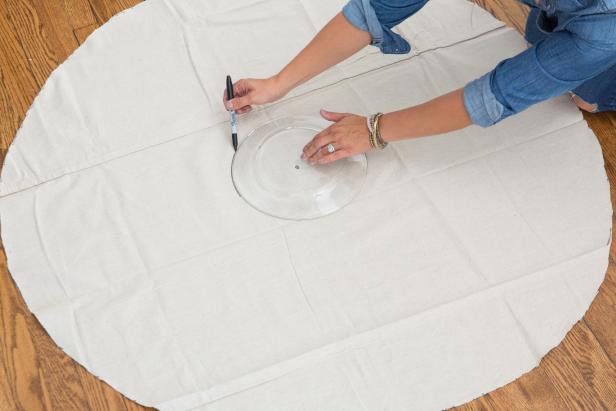
Start by laying your drop cloth on a flat surface. Next, cut a piece of twine to 2 feet. Make a dot with a marker at the estimated center point, then move the marker to the far end of the string and rotate around the center point like a compass. The end result should be a large circle with a 4-foot diameter. Cut along the line with scissors. Next, place a dinner plate in the center of the circle and trace using a marker. Using scissors, cut directly from the outside of the circle to the smaller traced circle and continue to cut until the center portion is removed.

Jalynn Baker

Jalynn Baker
Jalynn Baker

Jalynn Baker
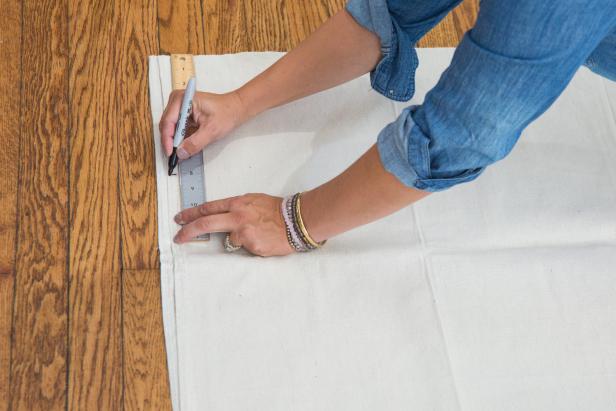
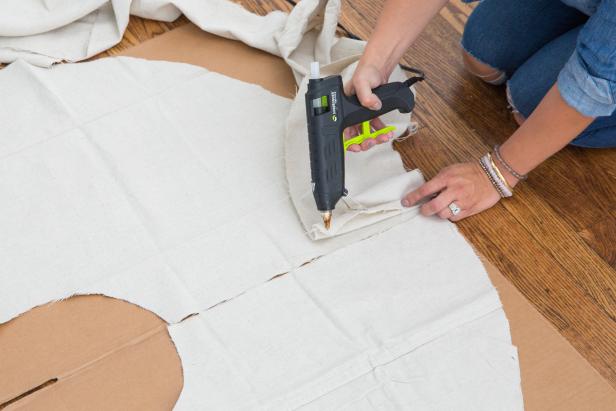
Cut any leftover drop cloth pieces into 8-inch wide strips, removing any bulky seams. Depending on how large of a drop cloth you used and how lush you’d like your layers to be, you may need to use a second drop cloth for extra strips. Once you’ve cut out your desired number of strips, place your tree skirt on a piece of cardboard to protect your work surface and begin hot gluing the strips onto the skirt. Start by placing the end of one strip against the opening of the skirt and hot gluing to secure. Neatly fold gathered pleats and hot glue as you go around the skirt. Once the first layer is complete, work toward the center of the skirt adding layers as you go. For a lusher look, make the layers very tight. For a more relaxed look, add more space between the layers.
Jalynn Baker

Jalynn Baker
Jalynn Baker

Jalynn Baker

Jalynn Baker
Simple Stripes

Jalynn Baker
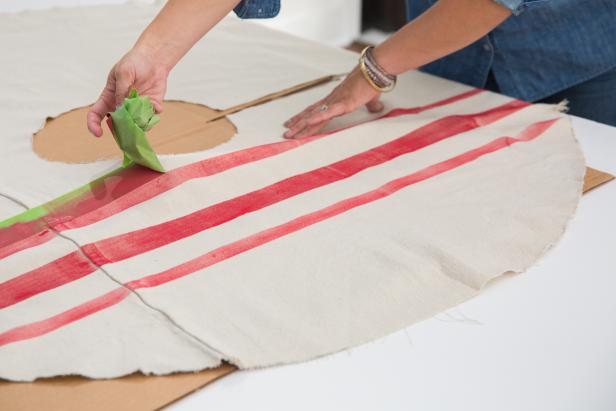
Following the same method as before, cut a drop cloth into a circle tree skirt with a 4-foot diameter. Next, place painter’s tape across one side of the skirt and leave small strips between the pieces. To get perfectly sized strips, use thin pieces of painter's tape between the larger tape and remove when you're ready to paint. Once you’ve taped down your desired pattern, use a foam roller to paint your favorite color within the stripes and allow to dry. Remove the tape to reveal the elegantly festive design!

Jalynn Baker

Jalynn Baker

Jalynn Baker

Jalynn Baker
Jalynn Baker
Pom-Poms Galore

Jalynn Baker
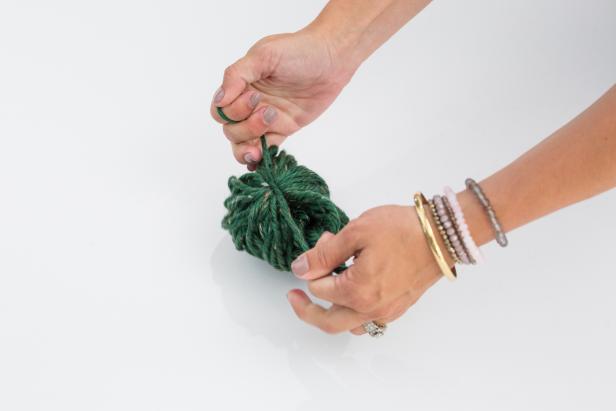
Cut out a drop cloth tree skirt by following the above procedure. Next, wrap thick green yarn around your hand 60 times. Remove from your hand and tie another long piece of green yarn around the middle of the entire bunch. Use scissors to cut the loops out of the yarn bunch and form pom-poms. Clean up any stray yarn pieces with the scissors, being sure to leave the long piece for tying. Use a hole punch to create holes along the edge of the tree skirt and tie the pom-poms in place. Use scissors to cut off the excess yarn from the knot and continue alternating colors until the whole skirt has been decked in poms. All done! Just don’t forget to accessorize with beautifully wrapped presents.

Jalynn Baker
Jalynn Baker

Jalynn Baker

Jalynn Baker

Jalynn Baker


