


3 DIY Halloween Hairstyles to Wig Out Over
These wigs are cheap, easy and oh-so-cute. Let's just say we're hair for it.


Halloween is upon us, and that means scary-good treats, jack-o-lanterns galore and arguably the most fun part: costumes. If you’re anything like me, a store-bought ensemble simply won’t do, but you also want to dress to impress (and save a little cash while you’re at it).

So, while you’re busy assembling the perfect outfit, let us show you how to execute the icing on the cake, the pièce de résistance, your crowning achievement! Ahem, you get the point. We’re talking wigs, people.
Troll

Sarah Busby
We’ll start with everyone’s favorite magical songstress: the troll. And we all know that a troll just isn’t a troll without its signature tall tuft of hair. Our secret for achieving the electrified locks? A balloon!
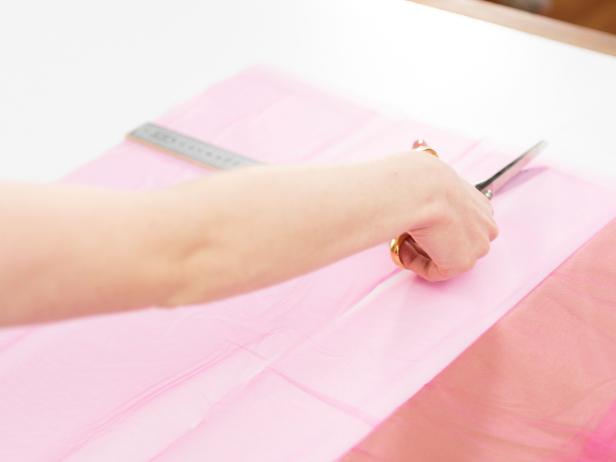
Cut + Tuck
Sarah Busby

Sarah Busby

Sarah Busby
Start by cutting long strips of tulle. Ours are about 12 inches wide and 30 inches long, but it doesn’t have to be precise. Using a stretchy woven headband, simply tuck one end through a hole near the bottom of the band until it feels secure. This will hold the tulle in place as well as create cute bangs for your troll look. Continue this all the way around the headband.
Fill It Up

Sarah Busby

Sarah Busby
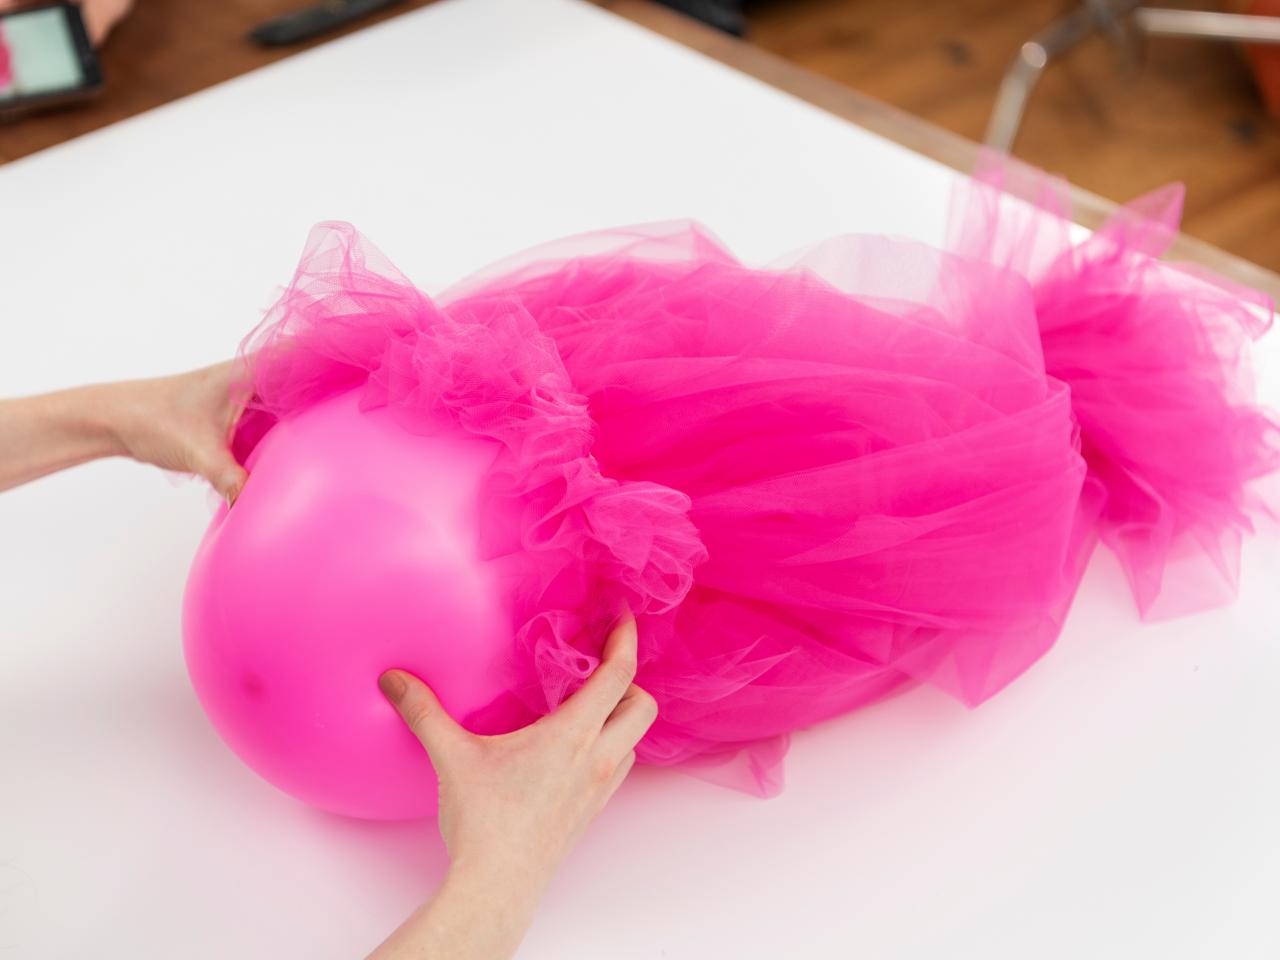
Once you finish tucking your strips, tie them off with another small piece of tulle near the top of the hair. Zhuzh to desired fluffiness. Next, add weightless volume with a matching balloon, adjusting the tulle as needed to disguise it.
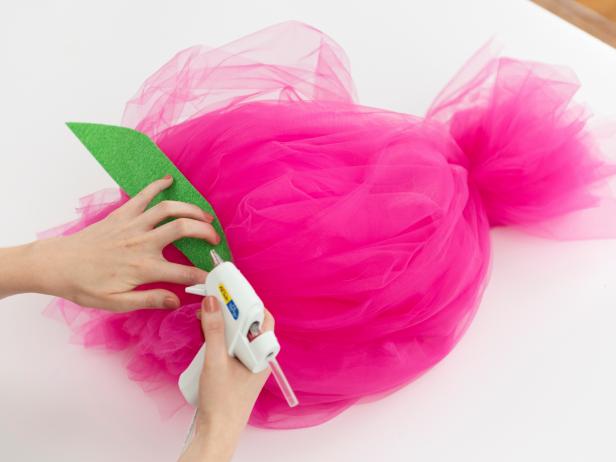
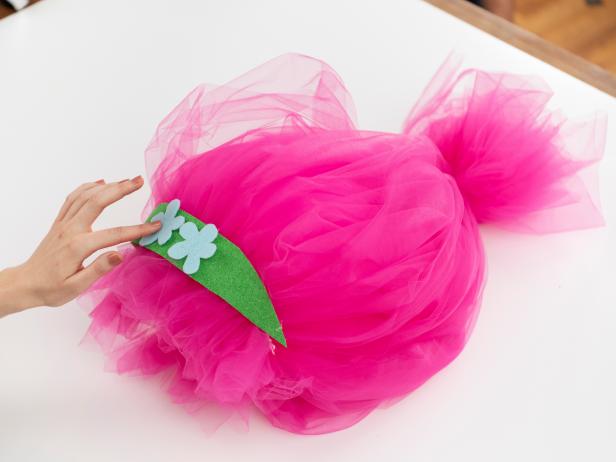
Add Embellishments
Sarah Busby
Sarah Busby
Finally, use felt and hot glue to add fun accents. We chose a simple green headband, but the options are endless!
Get Poppin'

Clown

Sarah Busby
Ah, the simple pom-pom. So easy to make, and they can be used for a myriad of projects. Take this colorful clown for example. With just a few colors of yarn and an hour of mindless (read: tv-watching) pom-pom making, you have yourself a statement-making wig any clown would be lucky to squirt seltzer water into.
Create Pom-Poms

Sarah Busby

Sarah Busby

Sarah Busby
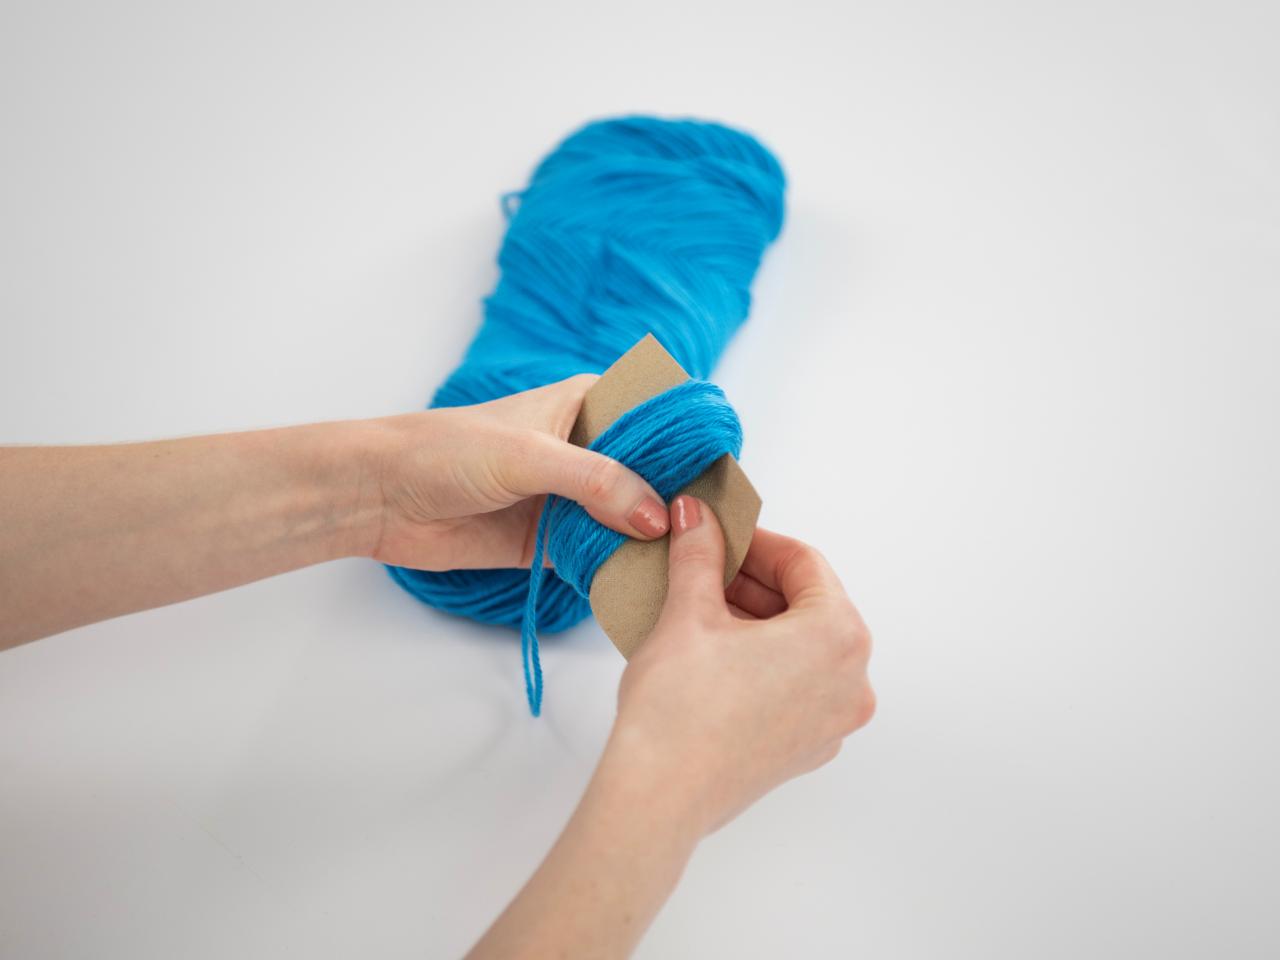
Cut a piece of cardboard about two inches wide. Wrap the yarn around the cardboard 100 times, then remove. Tie across the middle with another piece of yarn and cut each loop to create a fluffy pom-pom. We used approximately 30 pom-poms.
Make Wig Base

Sarah Busby

Sarah Busby
Tie the legs on an old pair of tights and trim off the excess. Use a foam head form to make the next steps a breeze.
Add Color

Sarah Busby

Sarah Busby
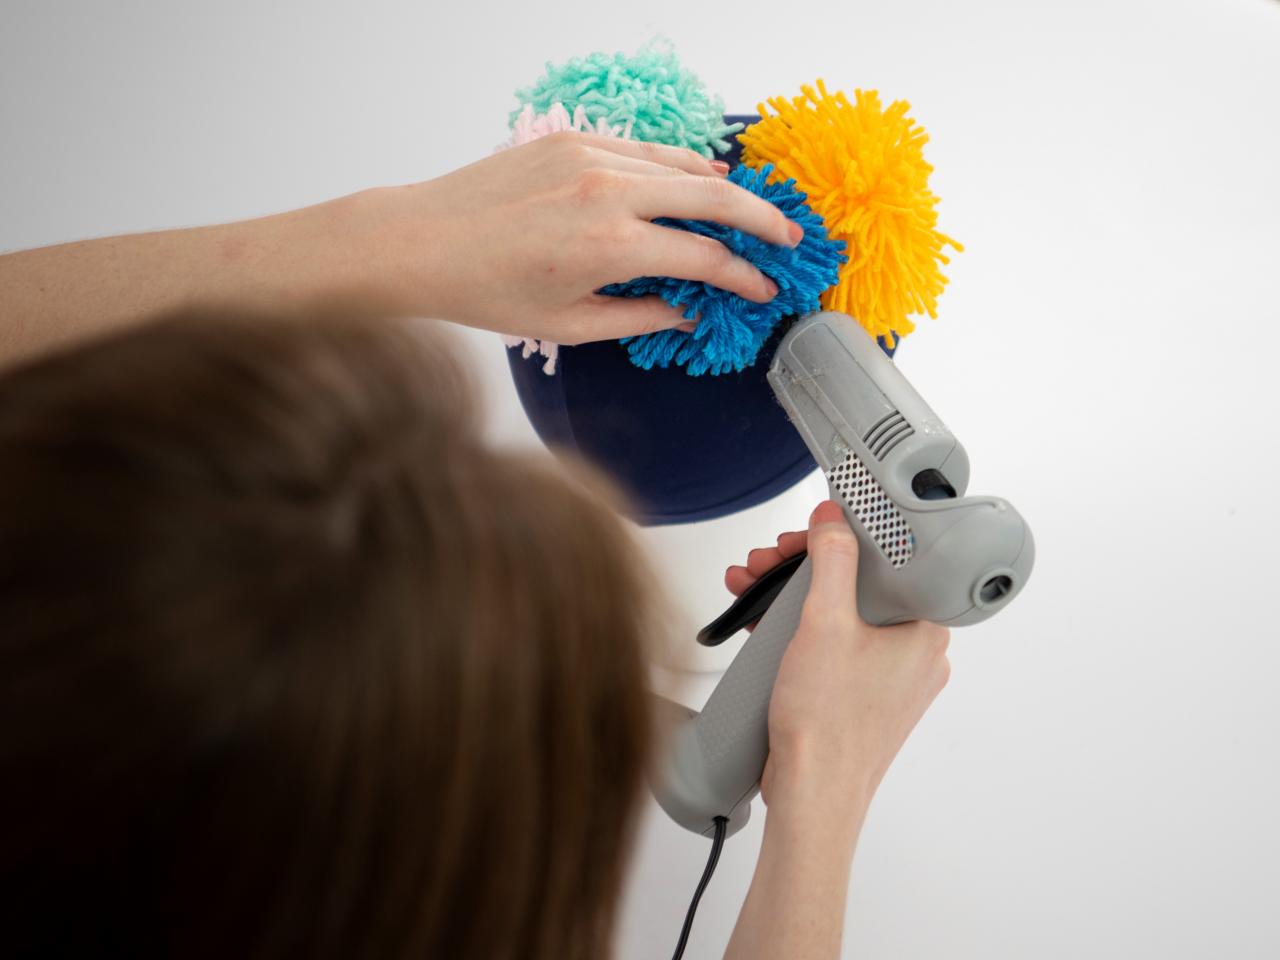
Now, simply hot glue each pom-pom to the tights in the color pattern of your choice. But be warned, the heat from the glue will likely transfer through to the foam, so remove the wig slowly in order to keep the foam from breaking off.
Clown Around

Princess
Sarah Busby
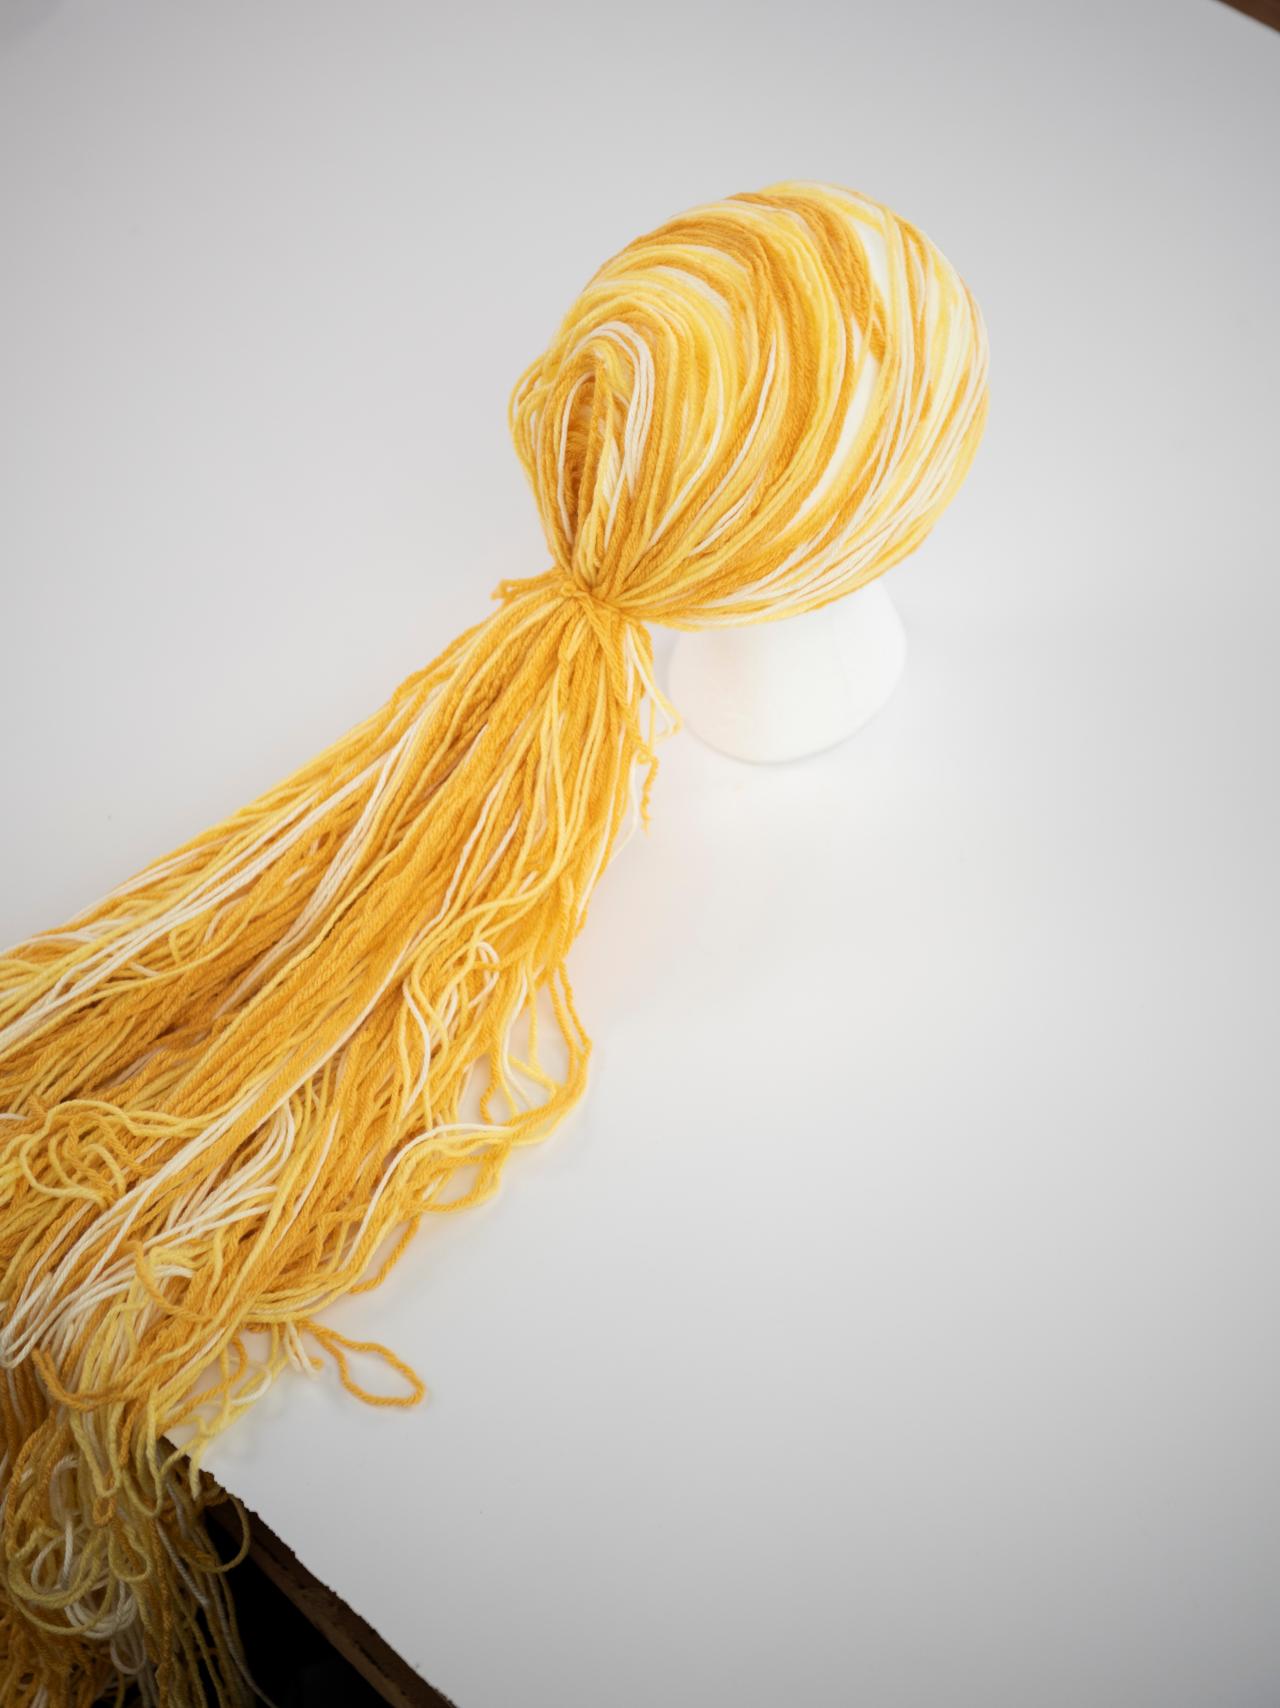
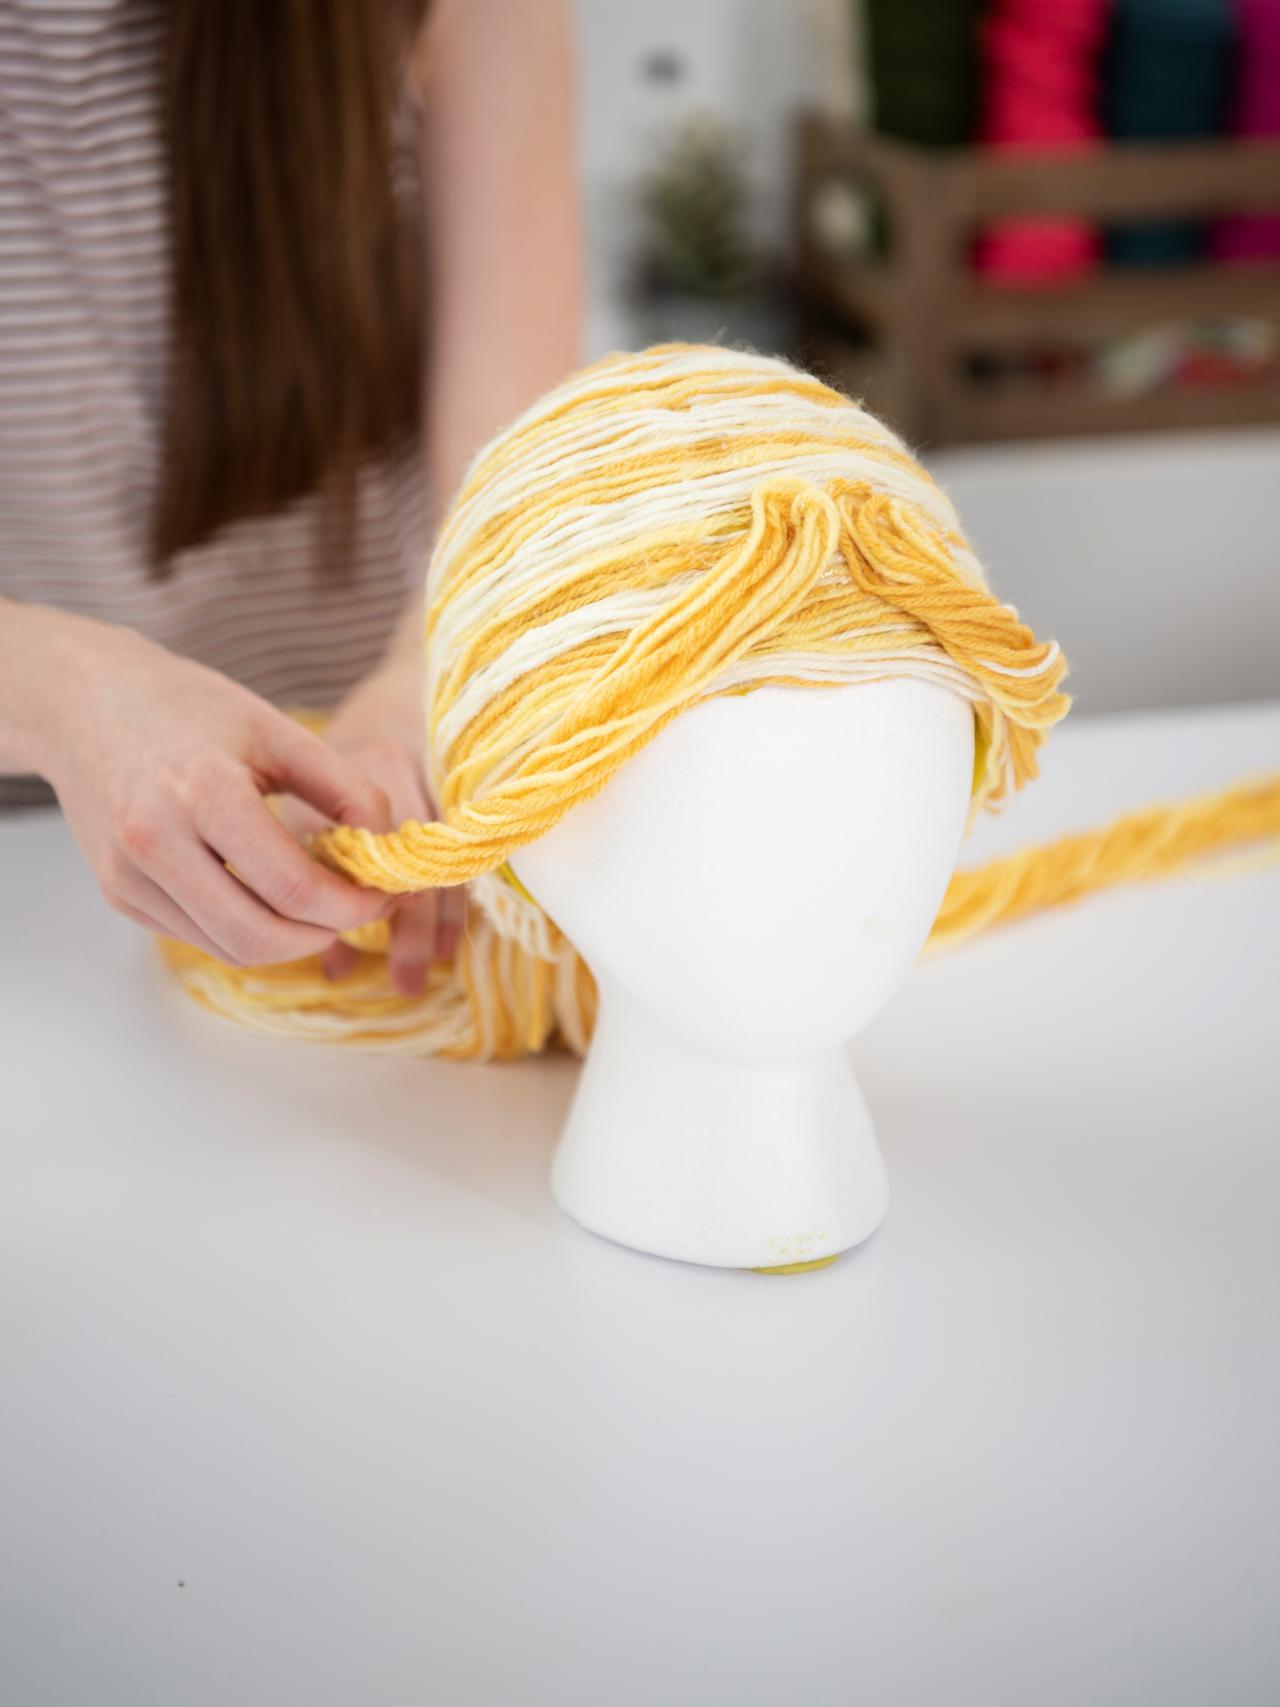
You don’t have to have long locks of golden tresses to be this pretty, pretty princess for Halloween. A few skeins of varying yellow yarn should do the trick!
Attach Yarn

Sarah Busby

Sarah Busby

Sarah Busby
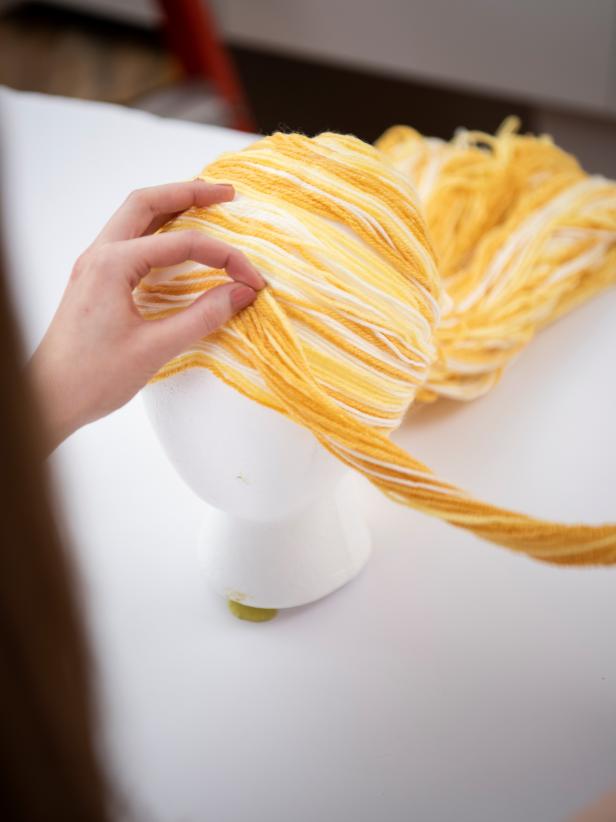
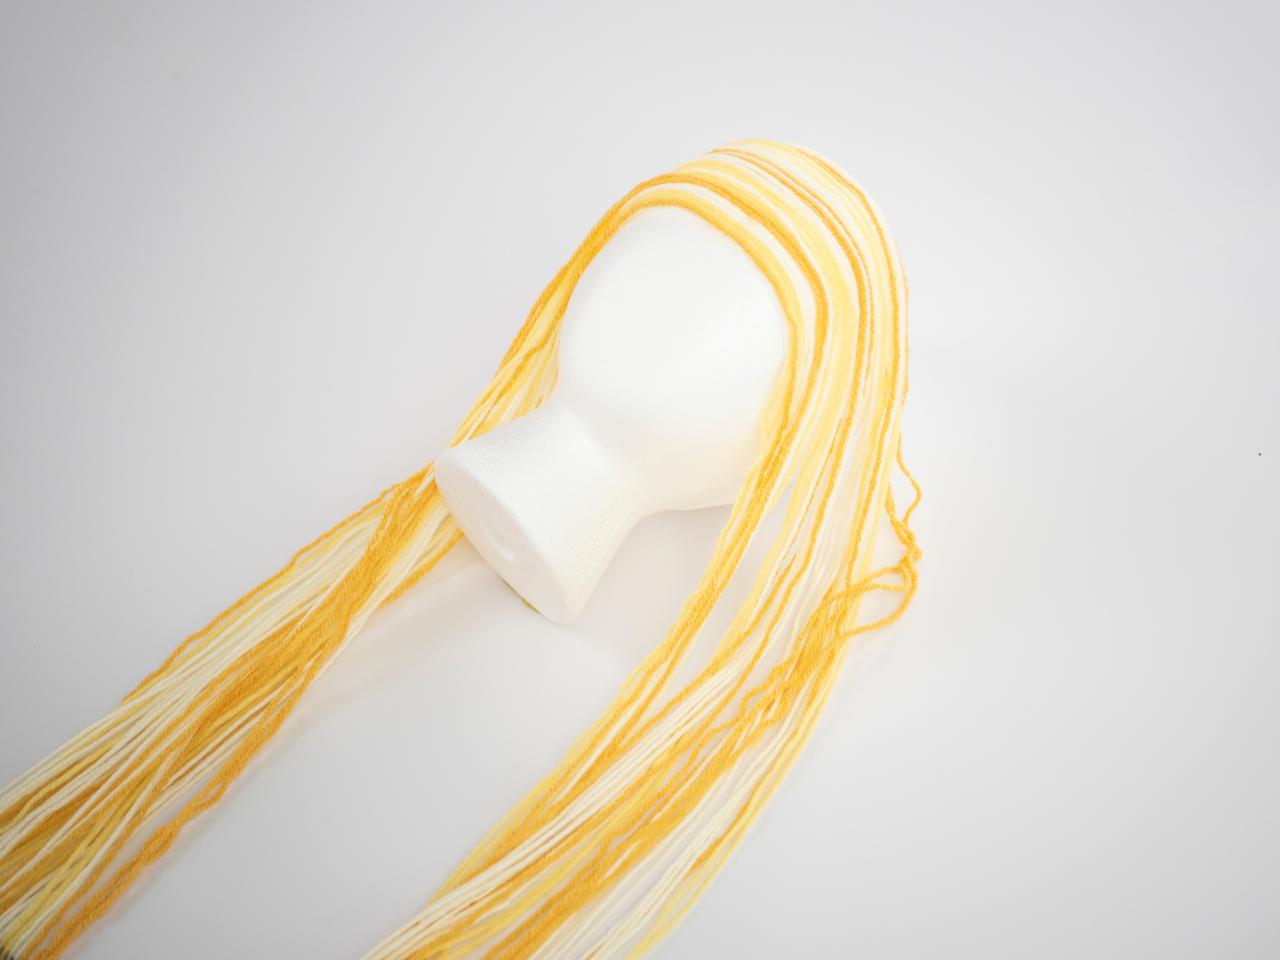
To begin, cut several strings of yarn to about 80 inches. Then create another hat made from tights as outlined in the clown wig tutorial. A color similar to the yarn will work best in case any shows through. Starting from the front, add short strips of hot glue, attaching five-to-seven strands of yarn at a time. Be sure the yarn is glued at the center of each strand and do your best to keep it tangle free as you go.
Create Texture

Sarah Busby
Sarah Busby

Sarah Busby
Continue to add hair until it begins to fall straight down at the back of the head. Tie off the yarn at the base of the neck. Next, glue two twists at the front of the head to add texture and a subtle part. Tie those back with the rest of the hair.
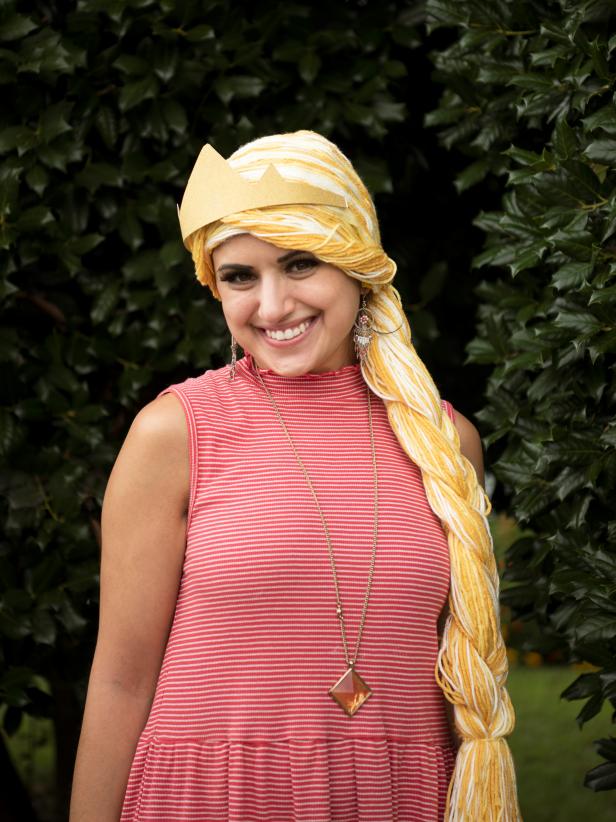
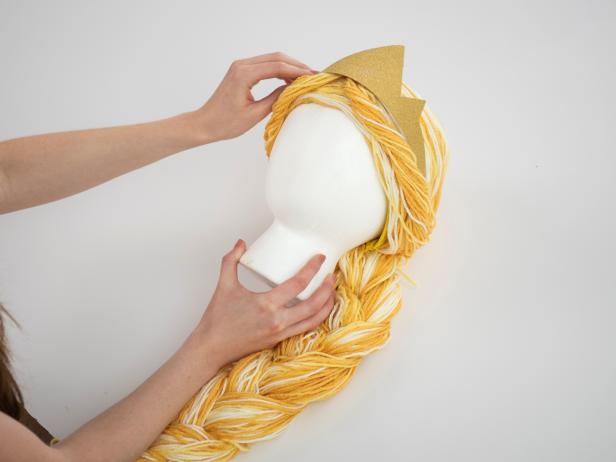
Braid + Crown

Sarah Busby
Sarah Busby
Braid your golden mane and tie off with more yarn. Add a pretty paper tiara just above the twists for a regal touch.
Let Down Your Hair


