


How to Make a Roman Shade From a Canvas Drop Cloth
Turn boring blinds into a custom window treatment with this simple DIY Roman shade project.
If you've got a free morning, you've got time to improve the look of your window treatments. We'll show you how to make a Roman shade for about $30.

Gary Payne
Skill Level: Beginner
Estimated Time: 1/2 day
Estimated Cost: $30
Tools and Materials
- window blind
- drop cloth
- scissors
- decoupage glue
- permanent marker
- painter’s tape
- measuring tape
- clothespins
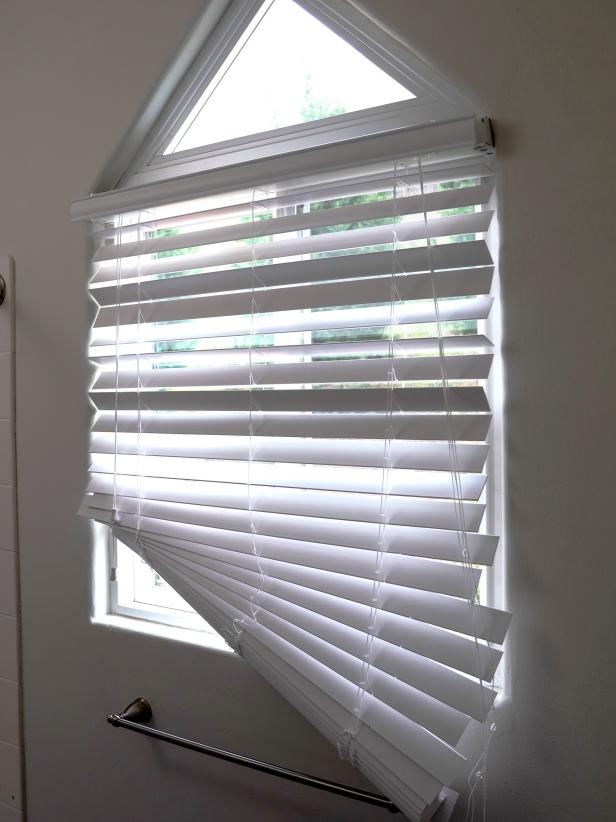
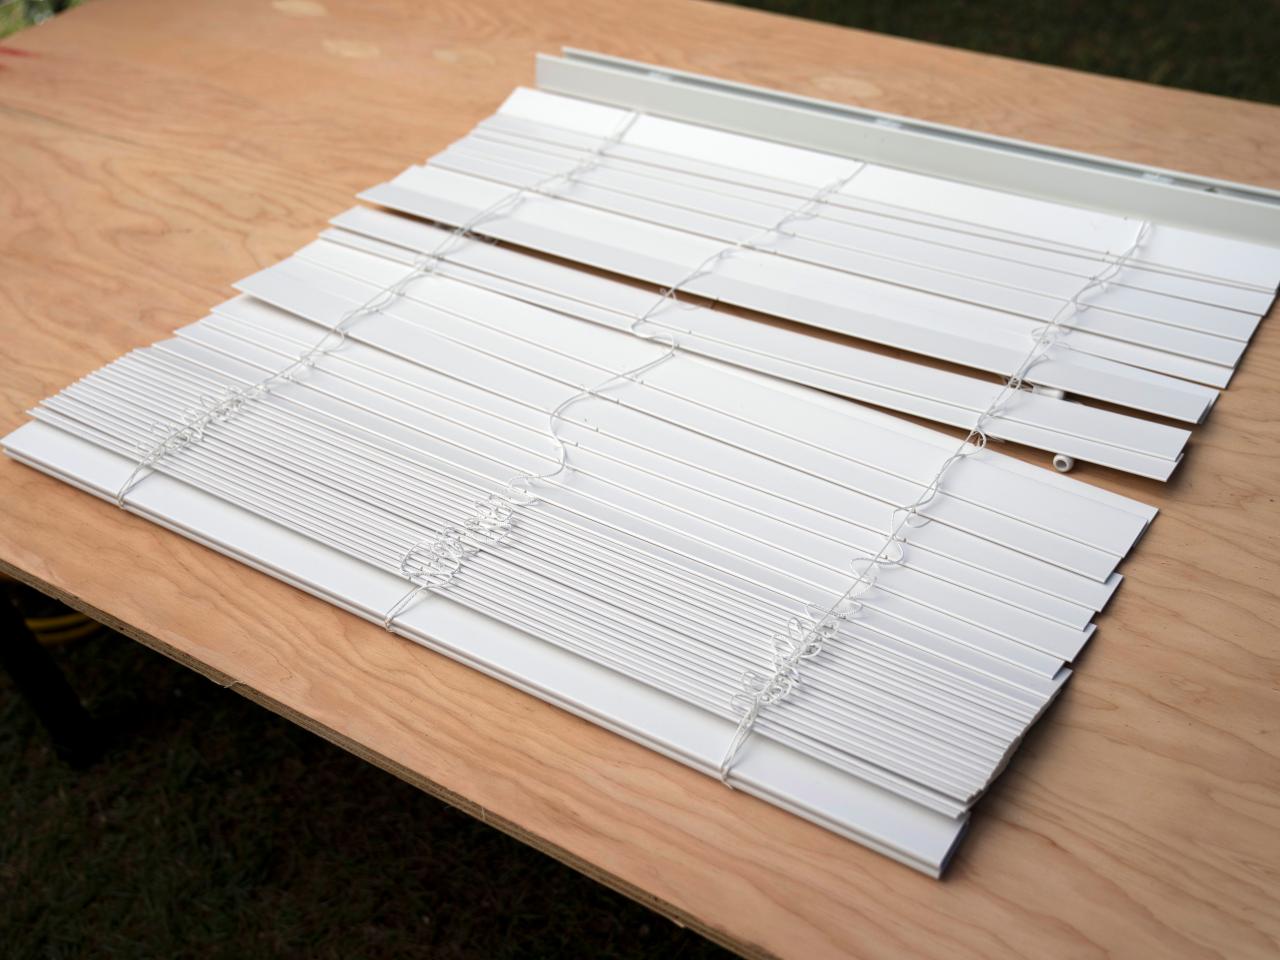
Remove Blind
Remove the blind from the window and lay it out on a work table.
Gary Payne
Before: Unruly blinds

Gary Payne
Remove Slats
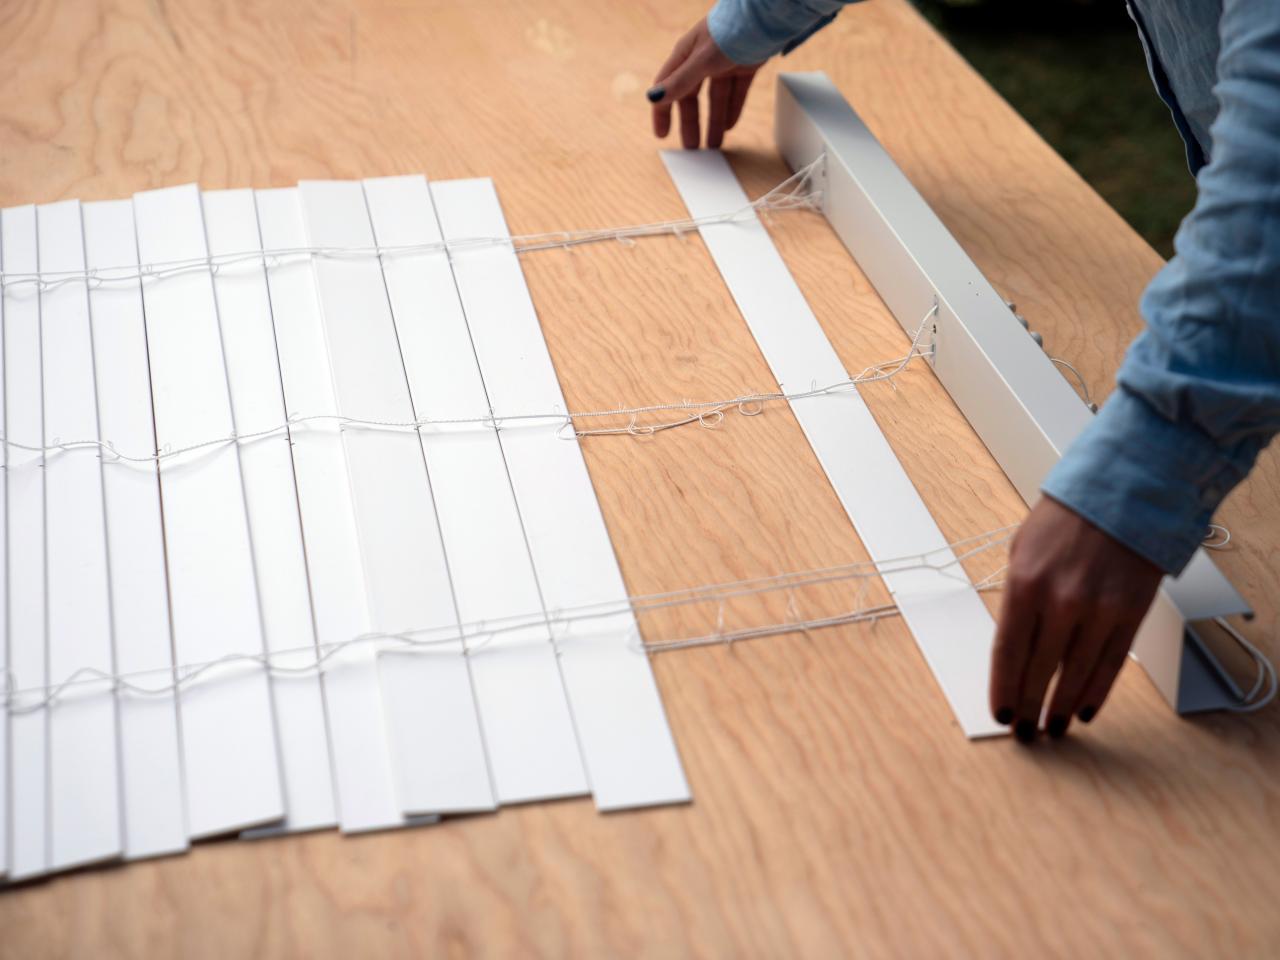
Measure the window length and set blinds to that length. Begin removing slats starting from the top and working down. For a 2-1/2-inch blind, leave roughly every fifth slat in place so when fabric is added the shade will draw up correctly. The remaining slats should be roughly 7 inches apart.

Gary Payne
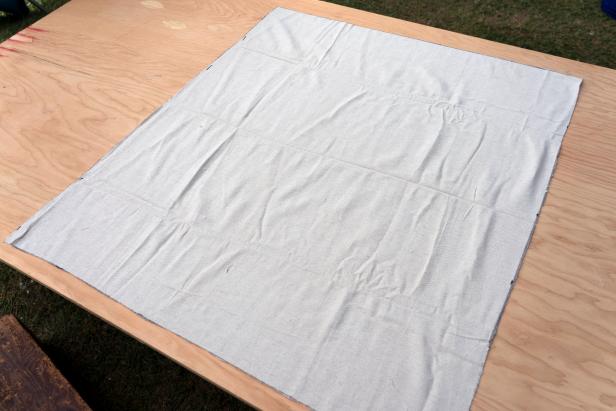
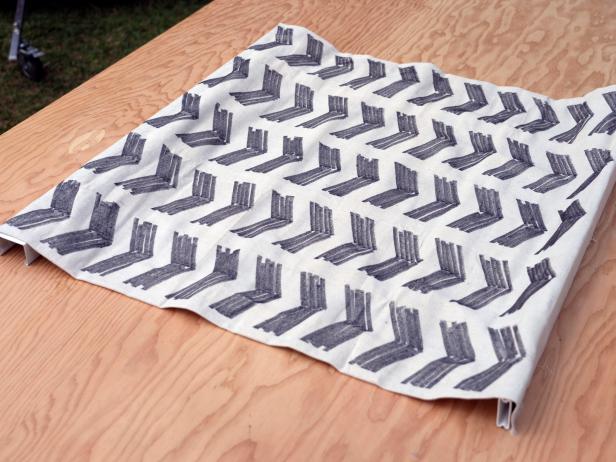
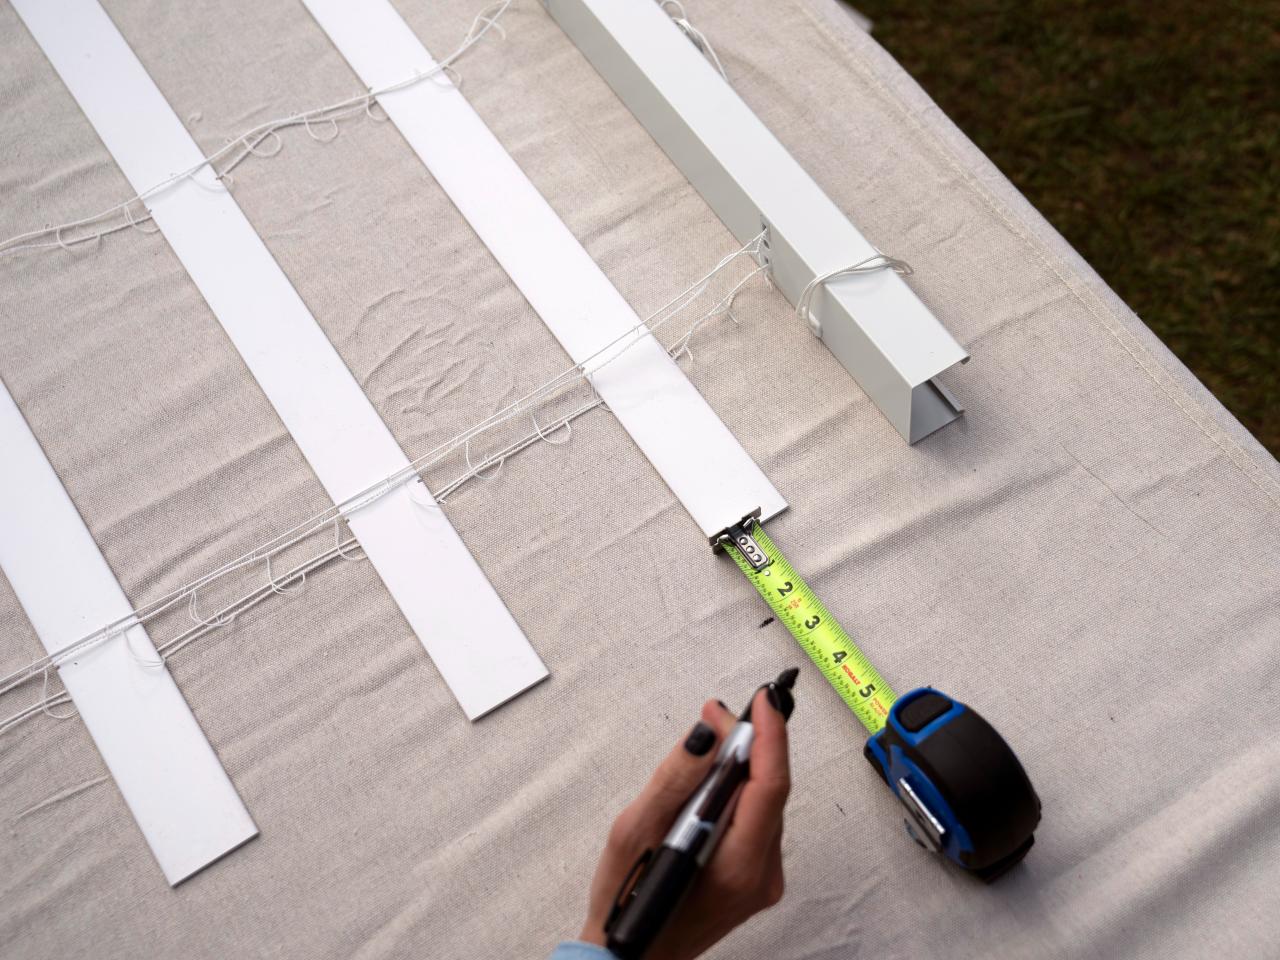
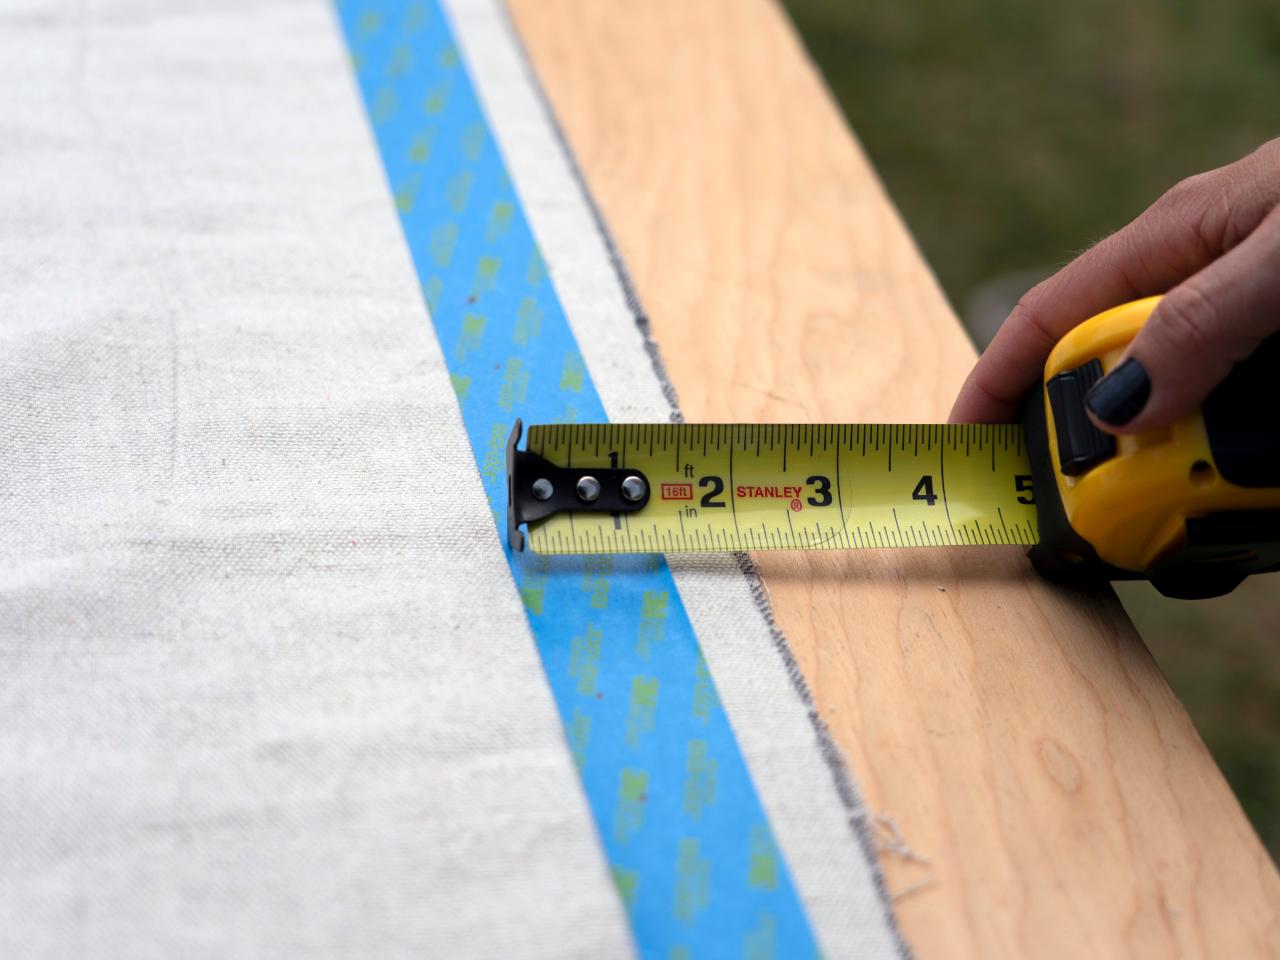
Measure and Mark Fabric
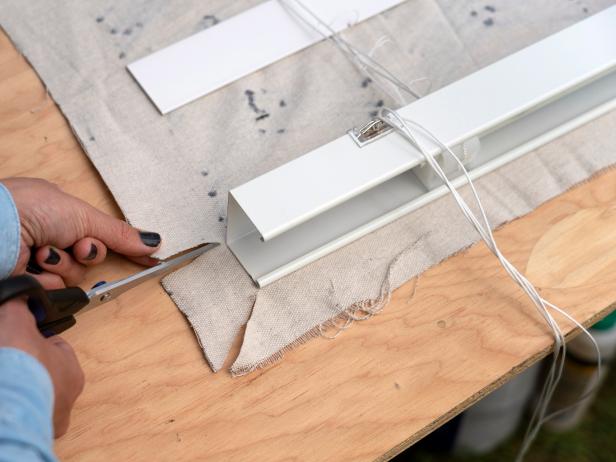
Lay the drop cloth on the work table and center the blind in the middle of it (Image 1). Measure and mark the fabric 2 inches wider than the blinds on all sides. Cut out the rectangle needed (Images 2 & 3).

Gary Payne

Gary Payne
Gary Payne
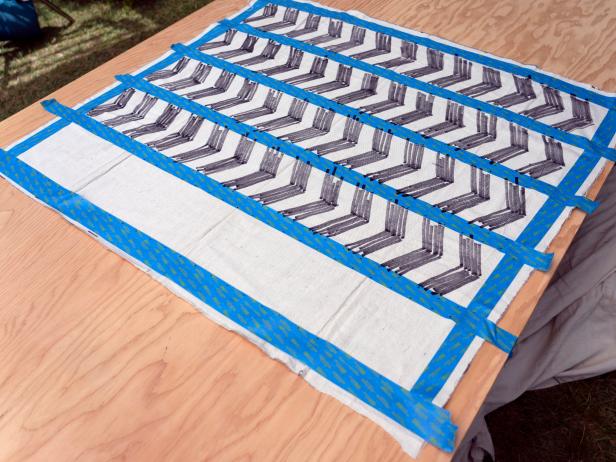
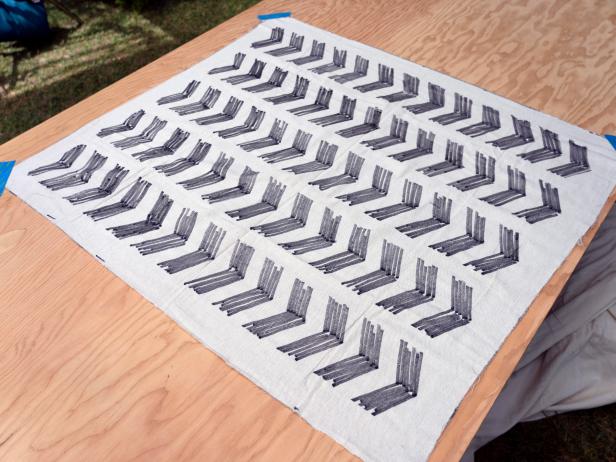
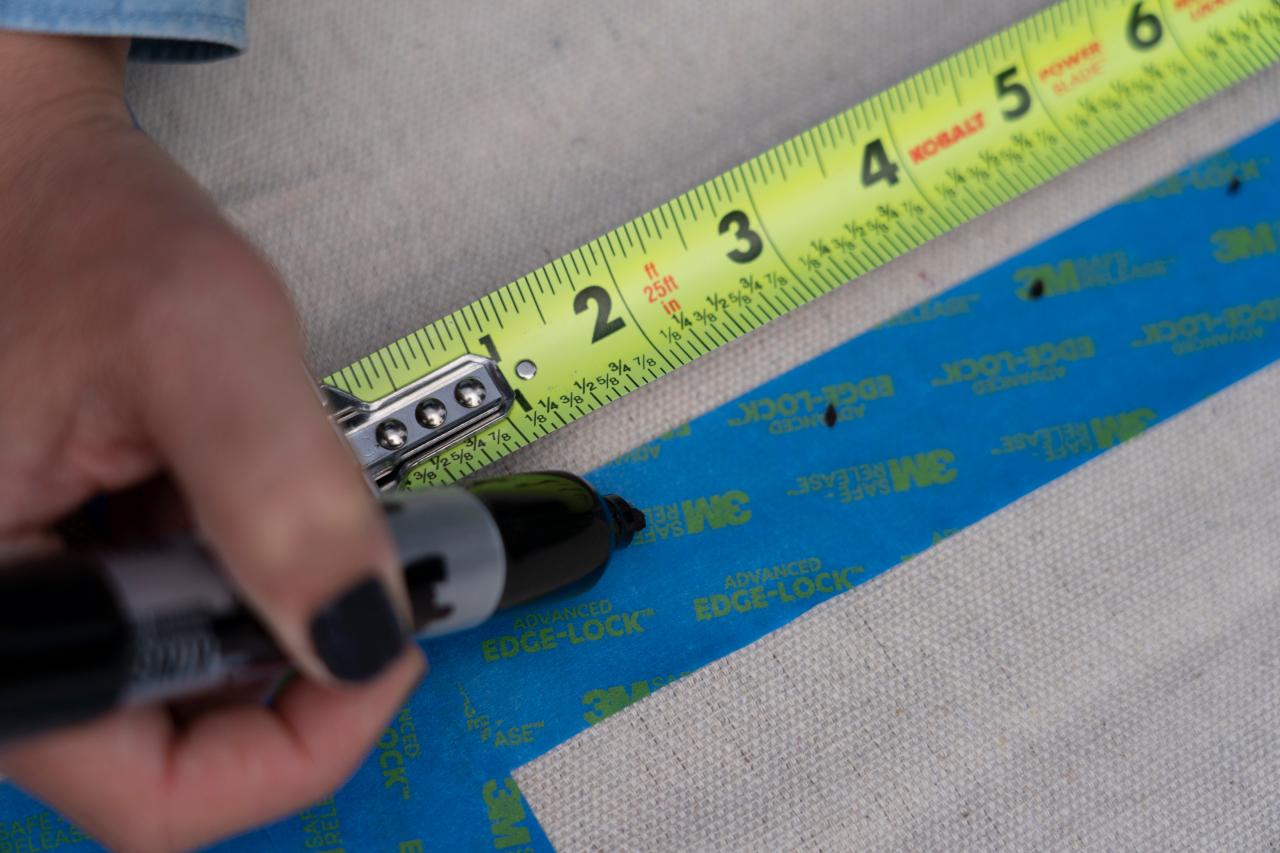
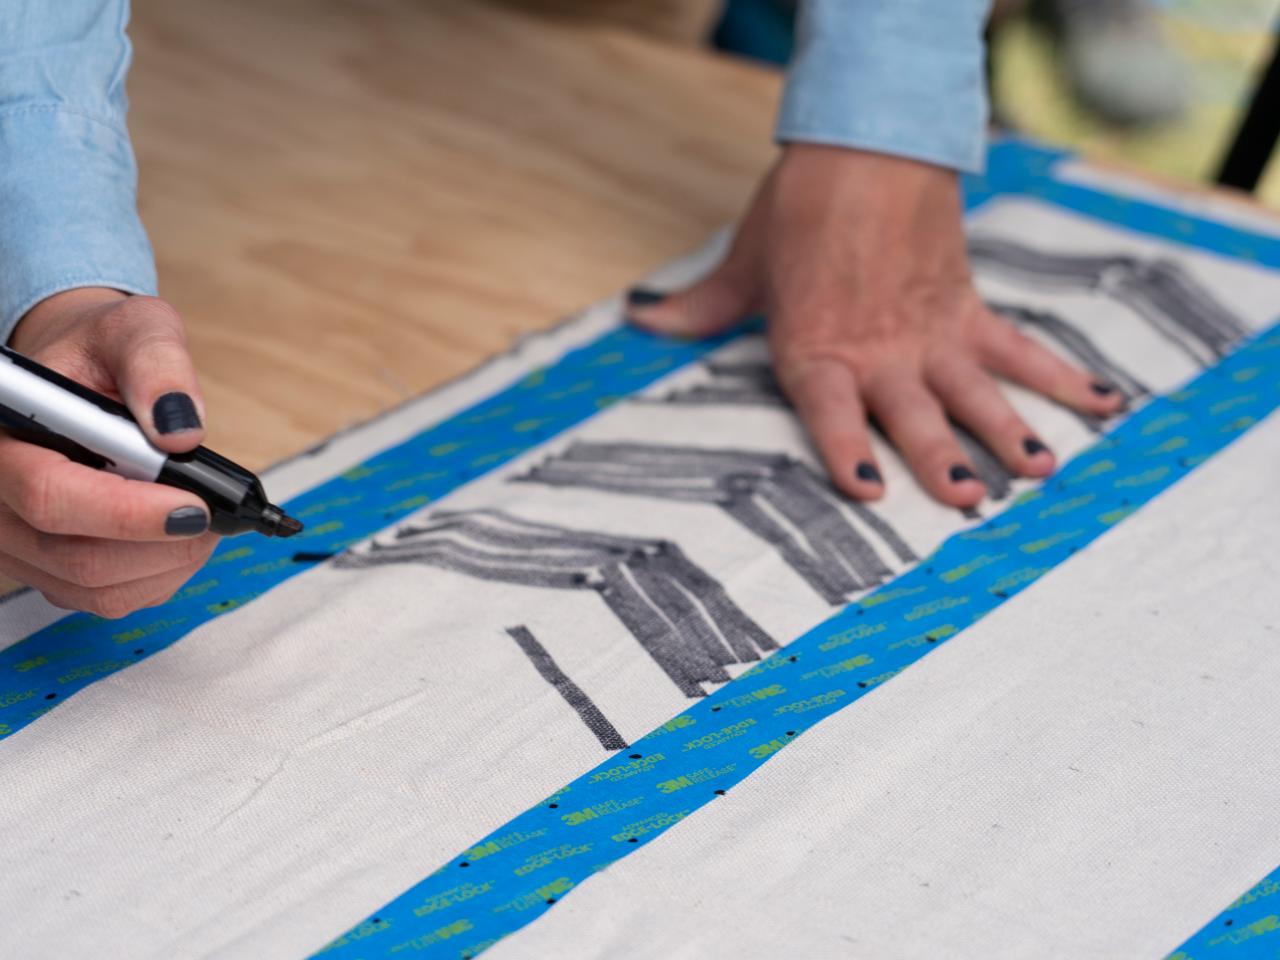
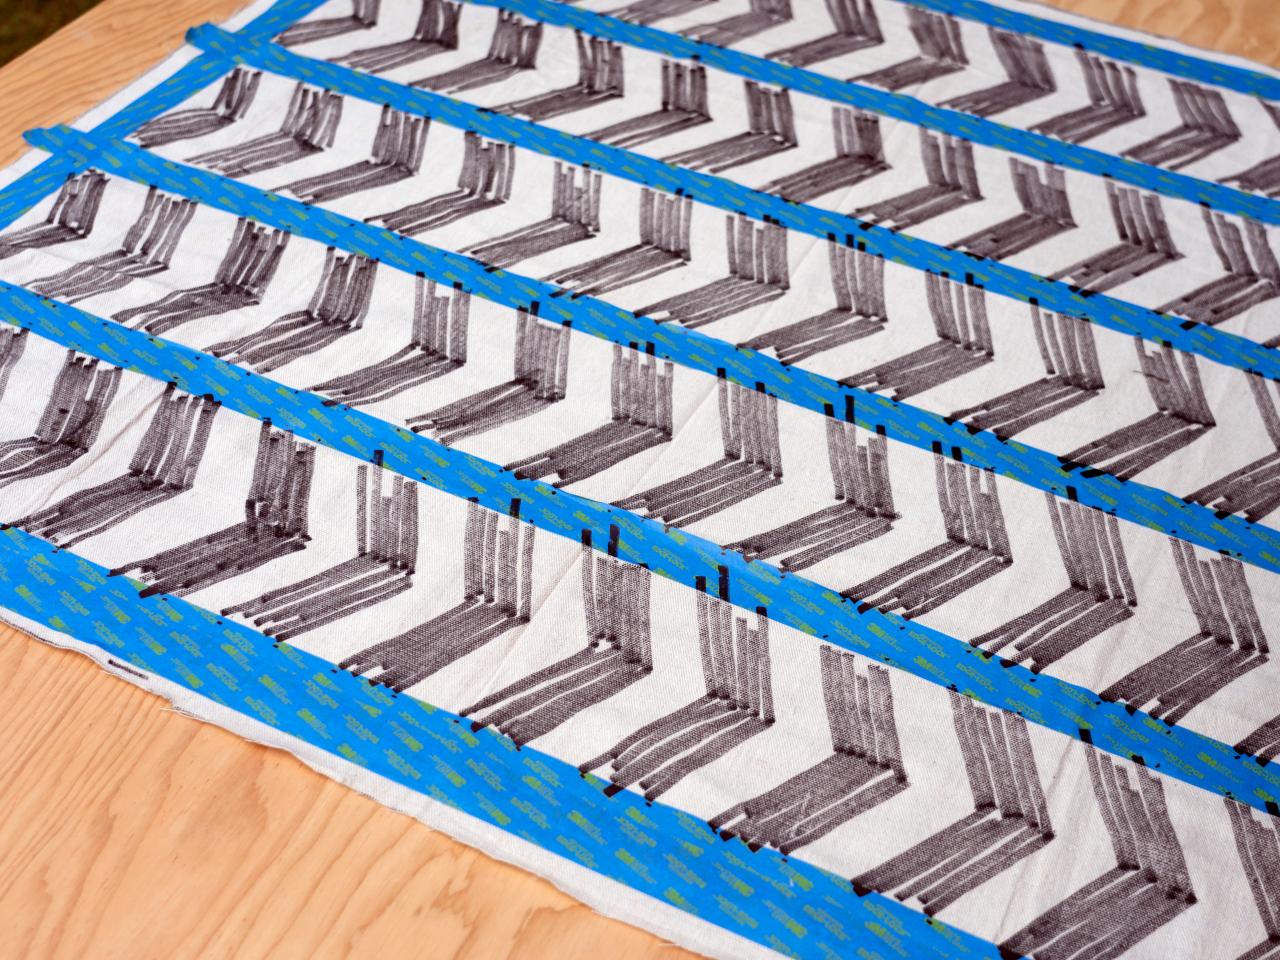
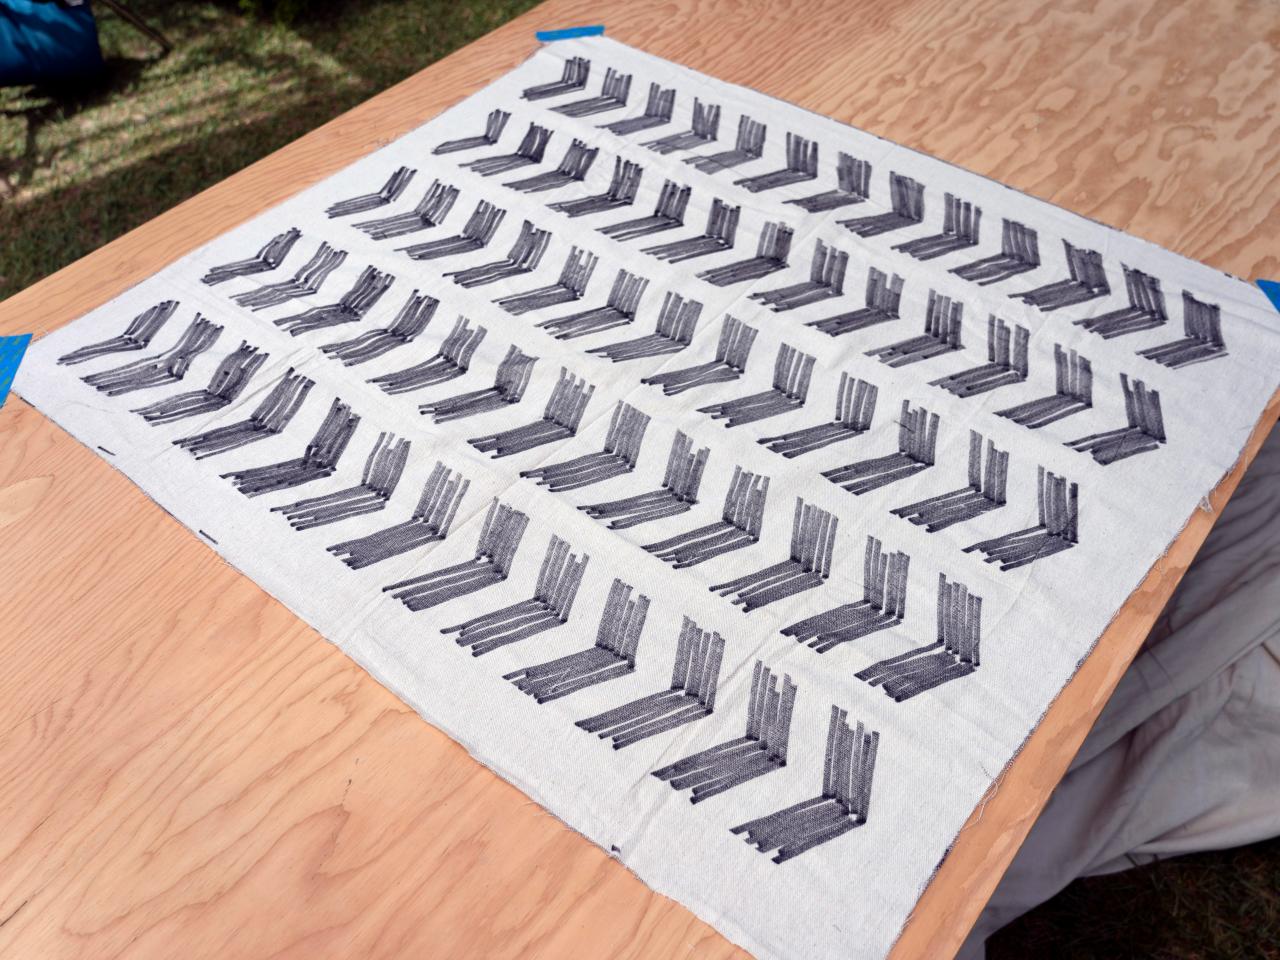
Create a Design
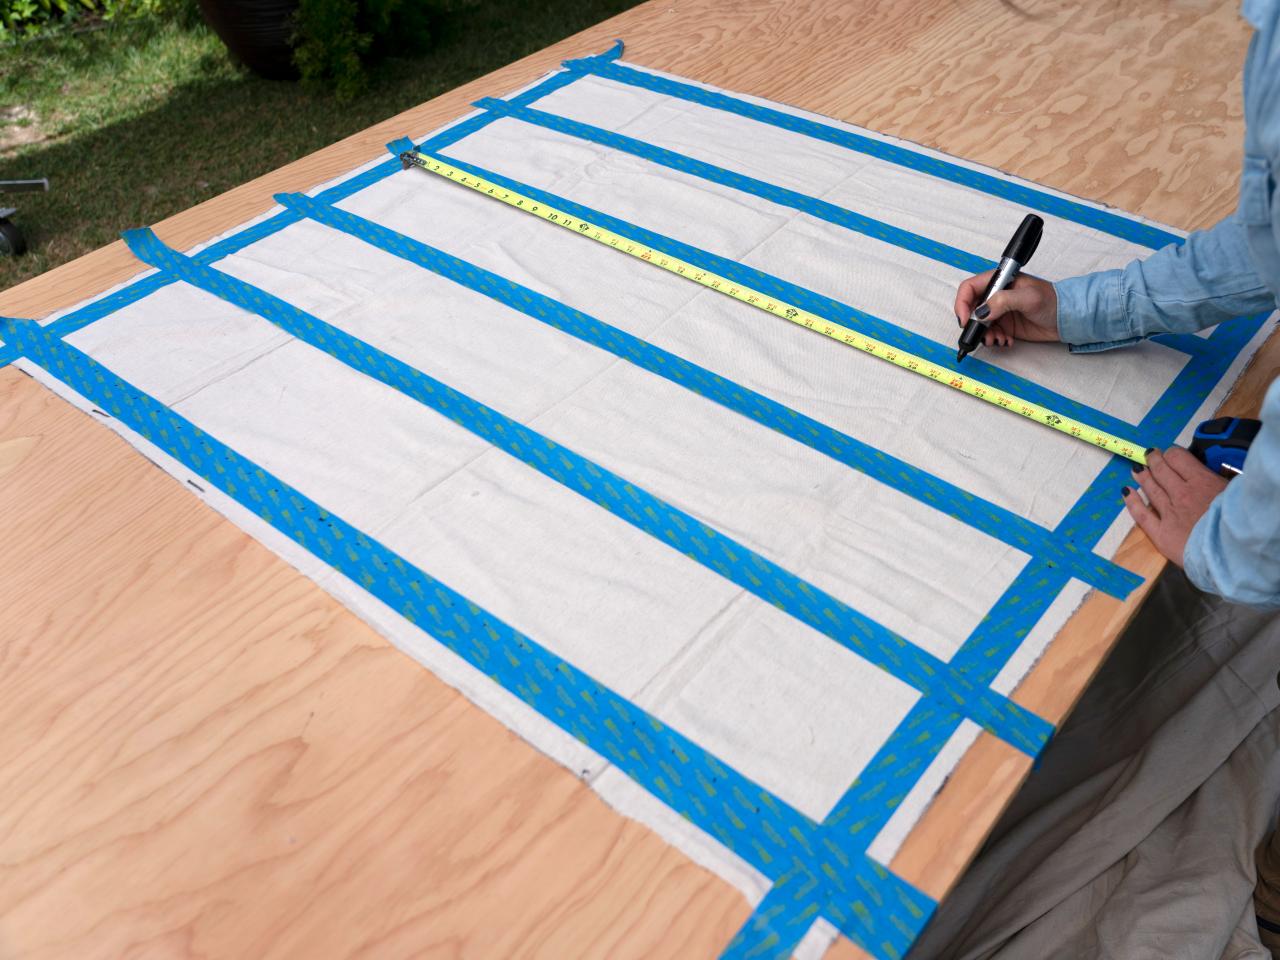
Use a marker and painter's tape to mark the 2-inch border that will be glued and folded over the blinds (Image 1). Be creative — any design will do. For a geometric V-shape pattern like ours, use painter's tape to make five columns equal in width (Image 2). Make a mark every 1-1/2 inches on the painter's tape as a guide for the pattern to mark the top and bottom points of the V shape (Image 3). Use a permanent marker to create the V shapes, keeping them uniform (Images 4 & 5).

Gary Payne

Gary Payne

Gary Payne

Gary Payne
Gary Payne

Customize Roman Shades With Fabric
HGTV Magazine shows you how to add style to your Roman shades with with these easy makeover ideas.
Place Blind on Cloth
When your pattern is complete, remove the painter's tape (Images 1 & 2). Flip the fabric over (patterned side down) and put the blinds on top of the fabric. The cord of the blind should be toward you, which is the back side.

Gary Payne
Gary Payne
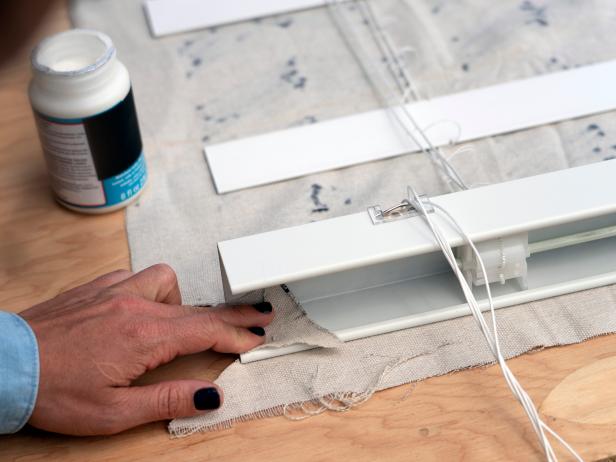
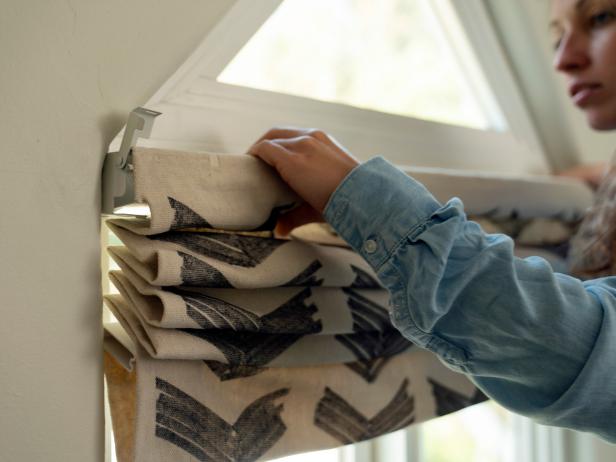
Attach Cloth to Blind
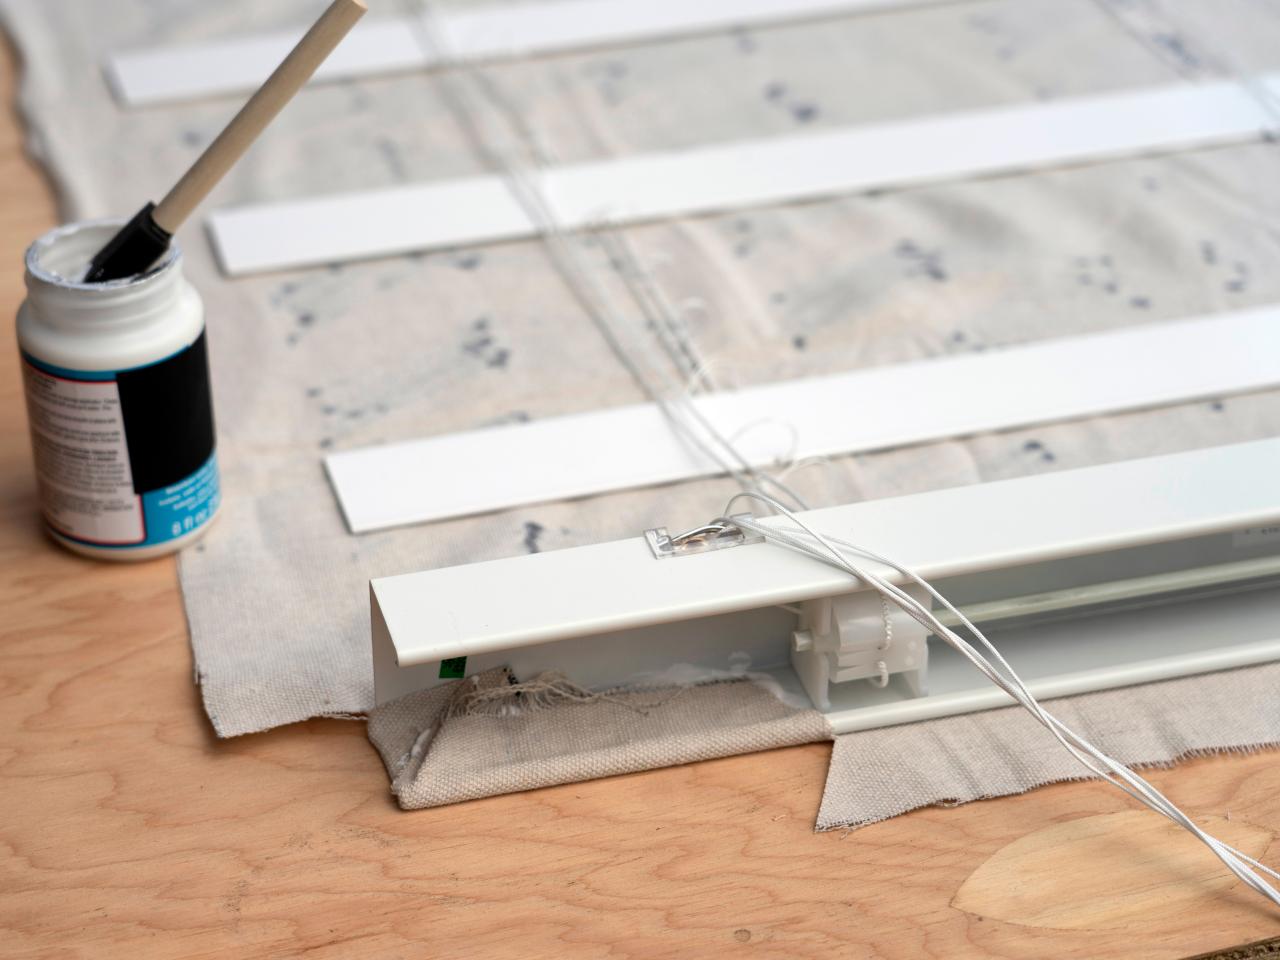
Adhere the fabric to the blinds using decoupage glue. Start with the top of the blinds and glue the fabric to the top bracket like you are wrapping a present. Cut a diagonal from the top of the bracket upward and cut from the lower side of the bracket straight across to the edge of the fabric for easy wrapping. (Images 1 and 2). When gluing the bottom of the blinds, be sure to roll the bottom rail so the fabric fully covers the rail (Images 3, 4 and 5).
Gary Payne
Gary Payne

Gary Payne

Gary Payne
Gary Payne
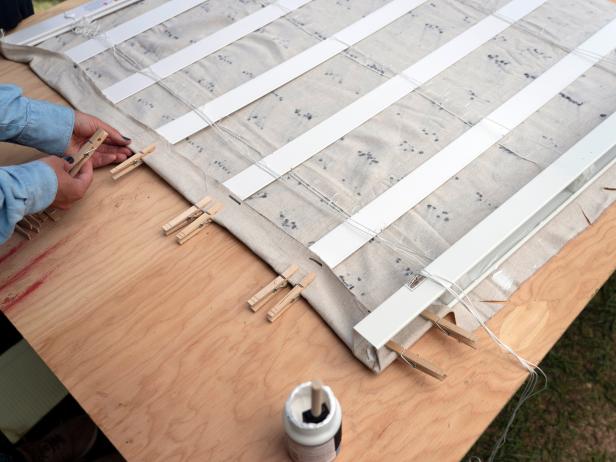
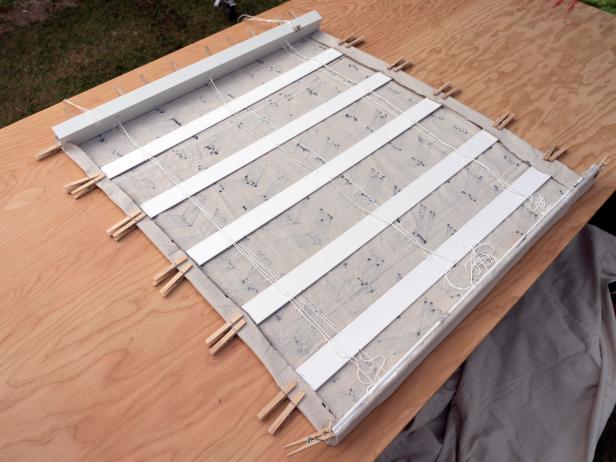
Glue Sides to Slats
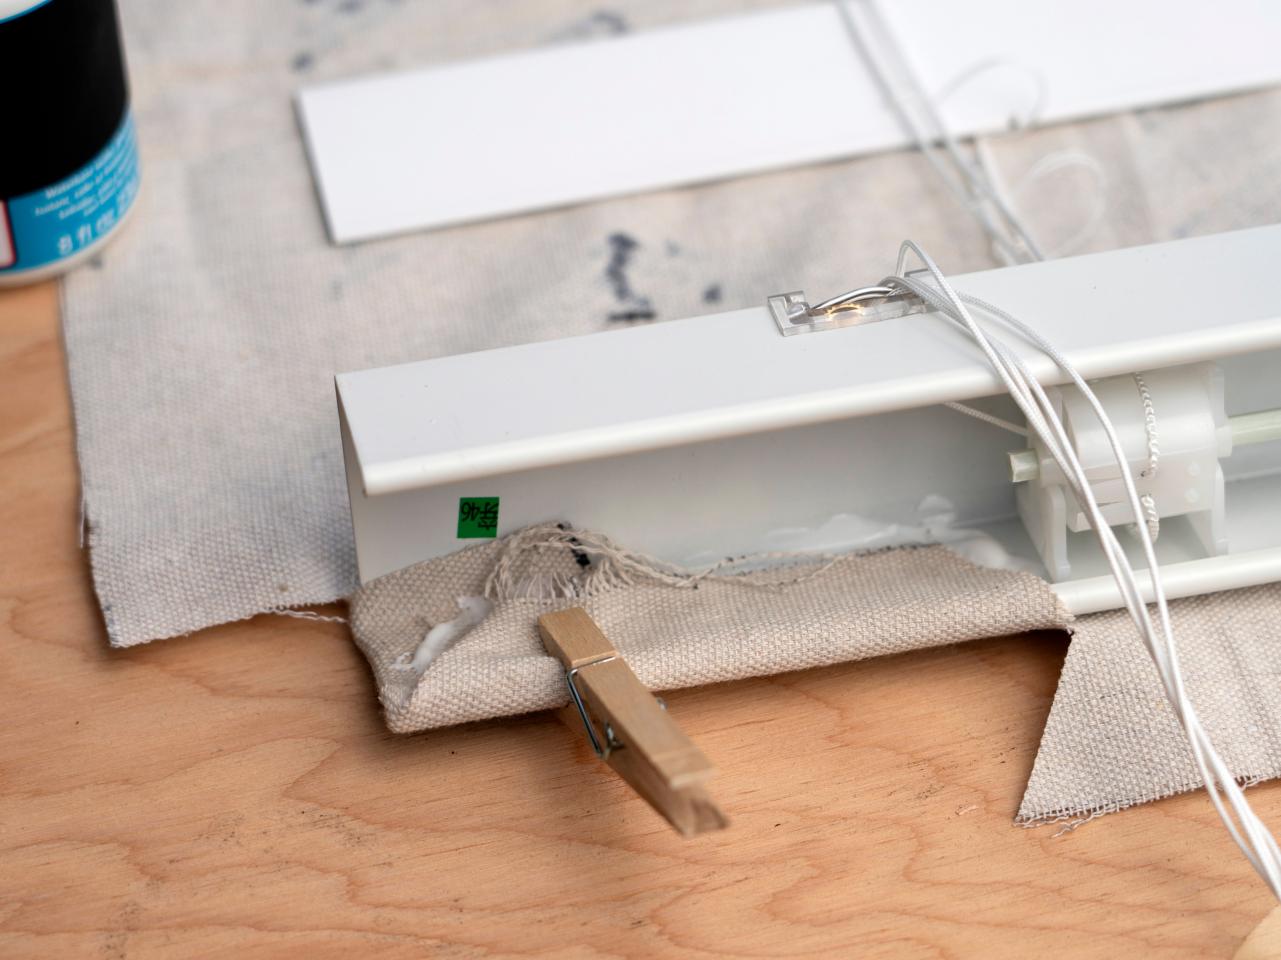
Continue gluing across the top and down each of the side of the blind (Image 1). Use clothespins to keep pressure applied until the glue dries.
Gary Payne
Gary Payne
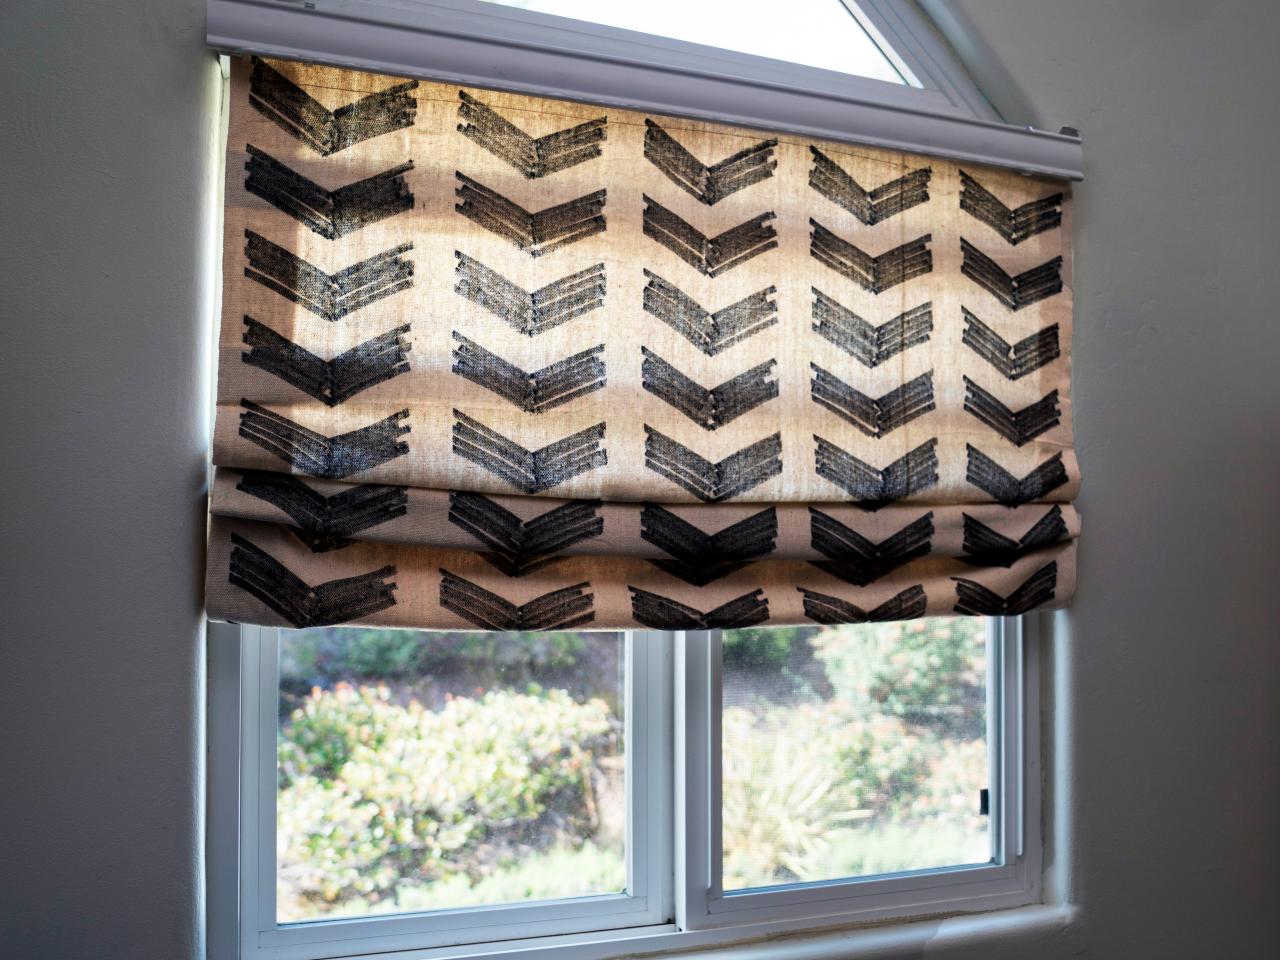
Hang Roman Shade
Hang your new Roman shade in the same brackets where the blinds were hung before.
Gary Payne
Gary Payne
Watch the DIY Roman Shade How-To


