


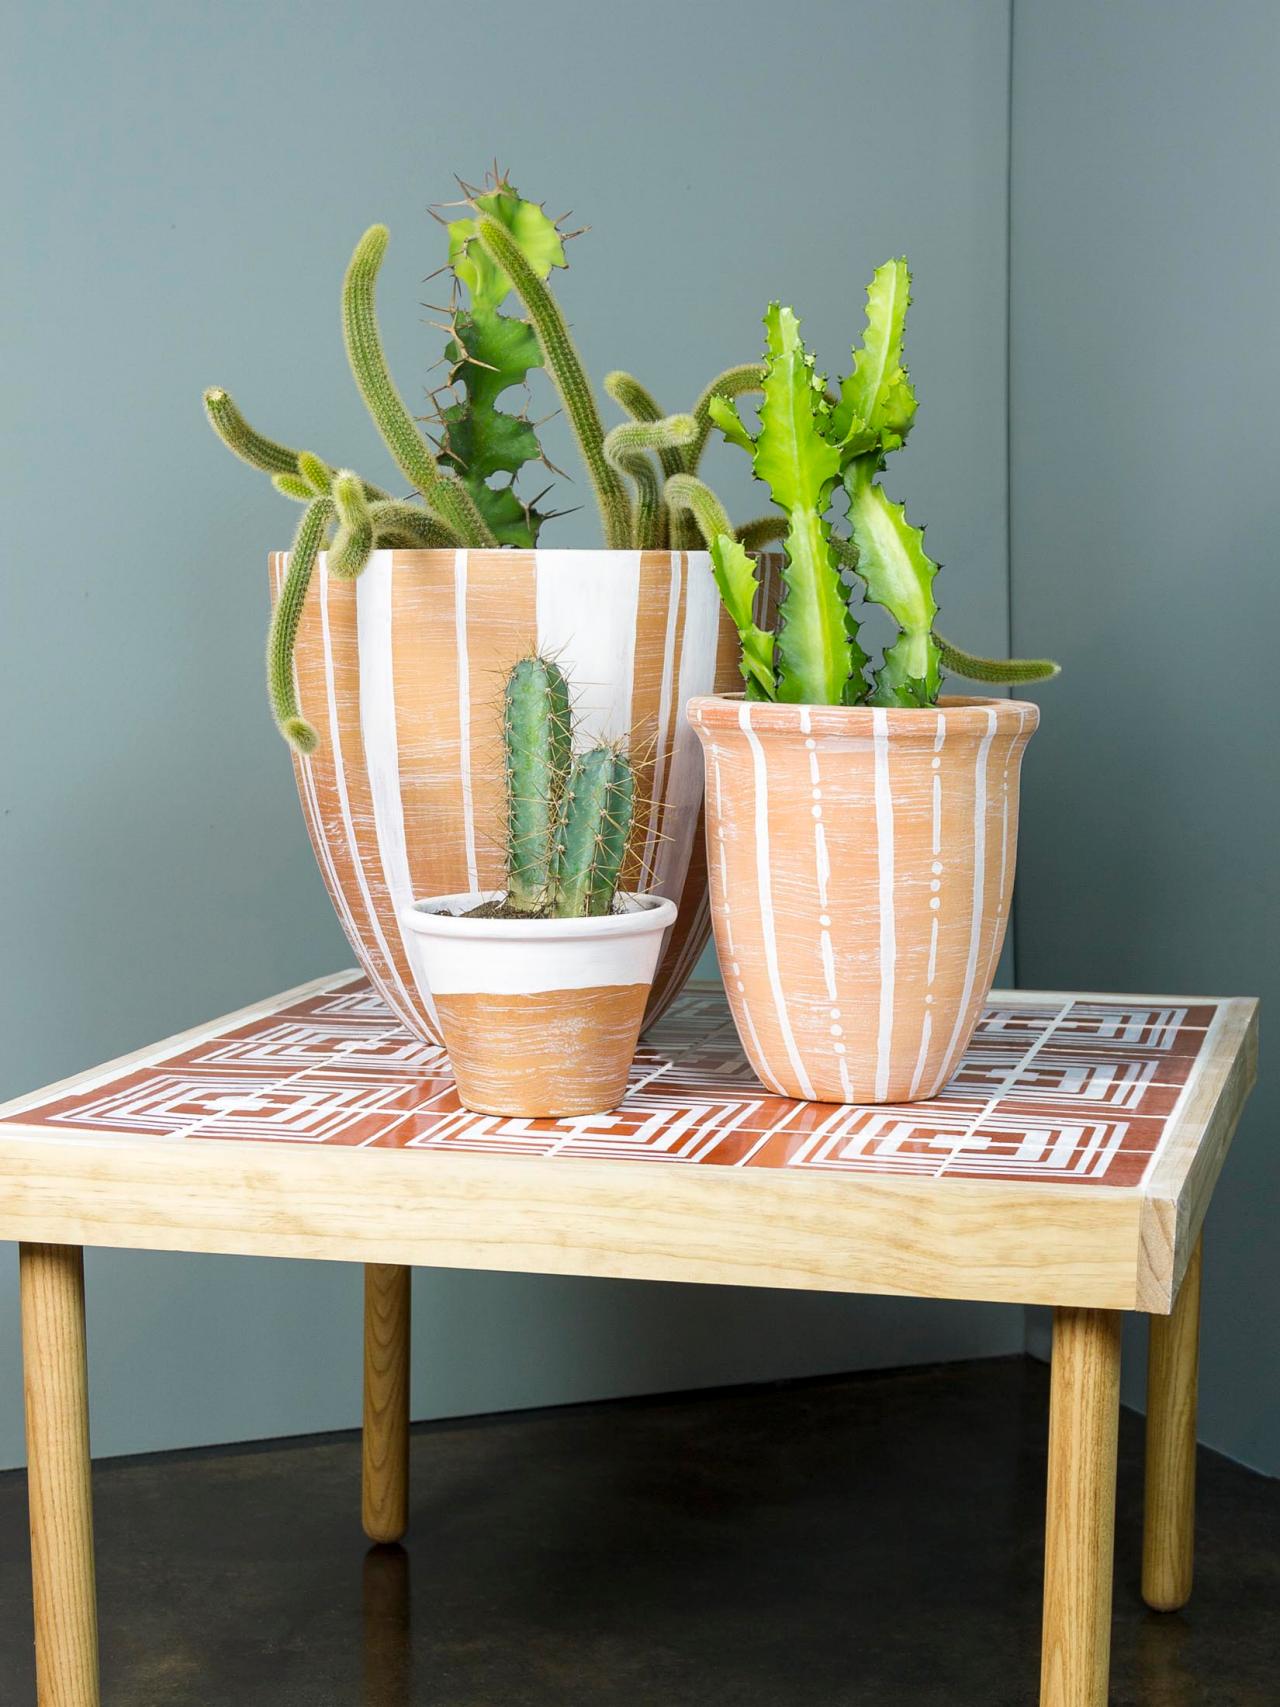
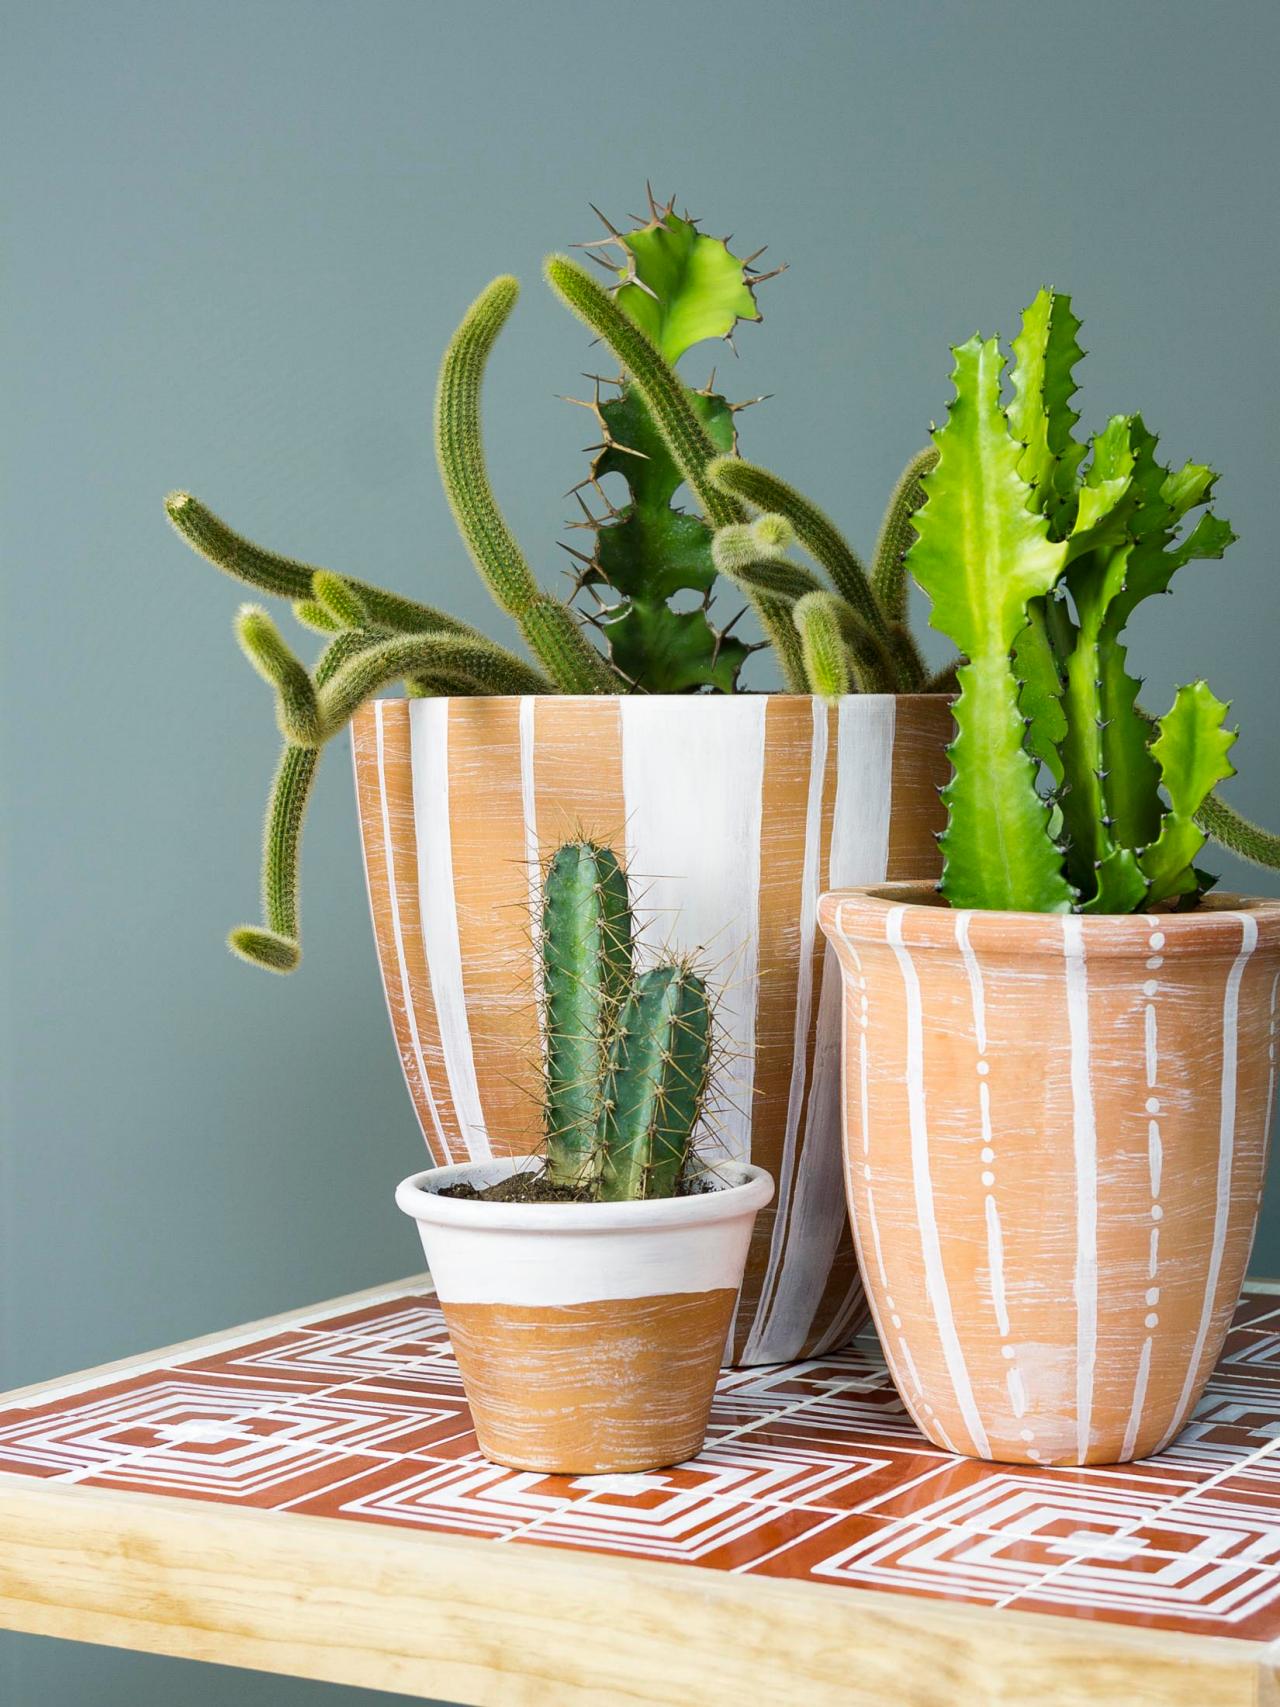
Create the Perfect TerraCottage Vignette
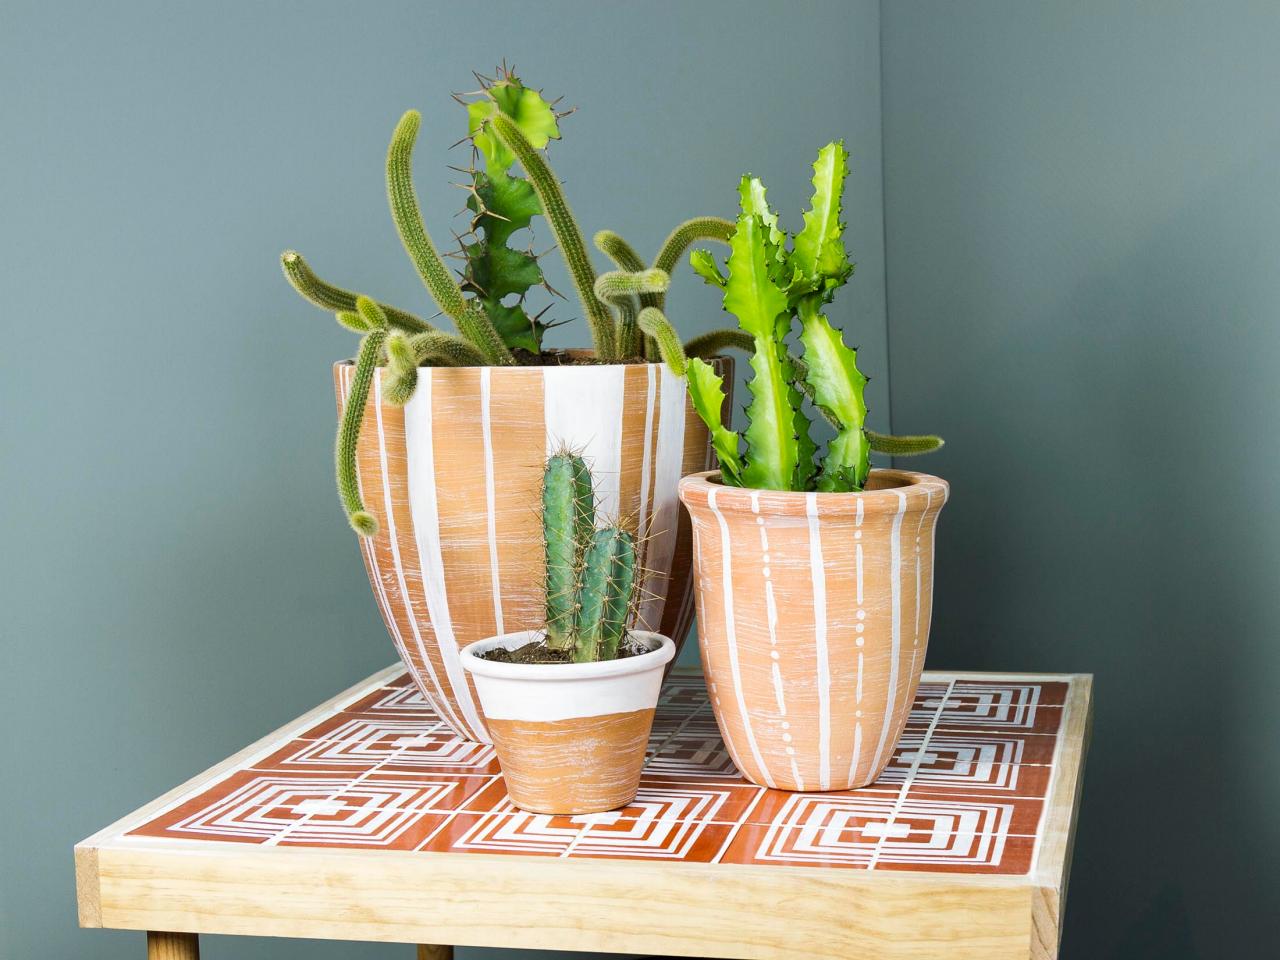
Bring TerraCottage's global look into your own home with these hand-painted pots and tile table.


The look of TerraCottage is artisanal and global with matte clays, pottery and sunbaked finishes. Earthy tones and natural elements give this design trend a comfortable feel. Finding accessories that fit the trend will be easy enough, but keep in mind that the look is global—like a mix of the gorgeous textiles and ceramics you've collected over a lifetime of travel—and not specifically Southwestern, though often infused with those hues of sunsets, desert and earth.
These pots and tile table are a great way to add the global feel of TerraCottage as well as a little greenery to your space. They have a handcrafted, aged look that is perfect for the TerraCottage trend.
Materials Needed:
- 3 terra cotta pots of varying heights
- cream colored acrylic paint
- water
- paint brushes
- cacti/succulents
- soil
- plywood, cut to 26-3/8" x 26-3/8"
- 2 pine boards, 1"x3"x26-3/8"
- 2 pine boards, 1"x3"x27-7/8"
- 2 clamps
- 1/8" tile spacers
- (8) 1-1/2" wood screws
- screwdriver
- 1-1/2" finishing nails
- hammer
- wood glue
- stain and/or sealant
- (36) 4-1/4" square tiles
- tile adhesive
- trowel
- grout
- tile float
- flat leg mounts
- (4) 18" legs
Instructions:

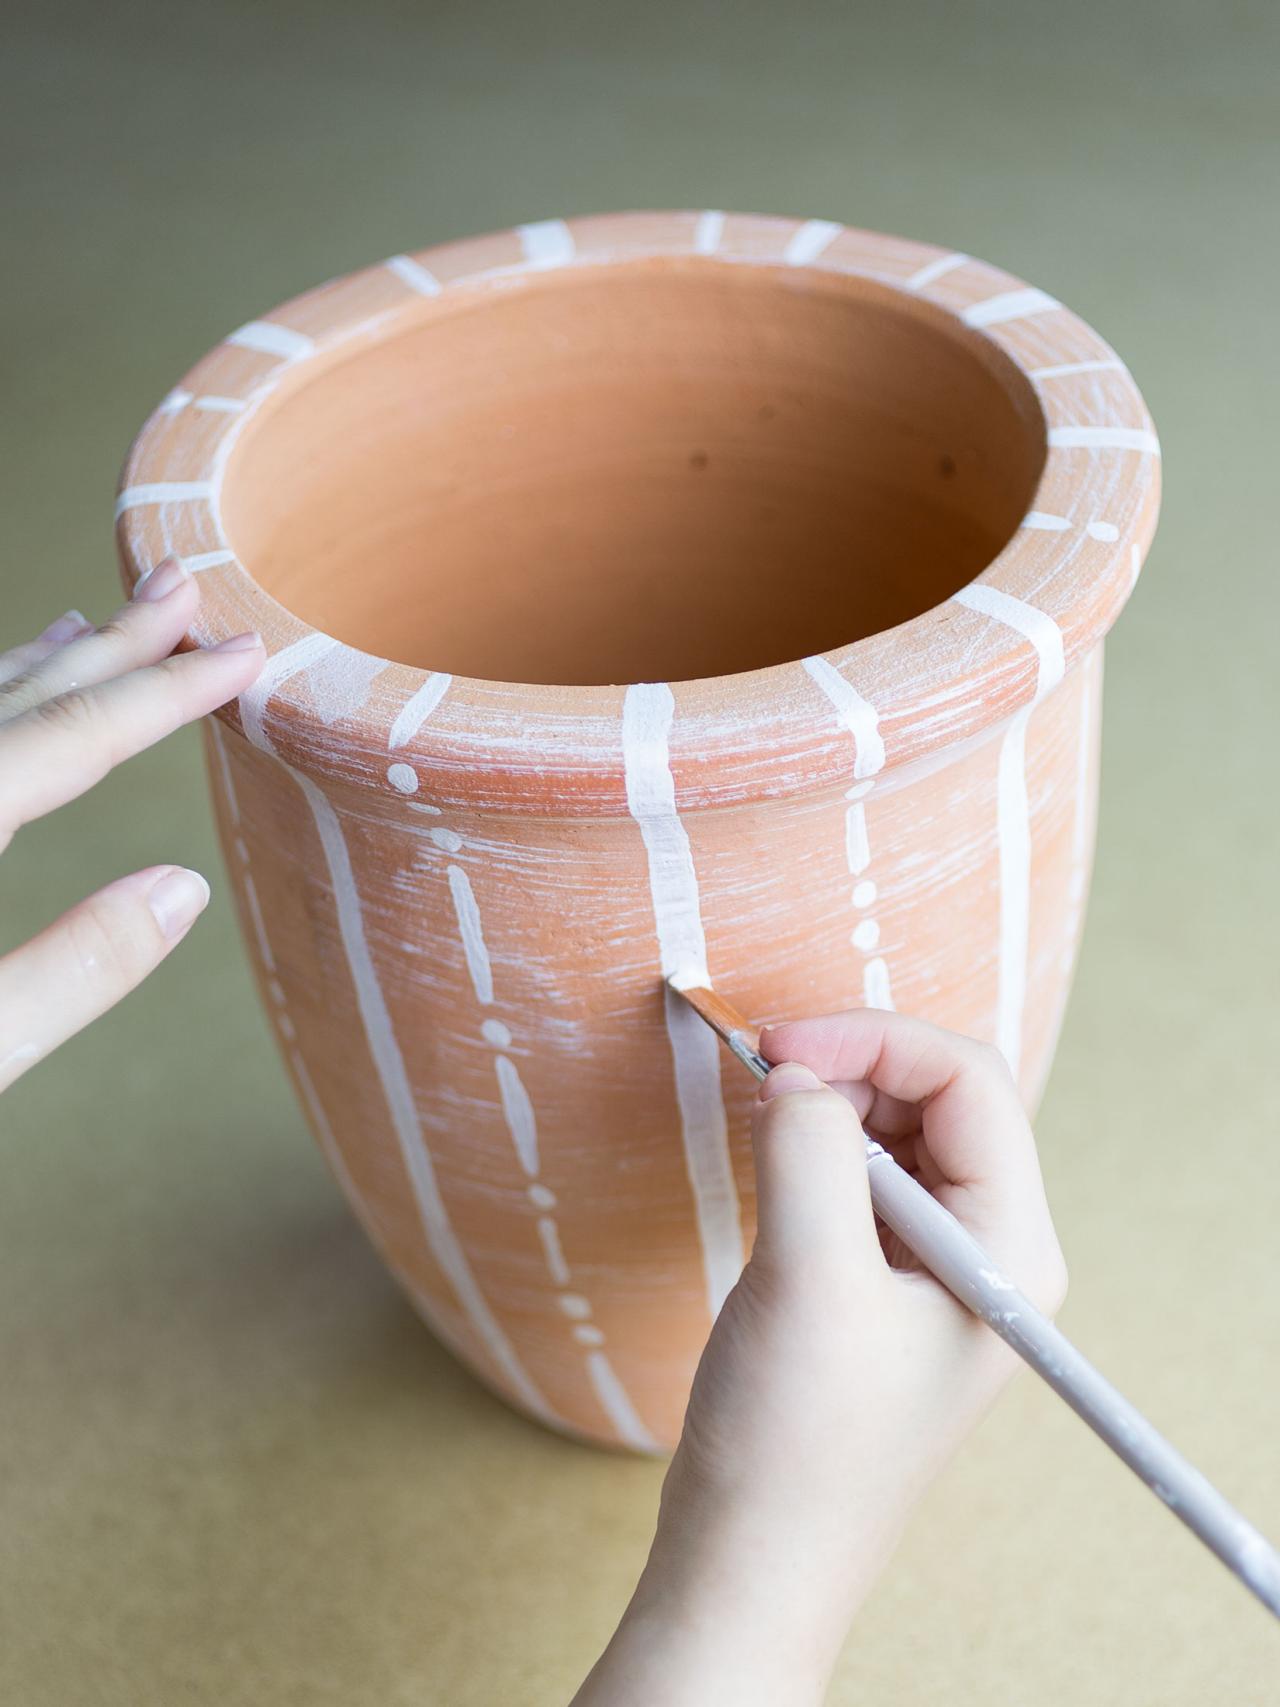
If an aged look is desired, consider dry brushing the pots. Thin acrylic paint 2:1 with water. Dip a brush in the paint and remove most of the paint on a paper towel. Lightly drag the brush over the pots horizontally to make very light marks around the pots. Allow to dry before proceeding.
Use paint brushes in non-diluted acrylic paint to make patterns on the pots. The look of TerraCottage is handmade and global. Make patterns that are simple and striped. Variegated stripes are another signature of the TerraCottage trend. Make some wider and some smaller and likewise vary the spaces between them. If the pot is smaller at the top than the bottom be sure to make the stripes at the bottom smaller than the top.
Wrap the patterns over the top and about an inch into the inside of the pot. Allow to dry completely before potting. When dry, fill pots with soil and succulents, plants that really capture the unique look of TerraCottage.

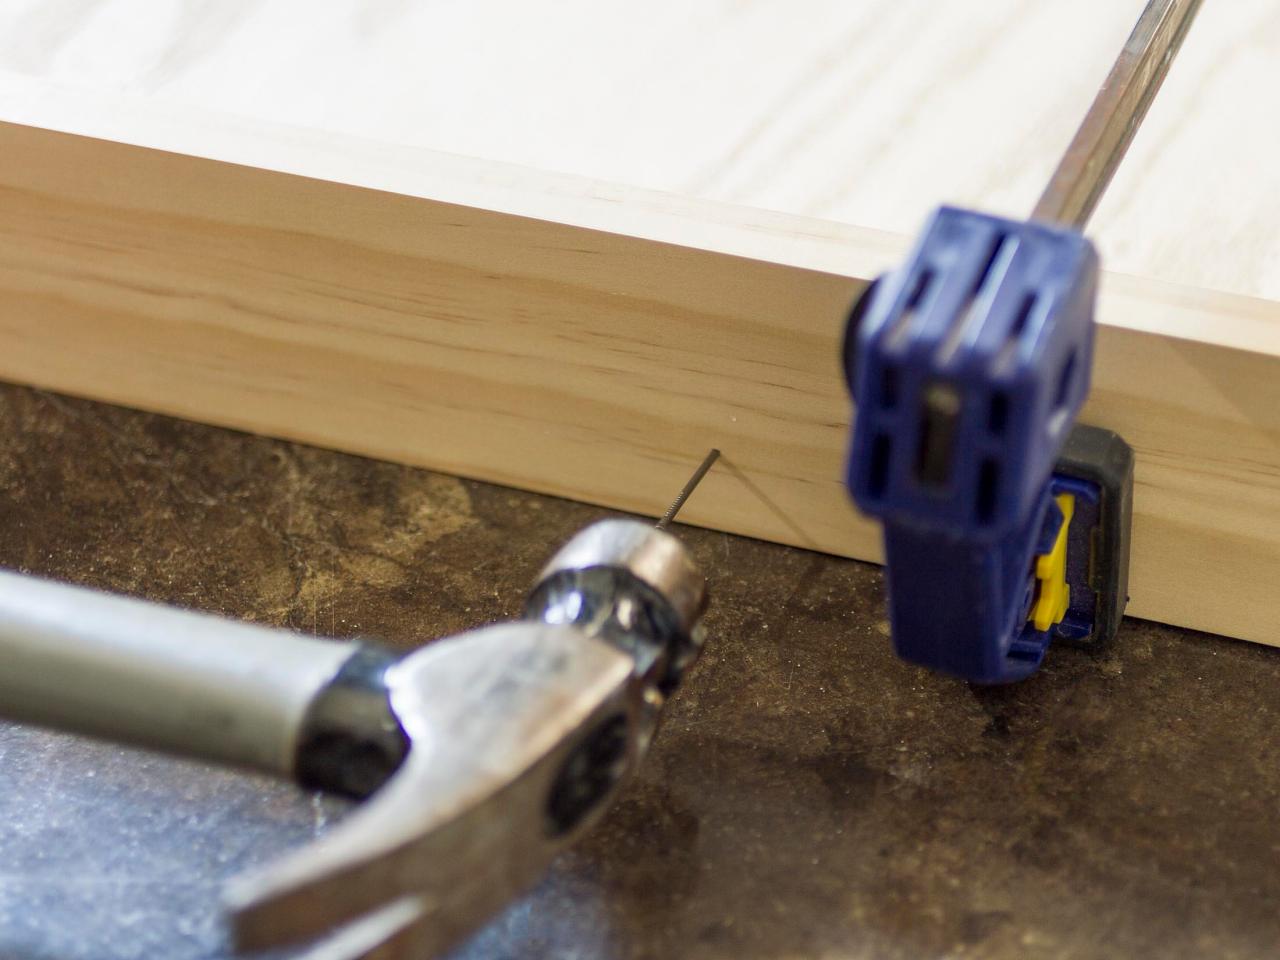
Cut wood to specified measurements or have them cut at the home improvement store. Place four tiles on a flat surface about 24 inches apart in a square. Place tile spacers on top of the corners of each of the tiles. Lay the plywood on the tiles and arrange the pine boards around the outside of the plywood with the two smaller pieces inside of the two longer pieces. Apply a thin bead of wood glue to the outside edge of the plywood. Press the pine boards to the plywood and clamp together. Add two screws to each of the corners through pre-drilled holes through the long boards into the ends of the shorter boards.
Use finishing nails all the way around the edge to attach the pine boards to the plywood.

Attach mounting plates to the four corners on the bottom of the table with included screws.

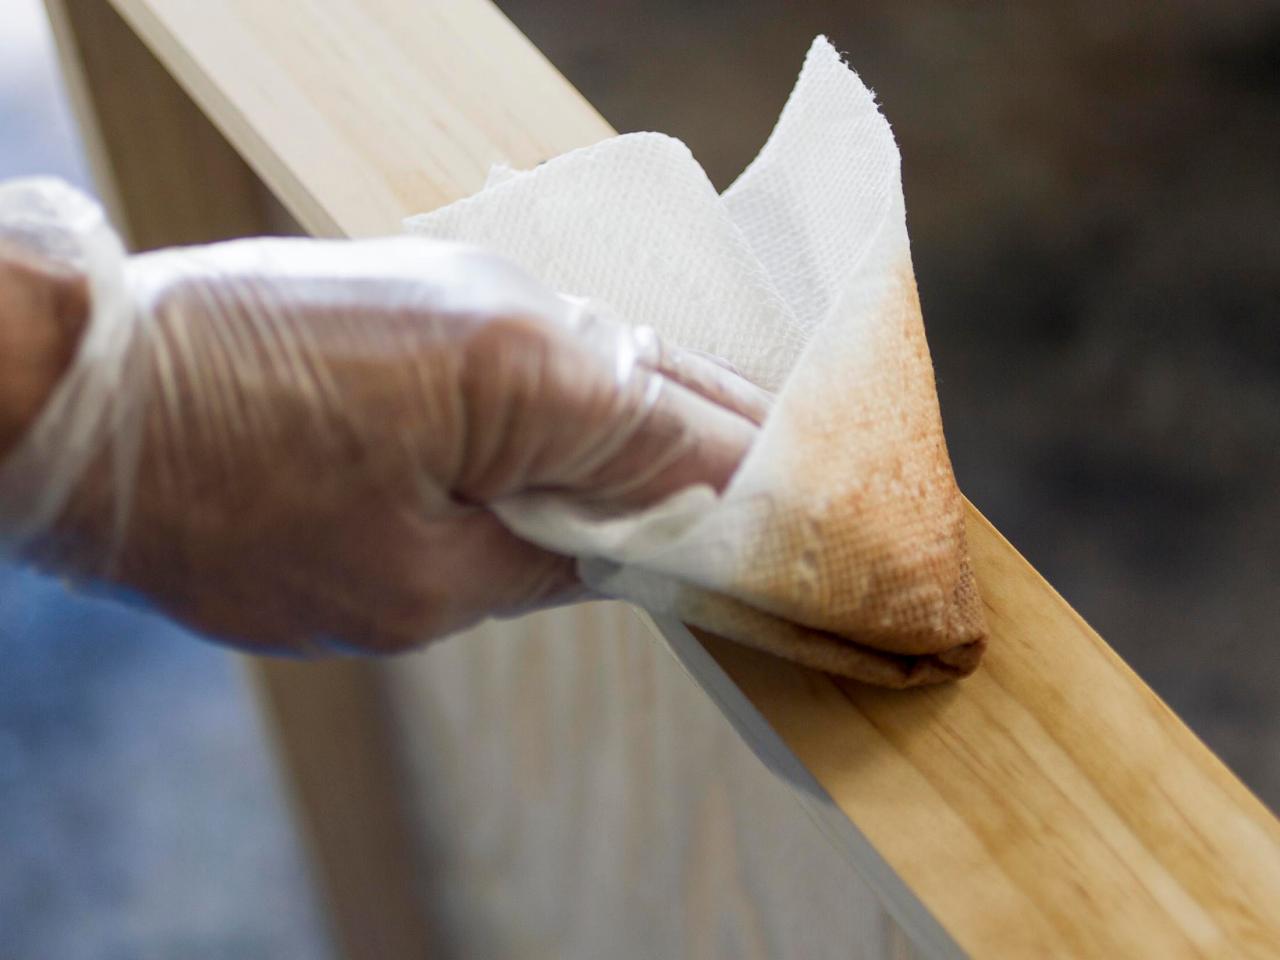
Stain and/or seal the table as desired.

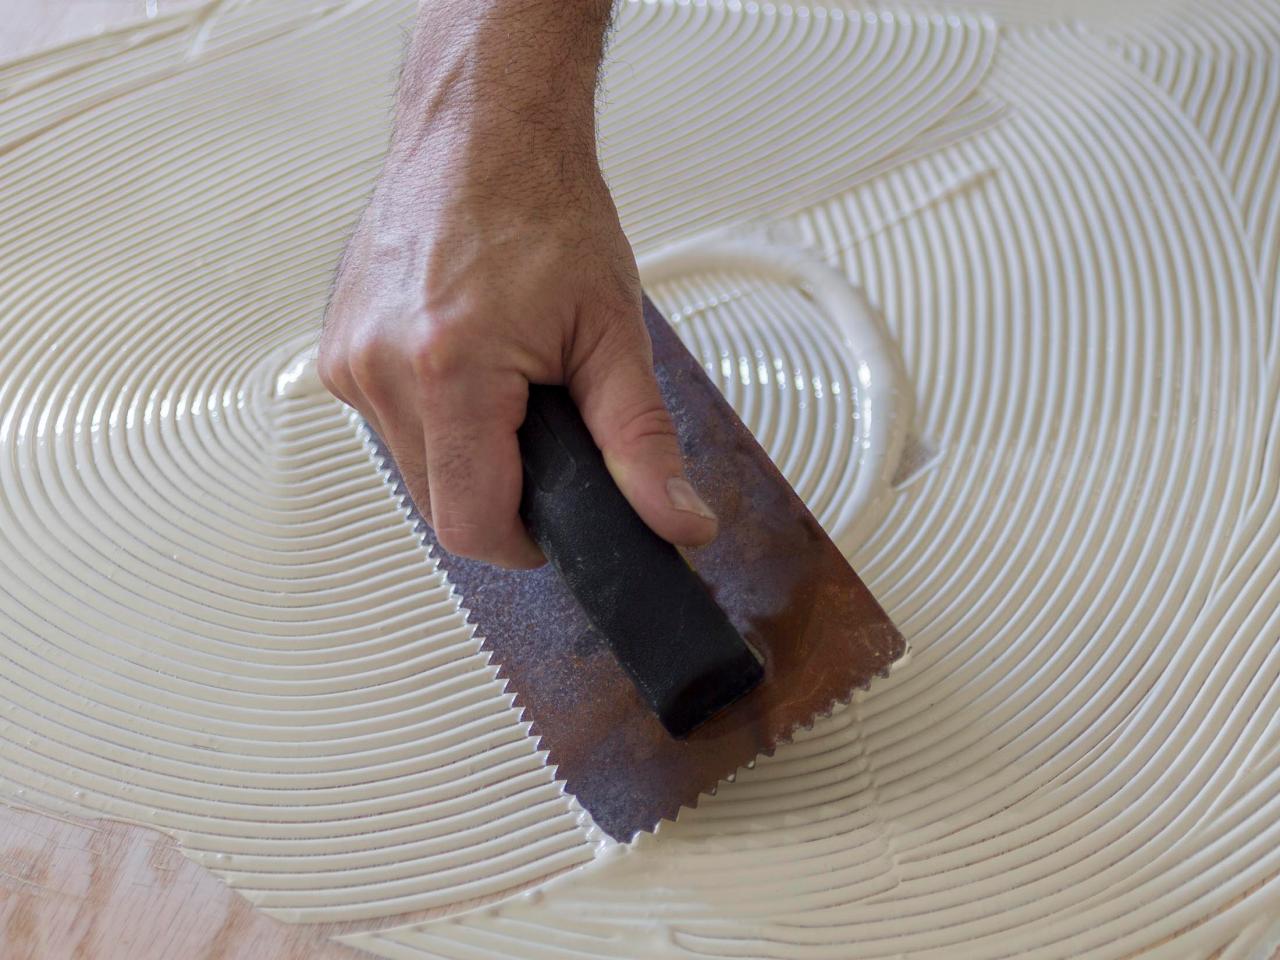
Apply a thin layer of tile adhesive with a trowel. Be sure to get all the way to the inside edges.

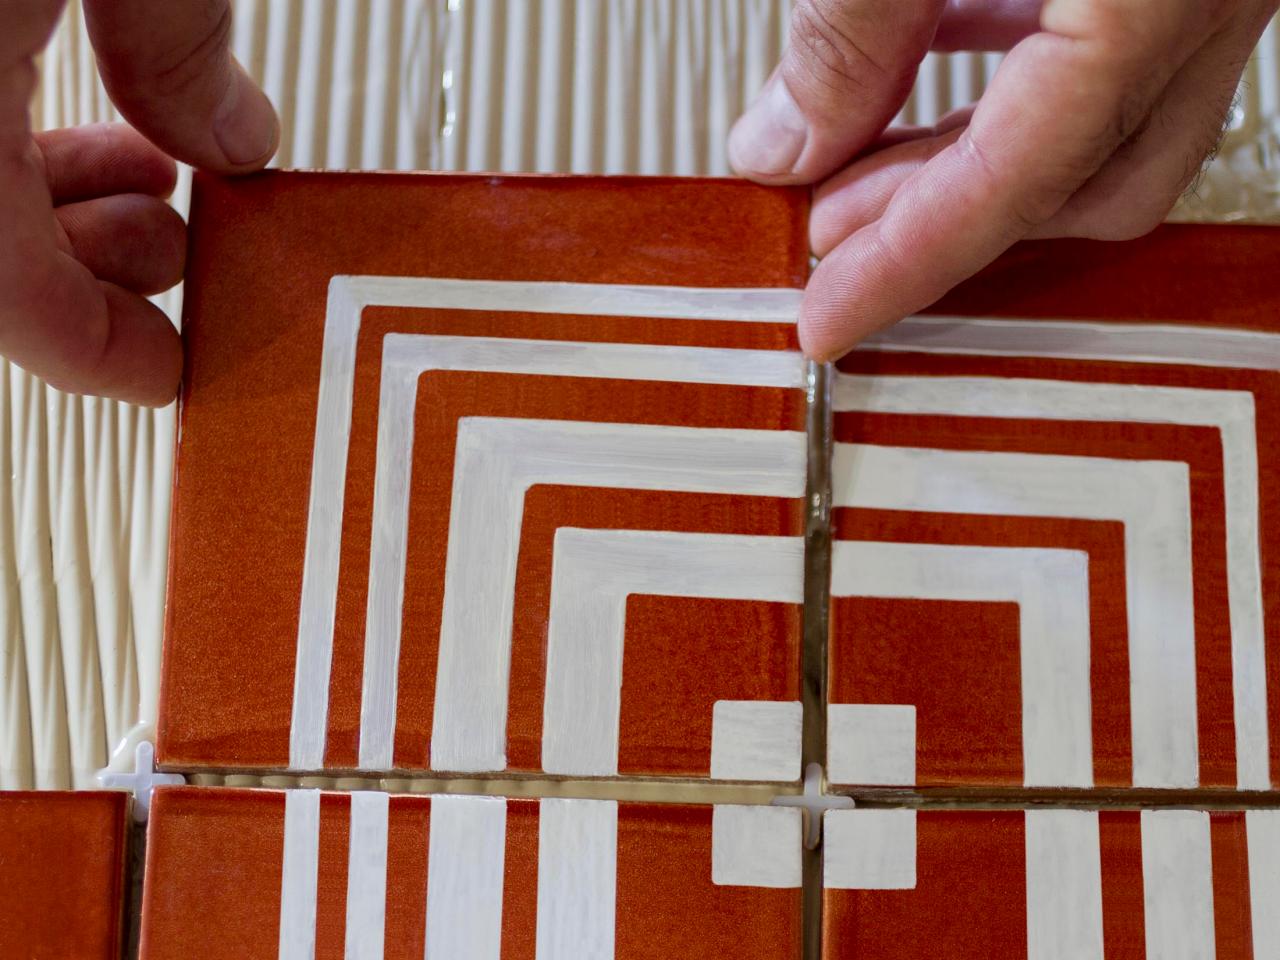
Lay the tiles in order with tile spacers between and leaving 1/8 inch space between the tiles and the edges of the table. Allow to bond before proceeding. Add grout to the top of the tiles and work into the spaces with a grout float. Remove the residue with a very lightly damp sponge.


