How to Hatch Duck Eggs

Photo by Lisa Steele
Hatching your own ducklings is a wonderful way to start, or add to, your backyard flock. Domestic ducks rarely go broody (i.e. sit on fertile eggs until they hatch), so hatching eggs in an incubator is generally your best bet. Various types of incubators work slightly differently, so it’s important to read the instruction manual for your particular model, but here are some general tips for a successful hatch.
Be sure to order your hatching eggs from a reputable breeder or hatchery. If you can find eggs from a local farm, that’s even better. Shipped eggs are often jostled and have a far lower hatch rate than eggs that don’t have to be shipped.
If you have your own fertile eggs, pick the most uniform, preferably not covered with mud or manure. Don’t wash them, instead carefully scrape off any muck with your fingernail or a rough sponge. Don’t choose small or large eggs because they tend to not hatch well.
“Candle” each egg to check for hairline cracks and discard any cracked eggs (use a regular flashlight and cup your hand around the beam to shine it through the shell). Store your eggs pointy end down at a 45 degree angle in a cool location (around 60 degrees). Rotate the eggs side to side several times a day until you’ve collected enough to fill your incubator. Eggs will stay viable for at least a week after being laid. After that, fertility starts to decline.
When you are ready to set your eggs, mark an X on one side with a pencil. This will serve as your guide when turning the eggs (if your incubator has an auto turner, you can skip this step). Place the eggs in the incubator with the pointy end down and set your incubator in a quiet location out of direct sunlight where it won’t be bothered by children or pets.
Duck eggs incubate at a temperature between 99.3 and 99.6 (but again, check the setting for your particular model) for 28 days. The humidity level should be 45-55% for the first 25 days and then increased to 65% for the last three days. If you are manually turning your eggs, you want to turn them a minimum of five times a day - turning 180 degrees side to side each time - so the egg spends every other night on the opposite side. This prevents the developing embryo from sticking to the shell.
Five days into the incubation, you should be able to see some veining and development when you candle the eggs. By day ten, candling will show significant expansion of the air sac in the blunt end of the egg and a developing embryo. If you see a reddish ring inside the egg, that ‘blood ring’ indicates bacteria has gotten inside and it should be discarded. Contaminated eggs can explode and contaminate other eggs.
Starting on day ten, the eggs will benefit from daily misting and cooling. Once a day, remove the lid of the incubator and leave it off for 30 minutes. Then mist each egg with lukewarm water and replace the lid. This mimics a mother duck leaving the nest each day to find something to eat and maybe take a short swim, returning wet to her nest. Studies have shown this can greatly improve hatch rates.
Continue turning, cooling and misting the eggs until day 26. At that point, one last candling should be done and any eggs not showing development discarded so only viable embryos remain. The eggs should get one last turn, cool and mist and the humidity should be increased in the incubator. The ducklings will move into ‘hatch position’ and the eggs should not be moved from this point on.
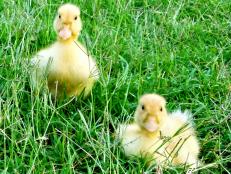
Hopefully, if all goes well, on day 28 you will begin to see ‘pip’s (small holes) appear in the eggshells. The duckling will then make its way out of the shell and eventually a brand new baby duckling will emerge! This whole process can take 48 hours or longer, so resist the urge to assist. Leave the ducklings in the incubator until they are rested and fluffy. They don’t need to eat or drink for the first few days; they can survive on the nutrients in the egg yolk they absorb just prior to hatching. Once they have dried off, they should be moved to a heated brooder. A few sips of sugar water before you put them in the brooder is always a good idea to give your new ducklings some added energy and a good start in life.


