


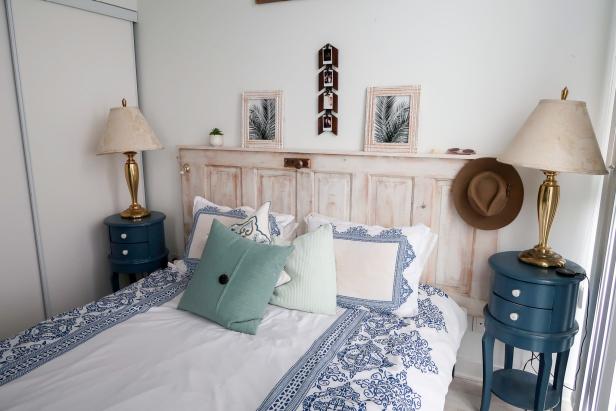
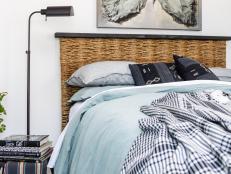
DIY This A-Door-Able Headboard
Dreaming of all things rustic? We’ve got the perfect headboard for you.


Crafting your own headboard is easier than you may think. With the help of a rustic door, some chalk paint and a few other materials, you can give your bedroom a mega-makeover in just an afternoon.
Materials Needed
- salvaged wood door
- 1x4 x 8’ pine board
- orbital sander
- 220-grit sandpaper
- tack cloth
- wax paint brush
- chalk paint
- chalk paint finish
- super glue
- painter’s tape
- (2) 12” French cleats
- large furniture pads
- two decorative hooks
- (6) #8 2” wood screws
- (4) #4 1” brass wood screw
- 1/8” drill bit
- drill
- (2) 36” wood clamps
- measuring tape
Source Door
Source a door of your liking. This could simply be a door already in your home, something sourced online or purchased new. Salvaged doors will come with a worn-in charm that will help achieve the rustic look. For this project, we chose a classic, five-panel wooden door.
Prep Door
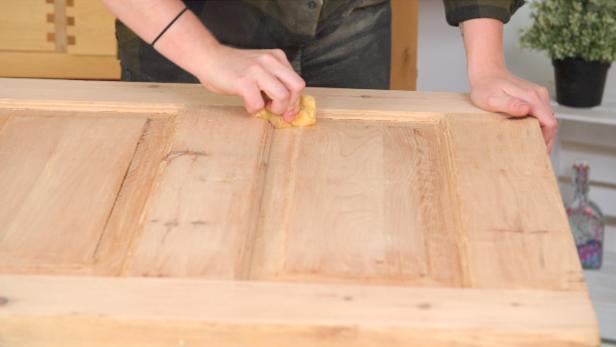
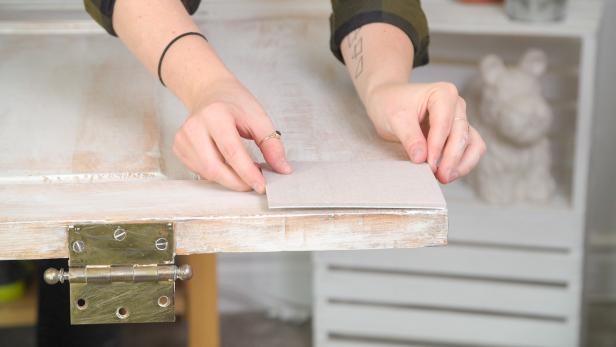
If your door comes with hardware and you don’t want to take it off, use painter’s tape to cover these pieces (Image 1). Use 220-grit sandpaper to lightly sand the top of your door. If your door had a layer of paint on top of it, you may want to use a lower grit sandpaper first to help remove any unwanted finishes. Use a tack cloth to remove excess dust after sanding (Image 2).

RTR Media
RTR Media
Pro Tip: Thick paint removal can be time consuming. A heat gun and scraper make quick work of latex-based paint, but be sure to always wear the proper safety equipment and work in a well-ventilated space.
Paint Door
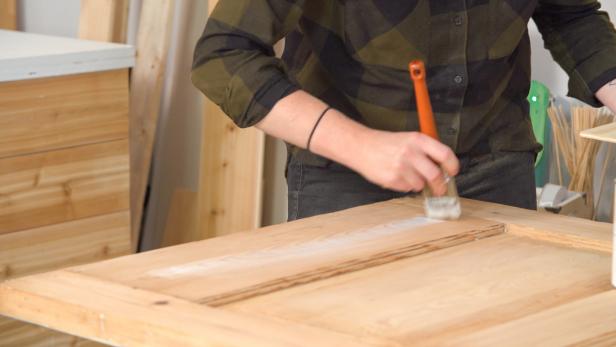
We chose a white linen chalk paint. The goal was to give the door a weathered look, so we opted to use a dry-brush technique. To use the dry-brush technique, dip just the tip of the brush into the paint and dab the brush on a dry surface (like a paper plate or scrap piece of plywood) to remove the excess paint on the brush. Paint the door with long brush strokes (Image 1), adding just thin, light strokes of paint. If you accidentally brush on too much paint in one spot, don't worry. Just leave it or dry off your brush and spread it out as much as you can (Image 2). Repeat the dry-brush technique on your 1x4 board. Let dry.
RTR Media

RTR Media
Finish Chalk Paint
The door will act as a headboard, so you need to think about wear and tear. To give the whole headboard a little more durability, add a matte chalk paint finish (wax or sealer) according to the manufacturer’s instructions.
Attach Shelf
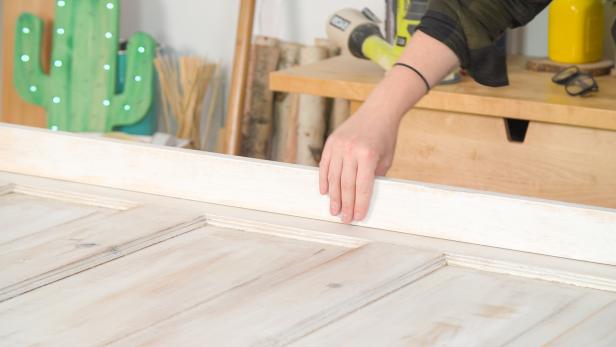
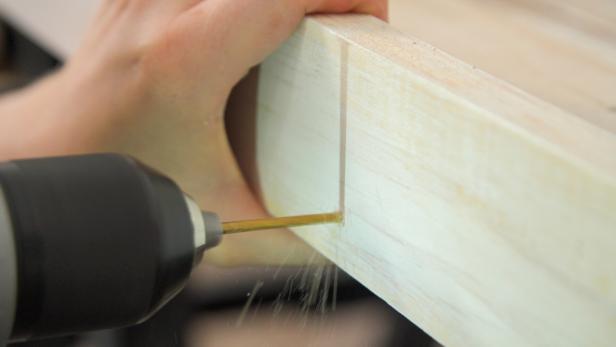
To attach the shelf, clamp the 1x4 board to the top rim of your door flush against the back and hanging off the front (Image 1). Since we left the doorknob on our door, this will be our top. To avoid splitting the door, be sure to pre-drill the holes using a 1/8-inch drill bit and secure using six 2-inch wood screws equally across the top (Image 2).
RTR Media
RTR Media
Remove Rear Doorknob
In order for the door to lie flat against the wall, remove the door knob on the back side. The front knob will fall off when you do so, but because this door is decorative, you don’t need the door to actually work. Simply glue the door knob into place with a strong adhesive.

RTR Media
Add Hooks
Add decorative hooks to each end of the door and secure with 1-inch brass wood screws. Again, be sure to pre-drill the holes to avoid splitting the wood.
Hang Door
As a last step, add two French cleats to the back of your door on each side (Image 1). To avoid any scuffs on the wall, add soft felt pads on the door's two bottom corners (Image 2). Place the other pieces of your cleats on the wall secured in studs if possible. If you can't locate studs, opt for heavy-duty drywall anchors.

RTR Media
RTR Media
RTR Media


