


3 Ways to Make Creepy Doll Head Planters for Halloween
Forget the expensive store-bought stuff, upcycle thrift-store toys to create spooky Halloween decor.


Jalynn Baker
Tools and Materials
- an assortment of baby dolls from thrift shops
- dainty tea set
- hacksaw
- drill with various sized bits
- scrap wood
- plastic lacing
- embroidery needle (wide enough for plastic lacing)
- black paint pen
- red acrylic paint
- aluminum window screening (for plant drainage)
- various plants, including succulents, air plants and moss
- soil
- cement spray paint
- antique glaze
- small paintbrush
- (2) bolts (and drill bit to match size)
- Hot-glue gun
Concrete Head

Jalynn Baker
Use a cherub-looking baby doll without hair for the best effect. You can find faux-finish cement spray paint and antiquing medium at most craft stores.

Jalynn Baker
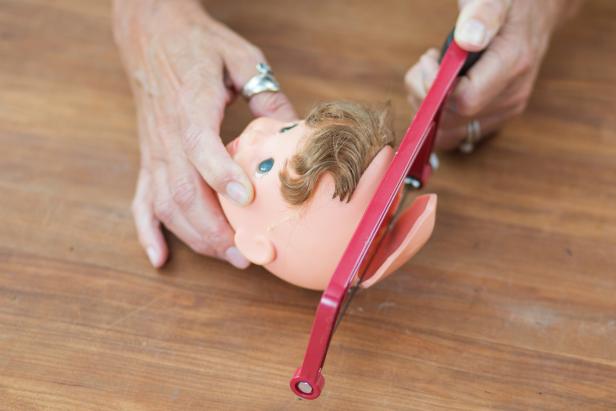
Use a hacksaw, utility knife or a power rotary tool with a cutting blade to remove the doll's head from the body.
Jalynn Baker
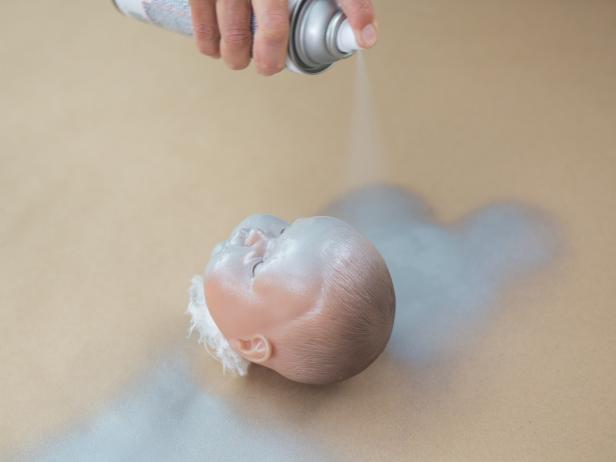
Apply faux cement spray paint to the head; apply two coats if necessary and allow it to dry completely. If adding neck bolts, paint those too.

Jalynn Baker
Don’t worry about applying even coats of the antique glazing medium, you want an uneven naturally aged look. Allow the glaze to fully dry.

Jalynn Baker
Use a paint or permanent marker to blacken the doll's eyes.

Jalynn Baker
Drill holes on each side of the neck then insert Frankenstein-like bolts.

Jalynn Baker
Remove the doll’s scalp.
Jalynn Baker
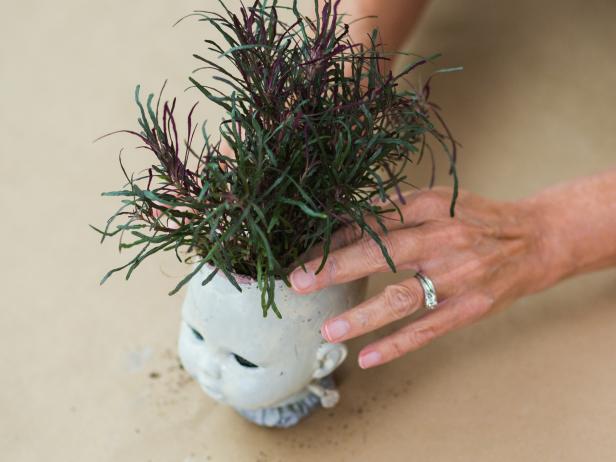
Add a piece or two of window screen to the inside bottom of the head to hold the soil in place but still allow water to drain. Fill the head with soil and a plant.
Stitch Face Doll

Jalynn Baker
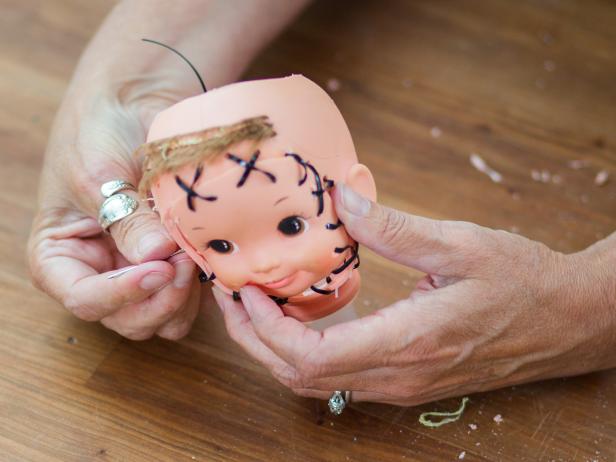
For the stitches, we used plastic beading lace found in the kids’ section of the craft store. You could use embroidery thread, but it will get ruined if you're using a live plant.
Jalynn Baker
Use a hacksaw, utility knife or a power rotary tool with a cutting blade to remove the doll’s head from the body. Remove the doll’s scalp and cut off any excess hair that you don’t want.
Jalynn Baker
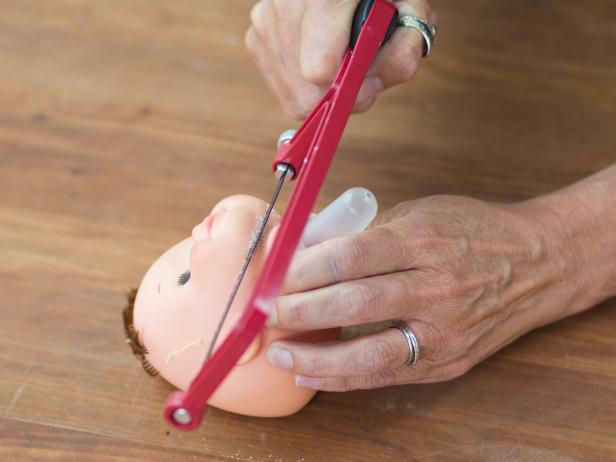
Start from the underside of the chin to remove the face. Use whichever tool works best. For us, a hacksaw and utility scissors worked well for removing the top of the head.
Jalynn Baker
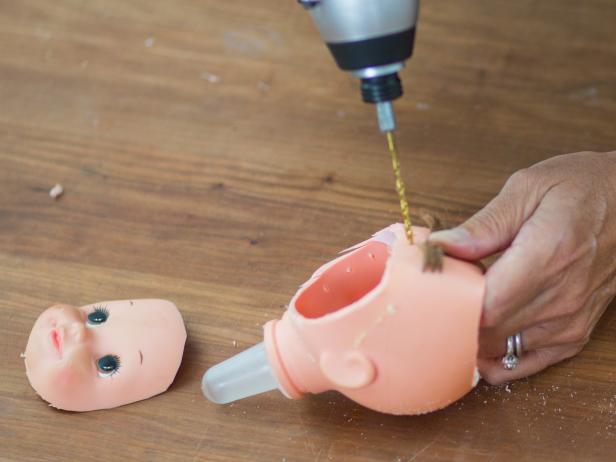
You can sew a face on from another doll or use the same face. Use a drill with a 1/8” bit to make holes all around the face opening. Pro tip: Be careful not to get the drill bit knotted up in the doll's hair.

Jalynn Baker
Use the same drill bit to make holes in the face. Place a piece of scrap wood underneath the face so you don’t ruin your work surface. Drill the same number of holes in the face as you did in the head.
Jalynn Baker
Use a needle and plastic lace/thread to cross-stitch the face onto the head. Don’t worry about being neat — you are playing Dr. Frankenstein after all.
Jalynn Baker
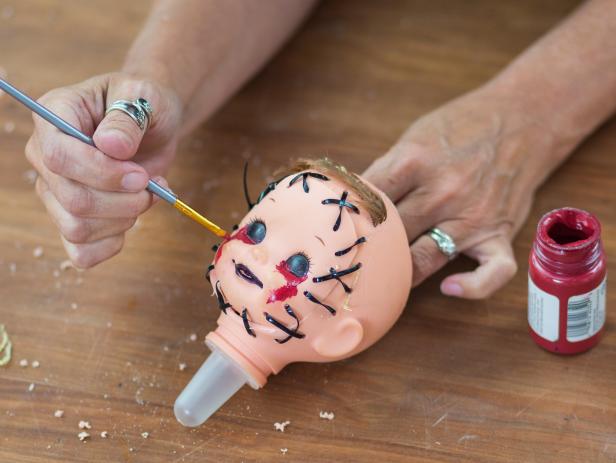
Use a paint or permanent marker to blacken the eyes and lips. Use red paint to add blood around the eyes and/or mouth. Add other features such as a third eye, piercings or fangs.

Jalynn Baker
Add a piece or two of window screen to the bottom of the head to hold the soil in place but still allow water to drain. Fill the head with soil and a plant.
Barbie Teacup
Jalynn Baker
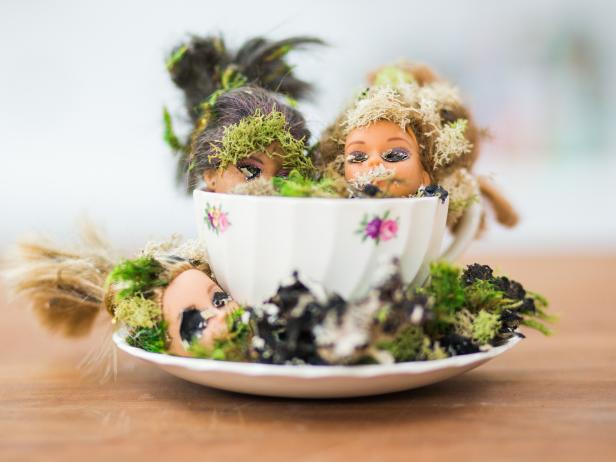
If working with smaller dolls – Barbie size – use moss and a dainty teacup to make a disturbing display.
Remove the heads from the dolls. If the head doesn’t easily pop off, use a hacksaw, utility knife or a power rotary tool with a cutting blade.
Jalynn Baker
Use a paint or permanent marker to add streaks to the dolls’ hair. Tie the hair up using string or a pipe cleaner.

Jalynn Baker
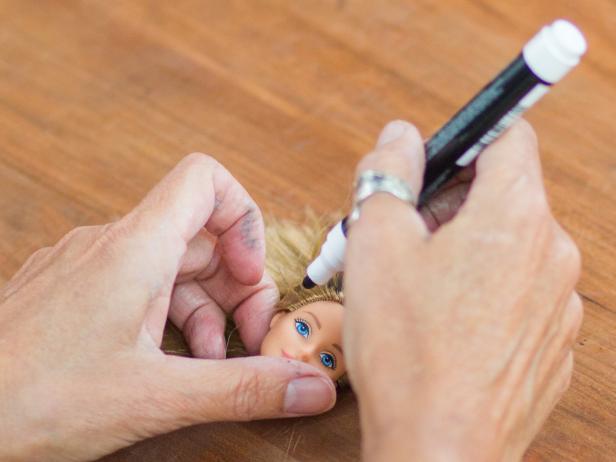
Use a paint permanent marker to blacken the eyes.

Jalynn Baker
Attach moss to the dolls using a hot glue gun.

Jalynn Baker
Arrange dolls heads in a teacup and saucer with a variety of moss.

Jalynn Baker


