


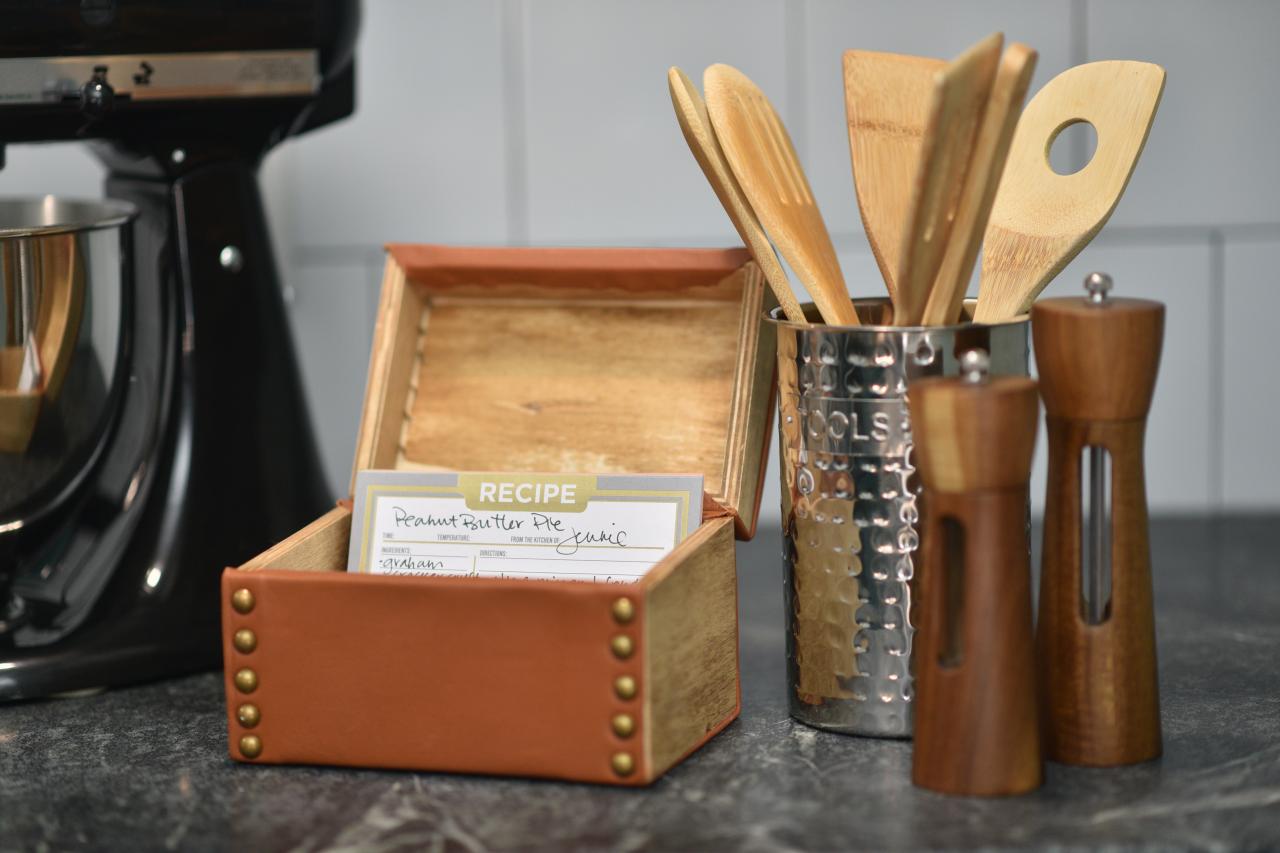
Pretty + Practical: Craft a Luxe, Leather Recipe Box
Keep those new and well-loved recipe cards well within reach with a DIY storage box that looks great on your kitchen counter.

Cookbooks can take up a ton of precious space and typically only contain a few recipes worth making. Instead of filling drawers and shelves with heavy books, write down your favorite recipes and store them in a DIY leather and wood container that won't disrupt your kitchen's style or monopolize much-needed countertop real estate.

What You'll Need
- unstained wood box
- screwdriver
- stain
- gridded cutting mat
- rotary cutter
- leather
- ruler
- spring clamps
- pliers
- hammer
- upholstery tacks
- scissors
- industrial strength glue
Prep & Stain Box


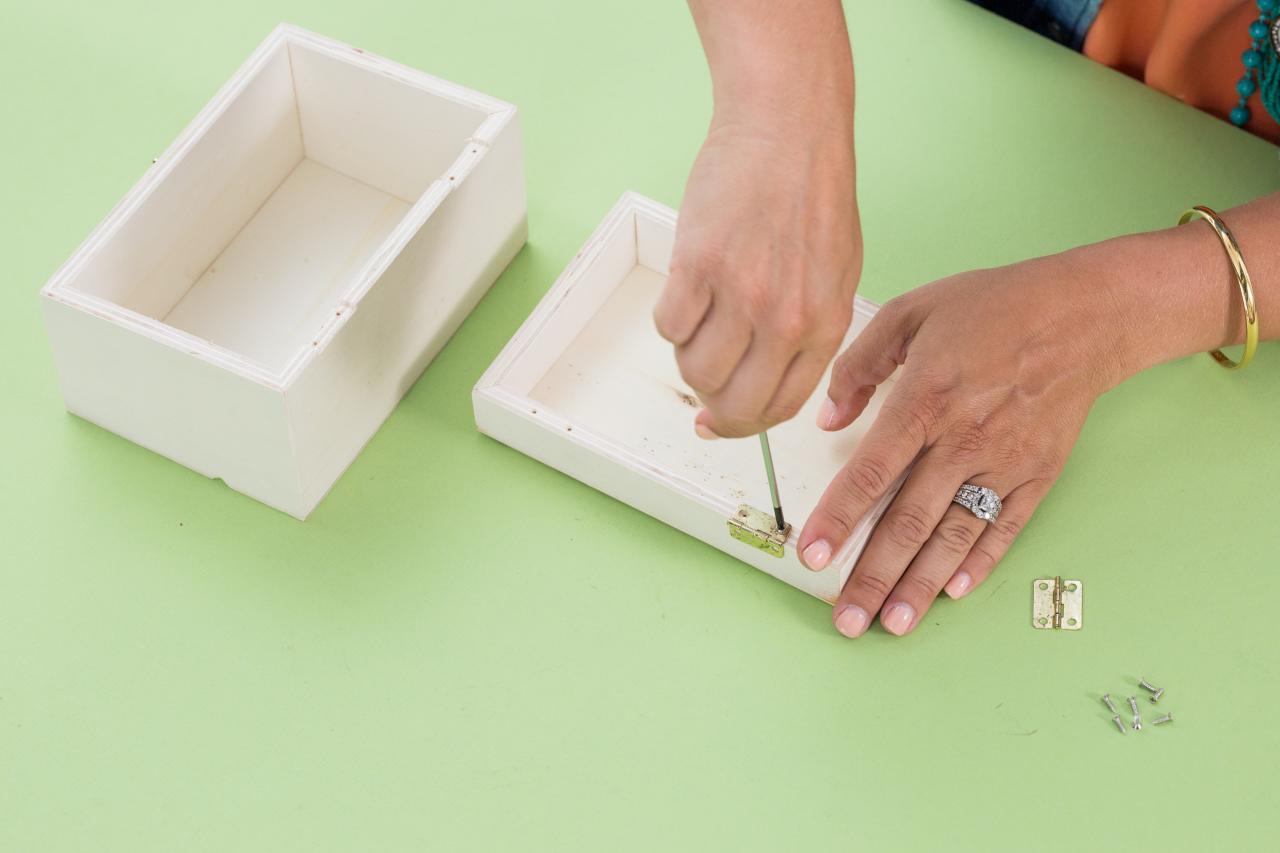
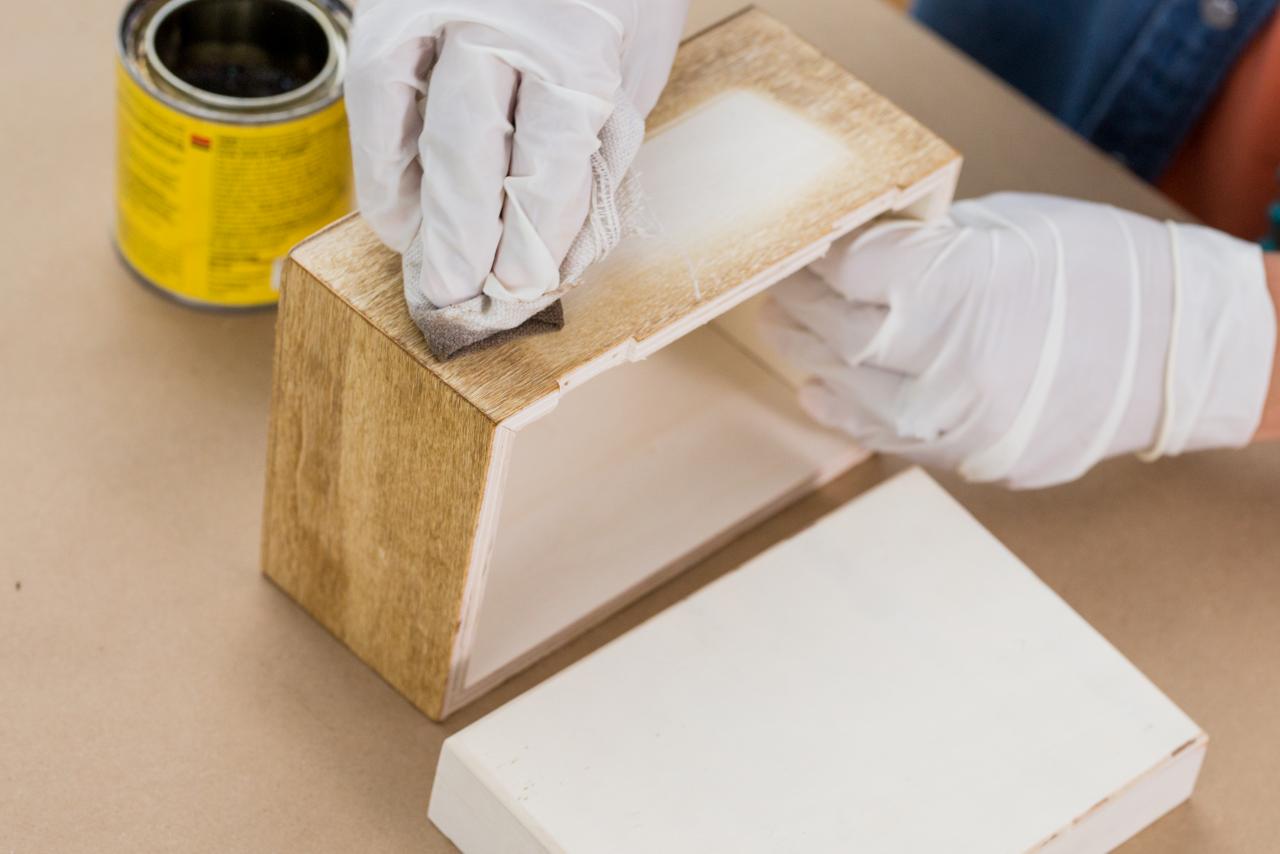
Begin by removing all hinges and latches from an unfinished wood recipe box. Set each piece aside and use an old cloth to stain the entire box your desired shade (we chose Golden Oak). Let dry completely.
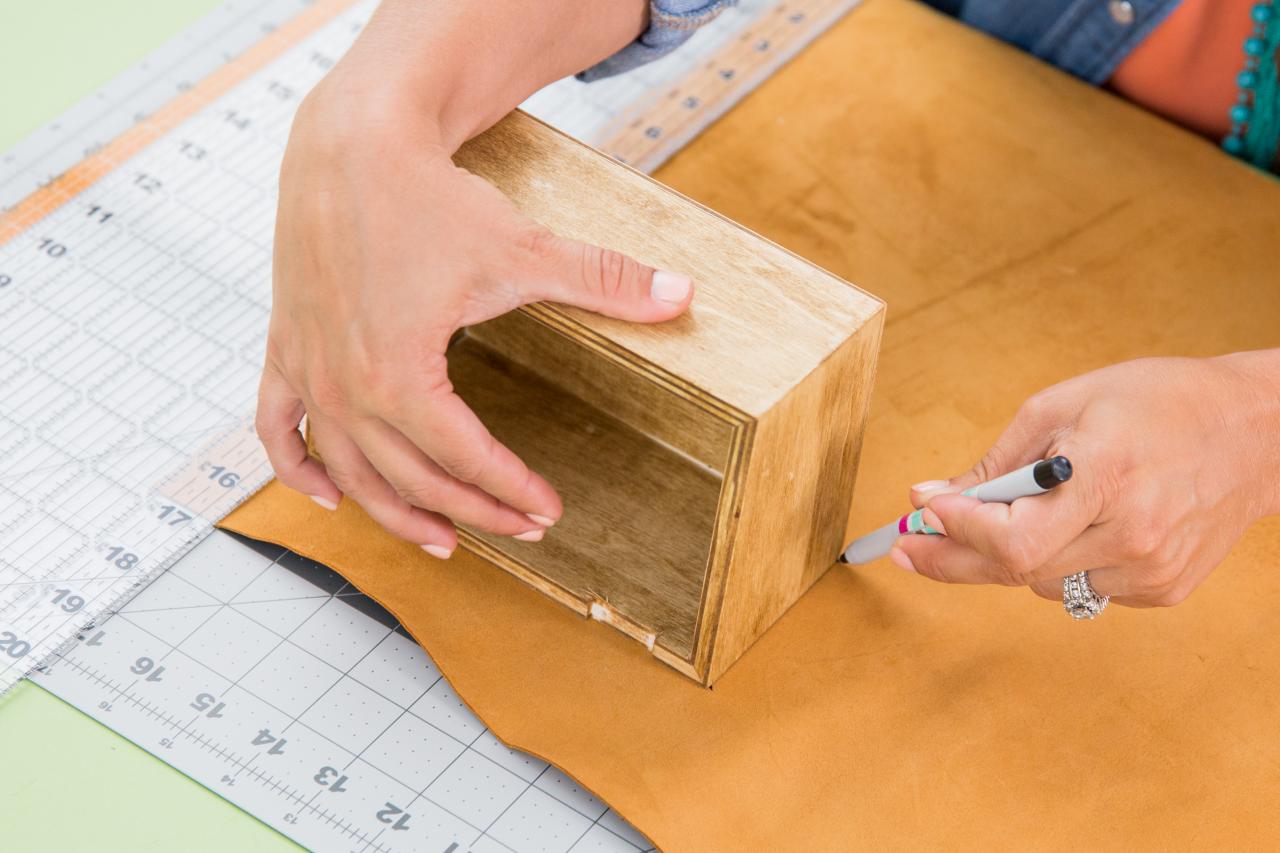
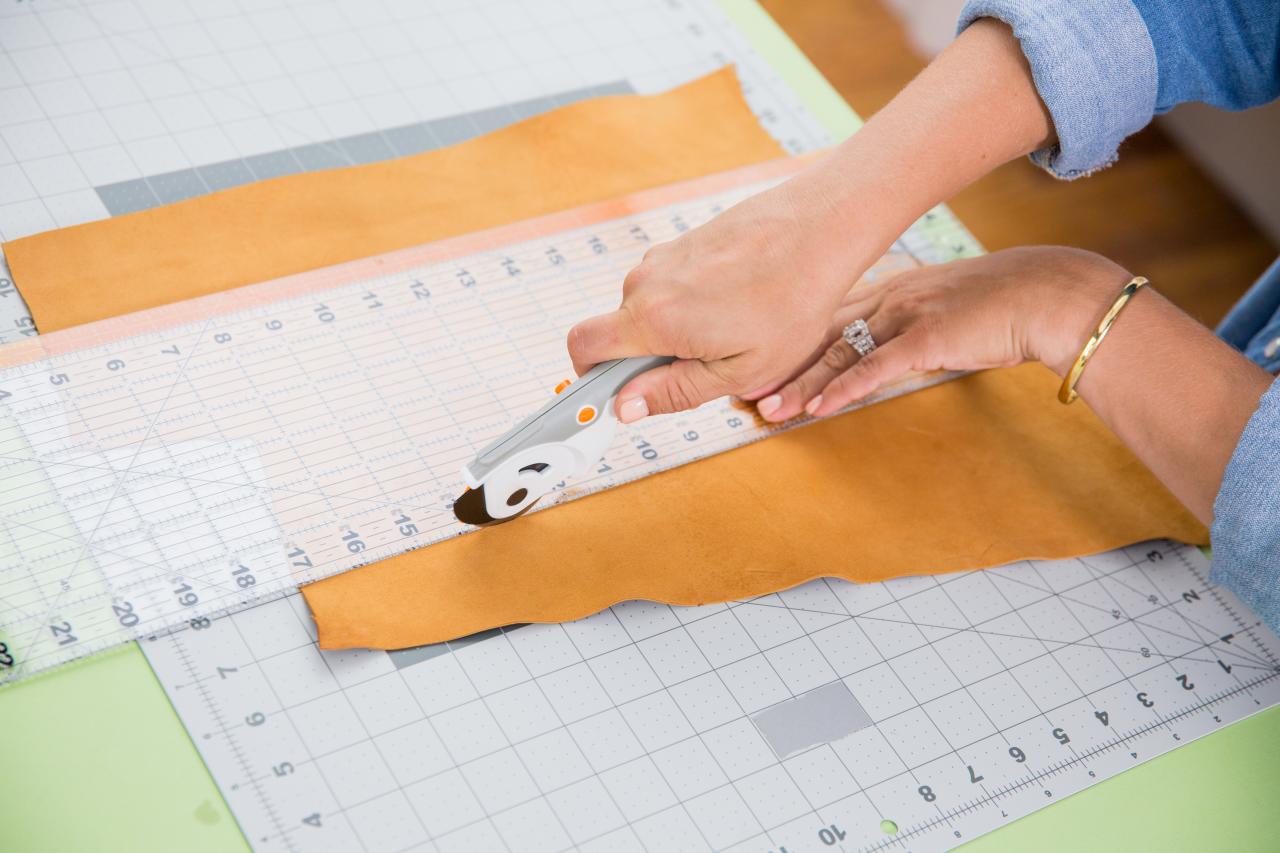
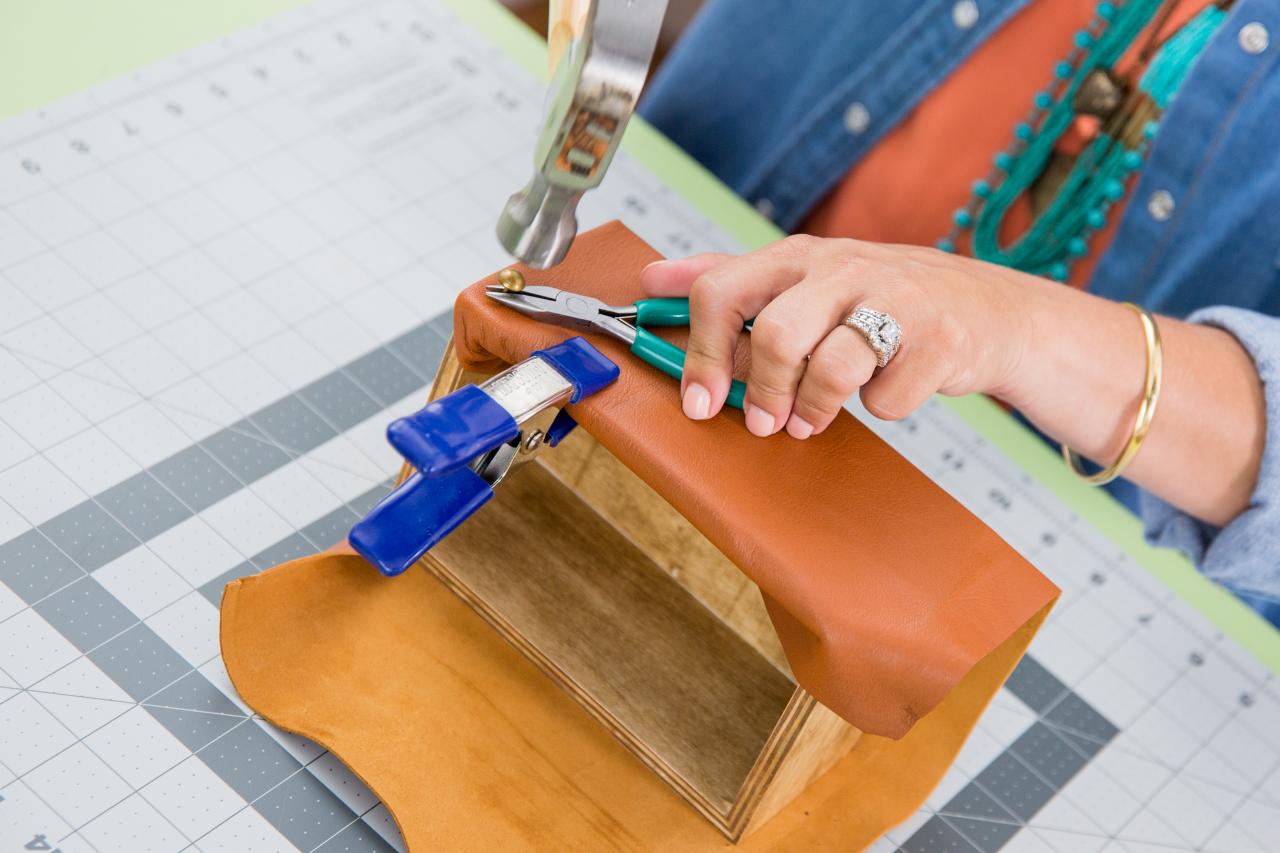
Measure, Cut & Attach Leather


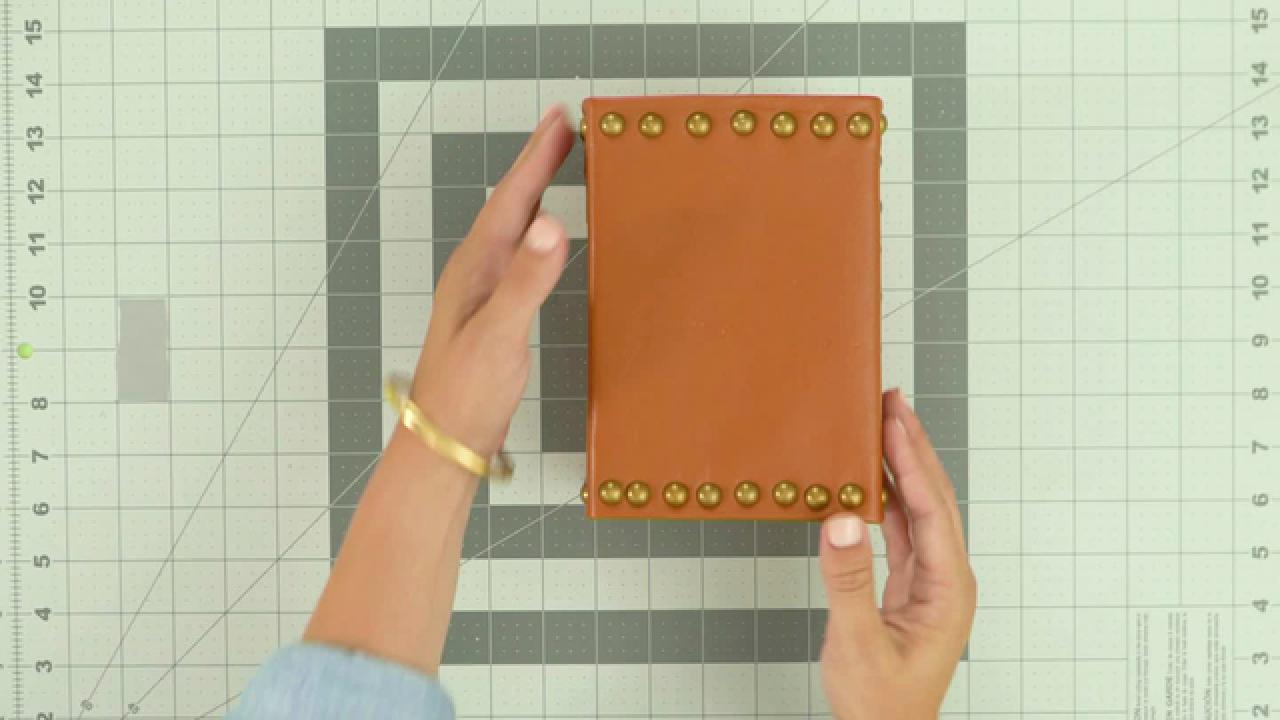
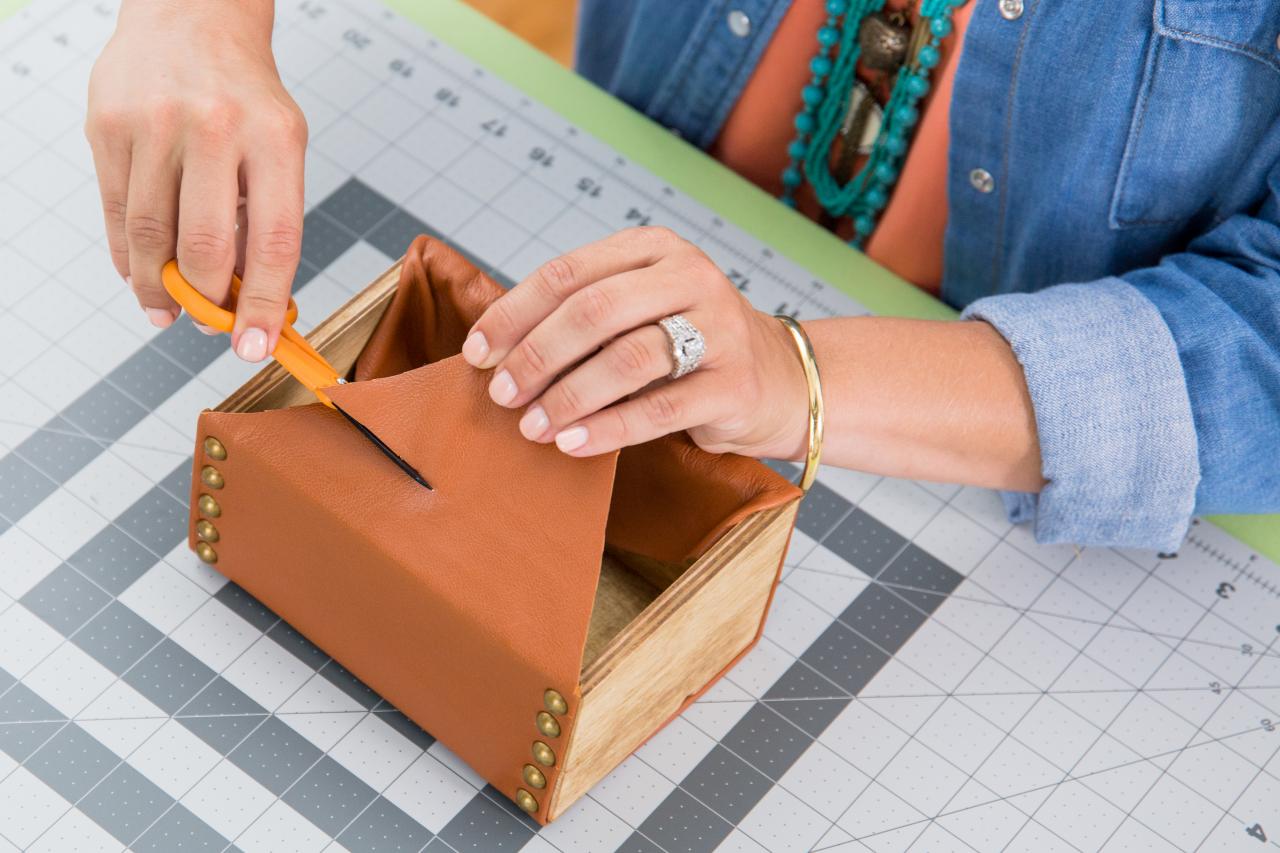
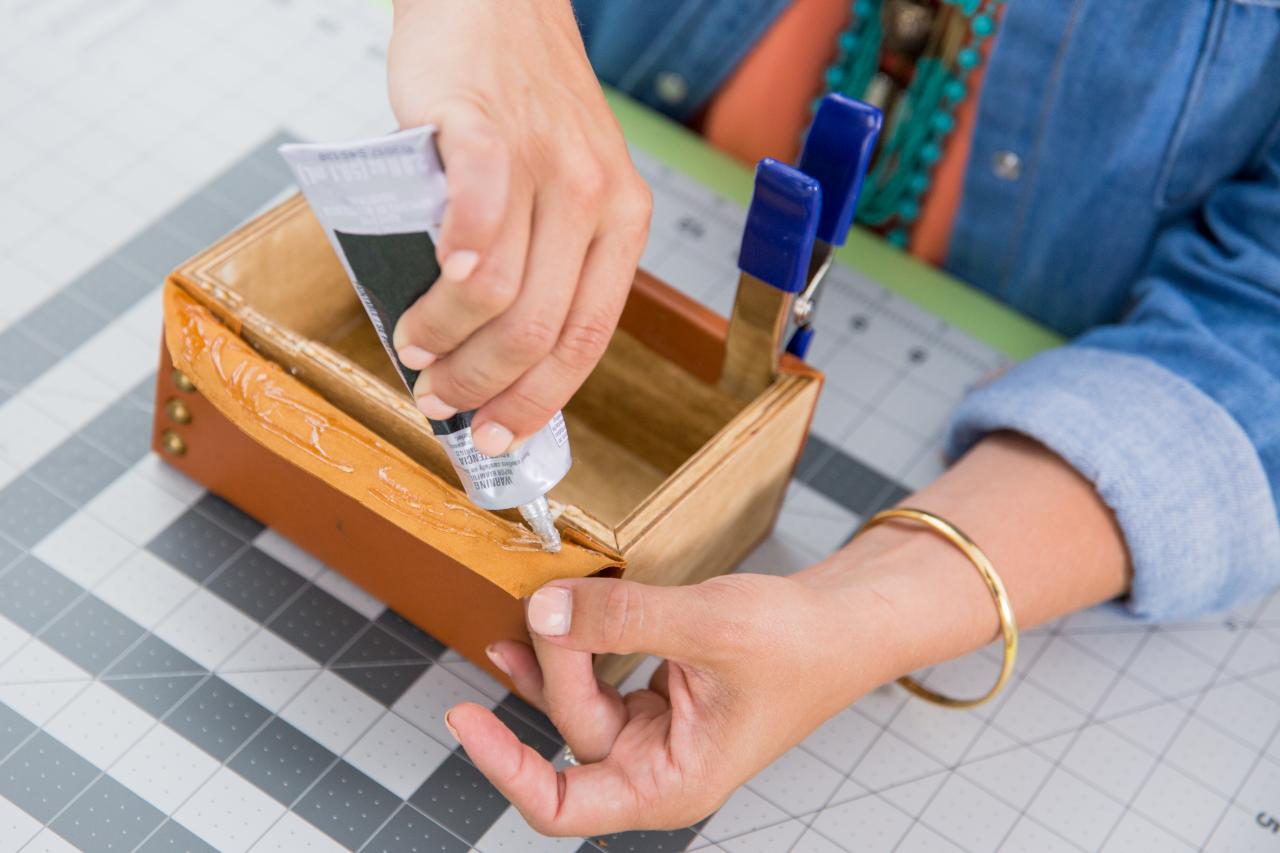
Measure and cut a strip of leather to the width of the box plus two inches. Fold over one inch on each side to achieve a finished look. Wrap the leather around the bottom, front and back and tuck the excess inside the box. Hold the leather to the box with a spring clamp and use a hammer and upholstery tacks to secure the leather to the front. Repeat on the back. Once finished, cut off any excess leather, leaving enough to fold around and glue to the inside of the box. Spring clamp the folds until dry. Repeat the same leather-and-tack process for the top of the box.
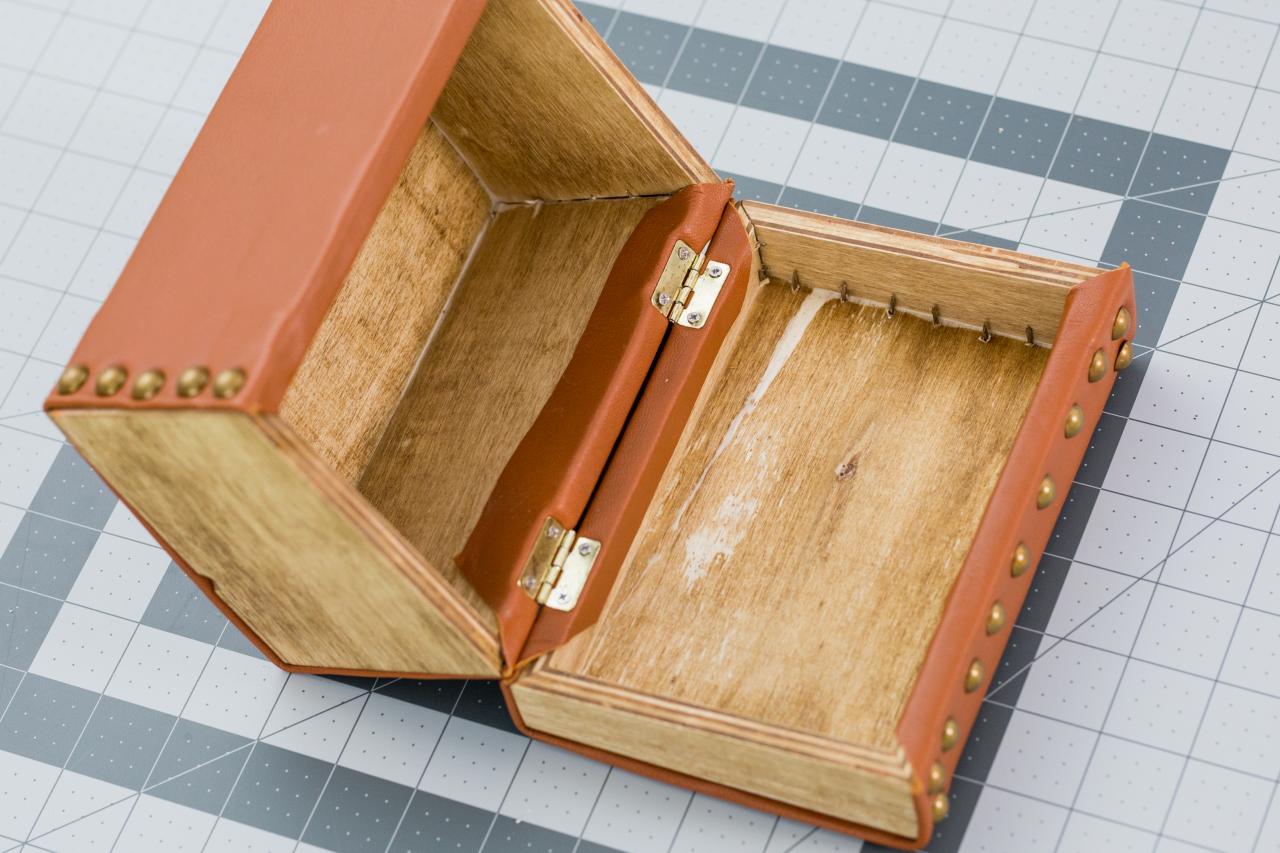
Attach Hinges & Finish


Once the entire box has been covered and the glue is completely dry, attach the hinges in their former spot, screwing through the leather. Fill the box with your favorite recipes and display beside a stand mixer or on open shelving for easy access.


