


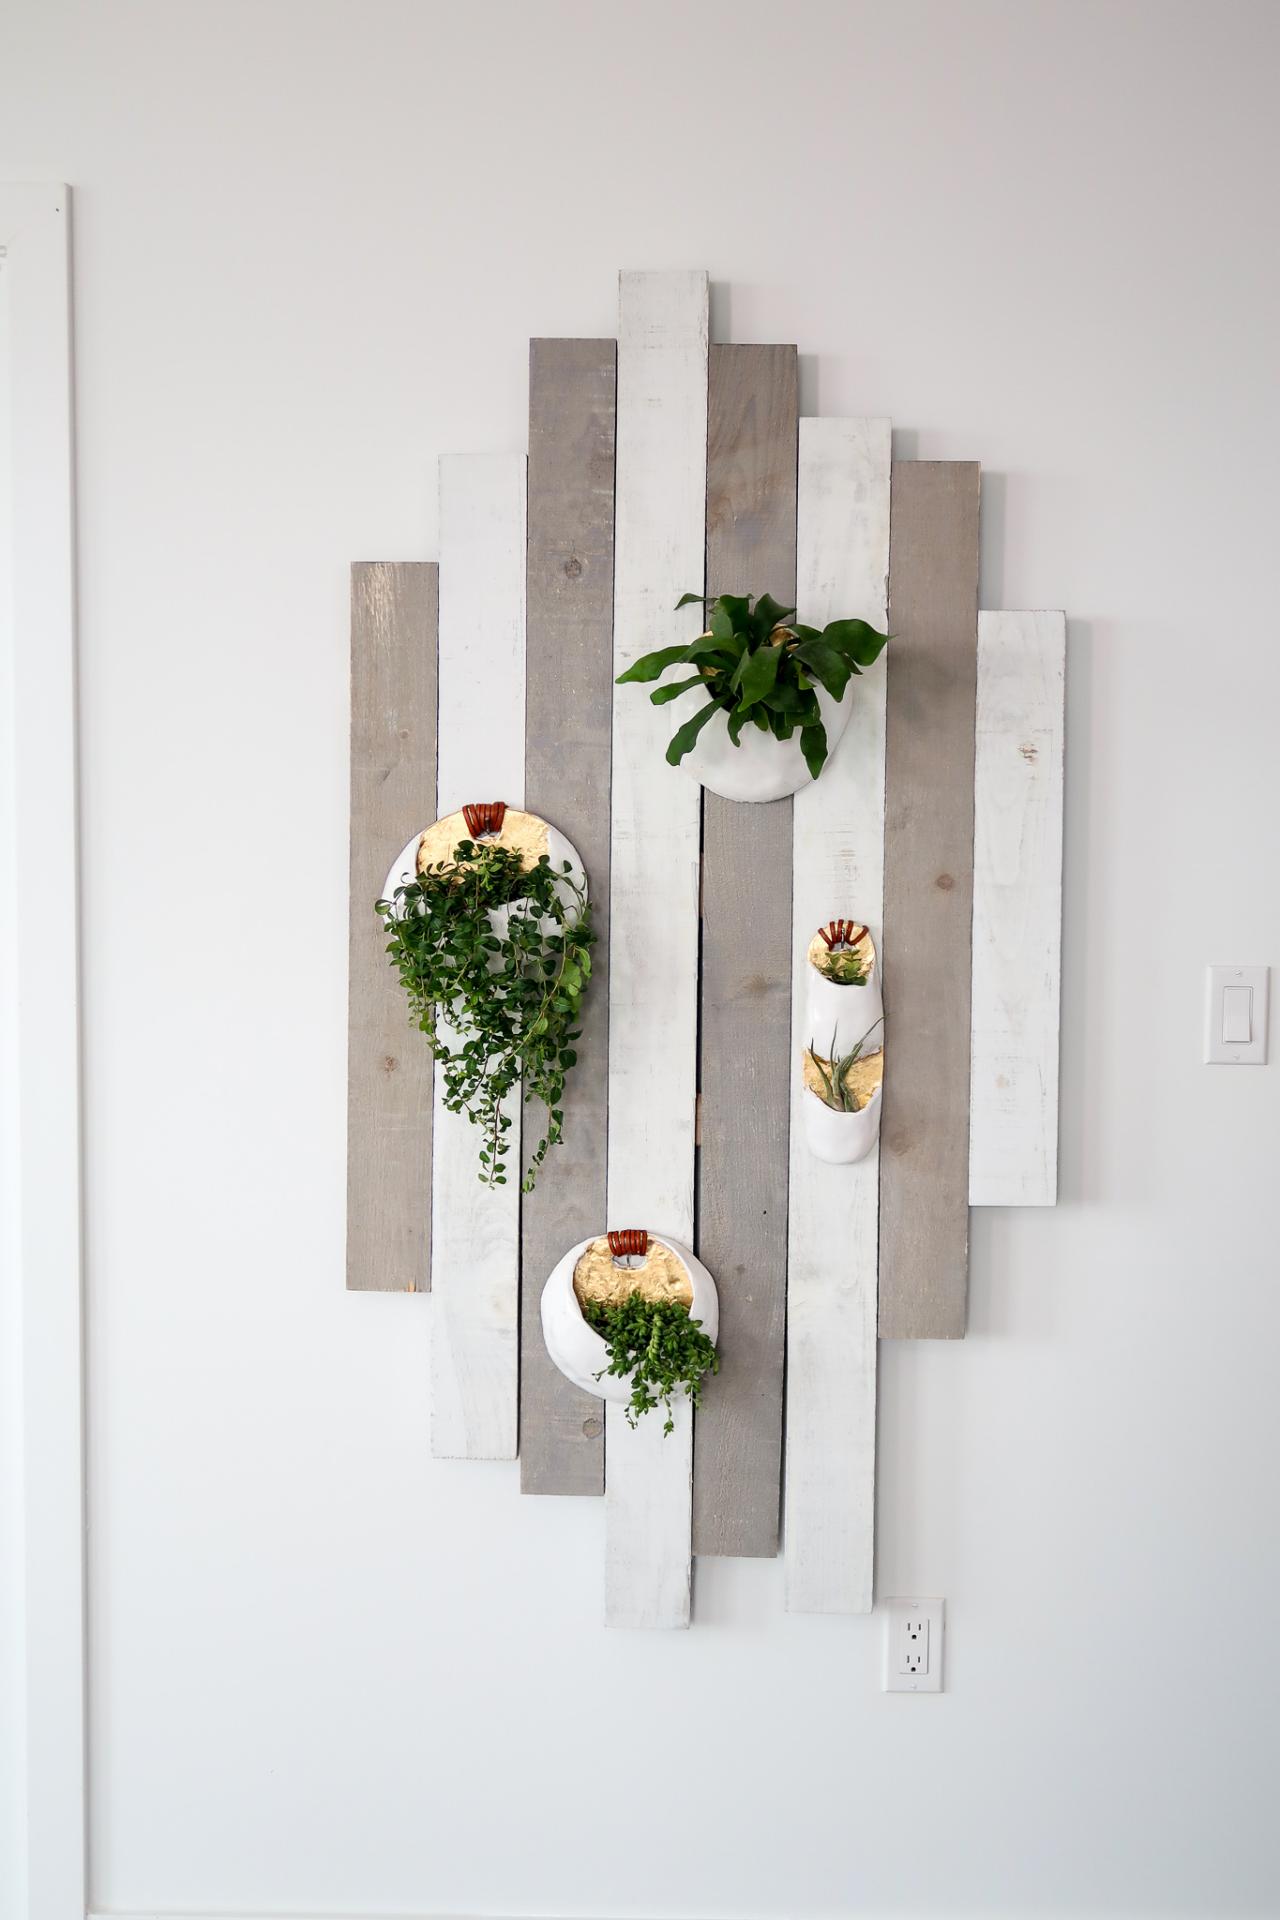
Rustic-Modern DIY Plant Wall
Bring a blank wall to life in a few simple steps.
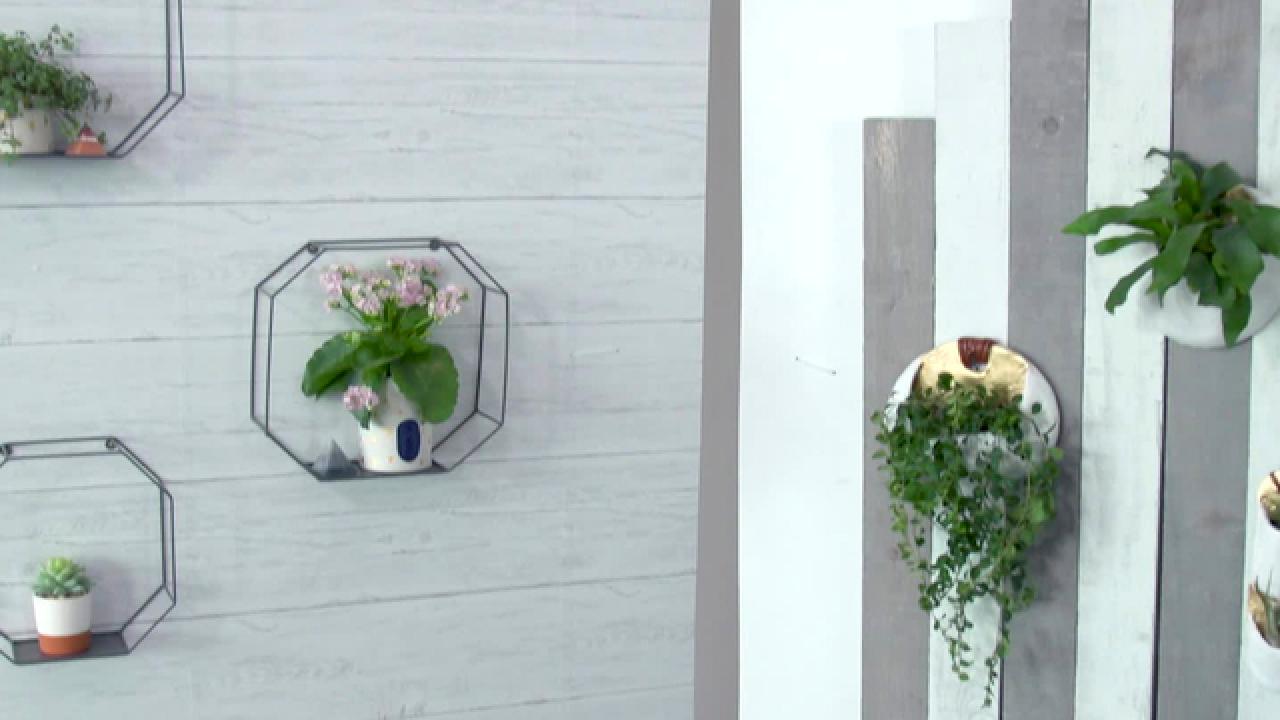

Vertical gardens are all the rage. Create your own in a few simple steps with this how-to. It can be used to bring a simple wall to life and add some color, or you can use it to sprout your favorite herbs and veggies. The possibilities are truly endless and definitely beautiful.
Materials Needed
- (3) 1x4 x 6’ whitewash barn wood boards
- (3) 1x4 x 6’ gray barn wood boards
- 1x4 x 8’ pine board
- (2) 30-50 pound picture hanging D-rings
- (22) #8 1-1/4” wood screws
- drill
- miter saw
- measuring tape
- 1” furniture pads
- (4) 2” finishing nails
- hammer
- level
- drywall anchors
Source Barn Wood
Begin by sourcing the boards you’ll be using. The boards used for this project were bought pre-color-washed from a local hardware store. If your local hardware store doesn’t carry barn wood like this, you can buy online or simply purchase 1x4 rough pine boards and cover them with a white and gray wash on the surface.
Cut Boards
Lay barn wood boards out on a flat surface. Use a miter saw to create the various lengths. There are no specific measurements but the goal is to stagger and cut the lengths to create a diamond shape.

RTR Media
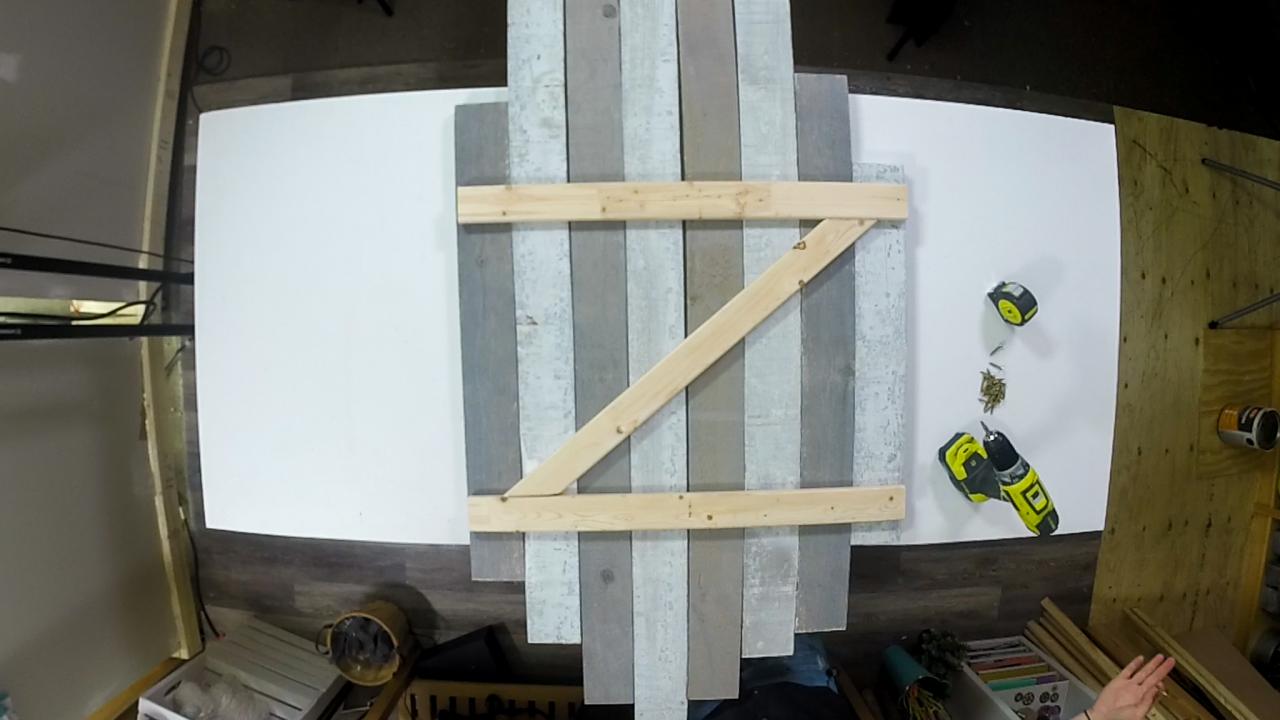
Measure and Cut “Z” Brace
Take the pine 1x4 board and lay it across the planks, marking it to the length of wood. Cut two identical pieces to create the support on the back and use the leftover wood to create the middle of the “Z” shape. Miter both ends of the center piece with a 45-degree angle. The resulting board shape will be a parallelogram.

RTR Media
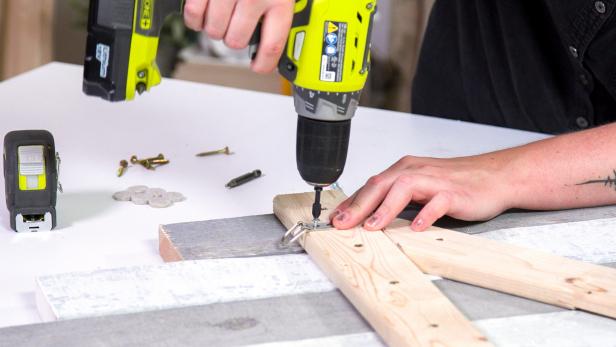
Attach Brace
Screw your “Z” brace onto the back of the barn wood panels using 1-1/4-inch wood screws. As you go, make sure every board has been attached and keep the barn board pieces as close together as possible. Test your brace before moving on. If you feel any unwanted movement, add a few more screws.

RTR Media
Finish and Install
Attach the D-ring hangers onto the top “Z” brace with one on each side. On the lower and middle brace, place furniture pads to protect the wall. Add 2-inch finishing nails to the front of your project for hanging the future planters. Hang the panel from the two picture hanger nails, being certain to measure that they are level before hanging. If possible, utilize the studs, otherwise heavy-duty drywall anchors should do the trick.
RTR Media
Clay Planters
Materials Needed
- pencil
- 3-4 air-dry clay bins
- leather cord
- gold gilding paper
- gilding adhesive
- clear water-based enamel paint
- spray paint, 12 Oz, gloss white
- podge glue
- white tissue paper
- scissors
- small dish sponge
- thick tracing paper
- razor knife
- pin tool
- wood sculpting kit
- sanding block
- nitrile gloves
- rolling pin
- crazy glue
- sponge brush
- paint brush
- parchment paper
Cut Paper Guides
Use tracing paper and a pencil to draw a circle. Next, cut out the shape. This will act as the base shape for the finished planter. Take your cut-out circle, place it under another sheet of tracing paper, and trace a half moon shape in the same size of your original circle. Cut this out. You now have the base and opening/front of your planter. Make sure to leave enough of an opening curve for a plant to fit in. Take the base and front pocket cut-out and create slightly smaller versions using the same technique. It needs to be about 1/2-inch smaller. Cut these two shapes out. Eventually, they will line the inside of your planter when the completed piece is drying to keep the sides from sticking together.
Roll Out Clay
On a canvas sheet, separate the bin of clay into two halves and roll them into a ball, trying to get rid of most of the lines and bubbles. Place a fist-sized ball on the middle of the canvas and begin to roll out and flatten using a roller or dowel until it is 1/4-inch thick.
Pro Tip: The canvas sheet helps to keep clay from sticking to the work surface. You can do this on parchment, too, but you will need to tape it down to keep it from sliding.
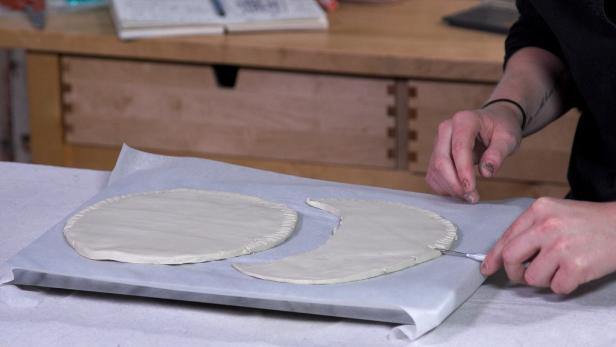
Cut Out Shapes
Lay the cut-out base pattern (the larger stencil) onto the flattened clay. Cut out the shape using a razor knife. Repeat with the front pocket piece. Do not discard any of the leftover clay as it can be used later. Lay the pocket-front paper pattern on your clay base and, using the pin tool, mark the point on the base where the pattern corners end. Next, use your pin tool to score lines all the way around the rim of the base where the front pocket will be joining the base. With your smaller half-moon clay piece, use the pin tool to score lines along the edge of that rim. No need to mark an end as it will touch all the way around. Now you are ready to attach the two pieces together.
RTR Media
Make Slip
Take the leftover clay and roll it so that it is about 1/4-inch thick. If it breaks apart here or there, don't worry. You can always rework it. Make the coil long enough to go around the bottom curve of your front pattern piece and be sure to taper the ends a bit. Take a few pinches worth of the leftover coil and put them into a small bowl with water to make slip.

RTR Media
Pro Tip: When joining two pieces of clay together, score or roughen both surfaces, then apply slip before pressing firmly together. To make slip, mix together clay and water until it's the consistency of heavy cream.
Attach Coil With Slip
Using a dish sponge, spread a thin amount of slip onto the scored edges. Avoid getting any water past the scored edge so the rest stays dry. Lay the coil with the tapered ends onto the slipped rim. Using the pin tool, score down the side to help join the coil to the base, then press your pin all around the coil. Now is a good time to cut out the “handle” or hanging hole. Make sure there is at least 1-1/2 inches from the edge for support.

RTR Media
Create Paper Form
Add some slip on top of the coil and also on the scored part of the front pocket piece of clay. Place your inside trace paper pattern pieces back in place. Roll a sheet of tissue into a loose ball, flattened and shaped to your planter’s dimensions. Play around till you get the depth (should be no more than 3-4 inches max) and shape that you want your final planter to be. Lay it on the base. This helps to create the bulbus planter shape.
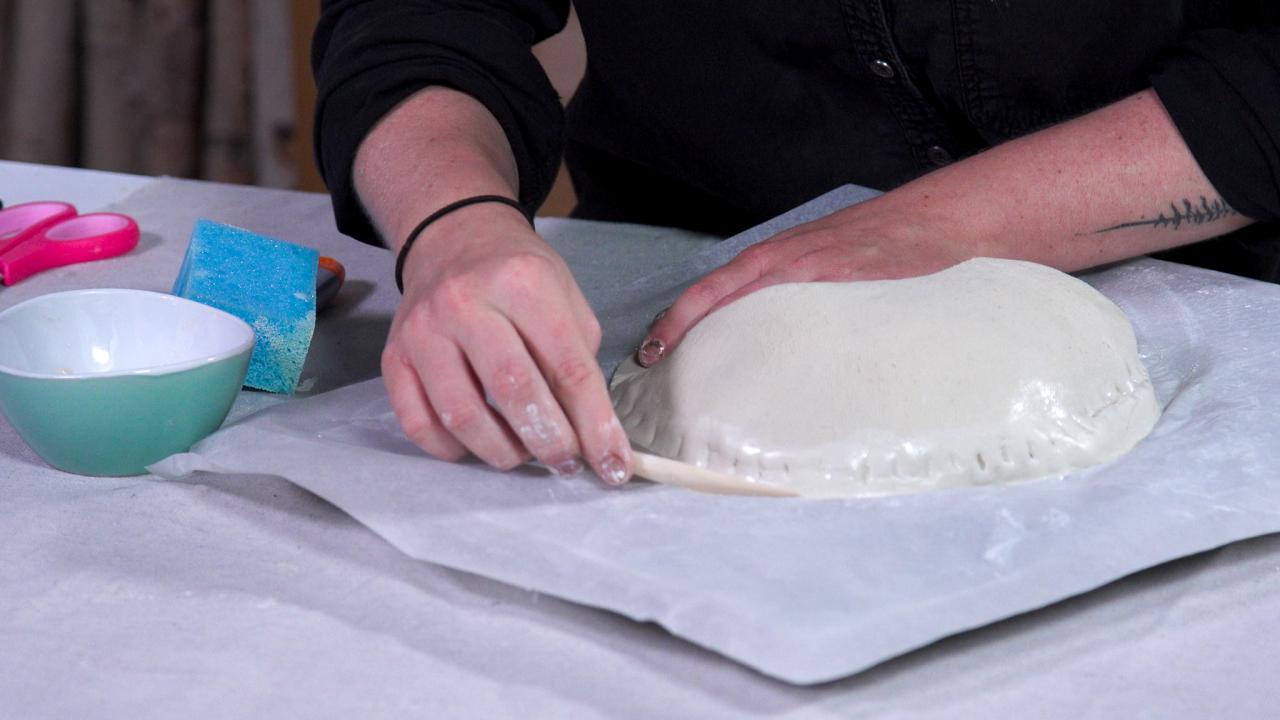
Attach Front Pocket
Take the front pocket piece and lay it score-side down onto the base and tissue paper (Image 1). Line up the edges of the scores and make sure the ends match up (Image 2). If you have too much tissue paper, remove some and flatten it more as needed. You have time to play here, so do it right and avoid tearing your clay. Sponge a bit more water on if the slip is starting to dry, but it should be okay for fifteen minutes or so. Lightly pinch and push your rim together.

RTR Media

RTR Media
Sculpt Clay
Use your smoothing tools, fingers and razor knife to trim the edges, take off the excess and smooth the surface of the front of the pocket. After the clay has dried for an hour or so, you can put your finishing touches on the pocket shape and smooth it all out one last time. Give your clay approximately three to four days of drying time so it can fully harden.
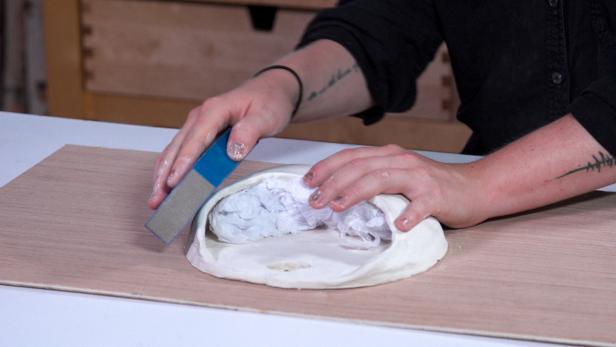
Sand and Seal
Once dry, smooth your pocket with a fine-grit sandpaper and the sanding block. Keep the tissue paper in and be very careful not to press. Use a soft brush to blow away dust. Seal your planter with craft glue and let dry for about 2 hours.
RTR Media
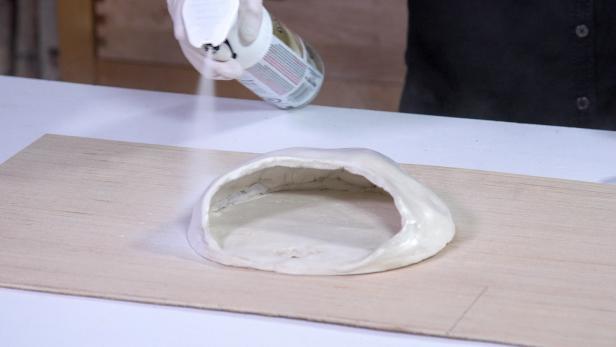
Paint and Finish Planter
Choose a color and spray paint your project (Image 1). Add the gold leaf gilding paper to the back/interior opening area of the planter using special gilding adhesive and a paintbrush (Image 2). Let it dry. Use a clear acrylic spray varnish to seal your paint and gilding since you will be watering your plants. Be sure to follow all manufacturer’s instructions on dry time so your project stands the test of time.
RTR Media

RTR Media
Attach Leather Cord
Wrap the handle of the planter with leather cord and secure with super glue. This is not only a beautiful finishing touch, but it also aids in the hanging process for a level planter.

RTR Media
Add Plants and Enjoy
Line the inside of your clay planter with a freezer bag. Add some plastic stones to the bottom and fill with dirt and your plant. Carefully hang your planters on the previously inserted nails on the panel and enjoy your wall of greenery.

RTR Media


