


Space Saver: DIY Folding Kitchen Island
Exchange some elbow grease for a huge space upgrade for your tiny kitchen.


Whether you’re renting an older house or are living in a small downtown apartment, you probably know the harsh reality that is a tiny kitchen. In a tiny kitchen, your prep space is also your serving space and most likely your dining space as well. Maximize your tiny space with a kitchen island that transforms into a dining table with the magic of folding brackets.
Materials Needed
- pine shelving
- table saw
- thrifted kitchen island
- drill + bit
- orbital sander
- 120- and 220-grit sandpaper
- tack cloth
- 5/8” wood screws
- (4) folding shelf brackets
- wood glue
- pre-stain wood conditioner
- wood stain
- staining rags
- rubber gloves
- water-based wood finish
- synthetic brush
- (2) 24" clamps
Prep Island
Remove the tabletop from your thrifted kitchen island by unscrewing the hardware underneath. If you are able to keep the original top and just add sides, that is completely up to you. We chose to replace the top as well as add sides in order to have one cohesive look in the end. Make sure to save all the hardware and screws to use on the new top.

RTR Media
Cut Top
Cut your pine shelving to fit your specific island. The top should be the dimensions of your island plus 1 inch on all sides for a slight overhang. The sides will be the same length as your top, and the width will be determined by preference but limited to what your brackets can handle. If you don’t have a table saw, take all your measurements to the hardware store, and they will cut the lumber for you. Remember: Measure twice and cut once. Pro Tip: Pine is a great option when working within a budget. However, finding a pine board that is wide enough for this DIY is very difficult, so we chose pine shop shelving slabs that come pre-sanded and glued. If your budget allows, a butcher block top would be a great option for this project.

RTR Media
Glue Top
If you are using smaller pieces of lumber, you can create your own top with a little bit of glue and some clamps. Be sure to sand both edges of the boards where you will apply the glue. Once sanded, evenly coat both sides of the joint with wood glue (Image 1) and firmly clamp both pieces together (Image 2). You’ll get a bit of squeeze out from the glue, but simply wipe it away with a damp cloth and allow it to dry per the manufacturer’s instructions (Image 3).

RTR Media

RTR Media

RTR Media
Fill Voids and Sand
Now that the glue has dried, use wood filler to fill in any voids (Image 1). Once dry, sand away any excess glue and wood filler with 120-grit sandpaper. Follow up by sanding all surfaces with 220-grit sandpaper (Image 2). Remove all dust with a tack cloth.

RTR Media
RTR Media
Apply Stain
Because pine is a soft wood and is prone to uneven, blotchy staining, the surface should be prepped with a pre-stain wood conditioner. Once the wood conditioner has fully dried, it is time to apply the stain. Pick a stain color that will accent your space well and also work well with the existing color of the island. Apply the stain according to the manufacturer’s instructions.
Apply Finish
Once the stain has dried, apply a protective water-based gloss finish to the board using a synthetic brush. Let dry and lightly sand with 220-grit sandpaper. Remove all dust and apply a second coat. The finishing method may be adjusted depending on the instructions on the wood finish you purchase.
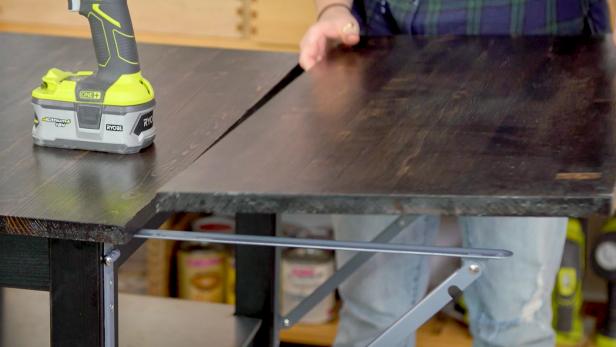
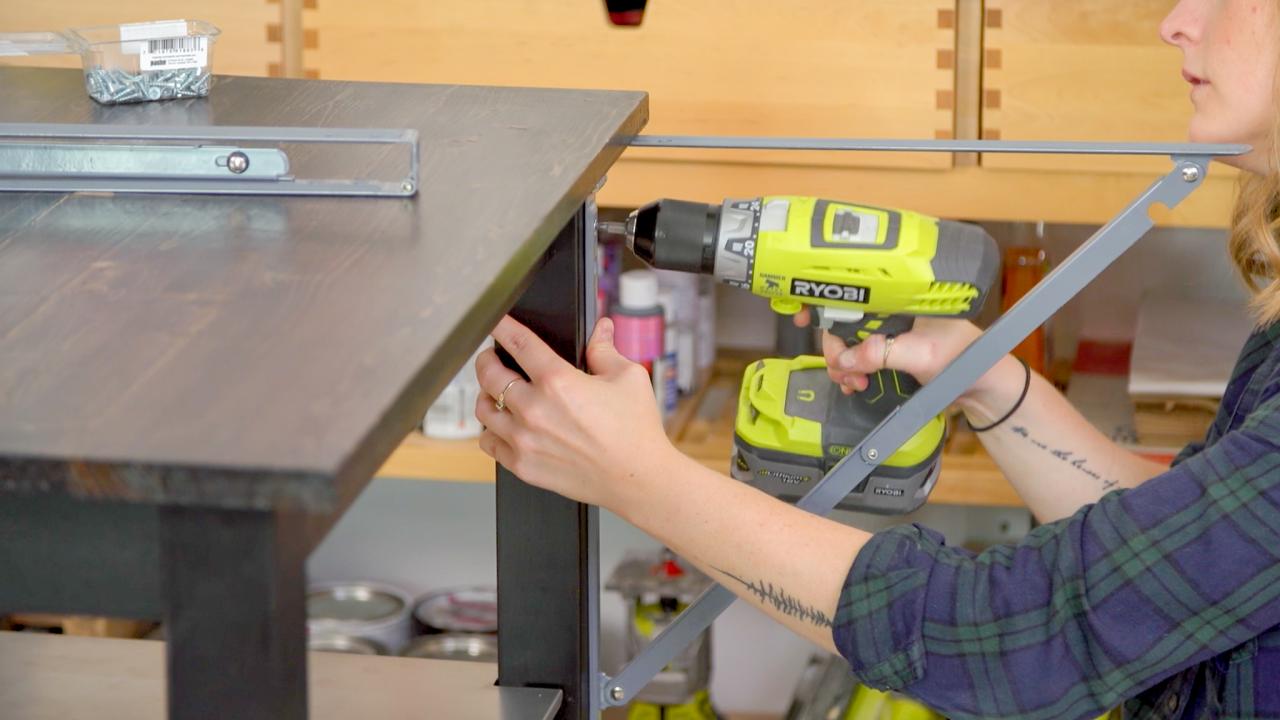
Assemble Top
Take your finished 21-inch wood top and fasten it onto your kitchen island. Use the hardware that you saved from the original top and leave a 1-inch overhang on each side (Image 1). Attach the four folding brackets to your four island legs (Image 2). With the brackets fully extended, align the side pieces to sit flush with the center piece (Image 3). Attach sides to brackets using 5/8-inch wood screws. Just like that, you have your very own Murphy island.

RTR Media

RTR Media
RTR Media

RTR Media


