


3 DIY Santa Sacks to Do All of This Year's Heavy Lifting
Say “No! No! No!” to expensive store-bought bags and “Ho! Ho! Ho!” to reusable Santa sacks this Christmas!
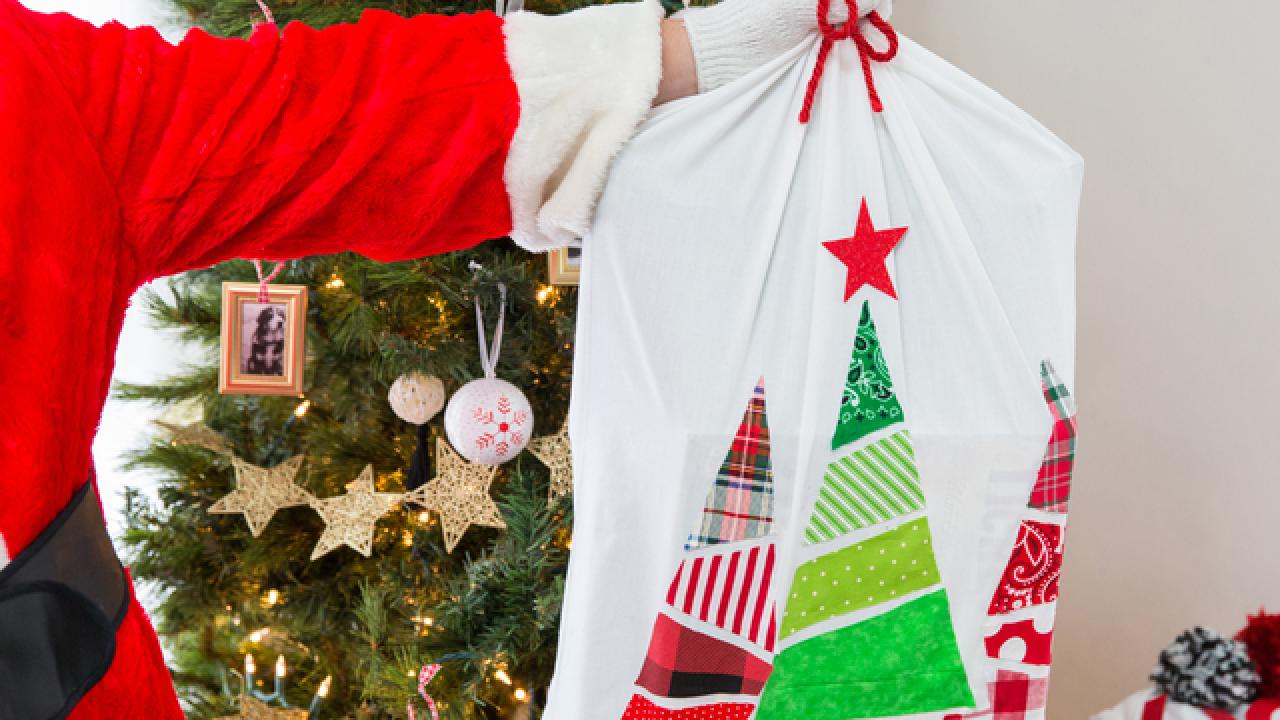

Millions of people exchange gifts during the Christmas season and getting all those awkwardly shaped boxes to their destinations is a lot of work. Why not take a hint from old St. Nick himself and enlist the help of a handy Santa sack! Sure, you could use trash bags, but all of that plastic adds up, and a personalized Santa sack is something you will use year after year to transport gifts, wrap oddly shaped items or clean up wrapping paper with.
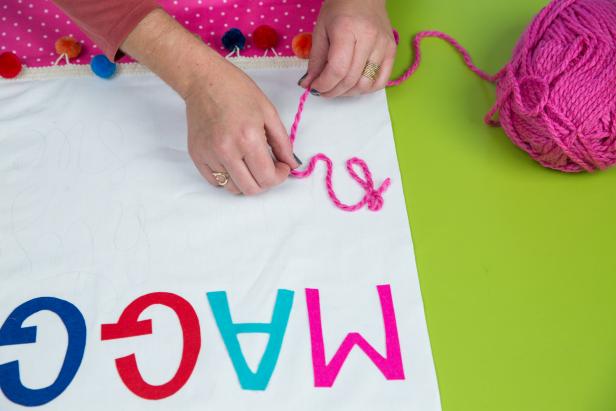
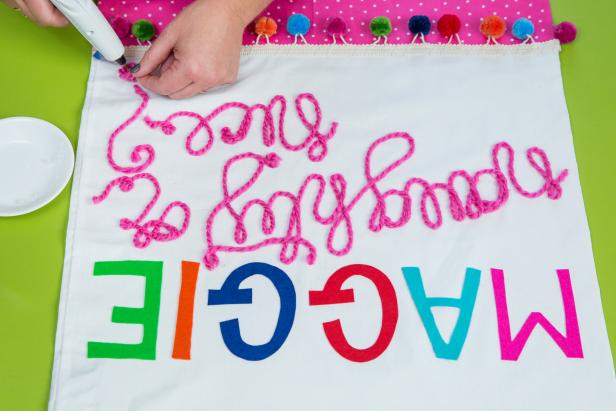
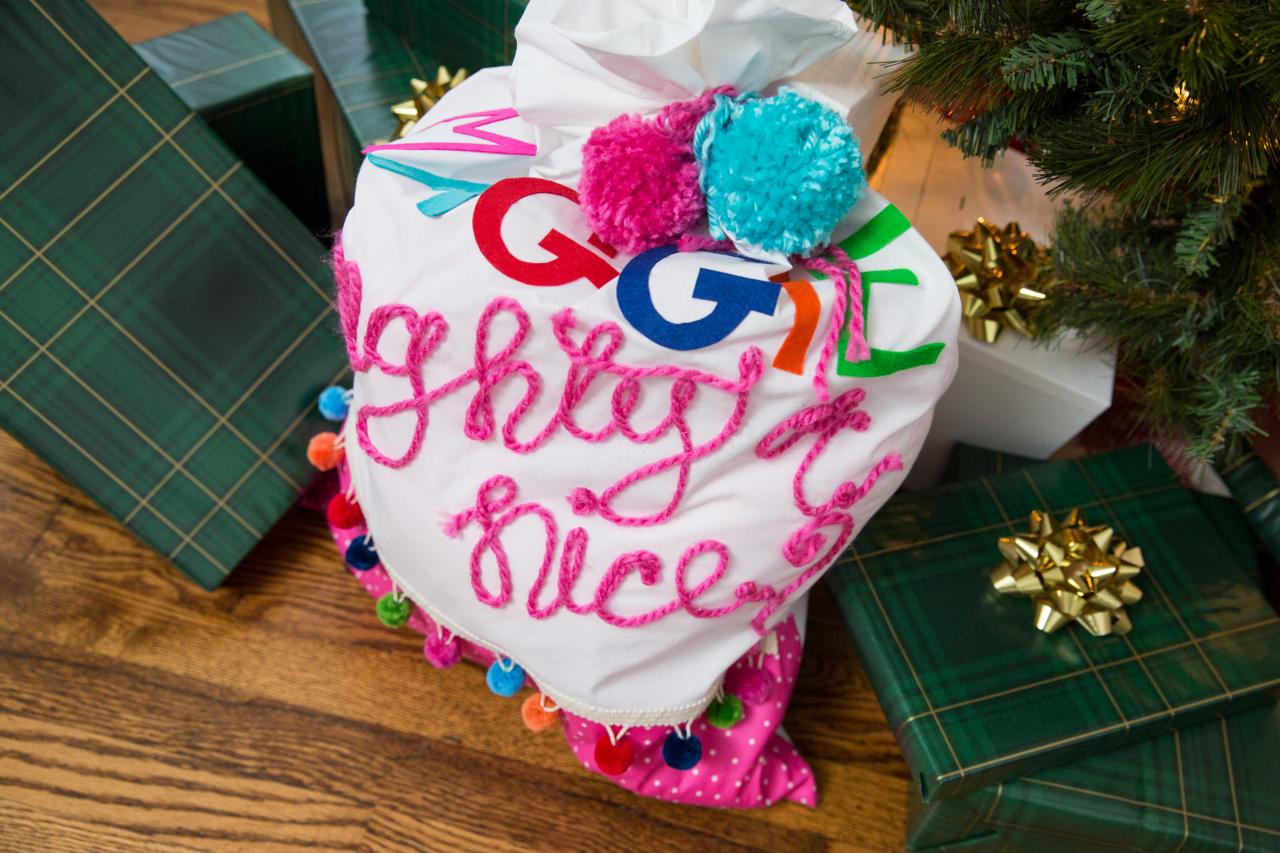
Naughty or Nice?

Jalynn Baker
To get started on our first design option, grab a white pillowcase and lay it out on a flat work surface. Take your choice of cotton fabric and cut an 8-inch-wide strip to the width of the pillowcase plus 2 inches. On the backside of the pillowcase, fold the cotton fabric around and secure using strips of iron-on adhesive. Once the bottom and sides are secured, flip the pillowcase back over and add a strip of adhesive across the top lip of the cotton fabric. Use a second strip of adhesive to secure an adorable strip of pompom trim.

Jalynn Baker

Jalynn Baker

Jalynn Baker
Use fun stencils to cut the letters of your name out of different colors of felt. Secure the letters across the top of the pillowcase using fabric glue. Between the name and the pom-pom trim, use hot glue and yarn to spell out the phrase “Naughty or Nice?” in cursive letters. This may seem challenging, but all you have to do is spell out the words a couple letters at a time using the hot glue, and then place the yarn on top of the glue to complete your masterpiece.

Jalynn Baker
Jalynn Baker
Jalynn Baker
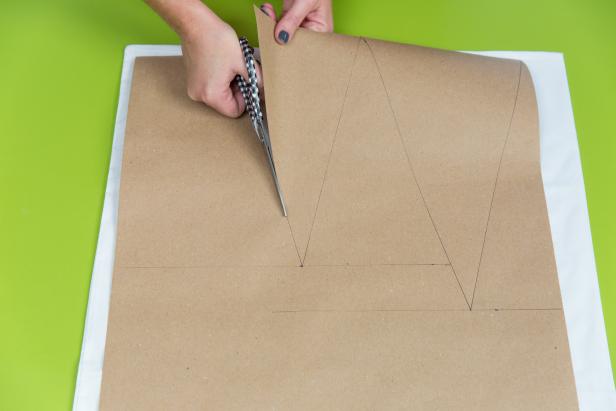
Patchwork Christmas Tree

Jalynn Baker
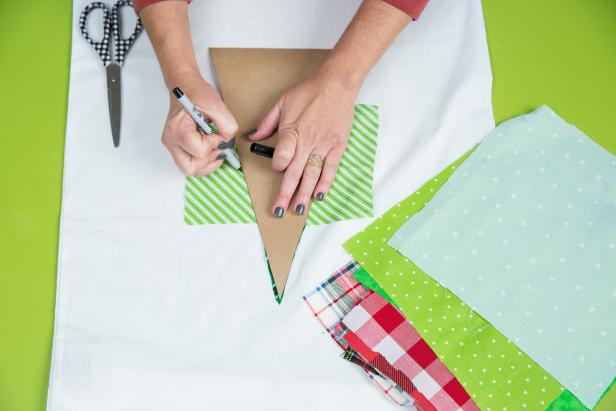
If you’re a fan of all things geometric, this may be the design for you. Start by rolling out a strip of butcher paper and using a straight edge to draw three triangles. To do this, trace a straight line across the paper about a foot above the bottom. Using that as your triangle tip, trace two slanted sides downward toward the bottom of the paper. Repeat this method, but slide your straight line down to form a smaller triangle. Once your second triangle has been drawn, your third will be found upside down between the first and second triangles. Use scissors to separate all of the triangles.

Jalynn Baker
Jalynn Baker
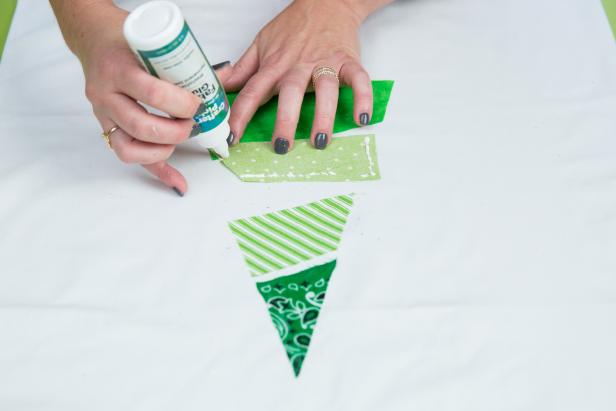
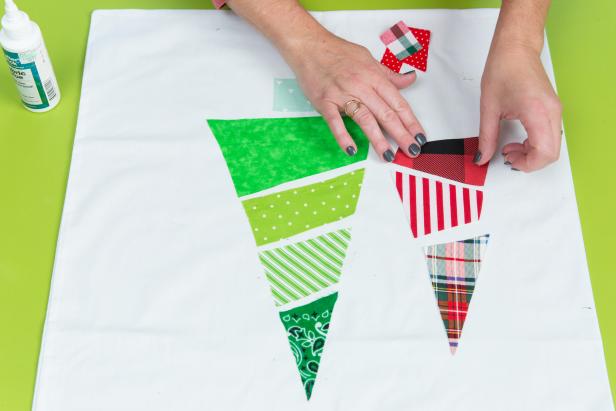
Use these butcher paper templates to cut out geometric trees using differently patterned fabric. The easiest way to do this is to choose a few different complementary fabrics for each tree and start at the top of the tree. Use a pen to trace the shape of the tree onto your fabric and cut. This is not an exact science, so just adjust until your pieces line up and look how you want them to. To finish the look, secure the fabric pieces to the pillowcase using fabric glue and, if you’re feeling up to it, you can even glue a fabric star on top of your center tree.

Jalynn Baker
Jalynn Baker
Jalynn Baker
Jalynn Baker
HO! HO! HO!

Jalynn Baker
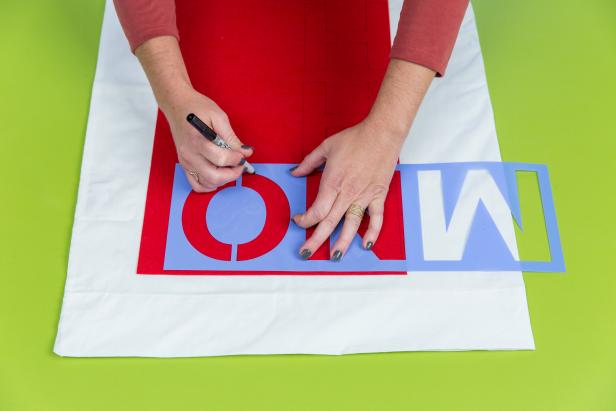
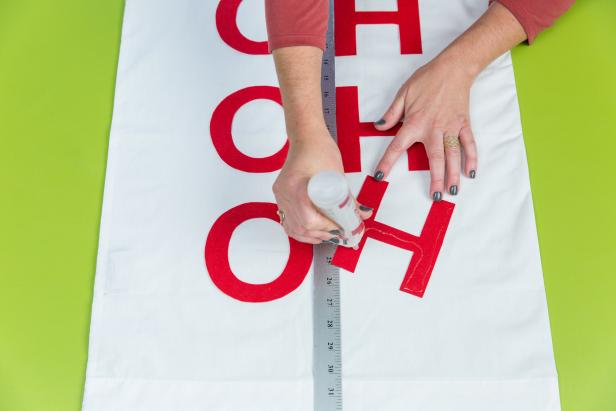
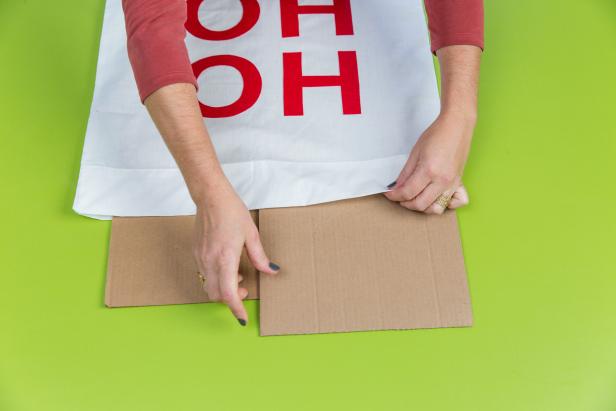
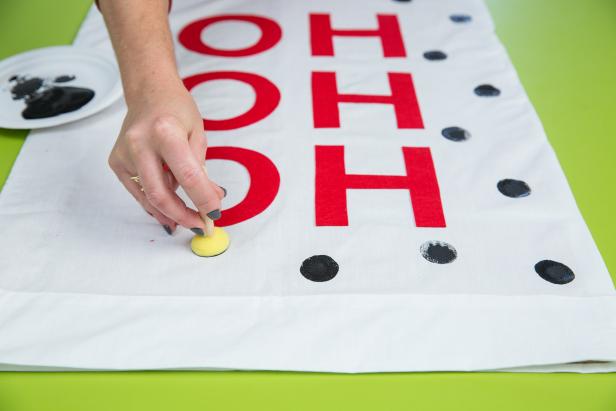
If you’re into something bold, but also simple, this is the perfect option for you. Use big, bold stencils to trace “HO HO HO” on a piece of red felt and cut out using scissors. Line the letters up vertically on the pillowcase and attach using fabric glue. Once dry, slide a piece of cardboard inside of the pillowcase to prevent bleed and use a round paint dauber to put black acrylic craft paint polka dots all around the felt words.
Jalynn Baker

Jalynn Baker
Jalynn Baker
Jalynn Baker
Jalynn Baker


