
.-Battle-on-the-Beach-courtesy-of-HGTV.-.jpg.rend.hgtvcom.196.196.suffix/1714761529029.jpeg)


Chic, Customizable Dorm Storage Solutions
Dress up a dorm room with these easy to make storage solutions. Changeable patterned liners make it simple to customize.


Materials Needed:
- (1) 4'x8' sheet of 1/2" MDF
- medium grit sandpaper
- wood glue
- clamps
- 1-1/4" finishing nails
- steel wool
- patterned self-adhesive shelf paper
- (4) 22" legs and attachment plates as necessary
- 2 D-rings and screws
- 2 dry wall anchors
Building the Table Frame

Cut MDF in the following pieces: table (2) 1/2”x10”x41”, (2) 1/2”x10”x17”, (2)1/2”x9”x17”, (1) 1/2”x17”x40”, shelf (2) 1/2”x9”x41”, (2) 1/2”x9”x10”, (2) 1/2”x8”x10”, (1) 1/2”x10”x40”. Tip: Get the MDF cut into one 9 inch strip, two 10 inch strips, and one 17 inch strip at the home improvement center to save time and make the process easier.
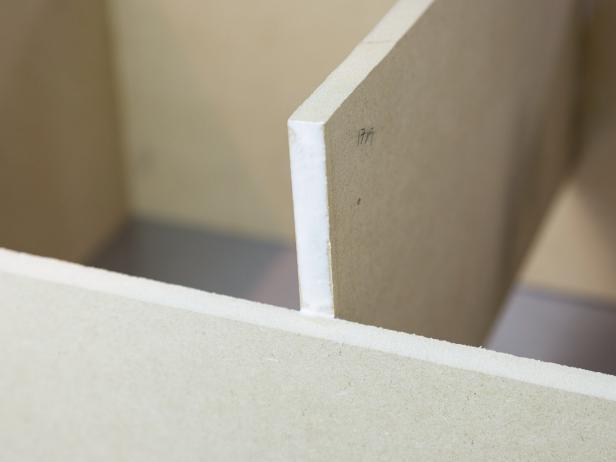

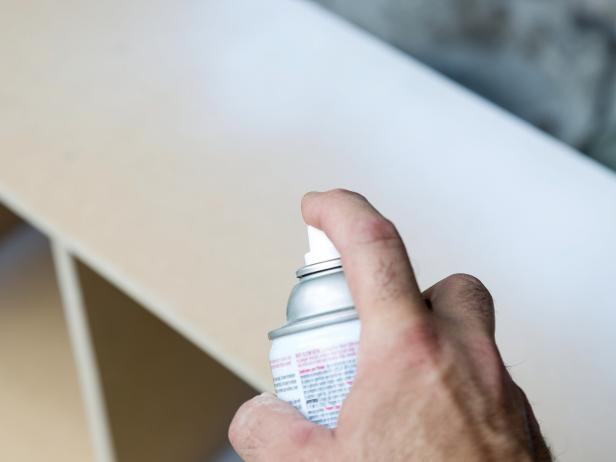
Stand the two 1/2”x10”x41” pieces on their long thin edge on a flat surface parallel to each other. Sandwich the two 1/2”x10”x17” pieces between them at the ends with the 17” edge against the surface to form a box. Apply wood glue to the edges of the 1/2”x10”x17” boards that will intersect. Use clamps to hold them in place flush with the ends of the 41” pieces. Wipe away any excess glue and use finishing nails through the outsides of the 41” pieces and into the edges of the 1/2”x10”x17” pieces. Allow glue to dry before proceeding. Mark a line on the inside of the 41” pieces 13 inches in from both inside edges of the ends. Add glue to the 9-inch edges of the 1/2”x9”x17” pieces. (Image 1) Insert the pieces on the side of the line that is away from the nearest end and flush with the bottom. Clamp in place and wipe away any excess glue with a damp cloth. Use finishing nails through the outside of the 41” piece and into the edges of the 1/2”x9”x17” pieces to secure in place. (Image 2) Allow glue to dry before proceeding. Sink nails slightly and fill with wood putty. Sand smooth and then paint the outside and front edges of the box as desired. (Image 3) Allow to dry completely before proceeding.
Building the Shelf Frame
Construct the shelf frame in the same manner as the table with the 1/2”x9”x10” pieces on the ends and the 1/2”x8”x10” pieces on the inside.
Finishing the Insides


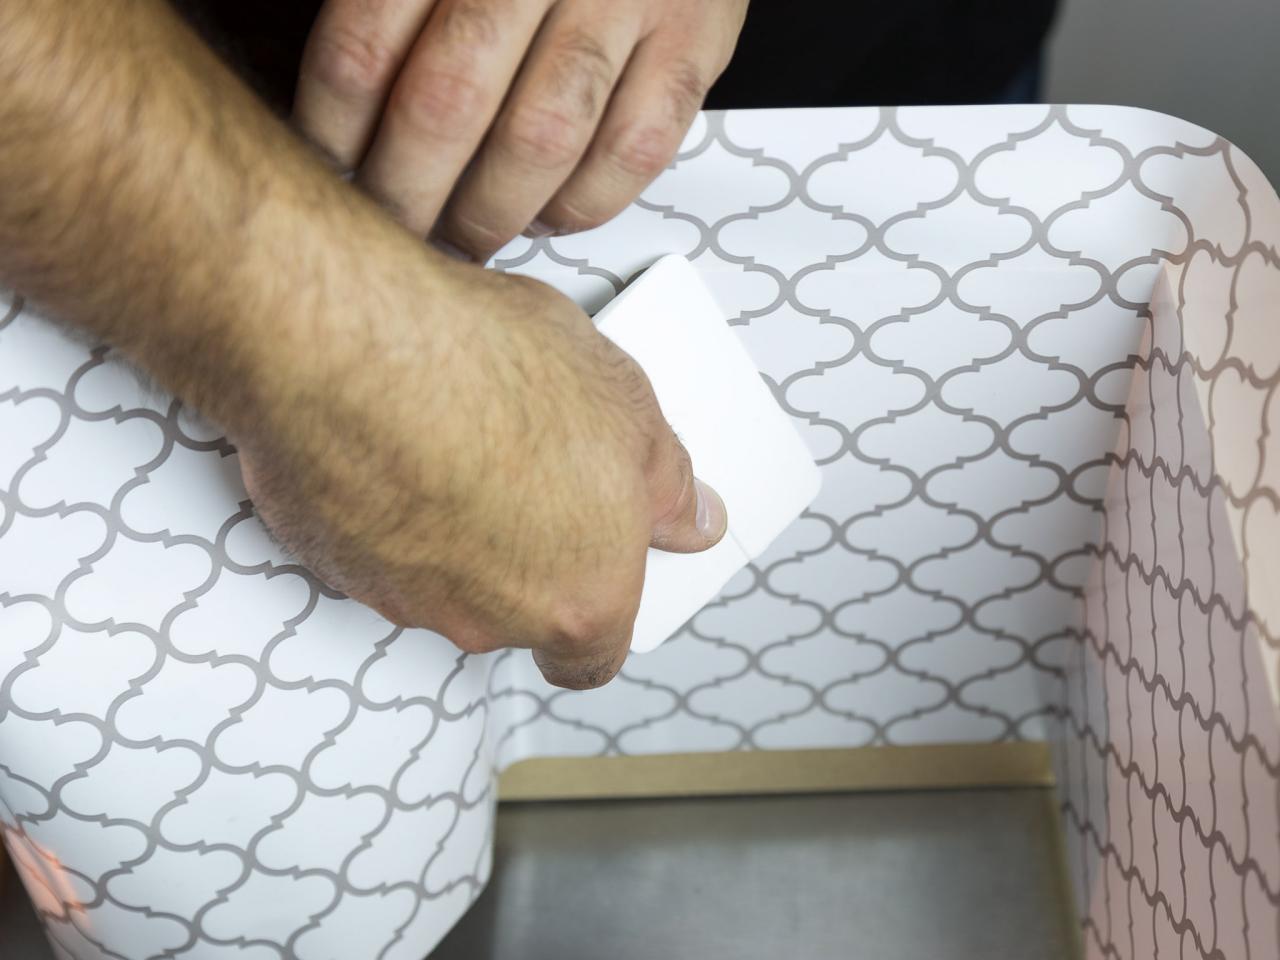
Apply self-adhesive shelf paper to the 1/2”x17”x40” piece and the 1/2”x10”x40” piece using a soft straight edge to work out any air bubbles as it is applied. (Image 1) Turn the pieces over and cut away any excess with a craft knife. (Image 2) Place each of these pieces in the back of the boxes and secure them in place with finishing nails through the outsides of the box and into the edges of the back pieces. (Image 3)
For the table cut three pieces of self-adhesive liner that are 10”x47” with the pattern running in the same direction. Starting with a 9-inch side of the box, apply the liner to the inside of the box flush to the bottom. (Image 4) It will extend beyond the the top edges. Use a soft straight edge to remove any air bubbles and press the liner firmly against the MDF and into the corners. Cut away excess liner with a craft knife.
Repeat the process for the hanging shelf, but the meaurement for the pieces of liner can be 9"x47".
Adding the Legs

Attach the mounting plates, if necessary, in the corners of the base of the storage table. Add the legs to the mounting plates or secure them with the attached mounting hardware.
Adding the Shelf Hardware

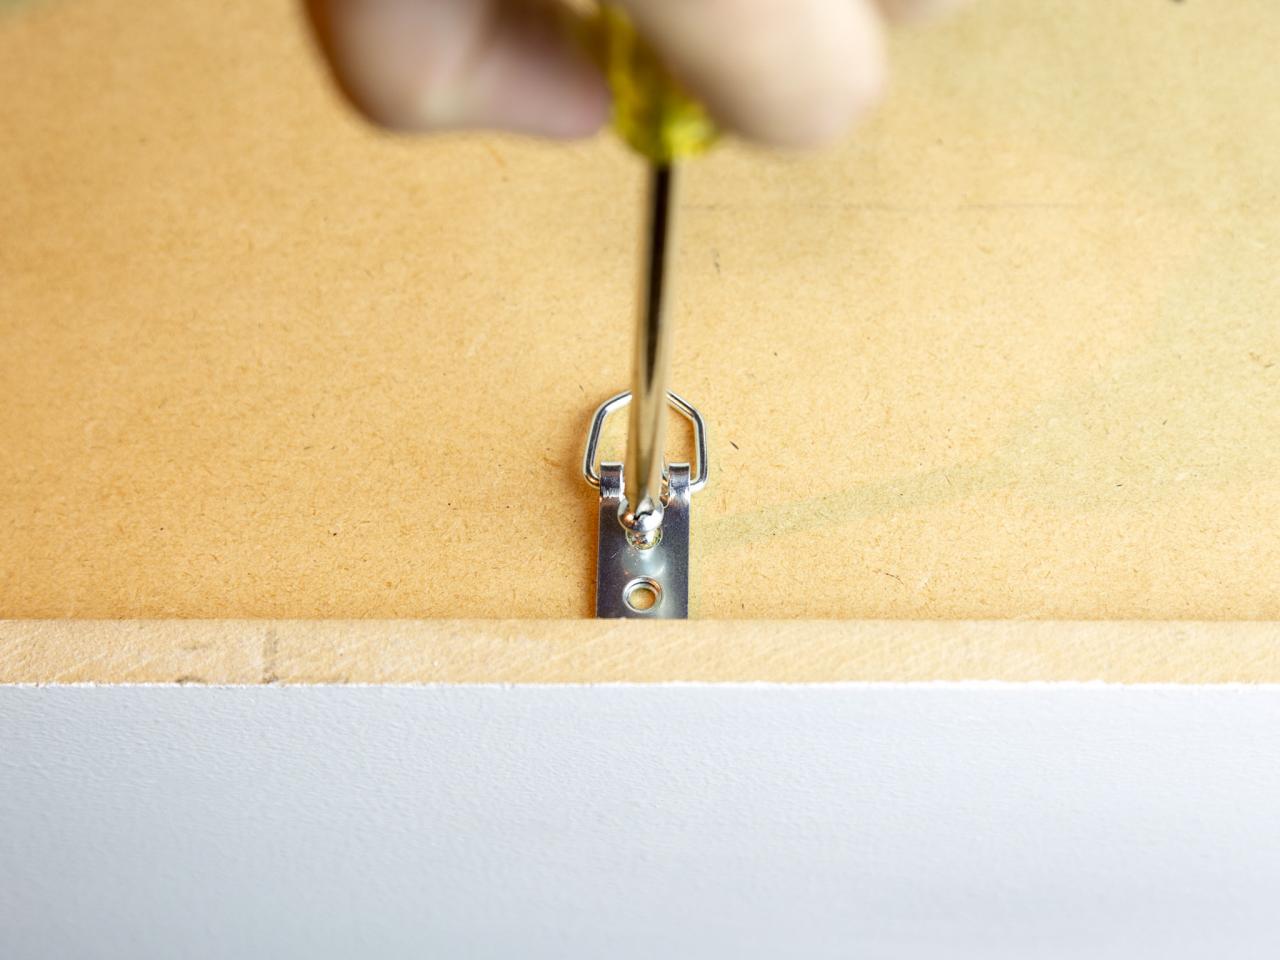
Screw the D-rings to the back of the hanging storage by placing the top of the mounting hardware to the top of the back of the storage and lined up with the two dividers. Use a level to screw anchors in the wall. Be sure to use anchors suitable for the amount of weight to be supported by the shelf and the contents. Add screws to the anchors leaving about 1/2" extended beyond the wall. Hang the D-rings over the screws.


