


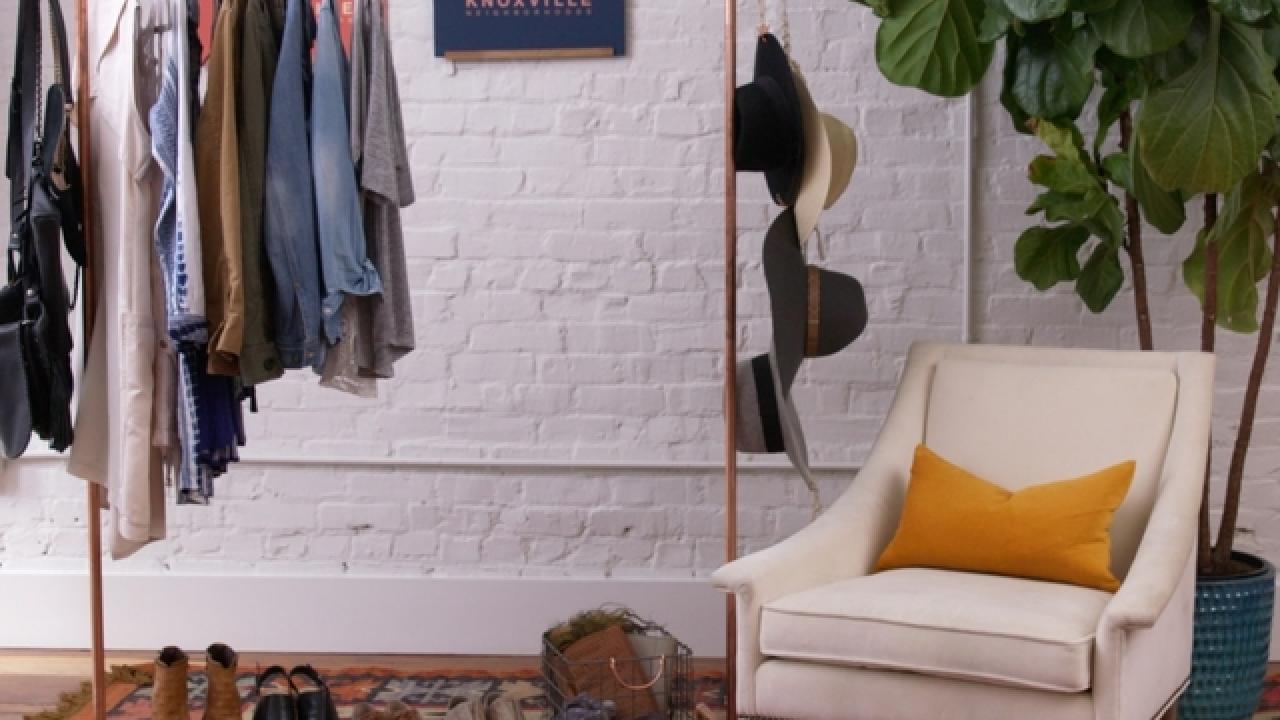
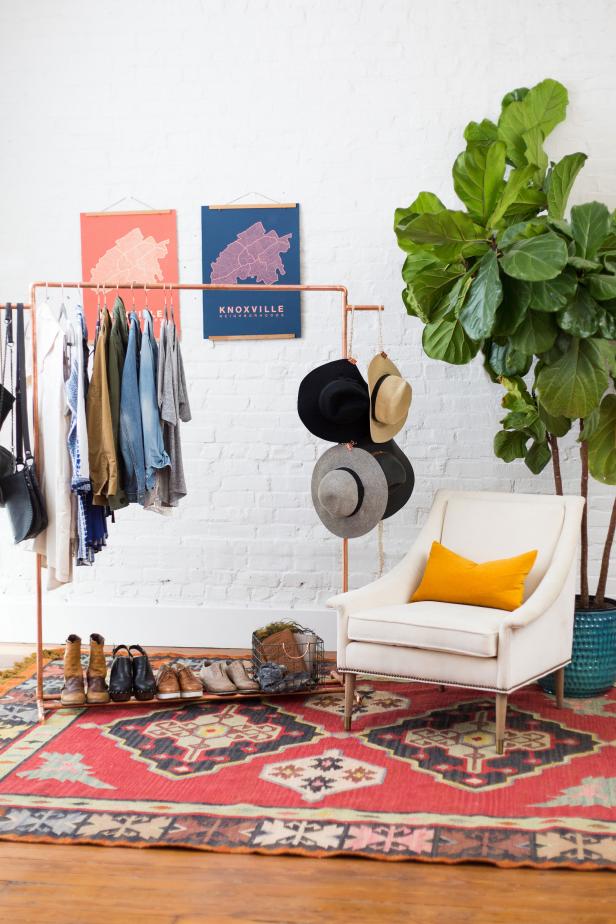
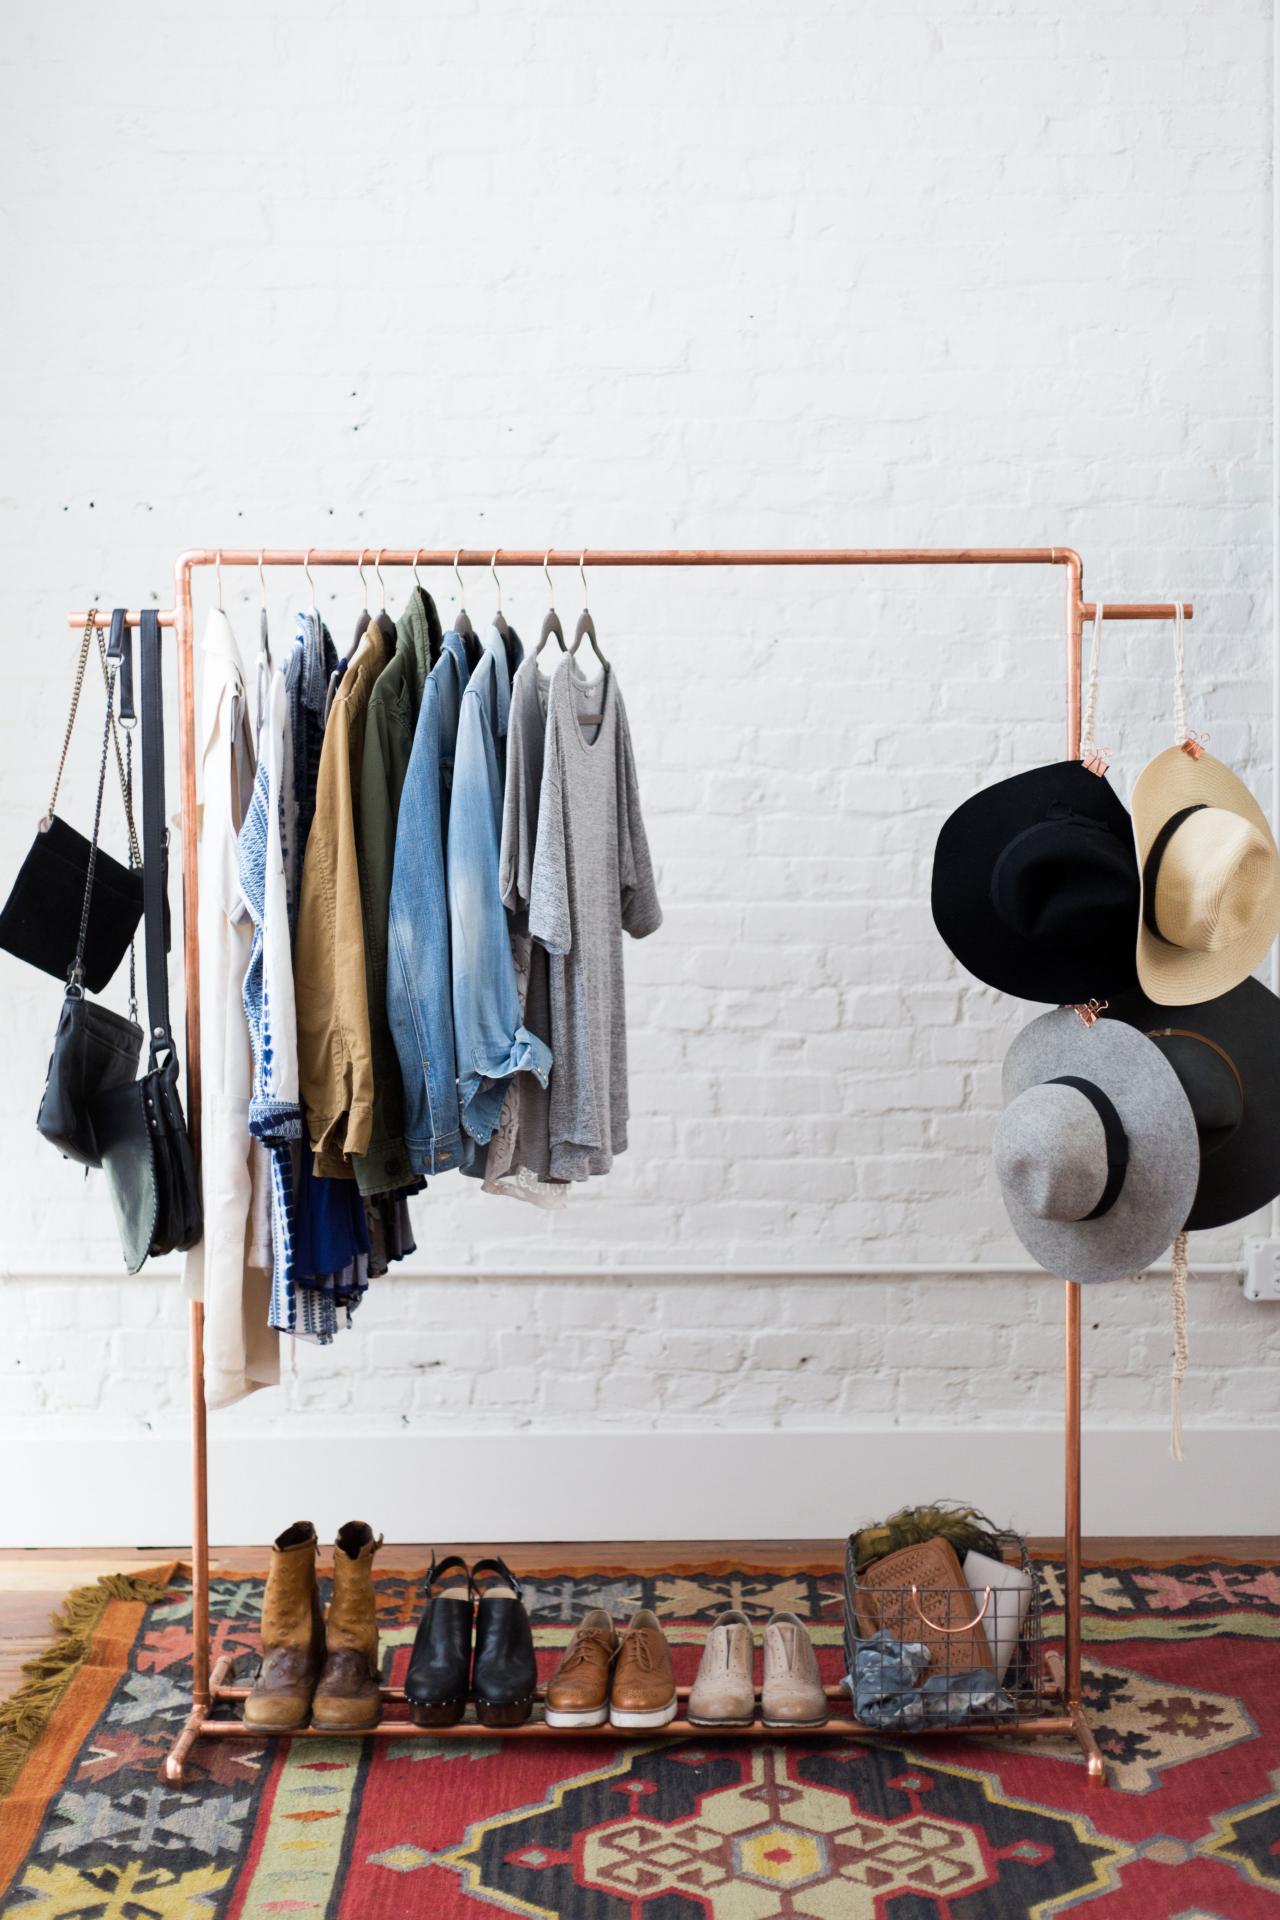
How to Make a Chic Copper Garment Rack
Short on closet space? Store your favorite clothes and accessories on this stylish DIY copper rack. It’s so pretty, you’ll want to give it a prominent spot in your bedroom.

Cassidy Garcia Photography

Watch How It's Made
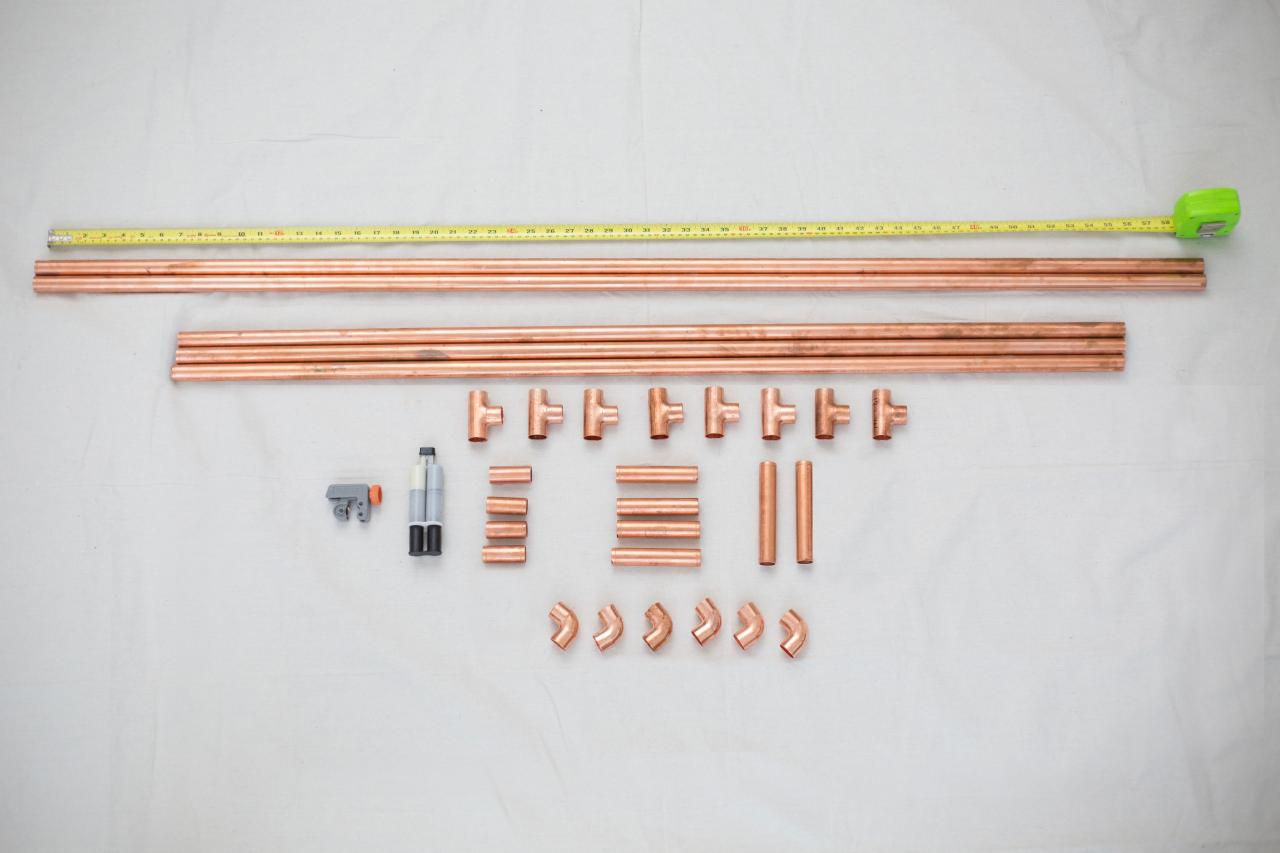
Materials Needed
- (2) 5’ long x 1” diameter copper pipes
- (1) 4’ long x 1” diameter copper pipes
- (2) 4’ long x 3/4" diameter copper pipes
- (4) 2” long x 1” diameter copper pipes
- (4) 4” long x 1” diameter copper pipes
- (2) 6” long x 1” diameter copper pipes
- (6) 1” 90-degree elbows
- (6) 1” x 3/4" tees
- (2) 1” x 1” tees
- pipe cutter
- measuring tape
- epoxy

Cassidy Garcia Photography
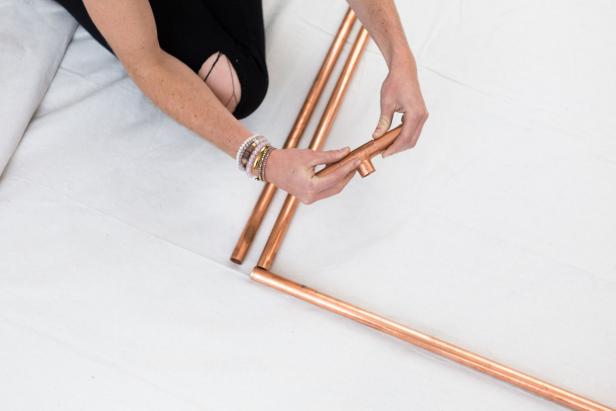
Cut Pipes to Size
Using a pipe cutter, cut the copper pipes to the measurements listed above.

Cassidy Garcia Photography
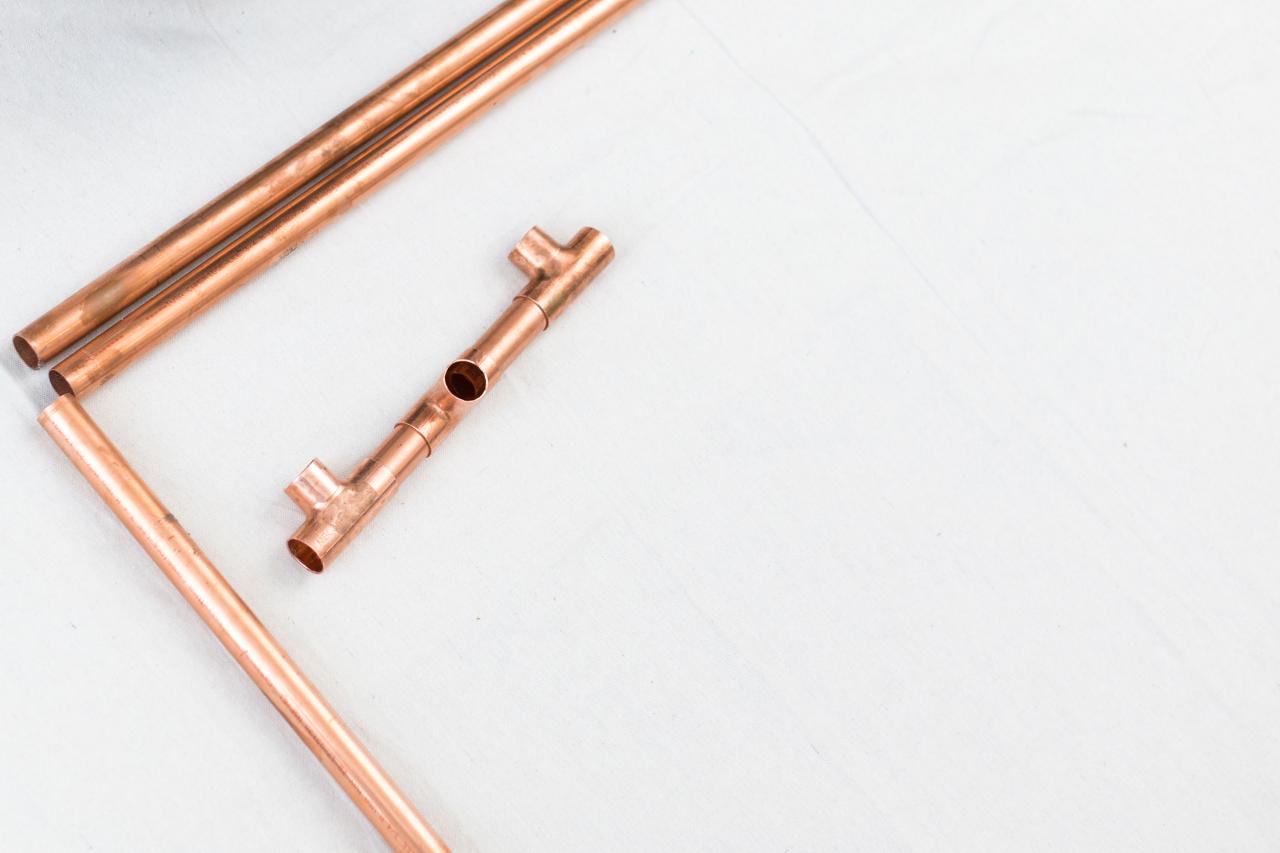
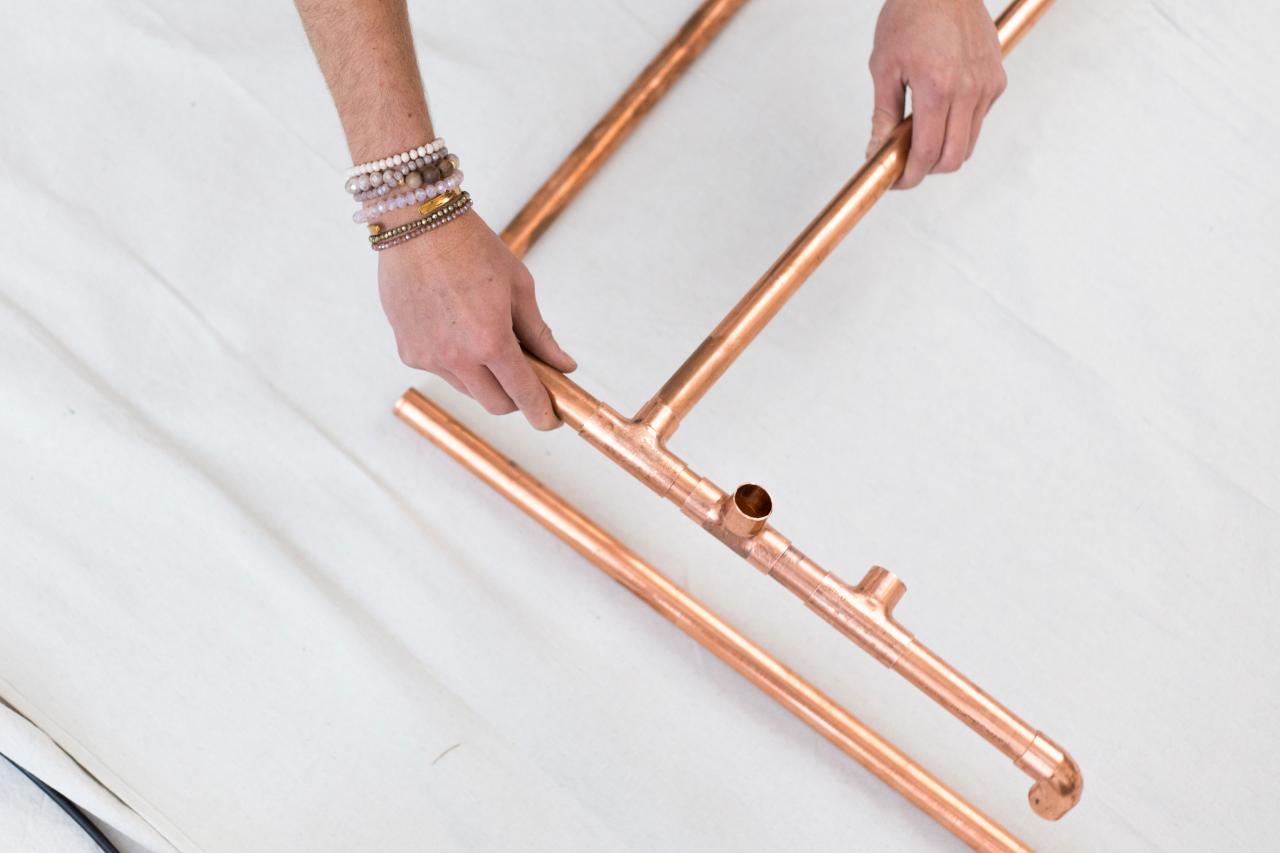
Build the Base
Start with a 1” x 1” tee and insert two 2” x 1” copper pipes into the ends of the tee.
Cassidy Garcia Photography
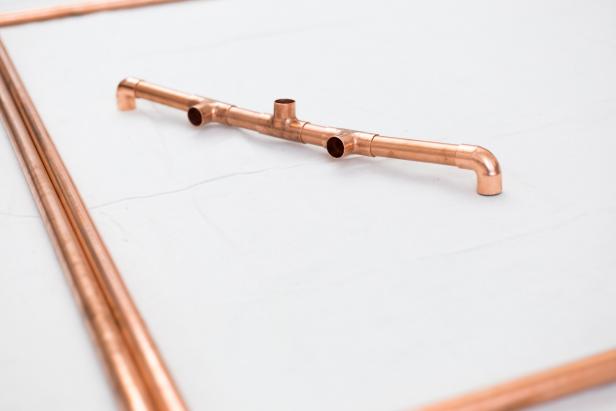
Next, connect two 1” x 3/4" tees to the ends of the 2” x 1” pipes. The opening of the 1” x 1” tee should face toward the ceiling, while the openings of the 1” x 3/4" tees should be parallel with the floor.

Cassidy Garcia Photography
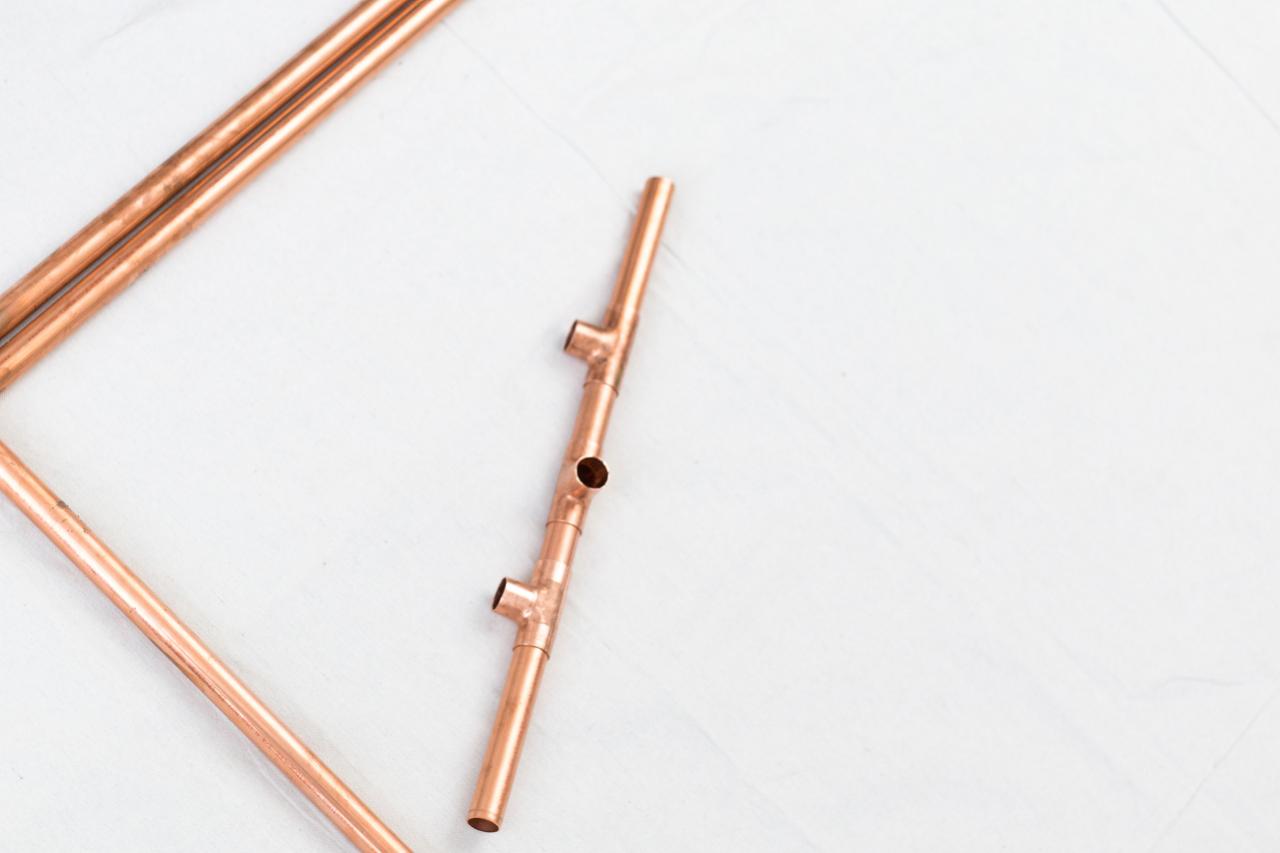
Connect 4” x 1” copper pipes to the ends of the 1” x 3/4" tees.

Cassidy Garcia Photography
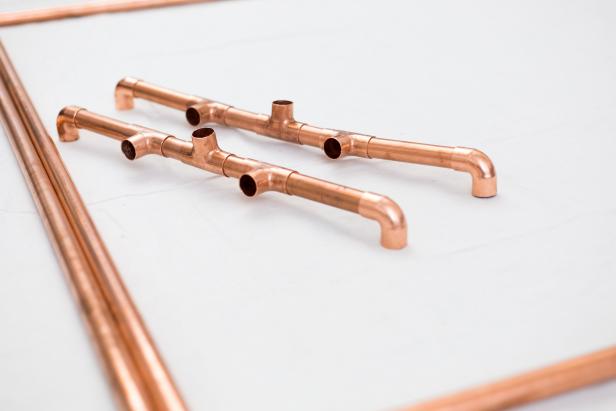
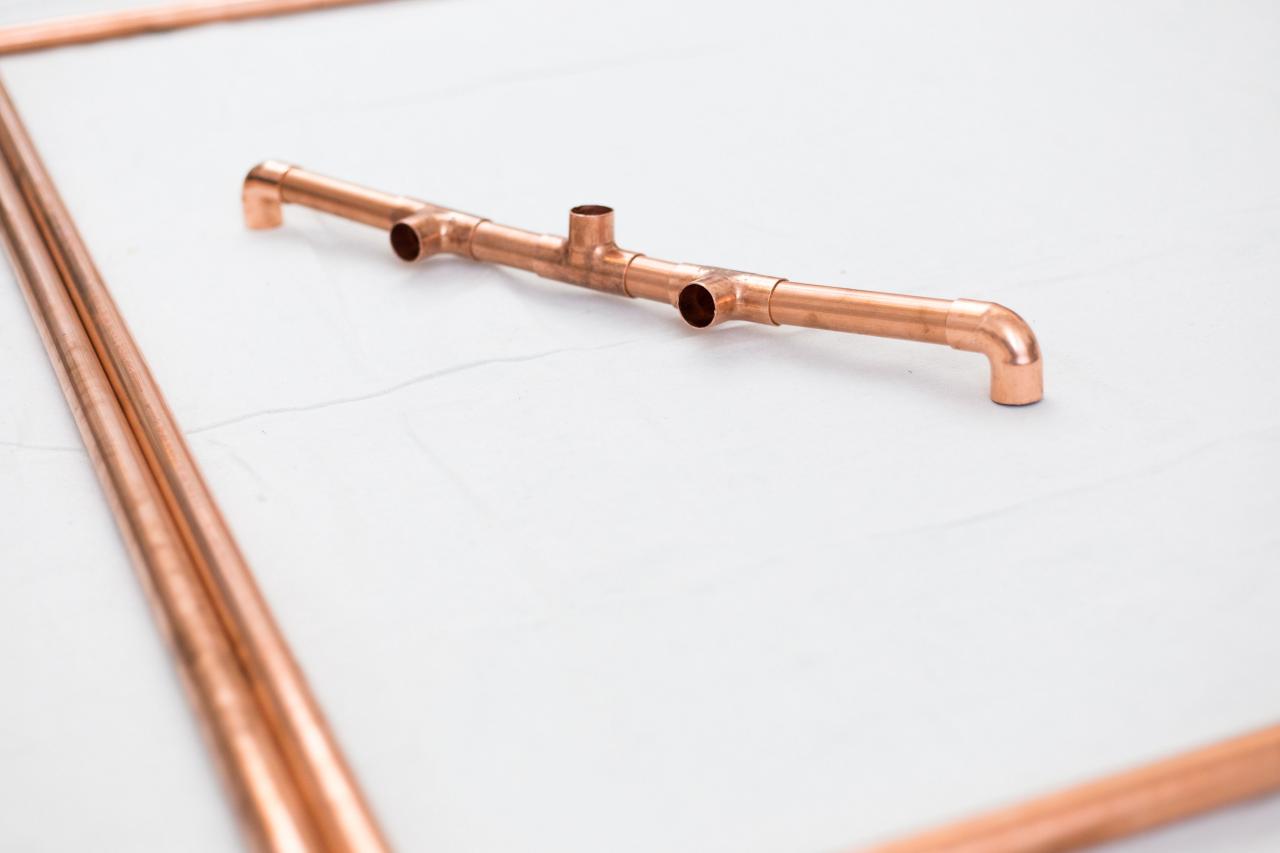
Connect 90-degree elbows to the ends of the 4” x 1” copper pipes. This will be the base for the closet frame. The openings of the 90-degree elbows should sit on the floor. Tip: Attach felt bases to the elbow openings to protect wooden floors from scratches.
Cassidy Garcia Photography
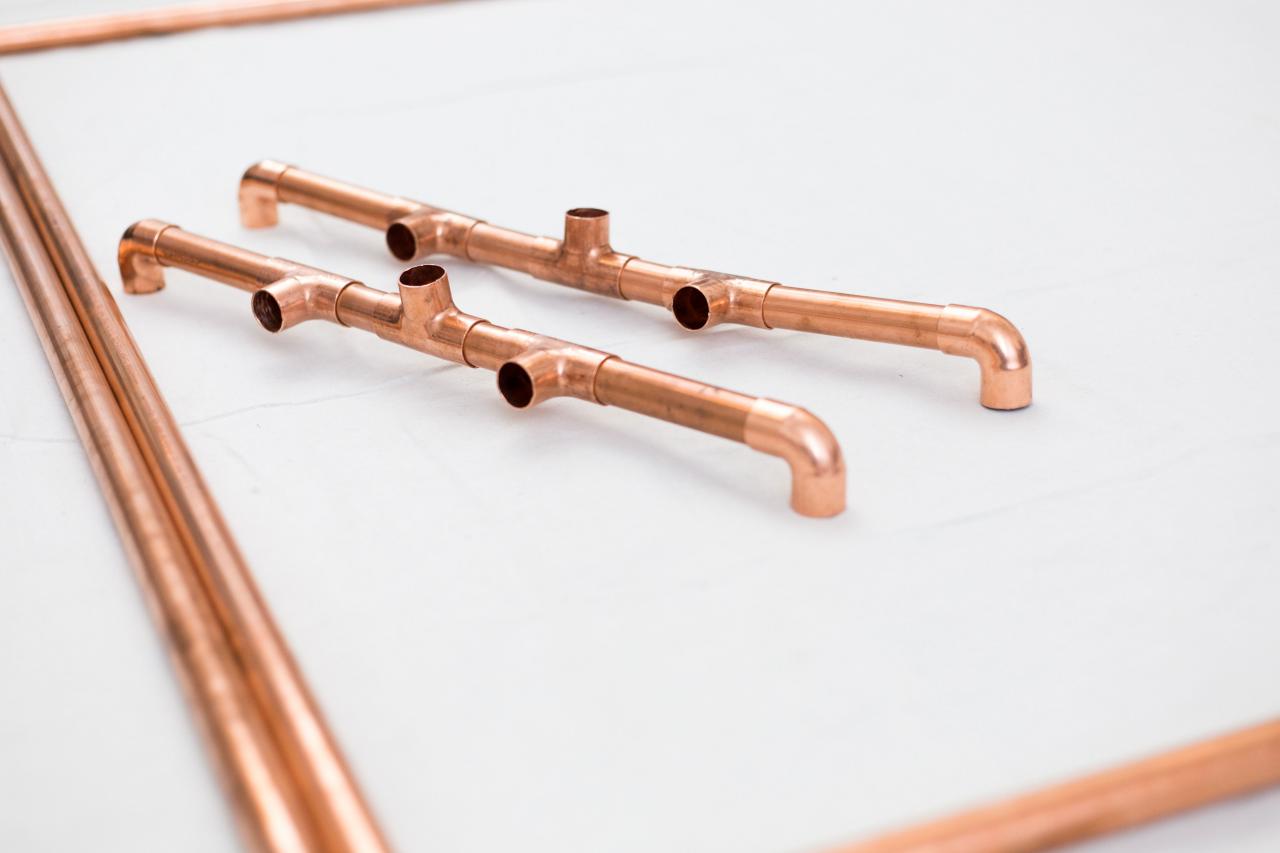
Repeat above steps to create the same base for the other side of the frame.
Cassidy Garcia Photography
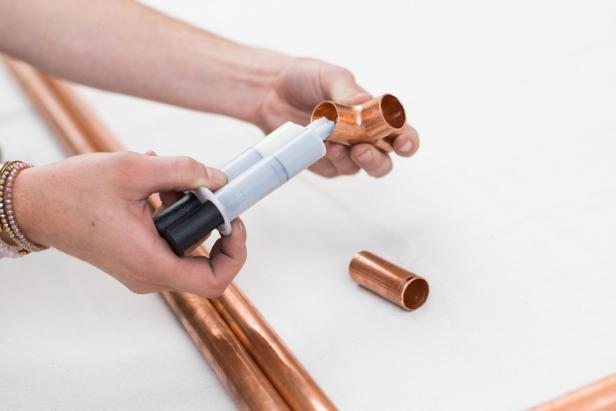
To create a sturdy structure, all copper pieces should be secured with epoxy. Make sure all of your pieces are connected correctly, then use the epoxy to permanently adhere them.
Cassidy Garcia Photography
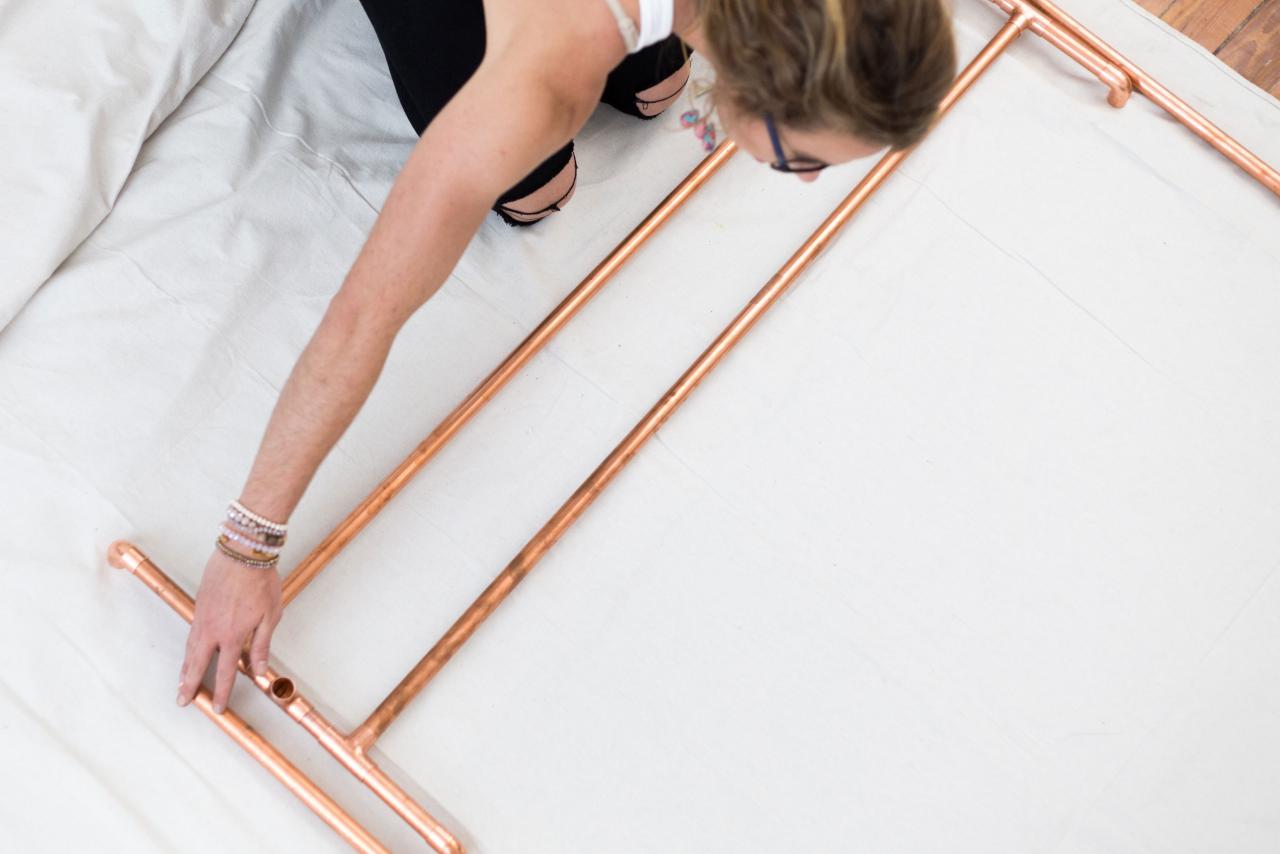
Build Lower Rack
Allow epoxy on both base pieces to dry thoroughly. Place the completed bases 4’ apart and parallel to each other on the floor.
Cassidy Garcia Photography
Connect the 4” x 3/4" copper pipes to the 1” x 3/4" tees on both bases.

Cassidy Garcia Photography
This creates the lower rack for the closet.

Cassidy Garcia Photography
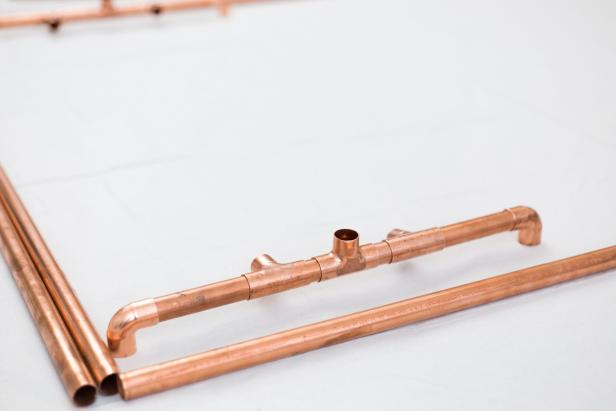
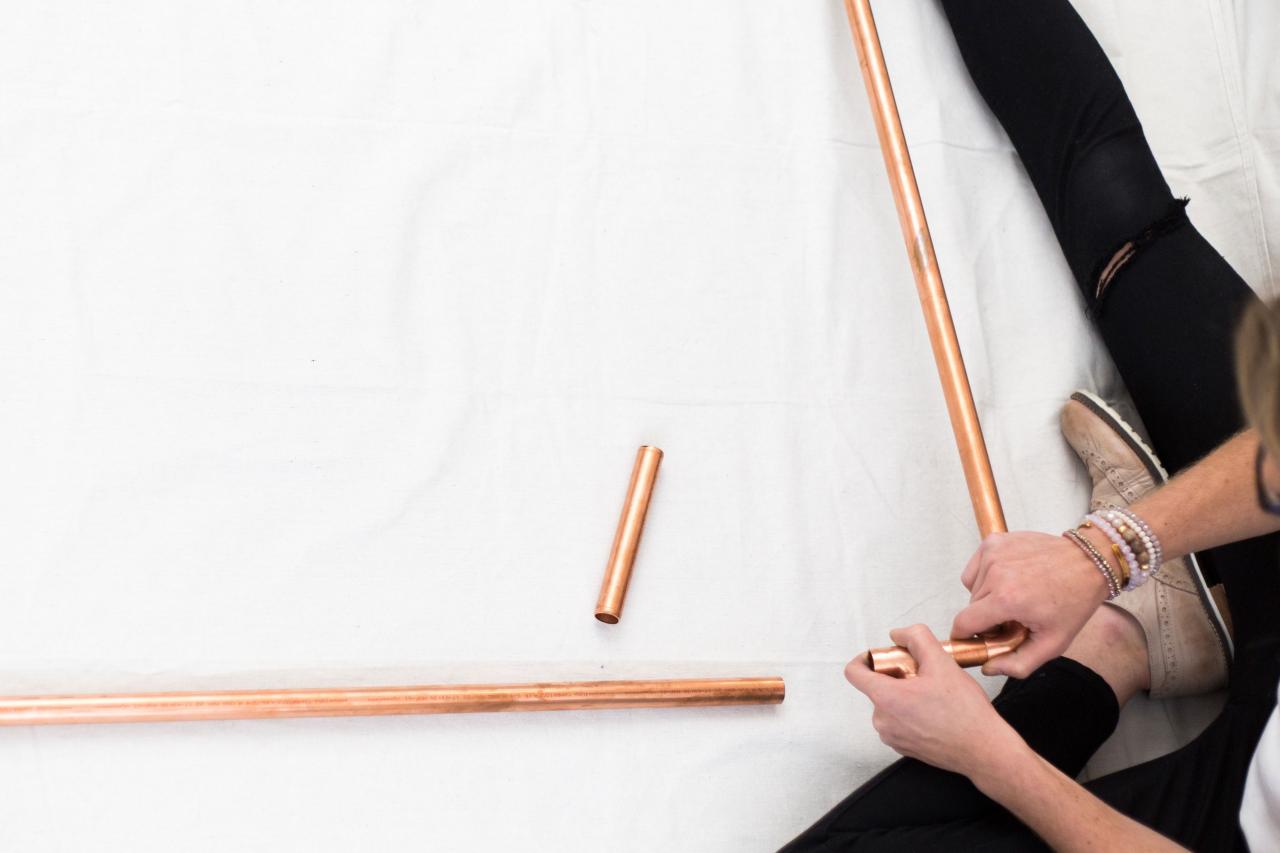
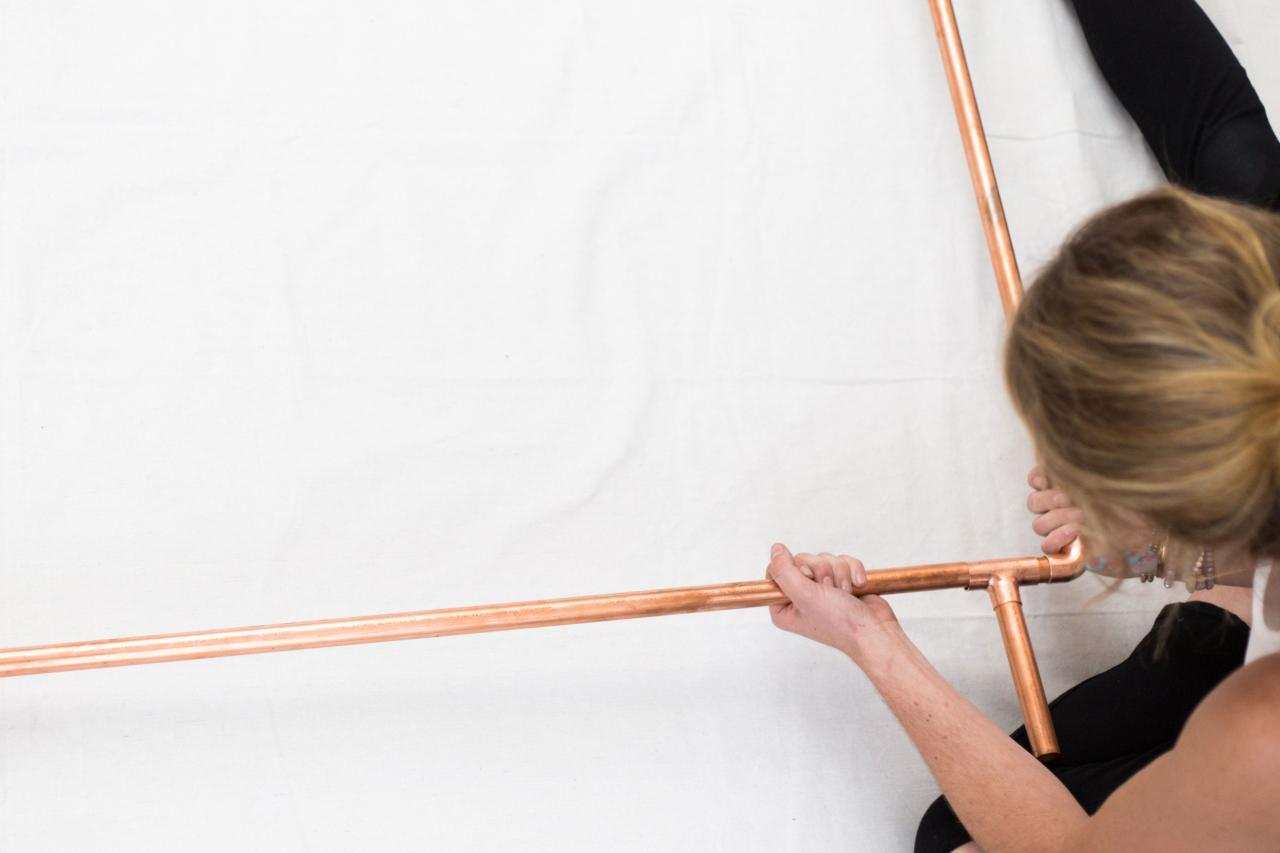
Build Top Rack
Connect a 1” 90-degree elbow to one end of the 4’ x 1” copper pipe. Next, connect a 2” x 1” copper pipe to the elbow. Finally, connect a 1” x 3/4” tee to the 2” x 1” pipe.

Cassidy Garcia Photography
Connect a 5’ x 1” piece of copper pipe to the tee, parallel to the 2” x 1” copper pipe. On the other opening of the tee, connect a 5” x 1” piece of copper pipe. Repeat these steps for the other side of the 4’ x 1” copper pipe. Secure all pieces with epoxy and let dry.

Cassidy Garcia Photography
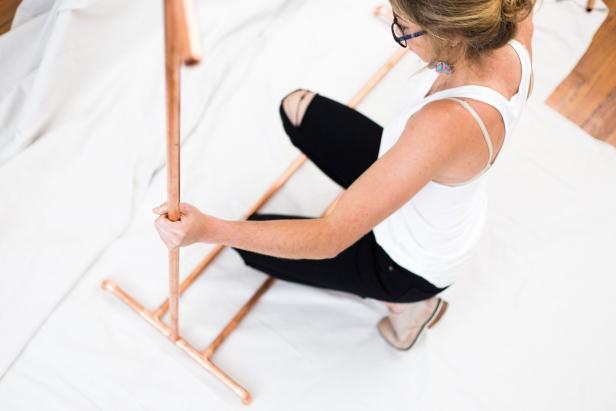
Connect Top Rack to Lower Rack
Connect the top portion of the rack to the lower portion by inserting the 5’ x 1” pipes into the 1” x 1” tees. Secure the pieces with epoxy and let dry.
Cassidy Garcia Photography
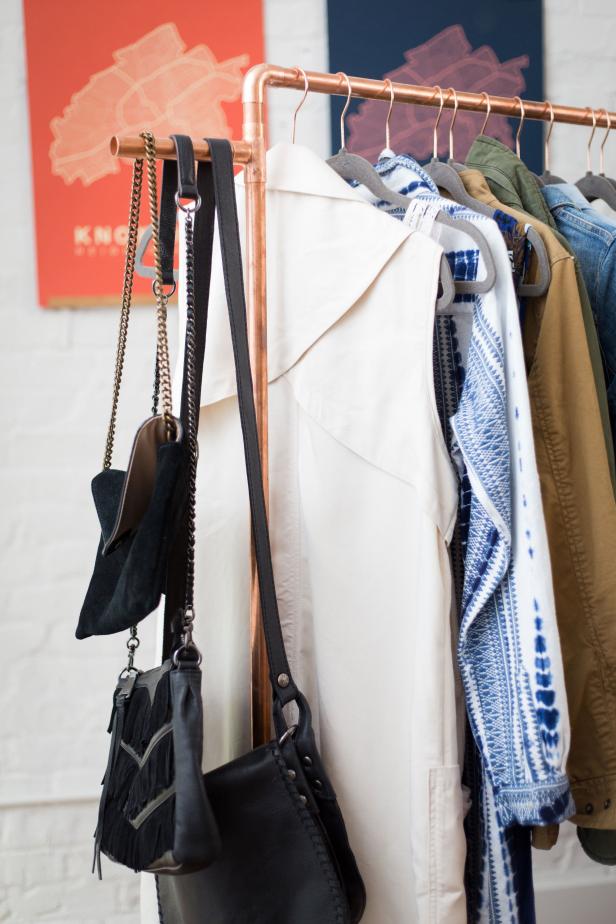
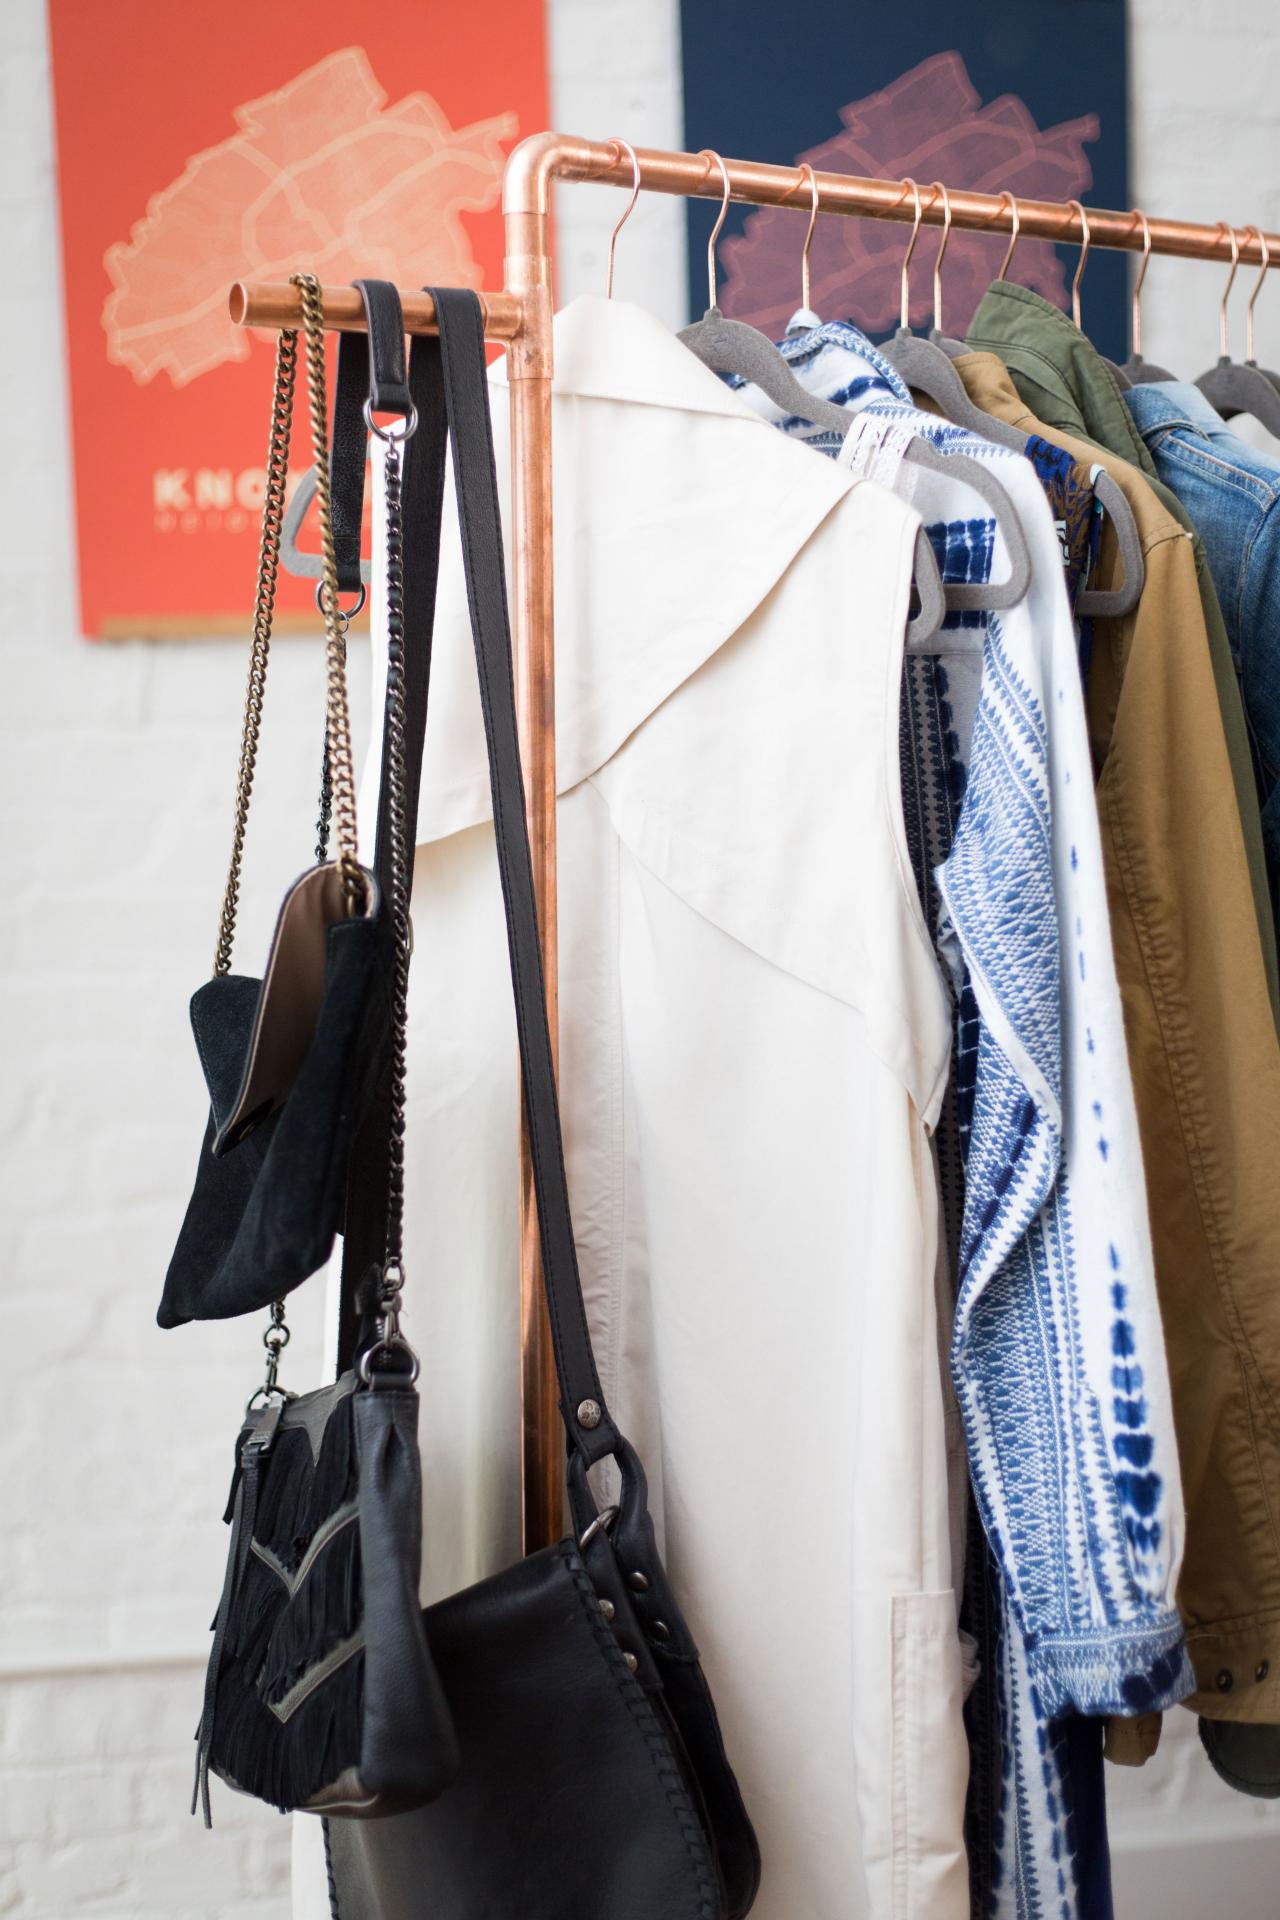
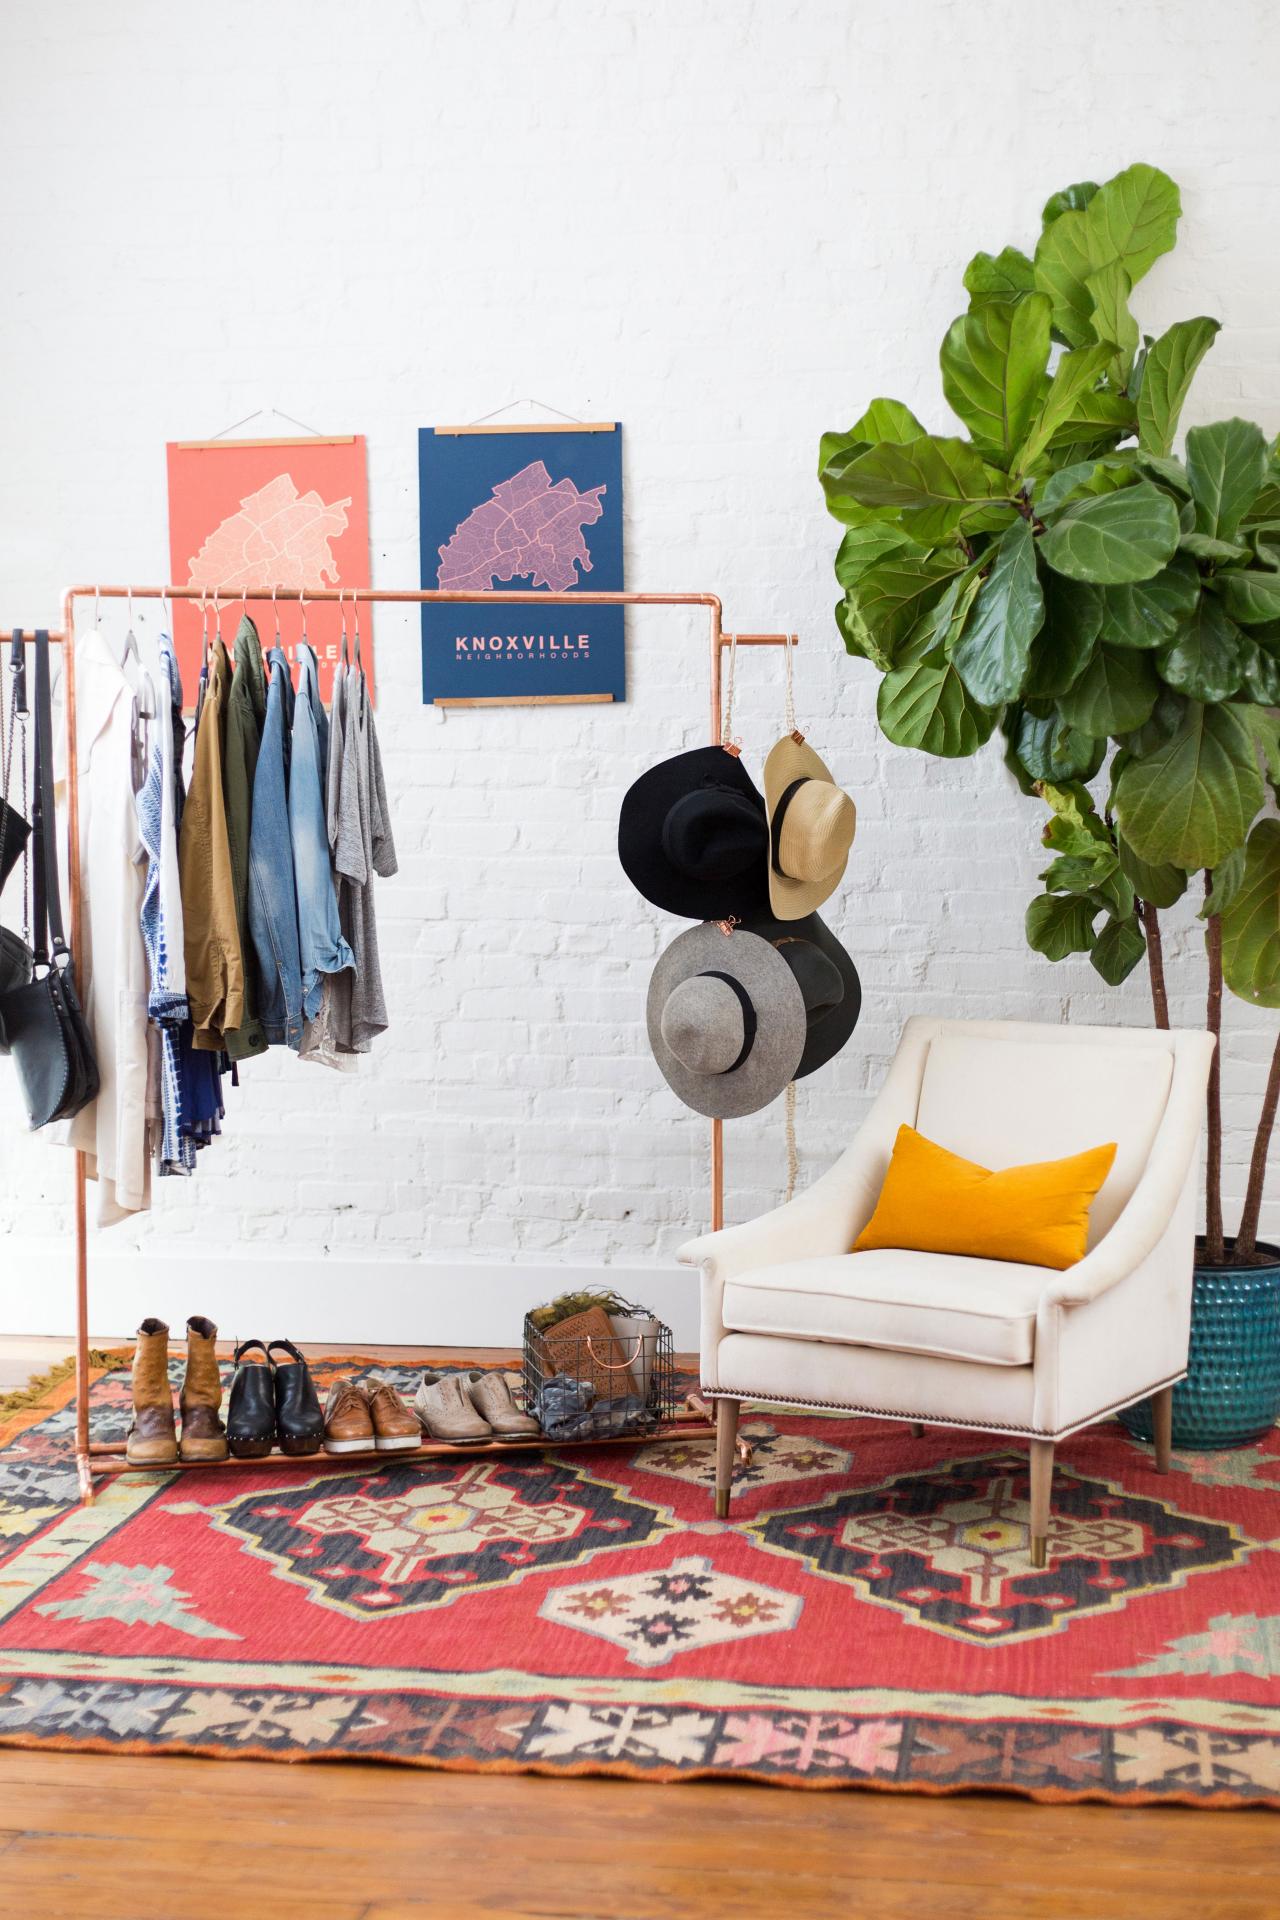
Once dry, you can use this stylish garment rack to store much more than just clothes. The arms on the sides can hold handbags, hats or accessories, while the bottom rack can corral shoes.
Cassidy Garcia Photography
Extra storage + gorgeous conversation piece = DIY win!
Cassidy Garcia Photography


