Distressed and Antiqued Kitchen Cabinets

Add cottage-style charm to white painted cabinets by distressing then applying antiquing glaze. This quick and easy project will give builder basic cabinets a custom look in no time.
Antiqued white kitchen cabinet with exposed shelves and kitchenware.

Customize Your Kitchen Cabinets: Antiquing Anyone?

Add cottage-style charm to white painted cabinets by distressing them and then applying an antiquing glaze. This quick and easy DIY project will give your builder basic cabinets a custom look in no time. This transformed cabinet features exposed shelving, white ceramic pitchers, a silver colander, baskets, cookbook, dishes and jars.

Related To:

Materials Needed:

  • rubber gloves
  • mocha-tinted antiquing glaze (available at most home improvement stores)
  • smooth cotton rags
  • painters' tape
  • sanding block
  • 80-grit sandpaper
  • small paintbrush
  • spray polyurethane

Clean Cabinets

Put on a pair of rubber gloves and wipe cabinet faces with a damp rag to remove surface dirt. Let the cabinets dry completely before moving on to the next step.

Empty half of a white kitchen cabinet following cleaning.

Antiquing Kitchen Cabinets: Make Them Squeaky Clean First

The first step in distressing and antiquing kitchen cabinets is clean them well. Put on a pair of rubber gloves and wipe cabinet faces with a damp rag to remove the surface dirt. Let the cabinets dry completely before moving on to the next step.

Protect Walls

Use painters' tape to protect the walls around cabinets. Glaze dries slowly, so there is usually time to clean up an accidental mark, but it's better to be safe than sorry.

Sand Edges

Using a sanding block wrapped in 80-grit sandpaper, sand raised edges and corners of each cabinet door and/or opening. Sand until the wood under paint is fully exposed.

Sanding a white kitchen cabinet with a sanding block.

Antiquing Kitchen Cabinets: Sand the Edges and Corners

Step 3 in distressing and antiquing kitchen cabinets is to sand them well. Using a sanding block wrapped in 80-grit sandpaper, sand the raised edges and corners of each cabinet door and opening. Sand until the wood under the paint is fully exposed.

Apply Antiquing Glaze

Add a small amount of antiquing glaze to a smooth, clean rag. Begin applying the glaze to the front or side of one cabinet in small, circular motions until you've covered the entire section. Tip: A small amount of glaze will go a very long way. It's better to start with too little glaze rather than too much.

Glazing a kitchen cabinet with antiquing glaze using a rag.

Antiquing Kitchen Cabinets: Applying the Glaze

Glazing is Step 4 in distressing and antiquing kitchen cabinets. Add a small amount of antiquing glaze to a smooth, clean rag. Begin applying the glaze to the front or side of one cabinet in small, circular motions until you've covered the entire section. Tip: A small amount of glaze will go a very long way. It's better to start with too little glaze rather than too much.

Smooth Finish

Once the entire front or side of a cabinet has been covered in glaze, use a clean area of your rag and a very light touch to smooth out all the circular marks. Gently wipe the glaze in straight up-and-down or side-to-side motion until the desired effect is achieved.

Smoothing out the antiquing glaze on a white kitchen cabinet.

Antiquing Kitchen Cabinets: Smoothing Out the Antiquing Glaze

Step 5 in distressing and antiquing kitchen cabinets is to smooth the glaze. Once the entire front or side of a cabinet has been covered in glaze, use a clean area of your rag and a very light touch to smooth out all the circular marks. Gently wipe the glaze in a straight up-and-down or side-to-side motion until the desired effect is achieved.

Darken Edges

Using a small brush, add more antiquing glaze to the distressed parts of the cabinets and/or doors. It's OK to apply the glaze liberally in these places because some of it will be removed in the next step.

Darkening a distressed cabinet with glaze to darken its edges.

Antiquing Kitchen Cabinets: Darken Cabinets With Glaze

Step 6 in distressing and antiquing kitchen cabinets is to darken the cabinets with additional glaze. Using a small brush, add more antiquing glaze to the distressed parts of the cabinets and doors. It's all right to apply the glaze liberally in these places because some of it will be removed in the next step of the process.

Remove Excess Glaze

Wrap a smooth, clean rag around your index finger and carefully wipe off any excess glaze that's accumulated outside of the distressed spots created in the previous step.

Wiping off excess glaze from a cabinet with a soft cloth.

Antiquing Kitchen Cabinets: Wiping Off Excess Antiquing Glaze

Step 7 in distressing and antiquing kitchen cabinets is to wipe off any residual glaze. Wrap a smooth, clean rag around your index finger and carefully wipe off any excess glaze that's accumulated outside of the distressed spots that were created when the cabinet's edges were darkened.

Distress Remaining Cabinets

Continue working, cabinet by cabinet, until every desired surface has been antiqued. Make sure to stand back every now and then to ensure the overall effect is consistent. When finished, let the glaze dry for at least 24 hours before sealing it.

Protect the Finish

Spray on a light coat of clear, non-yellowing sealer to protect the distressed finish from damage. Tip: It's very important to use a non-yellowing sealer as regular polyurethane will turn yellow if applied over white paint.

Next Up

DIY Grain Sack Kitchen Barstool Cushions

Inexpensive canvas drop cloths, acrylic paint and basic sewing skills come together to create fabulous custom cushions for kitchen barstools or chairs.

Easy Kitchen Update: DIY Wood-Burned Utensils

Wood burning is a great way to dress up bamboo kitchen tools: It won't wash off, gets better with age and can create one-of-a-kind designs. Upgrade your utensils in an afternoon with a little DIY elbow grease.

Upgrade Your Kitchen With a Stylish DIY Coffee Bar

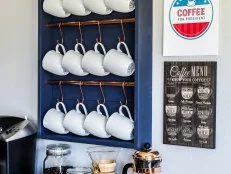
Need a space-saving solution for your collection of coffee mugs? Save valuable cabinet and countertop space and make this DIY display for about $25 in just one afternoon. Hang it on the wall, add some coffee-making essentials and create a chic self-serve coffee station.

Easy Kitchen Update: DIY Potato-Stamped Towels

A fresh set of towels instantly brightens up a dreary kitchen. Take an afternoon (with or without your kids) and create one-of-a-kind printed kitchen towels to add some fun color to your space. 

How to Build a DIY Kitchen Island on Wheels

Need some extra workspace in your kitchen? Build a rolling island for added functionality and style. One side stores a stand mixer, sheet pans, cutting boards and more, while the other side allows for extra seating. Perfect for small spaces, this portable kitchen island easily rolls out when you need it and neatly tucks away when you don’t.

Create a Family Message Center

Build a custom-framed chalkboard to hang in your kitchen and create a central location for everyone to leave messages, write to-dos and keep up with each others' schedules.

Chalkboard Kitchen Canisters

Glass canisters are practical, inexpensive and readily available, but can be a bit boring. Chalkboard paint and an easy-to-apply stenciled detail will transform them into a unique accessory for any kitchen.

Custom Kitchen Drum Pendants

Create contemporary kitchen island lighting with easy-to-make custom fabric-covered shades on pendant fixture kits.

Streamlined Kitchen Cabinet Makeover

With a few simple steps and basic materials, you can take the look of your kitchen cabinets from humdrum to high-end.

Update Kitchen Cabinets With Glass Inserts

With these easy, step-by-step instructions, anyone can quickly and inexpensively transform builder-grade cabinet doors into beautiful, custom-looking glass insert doors.

Go Shopping

Get product recommendations from HGTV editors, plus can’t-miss sales and deals.

On TV

Home Town

6am | 5c

Home Town

7am | 6c

Home Town

8am | 7c

Home Town

9am | 8c

Home Town

10am | 9c

Home Town

11am | 10c
4pm | 3c
5pm | 4c
6pm | 5c

House Hunters

7:30pm | 6:30c

House Hunters

8:30pm | 7:30c
On Tonight
On Tonight

Totally '90s House

9pm | 8c
10:31pm | 9:31c

House Hunters

11:32pm | 10:32c
1:31am | 12:31c

House Hunters

2:32am | 1:32c

House Hunters

3:30am | 2:30c

About HGTV

HGTV’s expert editors and writers share home decorating, garden and home improvement ideas, inspiration and advice based on our brand’s 30+ years of expertise and experience. We also give you the latest updates on HGTV shows and stars, cleaning tips and shopping recommendations. Learn more about us and our editorial standards.