Magnetic Kitchen Boards and Shelves

Transform empty kitchen wall space into functional, modern display and storage space with our easy-to-create magnetic accessories.
Metallic Magnetic Boards With Recipes and Small Canisters

Stainless Steel Kitchen Boards With Magnetic Canisters

Transform empty kitchen wall space with functional, magnetic display boards made from stainless steel.

By: Ana White

Related To:

Materials Needed:

  • 1 roll steel roof flashing, 14" wide by 10' long
  • 3/4" thick particle board shelf, 12" wide by 8' long
  • 2" metal screws
  • picture-hanging kit
  • measuring tape
  • tin snips
  • drill or screw gun with Phillips bit
  • hammer
  • magnetic hooks, clips and tape
  • black fine tipped permanent marker

Cut Particle Board and Flashing

Cut particle board shelving to desired length of magnetic board. Tip: Keep overall length less than 36 inches for ease of building. Add two inches to overall length of particle board shelving and mark flashing to this length. Cut flashing with tin snips.

Use tin snips to cut the flashing to size

Cut Particle Board and Flashing

Cut particle board shelving to desired length of magnetic board. Tip: Keep overall length less than 36 inches for ease of building. Add two inches to overall length of particle board shelving and mark flashing to this length. Cut flashing with tin snips.

Cut Flashing Corners

Lay shelf on top of flashing piece. Center shelf with approximately one inch of flashing surrounding shelf. Trace shelf with a permanent marker and cut corners of flashing.

Tin Snips on Flashing Corner

Cut Flashing Corners

Lay shelf on top of flashing piece. Center shelf with approximately one inch of flashing surrounding shelf. Trace shelf with a permanent marker and cut corners of flashing.

Bend Flashing

Bend flashing around shelving. Tip: Use a scrap board and hammer to crease flashing on edges. Attach flashing to shelving with 2-inch screws and drill every 12 inches.

Attach flashing with screws

Bend and Secure Flashing

Bend flashing around shelving. Tip: Use a scrap board and hammer to crease flashing on edges. Attach flashing to shelving with 2-inch screws and drill every 12 inches.

Hammer Edges Under

On the back side of the magnet board, hammer flashing down, bending flush with the shelving.

Attach Picture-Hanging Kit

Tape picture hanging kit to back of magnet board on center, approximately one inch from top. Nail picture hanger to magnet board with included nails. Remove tape and hang magnet board on wall.

Attach hanging hardware

Attach Picture-Hanging Kit

Tape picture hanging kit to back of magnet board on center, approximately one inch from top. Nail picture hanger to magnet board with included nails. Remove tape and hang magnet board on wall.

Make Ledges, Shelves and Backsplashes

Now that you have the basic process mastered, you can create a multitude of magnetic kitchen items. Using tin snips, cut metal flashing to desired length. Drill two holes in back of flashing and screw directly to wall. For longer shelves, drill holes and attach every 24 inches to wall. Tip: Magnetic accessories including hooks, canisters, clips and holders are readily available. To make a non-magnetic accessory magnetic, simply glue magnetic tape to the back.

Metal shelf and storage

Make Ledges, Shelves and Backsplashes

Now that you have the basic process mastered, you can create a multitude of magnetic kitchen items. Using tin snips, cut metal flashing to desired length. Drill two holes in back of flashing and screw directly to wall. For longer shelves, drill holes and attach every 24 inches to wall. Tip: Magnetic accessories including hooks, canisters, clips and holders are readily available. To make a non-magnetic accessory magnetic, simply glue magnetic tape to the back.

Next Up

Easy Kitchen Update: DIY Wood-Burned Utensils

Wood burning is a great way to dress up bamboo kitchen tools: It won't wash off, gets better with age and can create one-of-a-kind designs. Upgrade your utensils in an afternoon with a little DIY elbow grease.

How to Build a DIY Kitchen Island on Wheels

Need some extra workspace in your kitchen? Build a rolling island for added functionality and style. One side stores a stand mixer, sheet pans, cutting boards and more, while the other side allows for extra seating. Perfect for small spaces, this portable kitchen island easily rolls out when you need it and neatly tucks away when you don’t.

Easy Kitchen Update: DIY Potato-Stamped Towels

A fresh set of towels instantly brightens up a dreary kitchen. Take an afternoon (with or without your kids) and create one-of-a-kind printed kitchen towels to add some fun color to your space. 

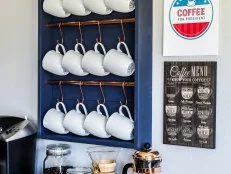
Upgrade Your Kitchen With a Stylish DIY Coffee Bar

Need a space-saving solution for your collection of coffee mugs? Save valuable cabinet and countertop space and make this DIY display for about $25 in just one afternoon. Hang it on the wall, add some coffee-making essentials and create a chic self-serve coffee station.

Distressed and Antiqued Kitchen Cabinets

Add cottage-style charm to white painted cabinets by distressing then applying antiquing glaze. This quick and easy project will give builder basic cabinets a custom look in no time.

How to Paint a Kitchen Island

Bring customized style to your kitchen by painting the island a color that complements the room.

Streamlined Kitchen Cabinet Makeover

With a few simple steps and basic materials, you can take the look of your kitchen cabinets from humdrum to high-end.

How to Modernize a Traditional Brass Chandelier

With a few simple steps, take an old brass chandelier from old, fussy and formal to functional, fun and fresh.

Update Kitchen Cabinets With Glass Inserts

With these easy, step-by-step instructions, anyone can quickly and inexpensively transform builder-grade cabinet doors into beautiful, custom-looking glass insert doors.

Chalkboard Kitchen Canisters

Glass canisters are practical, inexpensive and readily available, but can be a bit boring. Chalkboard paint and an easy-to-apply stenciled detail will transform them into a unique accessory for any kitchen.

Go Shopping

Get product recommendations from HGTV editors, plus can’t-miss sales and deals.

On TV

About HGTV

HGTV’s expert editors and writers share home decorating, garden and home improvement ideas, inspiration and advice based on our brand’s 30+ years of expertise and experience. We also give you the latest updates on HGTV shows and stars, cleaning tips and shopping recommendations. Learn more about us and our editorial standards.