

Turn a Galvanized Tub Into Playful Mobile Toy Storage

Give an old square galvanized tub new life as a handy place to stash kids' toys. This easy project creates fun and colorful storage for building blocks or other toys and includes a built-in play surface on top.
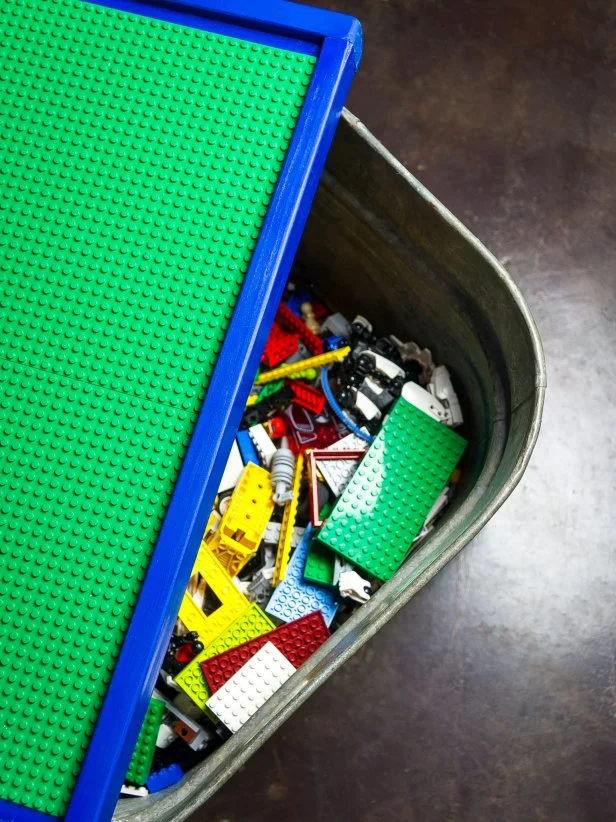
Give an old square galvanized tub new life. This simple project makes fun and colorful storage for building blocks or other toys.

DIY Galvanized Tub Storage

Give an old square galvanized tub new life. This simple project makes fun and colorful storage for building blocks or other toys.

Follow Sam on:

Related To:

Materials Needed

galvanized tub
saw
(1) 1/2" plywood cut to 16-3/4" x 16-7/8"
(1) 1/2" plywood cut to 20-1/8" x 21"
(2) 1"x2"x16-7/8" trim
(2) 1"x2"x18-1/8" trim
(2) 1"x2"x21" trim
(2) 1"x2"x21-5/8" trim
(2) 2’ clamps
1" wood screws
screwdriver
wood putty
sand paper
spray paint
2 handles with screws
four building block base plates
heavy duty spray adhesive
4 large casters
(16) 3/4" wood screws

Note: these measurements fit a standard square galvanized tub. Be sure to check the dimensions of your tub and adjust if necessary.

Cut Boards

Make all of the cuts. Sand the ends as necessary.

To make the top tray, place the 21â   trim pieces flush against the 21â   sides of the plywood. Center the plywood in the middle of the trim pieces with equal amounts of trim on the top and bottom of the plywood. Secure the trim in place with clamps. Use 1â   wood screws to attach the trim to the plywood by screwing through the trim and into the side of the plywood. Use at least 4 screws on each side, sinking them just a bit. Add the 21-5/8â   trim to the opposite sides in the same way, but be sure to insert a screw at both ends of the trim, screwing it into the ends of the previously attached trim. Fill screw holes with wood putty and allow to dry.

DIY Galvanized Tub Storage

To make the top tray, place the 21” trim pieces flush against the 21” sides of the plywood. Center the plywood in the middle of the trim pieces with equal amounts of trim on the top and bottom of the plywood. Secure the trim in place with clamps. Use 1” wood screws to attach the trim to the plywood by screwing through the trim and into the side of the plywood. Use at least 4 screws on each side, sinking them just a bit. Add the 21-5/8” trim to the opposite sides in the same way, but be sure to insert a screw at both ends of the trim, screwing it into the ends of the previously attached trim. Fill screw holes with wood putty and allow to dry.

Construct Top Tray

To make the top tray, place the 21" trim pieces flush against the 21" sides of the plywood. Center the plywood in the middle of the trim pieces with equal amounts of trim on the top and bottom of the plywood. Secure the trim in place with clamps. Use 1" wood screws to attach the trim to the plywood by screwing through the trim and into the side of the plywood. Use at least 4 screws on each side, sinking them just a bit. Add the 21-5/8" trim to the opposite sides in the same way, but be sure to insert a screw at both ends of the trim, screwing it into the ends of the previously attached trim. Fill screw holes with wood putty and allow to dry.

Repeat the process for the bottom tray beginning with the 16-7/8â   trim and finishing with the 18-Â¼â   trim. When the putty has dried, sand the trays. Pay special attention to the corners, taking away any sharp edges for safety.

DIY Galvanized Tub Storage

Repeat the process for the bottom tray beginning with the 16-7/8” trim and finishing with the 18-¼” trim. When the putty has dried, sand the trays. Pay special attention to the corners, taking away any sharp edges for safety.

Construct Bottom Tray

Repeat the process for the bottom tray beginning with the 16-7/8" trim and finishing with the 18-1/4" trim. When the putty has dried, sand the trays. Pay special attention to the corners, removing any sharp edges for safety.

Repeat the process for the bottom tray beginning with the 16-7/8â   trim and finishing with the 18-Â¼â   trim. When the putty has dried, sand the trays. Pay special attention to the corners, taking away any sharp edges for safety.

DIY Galvanized Tub Storage

Repeat the process for the bottom tray beginning with the 16-7/8” trim and finishing with the 18-¼” trim. When the putty has dried, sand the trays. Pay special attention to the corners, taking away any sharp edges for safety.

Paint

Spray paint both trays and allow to dry completely. Sand lightly with fine grit paper or steel wool. Add additional coats as necessary.

Spray paint both trays and allow to dry completely. Sand lightly with fine grit paper or steel wool. Add additional coats as necessary.

DIY Galvanized Tub Storage

Spray paint both trays and allow to dry completely. Sand lightly with fine grit paper or steel wool. Add additional coats as necessary.

Add Casters

Add casters to the bottom by placing the mounting plates flush in the corners. Secure with 3/4" screws.

Add casters to the bottom by placing the mounting plates flush in the corners. Secure with Â¾â   screws.

DIY Galvanized Tub Storage

Add casters to the bottom by placing the mounting plates flush in the corners. Secure with ¾” screws.

Add Handles

Add handles to the sides of the top tray centered vertically and horizontally on opposite sides of the tray.

Add handles to the sides of the top tray centered vertically and horizontally on opposite sides of the tray.

DIY Galvanized Tub Storage

Add handles to the sides of the top tray centered vertically and horizontally on opposite sides of the tray.

Get Top Tray Ready for Play

Add building square base plates by spraying the back side of the plates and top tray surface with heavy-duty spray adhesive. Press the two surfaces together. Place books on top of the building square base plates for weight until the adhesive sets. 

Add building square base plates by spraying the back side of the plates and top tray surface with heavy duty spray adhesive. Press the two surfaces together. Place books on top of the building square base plates for weight until the adhesive sets.

DIY Galvanized Tub Storage

Add building square base plates by spraying the back side of the plates and top tray surface with heavy duty spray adhesive. Press the two surfaces together. Place books on top of the building square base plates for weight until the adhesive sets.

Assemble and Enjoy

Assemble the storage unit by placing the tub on the bottom tray with casters. Then fill the tub with building blocks and add the top tray. Note: the top tray can be flipped and the smooth side used for coloring, crafts or homework. 

Give an old square galvanized tub new life. This simple project makes fun and colorful storage for building blocks or other toys.

DIY Galvanized Tub Storage

Give an old square galvanized tub new life. This simple project makes fun and colorful storage for building blocks or other toys.

Next Up

Create a Sunburst Mirror

Open up your living room and add style with a dramatic sunburst mirror.

Easy-to-Sew Pillows

Add a splash of color and pattern to a room by sewing your own pillows.

How to Mat and Frame Artwork

Finding artwork you love is a lengthy and expensive process. Make custom art using anything flat, from a vintage album cover to a page from a book or magazine.

Turn an Old Coffee Table Into an Upholstered Storage Ottoman

This stylish storage ottoman makes a great coffee table, provides extra seating and is a cushy place to prop up your feet at the end of the day. The handy lid lifts to reveal plenty of storage for throws, kids' toys or board games.

How to Slipcover an Ottoman

Take your ottoman from drab to fab with this simple step-by-step slipcover guide.

Pet Projects: Make a DIY Dog Bed

Make a removable, washable cover for your furbaby’s bed that's oozing with charming, farmhouse style. This simple sewing project will transform a bed your pet loves into one you love as well.

Add Casters to an Antique Trunk for a Mobile Coffee Table

Old wooden trunks are stowed away in many attics and often end up in yard sales or thrift stores at a great price. Give one an easy update by simply adding furniture casters to make it a charming (and mobile) storage piece for your living room.

Go Shopping

Get product recommendations from HGTV editors, plus can’t-miss sales and deals.

On TV

House Hunters

6:30pm | 5:30c

House Hunters

7:30pm | 6:30c

House Hunters

8:30pm | 7:30c
On Tonight
On Tonight

House Hunters

9pm | 8c

House Hunters

9:30pm | 8:30c

House Hunters

10pm | 9c

House Hunters

10:30pm | 9:30c

House Hunters

11pm | 10c

House Hunters

11:30pm | 10:30c

House Hunters

12am | 11c

House Hunters

12:30am | 11:30c

House Hunters

1am | 12c

House Hunters

1:30am | 12:30c

House Hunters

2:30am | 1:30c

House Hunters

3:30am | 2:30c

About HGTV

HGTV’s expert editors and writers share home decorating, garden and home improvement ideas, inspiration and advice based on our brand’s 30+ years of expertise and experience. We also give you the latest updates on HGTV shows and stars, cleaning tips and shopping recommendations. Learn more about us and our editorial standards.

