Easy-to-Sew Pillows

Add a splash of color and pattern to a room by sewing your own pillows.
Easy-Sew Pillows Add Color to Any Room

It's Sew Easy

Add a pop of pink in any room with these DIY easy-sew pillows.

By: Janell Beals

Materials Needed:

  • fabric
  • pillow inserts
  • brown paper
  • square or yardstick
  • tape measure
  • pencil
  • thread
  • needle
  • scissors
  • straight pins
  • sewing machine

Measure Pillow Insert

Measure dimensions of pillow insert.
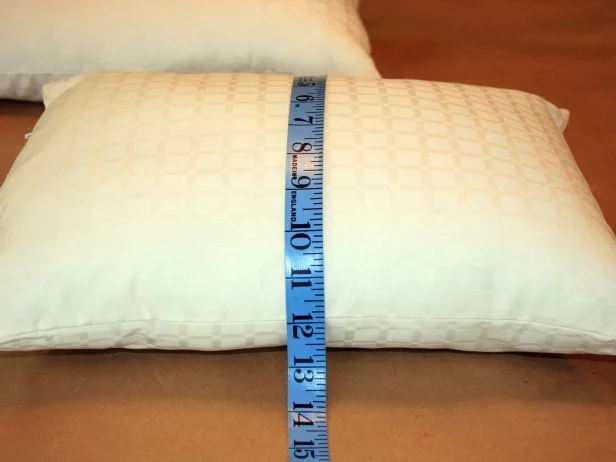
Measure Pillow Insert

Measure Pillow Insert for DIY Easy Sew Pillow Case

Take the proper measurements of existing pillows to know how much fabric is necessary for easy sew pillow cases.

Measure Height and Width

If using a rectangle insert, measure both height and width.

Measure the Length and Width of Pillows

Measure the Length and Width for Easy Sew Pillow Case

Take an accurate measurement of the length and width of the pillows you plan to use easy sew pillowcases on.

Create Pattern

Using pillow insert measurements, add two inches to both height and width. Mark measurements on brown paper with a square to create pattern. Cut out pattern.
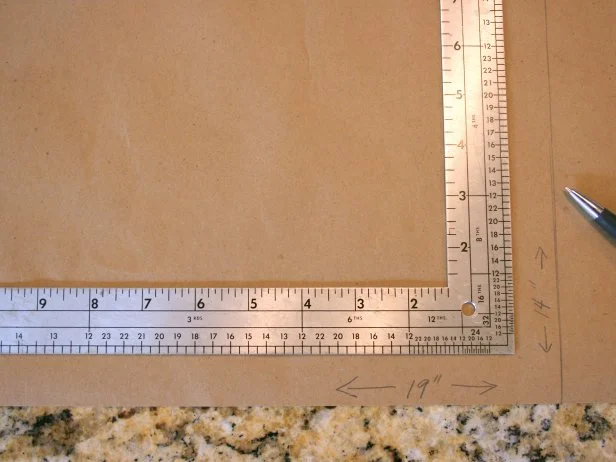
Draw Fabric Pattern

Draw Fabric Pattern for Easy Sew Pillow

Using pillow insert measurements, add two inches to both height and width. Mark measurements on brown paper with a square to create pattern. Cut out pattern.

Choose Pattern Placement

If using a patterned fabric, determine print placement by outlining finished shape of pillow on fabric.
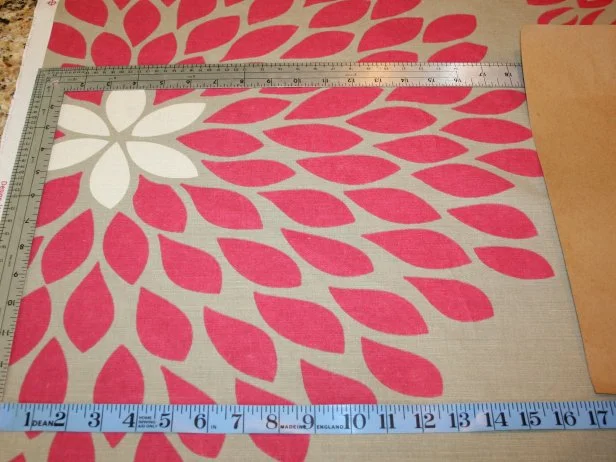
Measure Easy Sew Pillow Fabric

Measure Easy Sew Pillow Fabric For Size and Placement

Use rulers and measuring tape to determine how much fabric is needed to create easy sew pillows. If using a patterned fabric, determine print placement by outlining finished shape of pillow on fabric.

Cut Pillow Fronts

Place pattern on fabric, lining up pattern to fabric grain. Cut around edges of pattern.
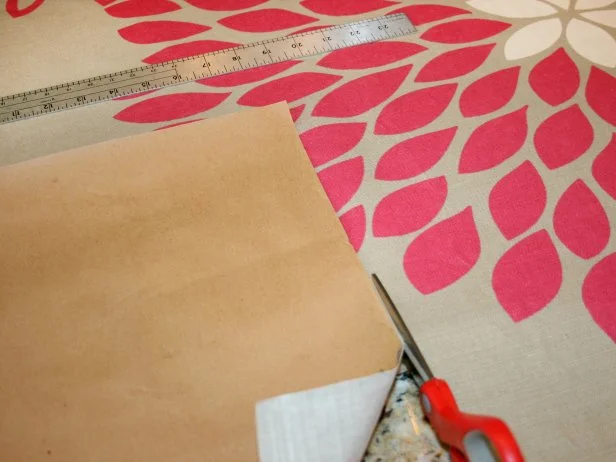
Cut Fabric for Easy Sew Pillows

Place Pattern on Fabric and Cut for Easy Sew Pillows

Place pattern on fabric, lining up pattern to fabric grain. Cut the desired amount for easy sew pillows.

Cut Pillow Back

Place same pattern on fabric selected for pillow backs, lining up pattern to fabric grain. Cut around edges of pattern. Tip: Use coordinating fabrics for pillow front and back for an interesting design.
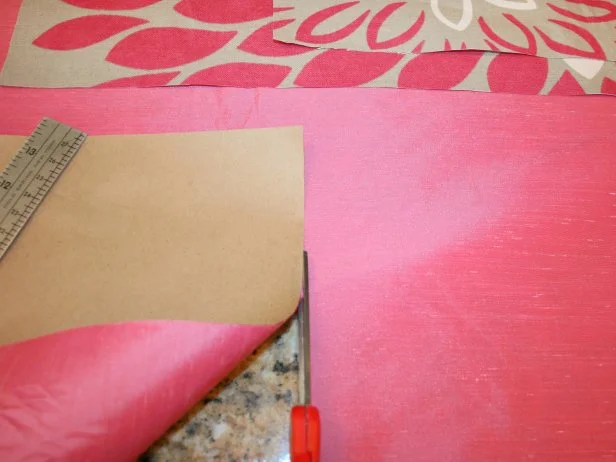
Cut Fabric with Pattern Guide

Use Pattern to Cut Fabric for Back of Easy Sew Pillows

Place same pattern on fabric selected for pillow backs, lining up pattern to fabric grain. Use a pattern to guide you as you cut the fabric for easy sew pillows. Tip: Use coordinating fabrics for pillow front and back for an interesting design.

Pin Fabric Edges

Lay fabric front over fabric back, right sides together. Pin edges.

Pin Fabric

Pin Easy Sew Pillow Material

Use straight pins to attach the two types of fabric for use in easy sew pillows.

Sew Pillow Pieces Together

Sew pillow pieces together using one-inch seam allowance. Leave approximately five-inch opening to insert pillow on bottom edge.
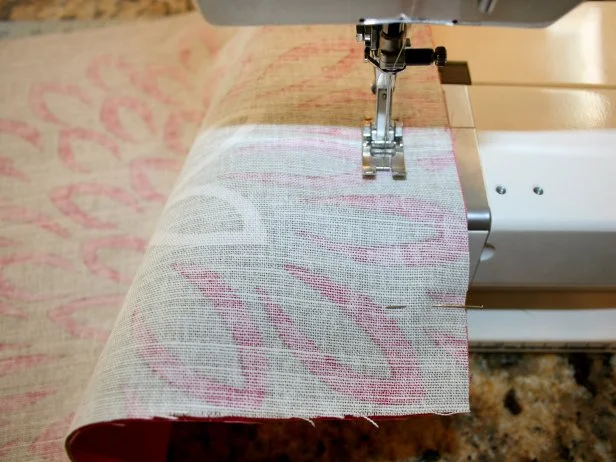
Sewing Fabric for Pillows

Use Sewing Machine to Stitch Fabric Pieces Together

Use a sewing machine to stitch together the fabric for the easy sew pillows. Sew pillow pieces together using one-inch seam allowance. Leave approximately five-inch opening to insert pillow on bottom edge

Trim Edges

Trim fabric edges to 1/2 inch, trimming first layer slightly more than second. Trim close to corners for a clean turned corner. Tip: Trimming seams to varying widths will help make seams less noticeable on turned pillow.

Trim Pillow Fabric Edges

Trim Fabric Edges For DIY Easy-To-Sew Pillow

Trim fabric edges to 1/2 inch, trimming first layer slightly more than second. Trim close to corners for a clean turned corner. Tip: Trimming seams to varying widths will help make seams less noticeable on turned pillow.

Turn Fabric and Press Edges

Turn fabric right side out and press edges.

Iron Fabric

Iron Fabric of Easy Sew Pillows

Turn fabric right side out and use an iron to smooth out the fabric of easy sew pillows for a crisp look.

Insert Pillow

Push pillow insert into pillow casing and adjust placement.
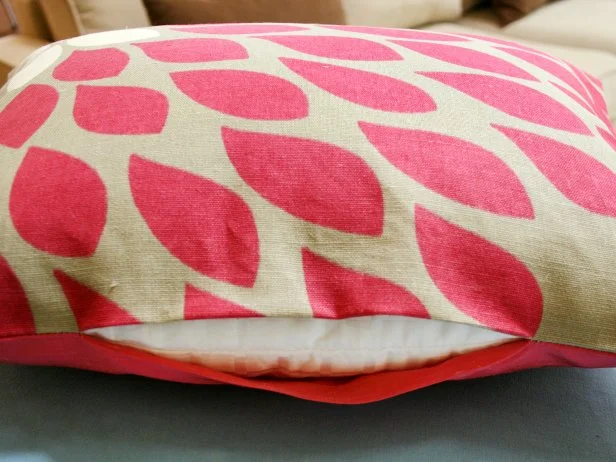
Insert Pillow into Case

Insert Pillow Into Open Side Of DIY Easy-To-Sew Pillow Case

After sewing three of the four sides of the pillow case, stuff the pillow insert or pillow stuffing inside and ensure that it fits properly.

Stitch Opening Closed

Sew opening closed using needle and thread.

Sew Opening in Pillow

Sew Final Stitches in the Opening of the DIY Easy Sew Pillow

Once pillow is secure inside new case, use a needle and thread to stitch up the rest of the DIY pillow case.

Next Up

How to Hang a Curtain Rod

Hang a curtain rod with an easy, DIY template that makes the job straightforward and stress free.

How to Stencil a Focal Wall

Introduce a dramatic focal wall into a living room by stenciling a wall with a creative pattern.

Build Custom End Tables

Create deep, wall-mounted end tables by cutting a vintage bench in half. The tables take up less floor space and provide ample surface space.

Create a Sunburst Mirror

Open up your living room and add style with a dramatic sunburst mirror.

How to Mat and Frame Artwork

Finding artwork you love is a lengthy and expensive process. Make custom art using anything flat, from a vintage album cover to a page from a book or magazine.

How to Install Timeless Rail-and-Stile Wainscoting

Wainscoting wall treatments are a classic way to add architectural interest to any room. Consisting of horizontal rails and vertical stiles, this relatively easy woodworking project is based on a design found in historic homes, and is sure to lend old-home charm to builder-basic new spaces. 

Turn a Galvanized Tub Into Playful Mobile Toy Storage

Give an old square galvanized tub new life as a handy place to stash kids' toys. This easy project creates fun and colorful storage for building blocks or other toys and includes a built-in play surface on top.

Turn an Old Coffee Table Into an Upholstered Storage Ottoman

This stylish storage ottoman makes a great coffee table, provides extra seating and is a cushy place to prop up your feet at the end of the day. The handy lid lifts to reveal plenty of storage for throws, kids' toys or board games.

Build a Shutter Console Table

Repurpose a shutter into a cottage-style console table that will add interest and soften the hard lines of the back side of any couch.

Add Nail Head Trim to Furniture

Bring a high-end look to an upholstered piece of furniture by adding nail head trim.

Go Shopping

Get product recommendations from HGTV editors, plus can’t-miss sales and deals.

On TV

Sin City Rehab

11am | 10c

Botched Homes

12pm | 11c

Botched Homes

1pm | 12c

House Hunters

3:30pm | 2:30c

House Hunters

4:30pm | 3:30c

House Hunters

5:30pm | 4:30c

House Hunters

6:30pm | 5:30c

House Hunters

7:30pm | 6:30c

House Hunters

8:30pm | 7:30c
On Tonight
On Tonight

House Hunters

9pm | 8c

House Hunters

9:30pm | 8:30c

House Hunters

10pm | 9c

House Hunters

10:30pm | 9:30c

House Shock

11pm | 10c

House Hunters

12am | 11c

House Hunters

12:30am | 11:30c

House Hunters

1am | 12c

House Hunters

1:30am | 12:30c

House Shock

2am | 1c

House Hunters

3:30am | 2:30c

About HGTV

HGTV’s expert editors and writers share home decorating, garden and home improvement ideas, inspiration and advice based on our brand’s 30+ years of expertise and experience. We also give you the latest updates on HGTV shows and stars, cleaning tips and shopping recommendations. Learn more about us and our editorial standards.