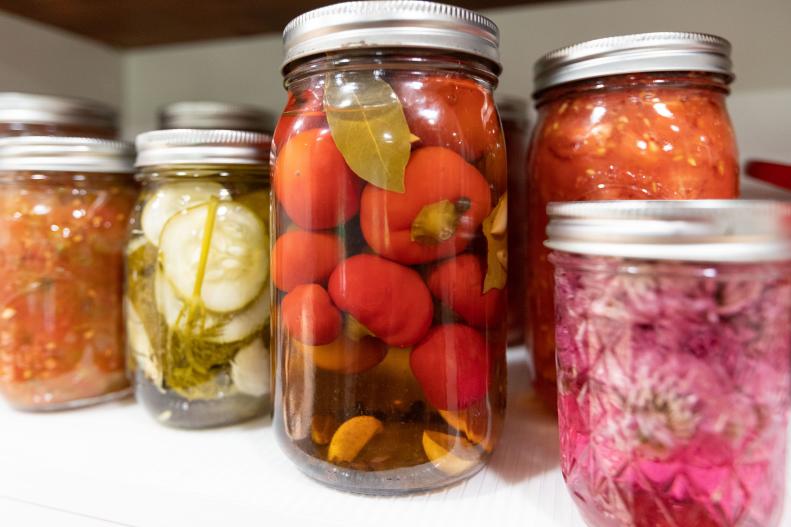
Home Canning for Beginners: Tools and Tips for Success
Canning is one of the easiest and most fundamental methods of preserving foods at home. Learn more about canning basics and what you'll need to can your produce safely and effortlessly at home.

Related To:

Photo By: Derek R. Trimble
How to Get Started With Canning
There are few things more pleasant and rewarding than opening an aromatic jar of freshly preserved tomatoes or pickles. When you make the effort to set aside some produce during the growing season, you can turn an otherwise dreary winter meal into a taste of summer and the best part is, it's not that hard to do. Canning your produce at home requires minimal investment, a little bit of effort and some basic know-how. Click through the gallery to see everything you'll need along with the four basic steps to help you get started.
Tools You'll Want to Have
Canning at home is one of the best ways to preserve the flavors of the growing season and keep your pantry stocked through the winter months. We're going to focus on water bath canning, which is the most basic of home canning processes and can be easily accomplished by even a novice. While it doesn't require sophisticated tools, there are some basic tools that will make the job safer, easier and more enjoyable. The biggest obstacle to home canning processes tends to be the handling of wet and scalding hot glass jars. Click through the gallery to see some of the tools we recommend, followed by a basic step-by-step guide to canning at home.
A Large Non-Reactive Pot
When you read about canning and pickling, there's a lot about non-reactive surfaces and non-reactive pots. If that has you scratching your head, you're not alone, but in basic terms it refers to a pot made from a metal that doesn't react with your food. Foods cooked in pans made from aluminum, cast iron and copper can sometimes react with the metals and leave foods with a slight metallic taste. While that might not be noticeable in your everyday meals, it will be very noticeable in anything preserved in a jar for a period of time. So, what kinds of pans are non-reactive? Enameled cast iron like a Le Creuset or a Staub Dutch oven are good options, and clad stainless-steel pans are also ideal for canning preparations. Always avoid cast iron and aluminum for canning recipes. Copper pans can be OK sometimes as long as they're truly copper, and not an inexpensive composite.
Buy It: Crate&Barrel | Le Creuset Dutch Oven, $288
Jars, Jars and More Jars
When it comes to jars for canning, there are lots of options but the jar you'll choose typically depends on your specific recipe. All canning jars have one thing in common: they're specifically designed for home canning. Avoid trying to repurpose jars from things you bought at the grocery store. They're not designed to be resealed and typically don't hold up well in a water bath canner. Jars that are purpose-built for home canning resist cracking, have the ability to create a sterile seal and can even withstand being put in the freezer. There are also many kinds of jars that are built for short-term preserving projects like refrigerator pickles. These have an airtight seal, but come with a heavy latch that keeps the jar airtight when not in use.
Lids and Rings
Most canning recipes require the use of self-sealing jar lids and safety rings in order to create a sterile air-tight seal. The lids are single-use so they're not able to be used again after you've popped them off your jar. Of course you can certainly save them for storing other items in your jars, but just make a note on the lid so you don't try to seal another canned good with them. The screw on rings add a layer of security to your jar's lid and prevent it from popping off while in storage or transport. Lid rings can be used repeatedly, and generally fit a wide range of jar sizes.
Jar Tongs
Handling hot jars is cause for thoughtful caution, but handling hot jars floating in boiling water is a scenario ripe for disaster if not approached with care. Fortunately, there are two tools that we highly recommend to help you process your jars safely. A good set of jar tongs is one of the best ways to gently get your jars in and out of the water bath while keeping your hands safely protected from burns.
Canning Rack
For larger batches of jars, combine your jar tongs with a canning rack for the bottom of your water bath kettle. A good rack should fit easily into your pot with no pinch points or resistance. The rack will help you raise and lower a whole batch of jars into and out of the water all at once and keep the jars from rolling around in the boiling water. There's nothing worse than cracking a jar while it's processing, so make sure you've got the tools to help you get a good grip on your processed jars.
BUY NOW: Amazon, $13.99
Water Bath Kettle
One of the first things you'll need to ensure the success of your canning recipes is a large deep pot — 12 quarts or larger is the ideal size. You need to be able to have enough space in your pot to boil a large volume of water and still have enough leftover space to safely lower a half dozen pint sized jars into it without causing it to overflow. If you're shopping for a pot, try to find one that's stainless steel or some other non-reactive material so it can do double duty in your kitchen. For a more affordable option, look for a coated aluminum water bath kettle. These are an affordable non-reactive option and as long as the coating is cared for, will provide you with a number of years of service.
A Funnel That Fits Your Jars
The next obstacle you're likely to encounter while canning at home is packing your jars. Pouring scalding hot liquids or foods into jars can be a messy and somewhat dangerous affair. Having a funnel that properly fits your canning vessel is a great way to be safe and efficient while you're working with hot foods and liquids. For jars, look for wide mouth kitchen funnels in pint and quart sizes. They'll often have a handle that doubles as a pour spout in case you happen to overfill a jar. If you're making things like hot sauces, look for funnels with skinny necks that will fit into woozy bottles (tall, skinny long-necked bottles generally 5 ounces and used for hot sauces, syrups and bitters). Remember that your funnel will come into contact with your processed foods, so make sure to get one that's made from non-reactive materials. High quality plastics and stainless steel make for great kitchen funnel choices.
BUY NOW: Amazon | Stainless Steel Funnels, $14.99
A Magnetic Lid Wand
Sealing your jars with sterilized lids and bands is a crucial step toward ensuring your jars have a clean and air-tight seal. Once you've sterilized your lids, you're going to want to avoid touching them with your hands since you might inadvertently re-introduce some bacteria. Also, it's highly likely that your lids are going to be very hot from the sterilization process, so touching them is likely not going to be an option. This is where the magnetic wand comes in! Use one of these to lift and lower your jar lids into place without contamination or the risk of potential burns. Once the lid is fitted to the jar, you can screw on the band with your hands.
BUY NOW: Amazon | Magnetic Canning Lid Lifter, $18.99
Time to Start Canning - The Basics
Water bath canning is the simplest and safest way to get started with canning at home. It's also one of the easiest ways to preserve a large volume of produce in your own kitchen. In one weekend, you can easily preserve enough to stock your pantry for a long time. Or, If you want to make just a few jars at a time, that’s easy too! The great thing about water bath canning is that you can do as much or as little as you'd like in any size jar. While you're canning anything, it's important to stay organized and be safe. You're dealing with lots of hot water and really hot jars, so make sure you have enough elbow room and all of your essential tools close at hand.
Learn More : How to Can Tomatoes
Sterilize Your Jars and Lids
Fill your water-bath canner or stock pot with enough water to completely submerge your jars while making sure you don't over fill. Leave enough room so that when you submerge jars, there's still a few inches of space left below the lip of the pot. Next, heat the water to just below boiling. Slowly submerge your jars with jar tongs or your lifting rack and let them sit in the simmering water for 15-20 minutes. This will kill any bacteria in the jars and sanitize them before filling. Take a small sauce pan and fill it with all of your lids and enough water to cover them. Heat that pan just enough to get it hot and keep it there. Until you're ready to put the lids on the jars keep them hot and out of the way. This will ensure you have clean, bacteria-free lids when it's time to put them on.
Packing Your Jars
Remove your jars from the water bath using tongs or the lifting rack and set them down on a clean dish towel. Keep them relatively close together so that you'll be able to easily and neatly move from one to the other as you're filling them. At this point, follow your particular recipe and fill the jars with the contents to be preserved. Make sure to leave some head space so the contents can expand slightly without breaking the jars.
Creating a Clean Seal
With all of your jars full, take a clean paper towel and dampen it with a bit of the vinegar. Wipe around the lip and threads of all of the jars to remove any germs or food particles that might be hanging out. You want nice clean seals in order to safely preserve your tomatoes. Next, take a pair of tongs or your magnetic wand and remove your lids from their hot-water bath on the rear burner. Take care not to touch the underside of the lid or any of the seals with your bare hands. You want to keep those surfaces pristine. Place a lid on each jar as shown, and screw it down firmly with the rings that came with your jars.
Hot Water Bath Processing
Place your jars back into your large pot for the final step known as processing. Once all of the jars are in the bath, bring the water back up to a rolling boil and leave them there for about 40-45 minutes. After that time has passed, remove your jars from the water bath and set them on a dishtowel to cool off. As they cool, you'll hear the lids make a loud "pop" as the lids compress. This lets you know that the jar has sealed, and at this point you can remove the bands and clean around the threads one last time. If you find that your jar lids are flexing, or if they come off when you remove the bands, it means your jars did not seal and that you need to try again with a new lid. If the lids are firmly in place, put the lid rings back on and store the jars until you're ready to start cooking.
Learn More : How to Store Home-Canned Produce