5 DIY Decorations That Transition From Halloween to Thanksgiving
With two major holidays in one season, the price to decorate your home can quickly rack up. Keep costs (and waste) low but style high with transitional decor ideas that will carry you through to Christmas.

Related To:

Photo By: Stephanie Studer, LifeCreated
All the Fall Feels
Pumpkins, leaves, skeletons, ghosts, oh my! It's finally fall, which means it’s time to celebrate two of our favorite holidays: Halloween and Thanksgiving. We’ve come up with five simple, stylish decorating ideas that easily transition from spooky to cozy.
Stylish + Spooky
Using many of the same materials, these simple projects feature easy modifications that will carry through the entire season.
One Wreath, Two Ways
With a few basic supplies from the craft store, you can easily assemble this white grapevine wreath to dress up your home for Halloween. Simply change out the embellishments and it transitions beautifully to fall. Download our free printable labels and attach to a mini chalkboard or sign for the perfect finishing touch.
What You'll Need: Spooky Wreath
For this project, you'll need a white grapevine wreath, white floral wire, scissors, mini chalkboard sign, tape, hot glue/gun, black rose garland, black plastic spiders, black and white striped ribbon and our free printable "spooky" label.
Add Moody Florals
Use floral wire to secure the black rose garland to the wreath.
Creepy, Crawly Accents
Weave plastic spiders throughout, using floral wire to attach.
Assemble Signage
Download, print and cut out the free “spooky” label, then use tape to attach to a mini chalkboard. Cut a piece of ribbon to desired length (doubled to fold in half for hanging).
Assemble Signage
Use hot glue to attach the mini chalkboard to the front of the ribbon.
Display
Place ribbon around the top of the wreath and use hot glue to secure the front part of the ribbon to the back part of the ribbon. Trim ends if needed and stylishly spook up your front door or fireplace mantel.
MORE IDEAS: 35 Creep-Tastic DIY Halloween Wreaths
Flip for Fall
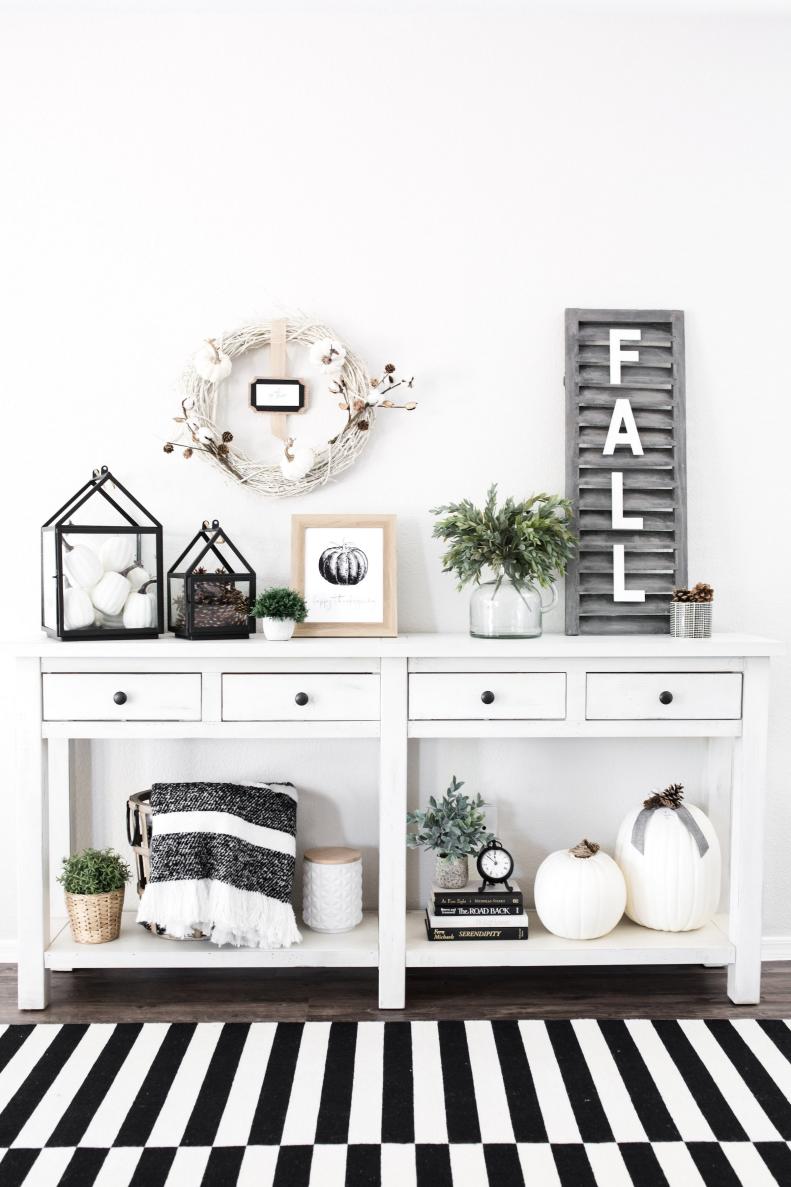
Easily dress up your spooky wreath for fall by replacing the Halloween effects with faux white pumpkins, cotton stems and a sweet, cozy sign.
What You'll Need
To make this simple fall wreath you'll need the existing supplies plus: Cotton stems, mini white faux pumpkins, burlap ribbon and our free printable "gather" label.
Add Faux Pumpkins + Cotton
Use floral wire to attach cotton stems and pumpkins to the wreath.
Assemble Signage
Download, print and cut out the free “gather” label, then use tape to attach to a mini chalkboard. Cut a piece of ribbon to desired length (doubled to fold in half for hanging).
Assemble Signage
Hot glue mini chalkboard to the front of the ribbon.
Enjoy Through Winter
When winter comes, simply replace the pumpkins with evergreen foliage and Christmas ornaments for a festive holiday look.
Skulls on Display
Add a festive touch to decorative lanterns by filling them with seasonal accents. For Halloween, put creepy skulls on display, curio-style.
Easy Assembly
We found these scary skulls in bulk at our local craft store.
Head Case
Ultra-spooky, minimum effort.
When Halloween Is Over...
Swap out skulls for store-bought or foraged pinecones. Or, for an extra infusion of fall flavor, fill your lanterns with cinnamon-scented cones.
Pumpkins + Pinecones
Pair your pinecone-filled lantern with a patch of pumpkins.
Carry Into Christmas
The best part? Your pinecone-filled lantern easily transitions into winter decor. Simply swap the pumpkins for sparkly Christmas ornaments or more pinecones.
Pretty Printables
We love using printable designs for home decor. They add an easily changeable element to any vignette. We created these free 8” x 10” printables for Halloween and Thanksgiving so you can create instant art for the cost of a piece of photo paper.
What You'll Need
This project is as easy as it gets. All you'll need is an 8" x 10" picture frame, our free printable designs, printer, matte photo paper and scissors.
Pumpkin Swap
Simply download our free designs, print onto photo paper, cut out and insert into frame. Display on a console table or kitchen counter paired with a small pumpkin and seasonal candle.
Shudder-Worthy Shutter
The possibilities for this easy wood shutter craft are endless. Dress it up for Halloween, then easily swap out the letters for fall and other holidays. It’s even perfect as everyday decor, displaying words like “home” or “love." But for Halloween, the obvious choice is "Boo!"
What You'll Need: Spook-Tastic Signage
For this project, you'll need a salvaged wood shutter, unfinished wood letters, craft paint, foam brush and removable mounting squares. Pro tip: Make sure your letters are an appropriate size for your shutter.
Paint Letters
Use a foam brush to apply craft paint to the unfinished letters, making sure to paint the sides as well. Allow to dry and apply a second coat if needed.
Attach Them, Temporarily
Once dry, lay out the letters and make sure the spacing between each letter is consistent. Use removable mounting squares to adhere to the shutter.
Decor That Goes "Boo"
This piece can be beautifully displayed on a tabletop, hanging on the wall, or outdoors, leaning by the front door.
Seasonal Swap
Upgrade for fall by removing existing letters and adding new ones in a soft white hue.
The Easiest Jack-O'-Lanterns
It’s easy to take these darling faux white pumpkins from Halloween to Thanksgiving. Use our free printable templates to create felt jack-o'-lantern faces for Halloween, then remove and add ribbon and embellishments for fall.
What You'll Need
For this easy project, you'll need faux white pumpkins in two, stair-stepped sizes, free printable jack-o'-lantern templates, printer, paper, scissors, a pencil and removable mounting squares.
Make a Face
Download, print and cut out our free jack-o'-lantern templates. Use a white colored pencil to trace designs on felt, then cut out the pieces. Use removable mounting squares to attach felt pieces to the pumpkins.
A Not-So-Spooky Display
When Halloween Is Over...
Simply remove the felt faces and mounting squares and add ribbon, embellishments like cotton blossoms and pinecones and our cute printable “gather” tag for fall.
Seasonal Style
We used these easy ideas to dress up a foyer table, but each project could add a touch of seasonal style anywhere in your home, from the front door to the fireplace mantel.
MORE IDEAS: Our Favorite Fall Decorating Ideas