St. Patrick's Day Clover Decor
Create your own Patty's Day decor with these DIY clover-inspired crafts.

By:
Ruth Meharg
Related To:
St. Patrick's Day Decor
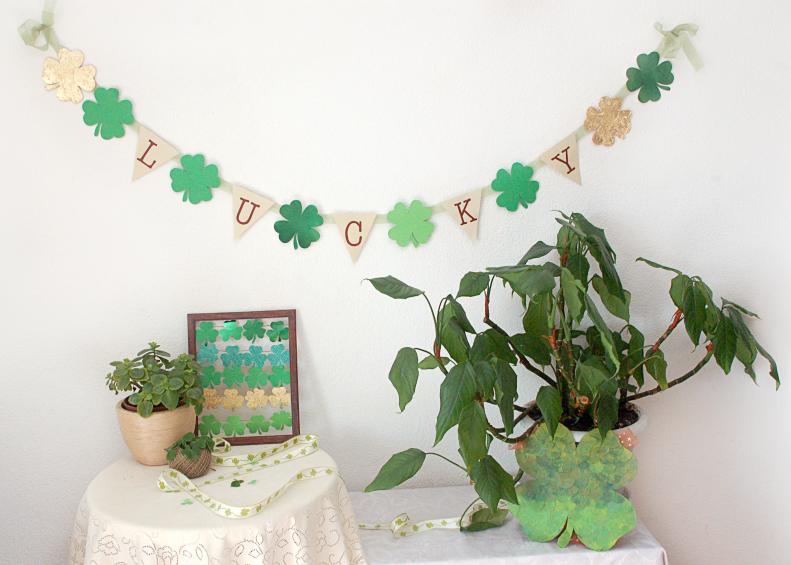
Celebrate St. Patty's Day with do-it-yourself decor inspired by the ever-lucky clover. This gallery will give you instructions on creating a framed clover centerpiece, a lucky banner and an ombre clover for your front door.
Framed Clover Supplies
To create your framed clover you will need an empty frame, twine, hot glue and a variety of small clover shapes cut from stiff paper like card stock. Look for different colors, textures and patterns of paper to make your finished piece more interesting. Look for pre-cut clovers at your local craft store, or create your own.
Create Clover Petals
If you can't find precut clovers or just want to save some money, don't worry! Making your own clovers is simple. Begin with a square that is about 1/4 the size you want your final clover to be. Fold it in half and cut out half a valentine shape. Unfold to reveal a full valentine shape. Cut a fat valentine for a three leaf clover, and a thin valentine for a four leaf clover.
Clover Template
Lay your valentine shape onto a piece of paper and trace it. Keeping the point of the valentine in the same place, rotate and trace again. You should have three or four valentines in a circle with points together and sides touching when you are finished. Add a stem and cut out your clover in one piece. Use this first clover as a template to trace and cut out the rest of your clovers!
Arrange Your Clovers
Stretch your twine across the frame where you want to hang a row of clover, and hot glue the twine to the back of the frame. Glue each piece of clover to the twine, matching colors in horizontal rows. If your clovers are all green, try arranging them in an ombre pattern with the darkest color on the top and the lightest on the bottom. Or add a row of gold or glittery clover near the center for sparkle.
Lucky Banner Supplies
To create your "lucky" banner you will need eight clover shapes cut from stiff paper. Use different colors of green and gold to add more variety to your banner. You will need five triangles of fabric or paper with the letters in "lucky" painted on them. You'll also need a ribbon, twine or yarn to string your banner together.
Finish Your Banner
Begin your banner by gluing two clovers to one end. Then begin adding in your lucky letters, alternating letters and clovers. Finish with two clovers after the "Y" and tie a bow at both ends before hanging. For a longer banner add an extra clover to each end, or remove a clover from each end to make it a bit shorter.
Clover Supplies
Create a beautiful clover to hang on your front door with a few simple supplies. You will need a large clover shape for the base of your clover. You can buy precut wood shapes at many craft stores, or cut your own from a sturdy piece of cardboard. You'll also need green paper or pressed green leaves. If you are using paper, look for a variety of shades of green, or paint it for a more organic look.
Cut and Paste
If you are using paper, cut a series of circles and arrange by color. If you are using pressed leaves, leave them whole and arrange by color. Begin gluing your leaves or paper onto the clover shaped backing, starting at the bottom and overlapping the shapes as you go up. Lay them in order of color for an ombre look, from light to dark or from more yellow-green to more blue-green. When the backing is completely covered, trim the edges flush with the backing.
Finished Clover
When the glue is dry, finish your clover by attaching a ribbon to the back with a strong glue. Hot glue will be enough to hold a lightweight cardboard base, but a wooden base will need a stronger adhesive. Add a nod to the St. Patrick's Day pot of gold with a gold ribbon, or keep things simple with a bit of twine.
St. Patrick's Day Arrangements
Accent your clover decor with an arrangement of potted plants for the perfect St. Patrick's day party, or for your own enjoyment. And remember to watch out for leprechauns!