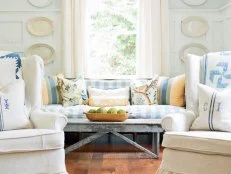
Add Pizzazz to Plain Hardwood Floors With Paint

Personalize basic hardwood floors with pattern, using proper preparation and simple painting steps.

BPF_original_paint-wood-floors_01_painted-floor-beauty-shot_h

Follow Brian on:

Materials Needed:

  • notepad
  • pencil
  • tape measure
  • paint chips
  • floor paint
  • roller handle
  • roller sleeve
  • paint pan
  • extender pole
  • drop cloth
  • painter's tape
  • wood floor sander
  • 150-grit wood-floor sanding sheets
  • 220-grit wood-floor sanding sheets
  • wet/dry vacuum
  • angled paintbrush
  • shoe covers

Clear Out Space

Before the project begins, it's important to remove all furnishings from the space.

BPF_original_paint-wood-floors_02_clear-out-space_h

Take Measurements and Sketch Pattern

Determine floor dimensions with tape measure, jotting measurements down on notepad. Sketch the intended look of painted pattern, noting width and/or length of each of its parts. Keep paint chips nearby to decide which color each area of the pattern will be.

BPF_original_paint-wood-floors_03_take-measurements-sketch-pattern_h

Attach Sanding Sheets

Pick up a wood-floor sander from the rental section of a local home improvement store. Following wood-floor sander's instruction manual, attach sanding sheets. Tip: Most hardwood floors require a two-step sanding process: a deep sanding with 150-grit sheets, which removes old finishes and imperfections, then a light sanding with 220-grit sheets, which ensures a smooth surface.

BPF_original_paint-wood-floors_05_attach-sanding-sheets_h

Sand Floors

Plug wood-floor sander into outlet. Moving slowly with controlled strokes, sand each section by moving from one end of the room to the other, ensuring the sander is going in the same direction as the wood grain. Start with 150-grit sanding sheets, and then repeat process with 220-grit sheets.

BPF_original_paint-wood-floors_06_sand-floors_h

Remove Sanding Dust

Plug wet/dry vacuum into outlet, adding proper attachments to remove all sanding dust from floor.

BPF_original_paint-wood-floors_08_remove-sanding-dust_h

Wash Floors

Ensure a perfectly clean wood surface by wiping the entire floor with a damp cloth. Tip: Using a cloth instead of a mop will ensure dust residue is removed from spaces between each strip of wood.

BPF_original_paint-wood-floors_10_wash-floors_h

Cut In Around Edge

Use an angled paintbrush to cut background color in around all edges of the room.

Roll Solid Color

Using roller handle and roller sleeve, add a solid coat of the background color to the floor. Once dry to the touch, repeat this step to add a second coat.

Check for Proper Coverage

With two coats of background color complete, check surface to ensure proper coverage.

Measure, Then Tape Off Pattern

Put protective booties on feet. Using tape measure to determine proper spacing for pattern, apply painter's tape as necessary. Tip: For equidistant stripes, position tape along the outside edges of the pre-painted areas. To ensure the proper areas get painted, mark the pre-painted solid areas with a small piece of painter's tape.

Paint Accent Colors

Alternating between taped-off areas, add two coats of accent colors with roller handle and roller sleeve.

BPF_original_paint-wood-floors_22_paint-accent-colors_h

Remove Tape

Once all taped-off areas are dry to the touch, gingerly remove painter's tape by pulling it up and back at a slight angle.

Next Up

How to Hang a Curtain Rod

Hang a curtain rod with an easy, DIY template that makes the job straightforward and stress free.

How to Slipcover an Ottoman

Take your ottoman from drab to fab with this simple step-by-step slipcover guide.

Upcycle Woven Table Runners Into a Durable Stair Runner

Wooden steps are beautiful but can be slippery and cold underfoot. Add warmth, softness and safety by installing a stair runner. Using inexpensive woven table runners, this project is a snap to do yourself. 

How to Install Timeless Rail-and-Stile Wainscoting

Wainscoting wall treatments are a classic way to add architectural interest to any room. Consisting of horizontal rails and vertical stiles, this relatively easy woodworking project is based on a design found in historic homes, and is sure to lend old-home charm to builder-basic new spaces. 

Pet Projects: Make a DIY Dog Bed

Make a removable, washable cover for your furbaby’s bed that's oozing with charming, farmhouse style. This simple sewing project will transform a bed your pet loves into one you love as well.

Add Casters to an Antique Trunk for a Mobile Coffee Table

Old wooden trunks are stowed away in many attics and often end up in yard sales or thrift stores at a great price. Give one an easy update by simply adding furniture casters to make it a charming (and mobile) storage piece for your living room.

Build a Factory Cart Coffee Table

Add updated style to your living room with this DIY coffee table. Featuring an optional reclaimed wood top and caster wheels, this step-by-step project proves factory style — without the price — is obtainable by anyone.

Create a Sunburst Mirror

Open up your living room and add style with a dramatic sunburst mirror.

License Plate Room Divider

Stylishly divide a space in just a few short steps using vintage license plates.

Build Custom End Tables

Create deep, wall-mounted end tables by cutting a vintage bench in half. The tables take up less floor space and provide ample surface space.

Go Shopping

Get product recommendations from HGTV editors, plus can’t-miss sales and deals.

On TV

Zillow Gone Wild

6:30am | 5:30c

Totally '90s House

7:30am | 6:30c

Home Town

10am | 9c

Home Town

11am | 10c

Home Town

12pm | 11c

Home Town

1pm | 12c

Home Town

2pm | 1c

House Hunters

7:30pm | 6:30c

House Hunters

8:30pm | 7:30c
On Tonight
On Tonight

Totally '90s House

9pm | 8c
10pm | 9c

House Hunters

11pm | 10c

House Hunters

11:31pm | 10:31c
1am | 12c

House Hunters

2:31am | 1:31c

House Hunters

3:30am | 2:30c

House Hunters

4:30am | 3:30c

House Hunters

5:30am | 4:30c

About HGTV

HGTV’s expert editors and writers share home decorating, garden and home improvement ideas, inspiration and advice based on our brand’s 30+ years of expertise and experience. We also give you the latest updates on HGTV shows and stars, cleaning tips and shopping recommendations. Learn more about us and our editorial standards.